
[Русский] RC-600 Руководство пользователя
- Я СОГЛАСЕН И ХОЧУ ПРОДОЛЖИТЬ СКАЧИВАНИЕ
Поддержка
- Наверх
- Загрузки
- Инструкции
- Сопроводительные документы
- Quick Start Video
- Полезные материалы
- AC Adaptor Information
Quick Links
- Roland Product Support
- Pro Audio/Video Product Support
Downloadable Content
- Boss Tone Central
Производитель:

Наличие на складе:
уточняйте у менеджера
Тип: Процессор эффектов BOSS RC-600

Доставка по Москве: бесплатно от 5000 ₽, если меньше — 400 ₽
От МКАД до границ Московской обл.:
- до 10 км — 400 ₽
- 10-25 км — 1 000 ₽
- 25-40 км — 1 500 ₽
- от 40 км — 2 000 ₽
Самовывоз: бесплатно
Отправка через ТК: по расценкам ТК
Подробнее о доставке
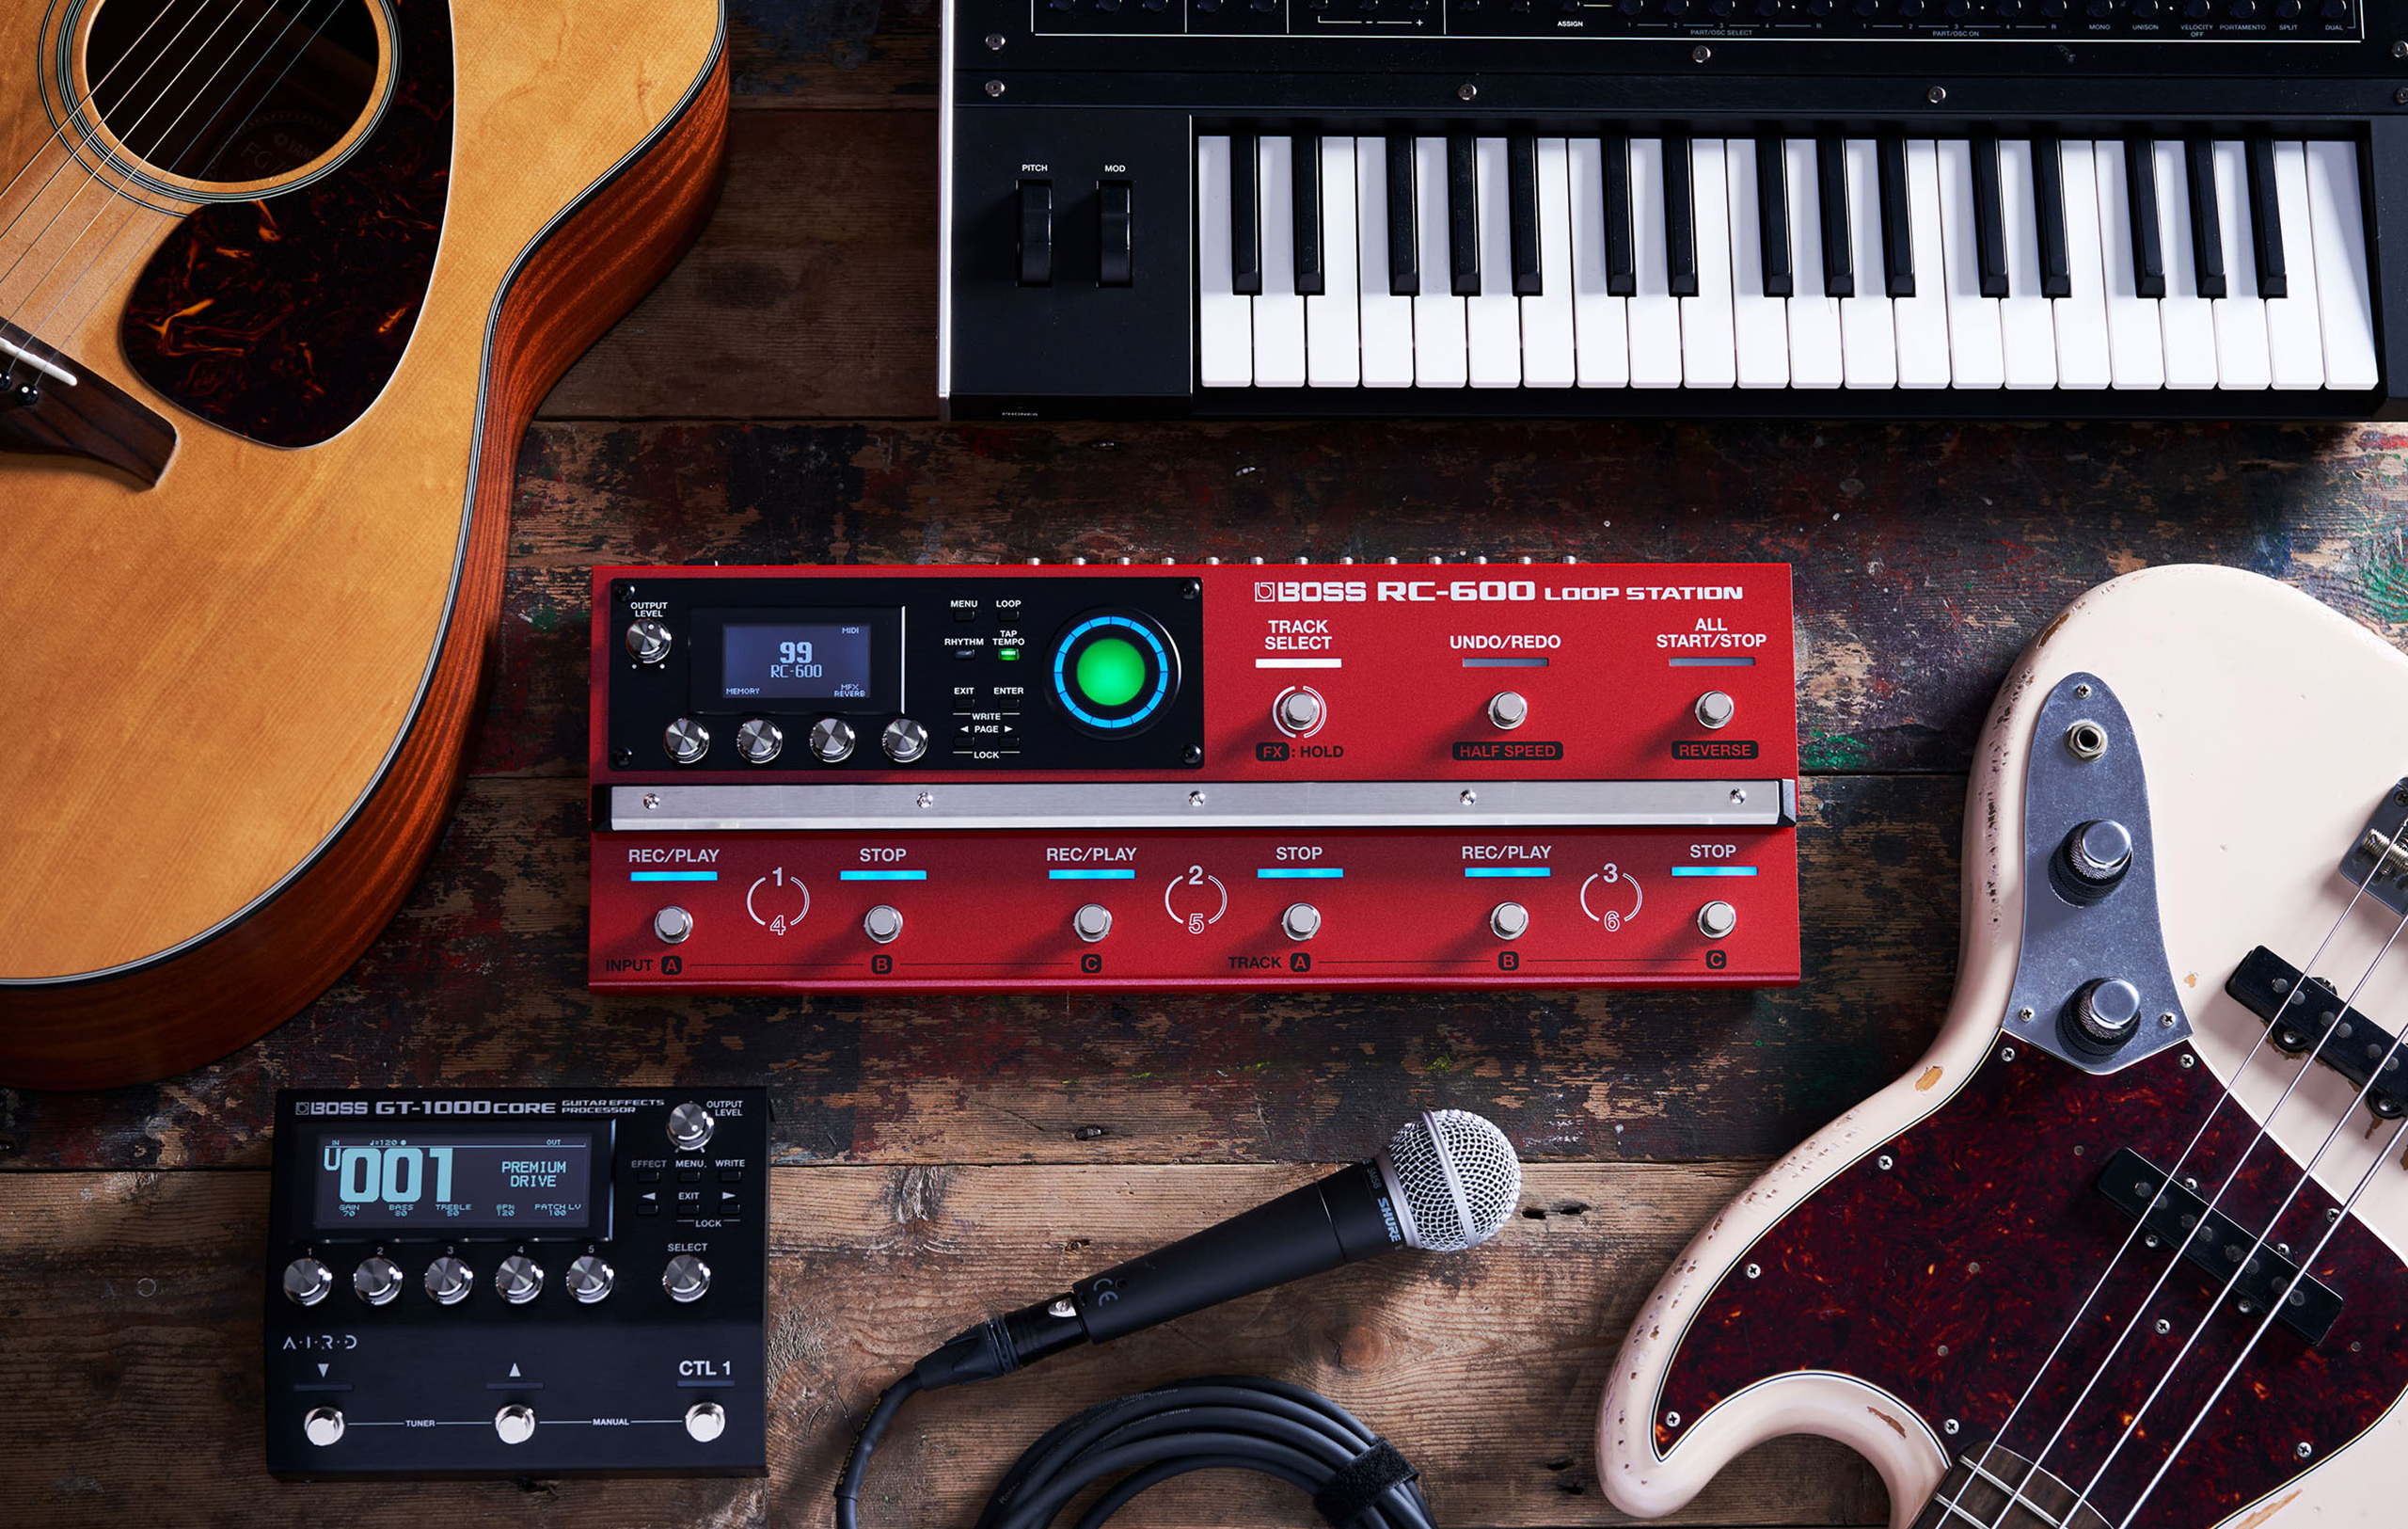
Boss RC-600 процессор для электрогитар
Знакомьтесь — RC-600, самый мощный лупер в мире. Обладая усовершенствованными настраиваемыми функциями, этот лупер следующего поколения открывает новые творческие горизонты перед гитаристами/авторами-исполнителями, мультиинструменталистами и другими музыкантами, работающими с циклами. Записывайте сигналы с нескольких микрофонов и инструментов на шесть стереотреков с высоким качеством 32-битного аудио, управляйте процессом с помощью программируемых встроенных ножных переключателей, а также внешних контроллеров. И это еще далеко не все ― лупы можно обрабатывать множеством эффектов, добавлять встроенные ритмы, направлять звук на любой из трех выходов, интегрировать устройство с компьютерным ПО по USB и многое другое.
Мощные возможности RC-600 позволяют записывать интересные лупы невиданной до этого времени сложности, управляя процессом с помощью ног. Маршрутизируя шесть треков последовательно или параллельно, можно создавать различные музыкальные текстуры, формировать кристально чистые наложения благодаря аудиодвижку нового поколения. Предусмотрена обработка эффектами как входного сигнала, так и записанного, включая темпозависимые для автоматической синхронизации с лупами и встроенными ритмами. Предлагаются беспрецедентные возможности управления с помощью девяти ножных переключателей и мгновенного вызова настроек назначения с использованием трех педальных режимов. Если и этого оказалось недостаточно, можно расширить функционал управления за счет подключения к RC-600 внешних контроллеров.
Основные характеристики
- — Флагманский лупер с качеством звука и функционалом нового уровня
- — Лучшее в данном классе качество звука благодаря 32-битным АЦ-/ЦА- конвертерам и 32-битной обработке с плавающей точкой
- — Шесть одновременно работающих стереотреков фраз
- — Гибкие возможности управления с помощью девяти программируемых ножных переключателей и трех педальных режимов
- — Широкая подборка встроенных эффектов (49 для обработки входного сигнала и 53 для обработки треков) с возможностью использования до четырех эффектов в каждой из секций одновременно
- — Темпозависимые эффекты для автоматической синхронизации с ритмами и темпом лупов
- — Два микрофонных входа на разъемах XLR, две стереопары для приема сигнала линейного уровня и три маршрутизируемых стереопары для вывода линейного сигнала
- — 99 ячеек памяти для хранения данных шести треков фраз, настроек пользовательских эффектов, воспроизведения, управления и других
- — Синхронизация лупов с более чем 200 встроенными ритмическими паттернами и 16 наборами ударных
- — Расширенные возможности управления по MIDI
- — Элегантный прочный металлический корпус
- — Большой круговой индикатор состояния лупа и информативный ЖК дисплей с поддержкой нескольких режимов работы
- — Два управляющих входа, каждый из которых поддерживает подключение двух внешних ножных переключателей или педали экспрессии
- — Порт USB для создания резервной копии данных, импорта/экспорта фраз в/из BOSS Tone Studio и импорта паттернов посредством RC Rhythm Converter
Технические характеристики Boss RC-600:
- — Частота дискретизации: 44.1 кГц
- — AD/DA Преобразование: 32 бит
- — Обработка: 32-битная с плавающей точкой
- — Запись/Воспроизведение. Количество дорожек: 6. Формат данных: WAV (44,1 кГц, 32-разрядный с плавающей точкой, стерео) / Максимальное время записи: Около 1,5 часов (1 дорожка), Около 13 часов (всего)
- — Тип ритма: 200 типов и более
- — Набор ритмов: 16 типов
- — Эффекты. Входные эффекты: 49 типов, эффекты трека: 53 типа, мастер эффекты: 2 типа.
- — Память: 99
- — Управление: переключатель записи/воспроизведения x 3, переключатель остановки x 3, переключатель выбра дорожки, переключатель отмены/повтора, переключатель всех пусков/остановок, кнопка меню, кнопка цикла, кнопка ритма, кнопка нажатия темпа, кнопка ввода, кнопка выхода, кнопки страницы, 1-4 ручки, регулятор выходного уровня
- — Дисплей: графический ЖК-дисплей (128 x 64 точек, ЖК-дисплей с подсветкой)
- — Разъемы: MIC IN 1, 2 connectors: XLR type (balanced, phantom power: DC 48 V, 10 mA Max. INST IN 1, 2 jacks, MAIN OUTPUT jacks, SUB OUTPUT 1, 2 jacks: 1/4-inch phone type. PHONES jack: Stereo 1/4-inch phone type. CTL1,2/EXP1 jack, CTL3,4/EXP2 jack: 1/4-inch TRS phone type. USB port: USB B type. MIDI (IN, OUT) connectors. DC IN jack
- — Источник питания: AC adaptor
- — Аксесуары: адаптер переменного тока, руководство пользователя, брошюра («Безопасное использование устройства», «Важные примечания» и «Информация»)
- — Размеры и вес: ширина: 435 мм, глубина: 163 мм, высота: 66 мм. Вес (включая батарею) 2.4 кг
| 25.12.2021
О предстоящей продаже этого лупера читал еще в октябре. Заявленные производителем характеристики впечатляют. Жду не дождусь продажи, чтобы оценить в живую, а не на словах. Думаю, что это будет достойный вариант!
Написать отзыв
Ваше имя:
Ваш отзыв:
Примечание: HTML разметка не поддерживается! Используйте обычный текст.
Оценка: Плохо
Хорошо
Введите код, указанный на картинке:

Доставка
По Москве
в пределах МКАД
Заказ до 5 000 ₽ — 400 ₽
Заказ от 5 001 ₽ —
БЕСПЛАТНО
От МКАД до границ
Московской обл.
до 10 км — 400 ₽
10-25 км — 1000 ₽
25-40 км — 1 500 ₽
от 40 км — 2 000 ₽
По России и странам
Таможенного союза
По тарифам СДЭК
Или иной транспортной компании
Доставка товара до транспортной
БЕСПЛАТНО
Оплата

Безналичным способом
для физических лиц
Вам на электронную почту будет отправлен счет для оплаты, который Вы можете распечатать и оплатить в ближайшем отделении банка, работающего с физическими лицами.
Перед оплатой товара безналичным способом, подтвердите наличие товара у наших менеджеров по телефону 8(495)5178580

Безналичным способом
для юридических лиц
После оформления заказа и получения Нами реквизитов Вашей компании, на электронный адрес ответственного лица Вашей компании будет отправлен счет для оплаты. Доставка товара осуществляется после поступления денежных средств на расчетный счет компании. При получении товара у Вас обязательно должна быть печать организации либо доверенность. Все остальные документы для бухгалтерии (оригинал счета, счет-фактура и товарная накладная) выдаются вместе с заказом.
Срок зачисления денежных средств — 1-2 рабочих дня. Срок обработки заказа начинается с момента поступления платежа.

Оплатить с помощью
банковской карты
Оплачивайте любыми российскими банковскими картами
![]()
Наши реквизиты
Организация
ООО «МузЦентр»
Адрес юр. и фактический
121108, г.Москва, Рублевское шоссе, д.9, этаж 1, помещение I, комната 14а.
Расчётный счёт
40702810838000126836
Корр. Счёт
30101.810.4.00000000225
ОГРН/ОГРНИП
1217700025674
Наш магазин предоставляет все гарантии в соответствии с Гражданским Кодексом РФ и Законом РФ «О защите прав потребителей». Приобретая товар в нашем магазине, Вы получаете платежный документ, подтверждающий факт совершения покупки в нашем магазине, накладную и надлежащим образом заполненный Гарантийный талон.
На большинство товаров срок гарантии составляет 12 месяцев. Обслуживание производится в авторизованных сервис-центрах производителей. Адреса и условия приводятся в сопутствующих товару гарантийных талонах.
Уважаемые покупатели, обращаем Ваше внимание, что Постановлением Правительства РФ №55 от 19 января 1998 г. (в ред. Постановления Правительства РФ №1222 от 20 октября 1998 г.) утвержден перечень непродовольственных товаров надлежащего качества, не подлежащих возврату или обмену на аналогичный товар другого размера, формы, габарита, фасона, расцветки и комплектации. В пункте 11 этого перечня указаны технически сложные товары бытового назначения, на которые установлены гарантийные сроки, в том числе бытовая радиоэлектронная аппаратура и электромузыкальные инструменты.
Обращаем ваше внимание на то, что данный интернет-сайт носит исключительно информационный характер и ни при каких условиях не является публичной офертой, определяемой положениями Статьи 437 (2) Гражданского кодекса РФ.
Кабели JACK-JACK
-
инструментальный кабель джек/джек стерео 6,3 мм, 1,5 м
инструментальный кабель джек/джек стерео 6 3 мм 1 5 м черный Срок гарантийного обслуживания — 1 год.
-
Инструментальный кабель 1/4″ джек — 1/4″ джек, 3 м.
Инструментальный кабель 1/4 джек — 1/4 джек 3 м.
-
инструментальный кабель джек/джек стерео 6,3 мм, 3,0 м
инструментальный кабель джек/джек стерео 6 3 мм 3 0 м черный Срок гарантийного обслуживания — 1 год.
-
инструментальный кабель джек/джек стерео 6,3 мм, 6,0 м
инструментальный кабель джек/джек стерео 6 3 мм 6 0 м черный Срок гарантийного обслуживания — 1 год.
-
Инструментальный кабель 1/4″ джек — 1/4″ джек, 6.1 м.
Инструментальный кабель 1/4 джек — 1/4 джек 6.1 м.
-
Инструментальный кабель, джек
Proel SB110LU05 — инструментальный кабель джек джек длина — 0.5 м. Proel SB110LU05 может быть маленьким по длине но его качество и производительность безмерно велики. Этот кабель предоставляет вам надежное и кристально чистое соединение между вашими аудиоустройствами. С Proel SB110LU05 вы получите звук который поразит вас своей четкостью и детализацией. Невзирая на его компактный размер в 0.5 метра этот кабель способствует выдающемуся звучанию.
-
инструментальный кабель, джек
Die Hard – качественный инструментальный кабель для профессиональной студийной и концертной работы. Этот кабель разработан с соблюдением всех требований и стандартов возлагаемых на коммутацию данного уровня. Точная передача сигнала – вот главная задача которую выполняет инструментальный кабель DIE HARD. От точности сигнала зависит многое: и звучание и восприятие соответственно. Не стоит экономить на самом главном для музыканта – на качестве звучания исполняемой им музыки. Используя в своем арсенале продукцию Die Hard — вы гарантируете точность и качество звучания. При выборе кабеля учитывайте и его длину так как сигнал поглощается собственным сопротивлением материала хотя это реально ощутимо на проводах большой длины. Характеристики: Соединения: 6.3 мм MONO JACK — 6.3 мм MONO JACK Провод: красная медь Первый экран: проводящий поливинилхлорид Второй экран: плетеная красная медь Изоляция внешняя: 6 5 мм прочный поливинилхлорид Цвет: черный Длина: 0.5 м Покрытие разъема — золото 24К Срок гарантийного обслуживания — 1 год.
-
инструментальный кабель, джек
Классический инструментальный кабель обеспечивают максимальное качество Новые технологии позволяют понизить емкость кабеля для передачи более чистого и прозрачного сигнала Экранирование обеспечивает подавление шума
-
инструментальный кабель джек/джек стерео 6,3 мм, 0,9 м
инструментальный кабель джек/джек стерео 6 3 мм 0 9 м черный Срок гарантийного обслуживания — 1 год.
-
Сценич. инстр. кабель, 6.3mml Jack
Профессиональный инструментальный кабель Моно штекер имеет никелированный металлический корпус соединения S4CPRO S4CPRO.


Электрогитары
-
электрогитара типа страт, S-S-H, V T 5W, цвет чёрный
Корпус — агатис Гриф — клен с палисандровой накладкой Крепление грифа — на болтах Мензура — 25 5 дюйма 22 лада Бридж — Vintage Tremolo Звукосниматели — HSS Электроника — 1V+1T 5ти-позиционный переключатель Цвет — черный
-
Электрогитара
Корпус — липа Гриф — клен с палисандровой накладкой Крепление грифа — на болтах Звукосниматели — HSH Электроника — 1V+1T 5-ти позиционный переключатель звукоснимателей Цвет — черный
-
электрогитара типа страт, S-S-H, V T 5W, цвет белый
Корпус: агатис/нато Гриф: клён Накладка грифа: палисандр 22 лада Механика: Vintage тремоло Электроника:звукосниматели — 2 сингла и хамбакер 5-ти позиционный переключатель
-
Шестиструнная электрогитара
FENDER SQUIER MM STRATOCASTER HARD TAIL BLACK – Шестиструнная электрогитара бюджетная модель Стратокастера от Squier. Это отличная возможность для начинающих гитаристов приобрести настоящий Фендер по весьма демократичной цене. Гриф удобного профиля «С» выполнен из клена покрытие — матовое. Мензура – 25 5 дюйма (648 миллиметров). Накладка радиуса 9 5 дюймов инкрустирована классическими точками. За узнаваемое звучание инструмента отвечают три звукоснимателя сингла. Звук настраивается пятипозиционным переключателем двумя регуляторами тембра и регулятором громкости. Фиксированный бридж обеспечивает стабильность строя. MM Strat доступен в двух вариантах цветового исполнения. Представленная гитара – стильного черного цвета с контрастным белым пикгардом. Характеристики: Материал корпуса клееная древесина Бренд FENDER Тремоло/Бридж Фиксированный Тип цельнокорпусная Тип корпуса Stratocaster Количество ладов (диапазон) 22 Цвет черный Мензура (в дюймах) 25.5 Материал топа клееная древесина Крепление грифа На болтах Тип электроники пассивная Конфигурация звукоснимателей SSS
-
электрогитара типа страт, S-S-H, V T 5W, цвет красный металлик
Корпус: ольха Гриф: клён Накладка грифа: палисандр 22 лада Механика: Vintage тремоло колки Diecast Электроника: звукосниматели — 2 сингла и хамбакер 5-ти позиционный переключатель регулировка громкости и тембра
-
электрогитара типа страт, S-S-H, V T 5W, цвет чёрный
Корпус: ольха Гриф: клён Накладка грифа: палисандр 22 лада Механика: Vintage тремоло колки Diecast Электроника: звукосниматели — 2 сингла и хамбакер 5-ти позиционный переключатель регулировка громкости и тембра
-
электрогитара
электрогитара цвет белый корпус сосна гриф цельный клен профиль грифа Modern “C” 21 лад Medium Jumbo звукосниматели: 2 Custom Vintage Style Single-Coil Tele® с магнитами AlNiCo 3 мензура 25.5” (648 mm)
-
электрогитара
электрогитара цвет черный корпус — липа гриф — клен накладка на гриф — палисандр профиль `С` 21 лад мензура — 25.5` звукосниматели — H-S-S бридж Tremolo Fender — самая крупная американская компания по производству музыкальных инструментов внесшая неоценимый вклад в развитие электрогитары. Squier — дочерняя торговая марка компании Fender Musical Instruments Corporation. Выпускаемые ею модели инструментов в основном унаследованы из модельного ряда Fender и являют собой бюджетные варианты известных гитар имеющие низкую стоимость и ориентированы как правило на начинающих музыкантов. К таким инструментам относится и электрогитара FENDER SQUIER BULLET STRAT TREMOLO HSS — RW — Black чьи отличительные особенности — корпус из липы кленовый гриф бридж Tremolo один хамбакер и два сингловых звукоснимателя. Характеристики FENDER SQUIER BULLET STRAT TREMOLO HSS — RW — Black: Корпус: липа Гриф: клен Накладка на гриф: палисандр Профиль грифа: C Лады: 21 Medium Мензура: 25.5’’ (648 мм) Звукосниматели: H-S-S Бридж: Tremolo Переключатель: 5-позиционный Фурнитура: хром Цвет: черный
-
электрогитара
электрогитара цвет красный
-
электрогитара
электрогитара цвет трехцветный санбёрст


Похожие товары
-
Портативный гитарный процессор
Koobic Pony Mustang — Портативный гитарный усилитель
…
-
Гитарный процессор
Koobic Pandora Mini FX — это гитарный процессор, который п…
-
Напольный процессор эффектов
Valeton GP-100 – это компактный, высокопроизводительн…
-
гитарный процессор
BOSS GT-1 – это напольный гитарный процессор эффектов бюдж…
-
Гитарный процессор
Valeton GP-200JR — гитарный процессор эффектов&n…


![]()
![]()
![]()
- Безопасные способы оплаты
- Официальная гарантия
Наличие в магазинах
Интернет-магазин —
в наличии
Санкт-Петербург —
отсутствует
Москва —
отсутствует
Доставка на дом и в ПВЗ06 — 08 декабря
Самовывоз из магазинов 06 — 08 декабря
Boss RC-600 Loop Station — напольный лупер. Позволяет подключать два микрофона и два инструмента в стерео / моно, добавлять эффекты и ритмические паттерны, отправлять аудиосигнал на три стереовыхода, а также интегрироваться с программным обеспечением по USB. Шесть треков можно использовать последовательно или параллельно. Доступны три режима лееринга. Функция Bounce In позволяет сводить нескольких дорожек в одну. При помощи функции Mark Back можно мгновенно вернуться к предыдущему состоянию петли. Доступна пульсация half-time и double-time, а также возможность регулировать скорость воспроизведения с изменением высоты тона и без него.
Обрабатывать звуки можно до и после записи с помощью набора из 53 эффектов. Одновременно можно использовать до четырех эффектов. В девайс встроено 200 паттернов в различных стилях — от рока до латины, джаза и электроники. У каждой фразы есть четыре вариации, доступны вступления и концовки, а также автоматические брейки для перехода между секциями песни. Возможен импорт собственных ритмов в формате SMF по USB с помощью программного обеспечения RC Rhythm Converter.
Футсвитчи можно назначить на любые параметры, в том числе на переключение между каналами, эффекты и Tap Tempo. Два дополнительных разъема позволяют подключать внешние футсвитчи или педали экспрессии. Функция Assign позволяет назначать 16 элементов управления по MIDI. Семь вариантов экрана верхнего уровня дают возможность получать обратную связь по множеству текущих операций в реальном времени. Подключение по USB позволяет интегрироваться с DAW и использовать Boss Tone Studio для импорта и экспорта фраз в формате WAV.
Особенности RC-600 Loop Station:
- Высокое качество звука, 32-битные АЦП / ЦАП;
- Шесть стереоканалов;
- Девять назначаемых футсвитчей;
- 53 эффекта;
- Возможность использования четырех эффектов одновременно в каждой секции;
- Временные эффекты с автосинхронизацией по темпу;
- Два микрофонных входа XLR с фантомным питанием;
- Две пары линейных стереовходов и три пары линейных стереовыходов с возможностью назначения;
- 99 ячеек памяти;
- 200 встроенных ритм-паттернов и 16 кит-пресетов;
- Управление по MIDI;
- Прочный металлический корпус;
- Информативный ЖК-дисплей с выбором режима отображения;
- Два разъема для внешнего управления с поддержкой до двух футсвитчей и педали экспрессии;
- USB для резервного копирования данных, импорта / экспорта фраз с помощью Boss Tone Studio и импорта паттернов с помощью RC Rhythm Converter.
Драйверы:
Драйвер RC-600 версии 1.0.0 для Windows 10/11 с официального сайта производителя;
Драйвер RC-600 версии 1.0.0 для macOS 11/12 с официального сайта производителя;
Драйвер RC-600 версии 1.0.0 для macOS 10.15 с официального сайта производителя.
- Boss
- Гитары Boss
- Педали эффектов Boss
Файлы для скачивания
- Инструкция для Boss RC-600 Loop Station (англ.) (PDF 2 Мб 918 Кб)
- Тип: напольный лупер / процессор эффектов;
- Частота дискретизации: 44,1 кГц;
- АЦ / ЦА преобразование: 32 бита;
- Обработка: 32-битная с плавающей запятой;
- Количество дорожек записи / воспроизведения: 6;
- Формат данных: WAV (44,1 кГц, 32-битное плавающее, стерео);
- Макс. время записи: прибл. 1,5 часа (1 трек), около 13 часов (на всю память)
- Типы ритмов: 200 типов или выше;
- Наборы ритмов: 16 типов;
- Эффекты: 49 (Input FX), 53 (Track FX), 2 (Master FX);
- Память: 99;
- Номинальный входной уровень: -40 дБн (Mic In 1, 2), -10 дБн (Inst In 1, 2);
- Макс. входной уровень: 0 дБн (Mic In 1, 2), +7 дБн / + 20 дБн (Inst In 1, 2);
- Входное сопротивление: 3 кОм (Mic In 1, 2), 1 МОм / 25 кОм (Inst In 1, 2);
- Номинальный выходной уровень: -10 дБн (Main Output), -10 дБн (Sub Output 1, 2);
- Макс. выходной уровень: +7 дБн (Main Output), +7 дБн (Sub Output 1, 2);
- Выходное сопротивление: 1 кОм (Main Output), 1 кОм (Sub Output 1, 2);
- Рекомендуемое сопротивление нагрузки: 10 кОм и более (Main Output), 10 кОм и более (Sub Output 1, 2);
- Управление: 3 x Rec/Play, 3 x Stop, Track Select, Undo / Redo, All Start / Stop, Menu, Loop, Rhythm, Tap Tempo, Enter, Exit, PAGE, 4 ручки, Output Level;
- Дисплей: ЖК-дисплей (128 x 64 точки, с подсветкой);
- Входы аудио: 2 x XLR (Mic In 1, 2, ,балансные, +48 В), 2 x 1/4” (Inst In 1), 2 x 1/4” (Inst In 2);
- Выходы аудио: 2 x 1/4” (Main Output), 2 x 1/4” (Sub Output 1), 2 x 1/4” (Sub Output 2), 1 x 1/4” TRS (Phones);
- Дополнительные входы: 2 x 1/4” TRS (Ctr1,2 / Exp1, Ctr3,4 / Exp2);
- USB: USB тип B;
- MIDI: MIDI In, Out;
- Питание: адаптер переменного тока 1,2 А (с фантомным питанием) или 1,1 А (без фантомного питания);
- Размеры: 435 x 163 x 66 мм;
- Вес: 2,4 кг.
Компания Boss оснастила свой новейший высококлассный лупер шестью стереодорожками, 13 часами хранения и полным пакетом встроенных эффектов. Пора ли увольнять группу?
РЕЗЮМЕ
Вполне способная рабочая станция для создания циклов, в которой продумано все до мелочей, но при этом она остается достаточно простой в использовании.
Существует два подхода к проектированию лупера. Первый заключается в том, чтобы сделать его как можно проще; второй — в том, чтобы сделать его большим и впихнуть в него столько функций, сколько может выдержать слабый человеческий мозг. В RC-600 компания Boss явно выбрала подход номер два.
Эта новейшая флагманская Loop Station имеет девять педальных переключателей, управляющих до шести стерео дорожек, и включает в себя широкий спектр барабанных паттернов, а также десятки эффектов. На задней панели больше разъемов, чем на телефонном коммутаторе 1950-х годов… и все же это более компактное устройство, чем его предшественник, похожий на доску для серфинга RC-300.
Отчасти это объясняется отказом от встроенной педали экспрессии — вы можете легко подключить свою собственную к одному из задних разъемов, — но взгляд на сравнительные характеристики говорит нам, что, помимо удвоения количества дорожек записи, новая модель увеличивает объем памяти с трех часов до примерно 13. Даже если вы используете все шесть дорожек, этого достаточно для двух часов музыки.

Интерфейс управления выглядит несколько упрощенным, что является хорошей новостью для слабого мозга. Разнообразные ручки и кнопки расположены вокруг двух основных ориентиров: небольшого монохромного ЖК-экрана слева и, что особенно поразительно, многоцветной круглой световой панели в центре. Она служит в качестве визуального метронома, с 16 индикаторами ударов по краям и немного смущающим сходством с HAL 9000 в фильме «2001 год: космическая одиссея». Будем надеяться, что этот компьютер будет менее глючным.
Четыре кнопочных циферблата позволяют перемещаться по разнообразным меню, предлагаемым главным дисплеем, но можно начать работу, даже не утруждая себя этим: подключите все, нажмите на педаль «rec» для дорожки 1, чтобы начать запись, нажмите на нее еще раз, чтобы остановить, затем еще раз, чтобы сделать овердаб — да, точно так же, как те простые луперы, о которых мы говорили в начале.
Конечно, вы не станете выкладывать полштуки баксов за огромный Loop Station только ради этого, даже если он обещает лучшее качество звука, чем большинство других, с его 44,1 кГц дискретизации и 32-битной обработкой с плавающей точкой. Поэтому давайте более подробно изучим дополнительные возможности RC-600.

В использовании
На самом деле, прежде чем мы приступим к любым бесстрашным приключениям с погружением в меню, мы действительно начнем с простого подключения и игры — и это звучит великолепно. Можно спорить, насколько велика разница в аудио характеристиках, когда вы прогоняете все через старый вентильный усилитель, но даже при прослушивании через студийные мониторы здесь нет явной «оцифровки» сигнала.
И нам по-прежнему не нужен ЖК-дисплей, чтобы сделать следующий шаг: добавить еще две дорожки так же просто, как нажать еще два переключателя, а нажатие пальцем ноги на «выбор дорожки» мгновенно переводит нас к трем другим. В течение пары минут мы можем получить шесть различных частей нашей петли, каждую из которых легко заглушить или вернуть в микс с помощью топталки.
Чтобы добавить эффекты к входному сигналу, нужно просто удерживать кнопку ‘track select’ до тех пор, пока индикатор не загорится синим; теперь все шесть нижних педальных переключателей становятся переключателями обхода эффектов. С завода в нашем устройстве было только три готовых к работе эффекта: фруктовый фазер/фильтр, жесткое тремоло с синхронизацией по темпу и, возможно, наиболее полезный эффект понижения октавы, который служит удобным сокращением для (только не говорите басисту) игры басовых партий на обычной гитаре.

Здесь нам, возможно, придется заглянуть в меню. К счастью, назначение и редактирование входных эффектов настолько просто, насколько это возможно при таком тесном интерфейсе, а набор доступных звуков является исчерпывающим. Эффекты также можно добавлять на дорожки после их записи, как в DAW.
Если вы использовали все 99 слотов встроенной памяти и хотите записать петли на внешнем носителе, стоит знать, что меню эффектов включает девять виртуальных усилителей. Есть чистые, хрустящие и металлические модели, все они впечатляют своей реалистичностью, и вы можете настроить все — от эквалайзера и присутствия до размера колонок и расположения микрофонов.

Пропустив вкратце режим реверса петли, который работает очень хорошо, и функцию половинной скорости, которая (по крайней мере, на нашем образце для обзора) звучит ужасно некачественно, мы переходим к встроенным барабанам. Возможно, не многие воспользуются бэк-ритмами RC-600 — они больше похожи на инструмент для джемов/сочинения песен в спальне, чем на что-то, что можно использовать вживую — но здесь есть целая куча различных комплектов, играющих целую кучу различных паттернов, и качество звука безупречно. Более того, полностью гибкая маршрутизация означает, что вы можете легко назначить барабаны на одну пару выходов (возможно, прямо на PA), в то время как гитарные дорожки направляются на ваш усилитель, как обычно.
Если вы осмелитесь, то сможете исследовать и другие уровни функциональности — есть даже возможность переназначить, что делают все педальные переключатели — но главное здесь то, что базовые возможности вполне доступны. Продуманный дизайн и надежная конструкция, RC-600 — это безумно функциональный лупер, который сложен настолько, насколько вы хотите его видеть.
Основные характеристики

- ОПИСАНИЕ Шестидорожечный стерео лупер, сделано в Малайзии
- УПРАВЛЕНИЕ Уровень выходного сигнала, ЖК-дисплей с подсветкой и четырьмя навигационными кнопками/ручками; кнопки меню, loop, rhythm, tap tempo, exit, enter, page back и forward; выбор трека (1/2/3 или 4/5/6), педали отмены/повтора и мастер-старт/стоп, три педали записи/воспроизведения и остановки (все педали имеют вторичные функции и назначаются пользователем).
- ЗАДНЯЯ ПАНЕЛЬ Два микрофонных входа XLR, две пары L/R инструментальных входов, основные выходы L/R, две пары L/R субвыходов, выход на наушники, два входа для педалей экспрессии или футсвитчей, вход и выход MIDI, USB типа B, кнопка питания, гнездо сетевого питания (адаптер входит в комплект).
- ОСОБЕННОСТИ 99 слотов памяти, 49 входных эффектов, 53 эффекта дорожек, два мастер-эффекта, 200 ритмов, 16 наборов ударных; 44,1 кГц/32-битная обработка; отключаемое фантомное питание на XLR-входах, режимы половинной скорости и реверса, общая память записи около 13 часов
- РАЗМЕРЫ 435 x 163 x 66 мм

Summary of Content for Boss RC-600 Owner’s Manual PDF
Owners Manual
USING THE UNIT SAFELY . . . . . . . . . . . . . . . . . . . . . . . . . . . . 2
IMPORTANT NOTES . . . . . . . . . . . . . . . . . . . . . . . . . . . . . . . . . 2
How the RC-600 Is Organized . . . . . . . . . . . . . . . . . . . . . . . 3
Getting Ready . . . . . . . . . . . . . . . . . . . . . . . . . . . . . . . . . . . . . . . 4 Top Panel . . . . . . . . . . . . . . . . . . . . . . . . . . . . . . . . . . . . . . . . . . . . . 4 Rear Panel (Connecting Your Equipment) . . . . . . . . . . . . . . . . 7 Turning the Power On/Off . . . . . . . . . . . . . . . . . . . . . . . . . . . . . . 7 Phantom Power Settings . . . . . . . . . . . . . . . . . . . . . . . . . . . . . . . 7 Switching Between Play Screens . . . . . . . . . . . . . . . . . . . . . . . . 8 Adjusting the Input/Output Level . . . . . . . . . . . . . . . . . . . . . . . 8 Pedal Mode . . . . . . . . . . . . . . . . . . . . . . . . . . . . . . . . . . . . . . . . . . . 9
Creating a Loop Phrase . . . . . . . . . . . . . . . . . . . . . . . . . . . . . 10 Recording on a Single Track . . . . . . . . . . . . . . . . . . . . . . . . . . . . . 10 Recording on Multiple Tracks . . . . . . . . . . . . . . . . . . . . . . . . . . . 11 Record While Listening to the Rhythm Sound . . . . . . . . . . . . 12 Sounding a Rhythm . . . . . . . . . . . . . . . . . . . . . . . . . . . . . . . . . . . . . 12 Setting the Tempo of Rhythm . . . . . . . . . . . . . . . . . . . . . . . . . . . . . 12 Using the Input FX . . . . . . . . . . . . . . . . . . . . . . . . . . . . . . . . . . . . . 12
Saving a Memory . . . . . . . . . . . . . . . . . . . . . . . . . . . . . . . . . . . . 13 Saving a Memory (WRITE) . . . . . . . . . . . . . . . . . . . . . . . . . . . . . . 13 Erasing Data from a Memory (CLEAR) . . . . . . . . . . . . . . . . . . . . 13
Editing a Memory . . . . . . . . . . . . . . . . . . . . . . . . . . . . . . . . . . . 14 Editing the Settings of a Memory . . . . . . . . . . . . . . . . . . . . . . . 14 Editing the Track Settings . . . . . . . . . . . . . . . . . . . . . . . . . . . . . . 15 Editing the Rhythm Settings . . . . . . . . . . . . . . . . . . . . . . . . . . . . 16 Changing How the Rhythm Starts and Stops . . . . . . . . . . . . . . . . . 16 Editing the Input FX/Track FX Settings . . . . . . . . . . . . . . . . . . . 17
System Settings (MENU) . . . . . . . . . . . . . . . . . . . . . . . . . . . . 18
Connecting to a Computer via USB . . . . . . . . . . . . . . . . . 20 Backing Up or Recovering Data . . . . . . . . . . . . . . . . . . . . . . . . . 20
Controlling Devices via MIDI . . . . . . . . . . . . . . . . . . . . . . . . . . . 21 MIDI Settings . . . . . . . . . . . . . . . . . . . . . . . . . . . . . . . . . . . . . . . . . . 21 Controlling an External MIDI Device from the RC-600 . . . . . . . . . . 21 Controlling the RC-600 from an External MIDI Device . . . . . . . . . . 22 Connecting Two RC-600 Units . . . . . . . . . . . . . . . . . . . . . . . . . . . 22
Appendix . . . . . . . . . . . . . . . . . . . . . . . . . . . . . . . . . . . . . . . . . . . . 23 Troubleshooting . . . . . . . . . . . . . . . . . . . . . . . . . . . . . . . . . . . . . . . 23 Error Message List . . . . . . . . . . . . . . . . . . . . . . . . . . . . . . . . . . . . . 24 Restoring the Factory Default Settings (Factory Reset) . . . . 25 Main Specifications . . . . . . . . . . . . . . . . . . . . . . . . . . . . . . . . . . . . 26
Owners Manual (this document)
Read this first. It explains the basic things you need to know in order to use the RC-600.
Parameter Guide (download from the Web)
This explains all of the parameters of the RC-600.
Before using this unit, carefully read USING THE UNIT SAFELY and IMPORTANT NOTES (the leaflet USING THE UNIT SAFELY and the Owners Manual (p. 2)). After reading, keep the document(s) where it will be available for immediate reference.
2021 Roland Corporation
To obtain the Parameter Guide
1 . Enter the following URL on your computer. https://www .boss .info/manuals/
2 . Choose RC-600 as the product name.
2
IMPORTANT NOTES Power Supply Place the AC adaptor so the side with the indicator faces upwards. The indicator will
light when you plug the AC adaptor into an AC outlet.
Depending on the material and temperature of the surface on which you place the unit, its rubber feet may discolor or mar the surface.
Repairs and Data
Before sending the unit away for repairs, be sure to make a backup of the data stored within it; or you may prefer to write down the needed information. Although we will do our utmost to preserve the data stored in your unit when we carry out repairs, in some cases, such as when the memory section is physically damaged, restoration of the stored content may be impossible. Roland assumes no liability concerning the restoration of any stored content that has been lost.
Additional Precautions
Any data stored within the unit can be lost as the result of equipment failure, incorrect operation, etc. To protect yourself against the irretrievable loss of data, try to make a habit of creating regular backups of the data youve stored in the unit.
Roland assumes no liability concerning the restoration of any stored content that has been lost.
Never strike or apply strong pressure to the display.
When disposing of the packing carton or cushioning material in which this unit was packed, you must observe the waste disposal regulations that apply to your locality.
Use only the specified expression pedal (FV-500H, FV-500L, EV-30, and Roland EV-5; sold separately). By connecting any other expression pedals, you risk causing malfunction and/or damage to the unit.
Do not use connection cables that contain a built-in resistor.
Intellectual Property Right
It is forbidden by law to make an audio recording, video recording, copy or revision of a third partys copyrighted work (musical work, video work, broadcast, live performance, or other work), whether in whole or in part, and distribute, sell, lease, perform or broadcast it without the permission of the copyright owner.
Do not use this product for purposes that could infringe on a copyright held by a third party. We assume no responsibility whatsoever with regard to any infringements of third-party copyrights arising through your use of this product.
The copyright of content in this product (the sound waveform data, style data, accompaniment patterns, phrase data, audio loops and image data) is reserved by Roland Corporation.
Purchasers of this product are permitted to utilize said content (except song data such as Demo Songs) for the creating, performing, recording and distributing original musical works.
Purchasers of this product are NOT permitted to extract said content in original or modified form, for the purpose of distributing recorded medium of said content or making them available on a computer network.
This product contains eParts integrated software platform of eSOL Co., Ltd. eParts is a trademark of eSOL Co., Ltd. in Japan.
This Product uses the Source Code of T-Kernel under T-License 2.0 granted by the T-Engine Forum (www.tron.org).
This product includes third party open source software. Copyright 2009-2019 ARM Limited. All rights reserved. Licensed under the Apache License, Version 2.0 (the License); You may obtain a copy of the License at http://www.apache.org/licenses/LICENSE-2.0
Copyright 2016, Freescale Semiconductor, Inc.
Copyright 2016-2019 NXP. All rights reserved. Licensed under the BSD-3-Clause; You may obtain a copy of the License at https://opensource.org/licenses/BSD-3-Clause
Copyright 2020 Amazon.com, Inc. or its affiliates. All Rights Reserved. Licensed under the MIT license https://opensource.org/licenses/mit-license.php
Roland, BOSS, and LOOP STATION are either registered trademarks or trademarks of Roland Corporation in the United States and/or other countries.
Company names and product names appearing in this document are registered trademarks or trademarks of their respective owners.
WARNING Concerning the Auto Off function The power to this unit will be turned off automatically after a predetermined amount of time has passed since it was last used for playing music, or its buttons or controls were operated (AUTO OFF function). If you do not want the power to be turned off automatically, disengage the AUTO OFF function (p. 19).
WARNING Use only the supplied AC adaptor and the correct voltage Be sure to use only the AC adaptor supplied with the unit. Also, make sure the line voltage at the installation matches the input voltage specified on the AC adaptors body. Other AC adaptors may use a different polarity, or be designed for a different voltage, so their use could result in damage, malfunction, or electric shock.
Use only the supplied power cord Use only the attached power cord. Also, the supplied power cord must not be used with any other device.
CAUTION Handle the ground terminal carefully If you remove the screw from the ground terminal, be sure to replace it; dont leave it lying around where it could accidentally be swallowed by small children. When refastening the screw, make that it is firmly fastened, so it wont come loose.
Precautions concerning use of phantom power supply Always turn the phantom power off when connecting any device other than condenser microphones that require phantom power. You risk causing damage if you mistakenly supply phantom power to dynamic microphones, audio playback devices, or other devices that dont require such power. Be sure to check the specifications of any microphone you intend to use by referring to the manual that came with it. (This instruments phantom power: 48 V DC, 10 mA Max)
USING THE UNIT SAFELY
3
How the RC-600 Is Organized
Track Tracks are used for recording and playing back audio from a microphone or a musical instrument.
You can combine tracks 16 when using this unit.
Input FX, Track FX Effects that are applied to the input audio are called input FX, and effects that are applied to the tracks are called track FX.
You can register 16 input/track FX (4 banks x 4 types) to the buttons and use them.
Rhythm In addition to playing back tracks 16, you can also play rhythms with this unit.
You can record while listening to a rhythm at the tempo you specify.
Memory The settings for tracks 16 together with the input FX/track FX and rhythm are collectively called a memory.
You can store up to 99 memories with this unit.
System settings Settings that are common to the RC-600 overall such as the display contrast, USB and MIDI settings are called system settings.
Memory 99
Memory 01
Rhythm
System settings
Track 1
Track 2
Track 3
Track 4
Track 5
Input FX
Banks AD
FX
Track FX
Banks AD
FX
Track 6
Recording versus Overdubbing In this manual, we refer to the act of recording to an empty track for the first time as recording. Any subsequent recordings that are made, which are added on top of the existing recording, we refer to as overdubbning.
4
Getting Ready
1
[OUTPUT LEVEL] knob Adjusts the volume of the RC-600.
Display Shows various information of the RC-600.
[1][4] knobs Use these knobs to set the parameter values shown in the screen.
[1] [2] [3] [4]
5To change a value in larger steps, turn a knob while pressing it. 5For some parameters, you must press the knob to edit the value.
2
[MENU] button This button gives you access to the overall system settings and USB/MIDI settings of the RC-600.
[LOOP] button Press this button to edit a memory. Use this to configure the settings for tracks 16, settings related to loop playback/recording and so on, input FX/track FX settings, rhythm settings and the memory name.
[RHYTHM] button Each time you press the button, the rhythm switches on (lit)/off (unlit)/standby (blink).
[TAP TEMPO] button Set the tempo by pressing this button at the desired interval (tap tempo). When doing this, the tempo is shown on the screen. Long-press the button to return to the previous tempo.
3
[EXIT] button Press to return to the previous screen.
[ENTER] button Press to confirm an operation.
5 If you press the [ENTER] button while the play screen is shown, the screen switches to the MIXER screen (p. 8).
5 By pressing the [EXIT] button and [ENTER] button simultaneously, you can save a memory (write) or erase (clear) memory data.
PAGE [K] [J] buttons Use these buttons to move the cursor and switch between pages. If you press these buttons while the play screen is shown, you can switch between variations of the play screen.
LOCK function
In the play screen, press the PAGE [K] [J] buttons simultaneously to turn the lock function on, so that the [1][4] knobs are disabled. This lets you prevent the settings from being changed inadvertently. The Lock function turns off when you press the two buttons simultaneously once again.
4
Loop indicators Indicates the tracks status and loop position.
Top Panel
1 4
2
3
5
6
5
Getting Ready
5
[TRACK SELECT] switch/indicator Switches between tracks 13 and 46. Indicator Explanation Lit white Tracks 13 Lit red Tracks 46
When you hold down the [TRACK SELECT] switch, the indicator lights up blue, and the switches on this unit change their functions.
[UNDO/REDO] switch/indicator Press the switch during playback or overdubbing to cancel the recording or the last overdubbing (Undo). Press the switch once again to cancel the Undo (Redo).
Indicator Explanation Lit green Undo available Lit red Redo available Unlit Undo/redo not available
TRACK SELECT indicator: when lit blue The [UNDO/REDO] switch/indicator functions as the [HALF SPEED] switch/indicator. This is used to switch between playback speeds for the currently selected track (current track).
Indicator Explanation
Lit 1/2 playback speed Unlit Normal playback speed
MEMO
The track that is currently selected (currently the target of operations) is called the current track.
[ALL START/STOP] switch/indicator This makes all tracks start (play back) at the same time. If you press this button when the tracks are currently playing back or recording, all tracks stop.
TRACK SELECT indicator: when lit blue The [ALL START/STOP] switch/indicator functions as the [REVERSE] switch/indicator. This is used to switch between normal and reverse playback for the currently selected track (current track).
Indicator Explanation
Lit Reverse playback Unlit Normal playback
6
[REC/PLAY] 16 switches/indicators Switches between recording, playback, and overdubbing.
For an empty phrase:
Recording0Playback0Overdubbing
For a phrase that contains data:
Playback0Overdubbing
Indicator Explanation Lit blue No phrase Lit red Recording Lit green Playing Lit yellow Overdubbing Lit white Stopping (phrase exists)
[STOP] 16 switches/indicators Stops the track that is currently recording/playing/overdubbing. If you long-press the switch (two seconds or longer), the track is cleared. Indicator Explanation
Lit blue No phrase
Lit white Phrase exists
TRACK SELECT indicator: when lit blue These function as the INPUT [A][C] switches/indicators and the TRACK [A][C] switches/indicators.
INPUT [A][C] switches/indicators Switches the effects AC in the currently selected input FX bank on/off.
TRACK [A][C] switches/indicators Switches the effects AC in the currently selected track FX bank on/ off.
Indicator Explanation
Lit red Effect: on
Lit pink Indicates the effect you can currently operate/edit (effect: on).
Unlit Effect: off
Top Panel
6
Getting Ready
7
MIC IN 1, 2 connectors Connect your microphone(s) here.
* If youre using a condenser mic that requires phantom power, turn on this units phantom power.
INST IN 1, 2 jacks (L/MONO, R) Connect your guitar/bass, effect units, keyboards and other instruments to these jacks.
8
MAIN OUTPUT jacks (L/MONO, R) SUB OUTPUT 1, 2 jacks (L/MONO, R) Connect these jacks to your amp, monitor speakers or mixer.
MEMO
You can set the MAIN/SUB jacks as parallel output jacks (mono output x 6) that individually output the sounds from each track.
& Parameter Guide (PDF)
PHONES jack Connect your headphones here.
MEMO
You can configure this unit to let you listen to only the audio you specify in headphones.
& Parameter Guide (PDF)
9 CTL/EXP
CTL 1, 2/EXP 1 jack and CTL 3, 4/EXP 2 jack You can connect an expression pedal or footswitches (sold separately) to these jacks, for controlling a variety of functions.
* Use only the specified expression pedal (FV-500H, FV-500L, EV- 30, and Roland EV-5; sold separately). By connecting any other expression pedals, you risk causing malfunction and/or damage to the unit.
10
MIDI OUT, MIDI IN connectors Connect an external MIDI device here. This lets you control an external MIDI device from this unit via MIDI.
11
USB port Connect your computer using a commercially available USB cable that supports USB 2.0. You can connect your computer here and use it to back up or recover data. You can also use USB audio to play the sound from your computer through this unit, and use USB MIDI to synchronize the tempo of this unit with the DAW software on your computer.
[POWER] switch Turns the power on/off.
DC IN jack Connect the included AC adaptor to this jack.
* Use only the specified AC adaptor (PSB-1U), connected to an AC outlet of the correct voltage.
Rear Panel (Connecting Your Equipment) To prevent malfunction and equipment failure, always turn down the volume, and turn off all the units before making any connections.
To AC outlet
Pin assignment MIC IN 1, 2 connectors
1: GND2: HOT
3: COLD
7 8 9 10 11
Ground terminal
Connect this to an external earth or ground.
Connect this if necessary.
7
Getting Ready
Turning the Power On/Off Before turning the unit on/off, always be sure to turn the volume down. Even with the volume turned down, you might hear some sound when switching the unit on/off. However, this is normal and does not indicate a malfunction.
Turning the Power On Turn on the power in the following order: this unit ([POWER] switch: ON) 0 connected devices 0 amplifier.
Turning the Power Off Turn off the power in the following order: amplifier 0 connected devices 0 this unit ([POWER] switch: OFF).
The power to this unit will be turned off automatically after a predetermined amount of time has passed since it was last used for playing music, or its buttons or controls were operated (AUTO OFF function).
If you do not want the power to be turned off automatically, disengage the AUTO OFF function (p. 19).
5 Unsaved data is lost when the power turns off. Before turning the power off, save the data that you want to keep (p. 13).
5 To restore power, turn the power on again.
Phantom Power Settings If youre using a condenser mic that requires phantom power, use the settings below to turn on this units phantom power.
1 . Press the [MENU] button.
2 . Press the [1] (INPUT) knob.
3 . Press the [1] (SETUP) knob.
4 . Turn the [1] (MIC1)/[2] (MIC2) knobs to set PHANTOM to ON.
5 . Press the [EXIT] button to return to the play screen (p. 8).
NOTE
Always turn the phantom power off when connecting any device other than condenser microphones that require phantom power.
Rear Panel (Connecting Your Equipment)
Connecting footswitches Connect one or more footswitches and set their mode/polarity switches by referring to the illustrations below.
FS-6 FS-7
CTL 2
FS-5U x 1
FS-5U
FS-6
Mode/Polarity switch
FS-7
1/4 phone type
1/4 phone type
Stereo 1/4 phone type
Stereo 1/4 phone type
Stereo 1/4 phone type
Stereo 1/4 phone type
CTL 1CTL 2 CTL 1CTL 1
RINGTIP
Stereo 1/4 phone type
1/4 phone type x 2
CTL 1 CTL 2
FS-5U x 2
8
Getting Ready
(1) MEMORY NUMBER
(2) TRACK STATUS Loop track status is shown with an icon
Icon Explanation
Recording, playing back, overdubbing
Stopped (phrase exists)
No phrase
Current track
(3) LOOP TRACKS Displays the track status + progress during playback
(4) LOOP STATUS Indicates the status of the tracks
(5) LOOP LEVEL Volume of each track is shown by the level meters
(6) INPUT FX Indicates the input FX status
A B C D
Off
On
(7) TRACK FX Indicates the track FX status
* You can change which play screen is shown on startup.
& Parameter Guide (PDF)
Switching Between Play Screens The screen that appears after you turn on the power is called the play screen.
Icon Explanation
Tempo
Phantom power for MIC 1, 2 connectors is on (off when not displayed)
Knob lock function is on (off when not displayed)
Memory name
[1] [2] [3] [4]
Parameters to set using the [1][4] knobs
Memory number
Press the PAGE [K] or [J] button while the play screen is shown to switch between variations of the play screen.
Adjusting the Input/Output Level Press the [ENTER] button while the play screen is shown to display the MIXER screen, where you can check the input/output levels for each jack and connector.
Use the PAGE [K] [J] buttons to switch between pages, and turn the [1][4] knobs to adjust the respective input/output levels.
[J] [K]
[J] [K]
Mute: On ScalePeak indicator
Switches the page
5 Adjust the levels so that the peak indicator on the level meter matches the scale shown in the illustration.
5 For the inputs, push the [1][4] knobs to mute the sound.
5 Use the MASTER OUT to adjust the levels of the MAIN OUTPUT, SUB OUTPUT 1 and SUB OUTPUT 2. The [OUTPUT LEVEL] knob is configured to adjust the levels as well by factory default.
The jacks and connectors shown in the MIXER screen may change, depending on the stereo link settings.
Stereo link Explanation ON The MIC 1, 2 and L/R channels are shown as a single connector. OFF The MIC 1, 2 and L/R channels are shown separately.
* For details on stereo link, refer to the Parameter Guide (PDF).
9
Getting Ready
Pedal Mode In Pedal mode, you can assign the functions you like to the nine switches on this unit as a set. This lets you efficiently operate switches such as record, playback and overdubbing.
5 Pedal mode features three separate modes, and you can switch between these three modes as sets.
5 You can also assign the function for selecting modes 13 to a switch you like.
5 The settings for modes 13 can be saved in memory, letting you use different settings for each pedal mode in memory.
Examples of settings
(1) These are the basic (factory default) settings of the RC-600. Tracks 13
Tracks 46
REC/PLAY STOP
Track 1
REC/PLAY STOP
Track 2
REC/PLAY STOP
Track 3
REC/PLAY STOP
Track 4
REC/PLAY STOP
Track 5
REC/PLAY STOP
Track 6
PEDAL MODE (Track select)
(2) These are the settings for quickly selecting a desired track.
PEDAL MODE (Track 1)
PEDAL MODE (Track 2)
PEDAL MODE (Track 3)
PEDAL MODE (Track 4)
PEDAL MODE (Track 5)
PEDAL MODE (Track 6)
TAP TEMPO
Track select
REC/PLAY STOP
Track 16
Pedal mode settings Make the Pedal mode settings by selecting the PEDAL MODE1PEDAL MODE3 parameters from CTL FUNC on the MENU screen (p. 18).
For details on the parameters, refer to Parameter Guide (PDF).
10
Creating a Loop Phrase
Recording on a Single Track Heres how to record and overdub on track 1.
Getting ready to record
1 . Connect your guitar or mic.
2 . Adjusts the input/output level (p. 8).
3 . Use the [OUTPUT LEVEL] knob to adjust the overall volume of the RC-600.
4 . On the play screen, turn the [1] (MEMORY) knob to select a memory.
5 . Press the [TRACK SELECT] switch to the tracks 13. Indicator Explanation Lit white Tracks 13 Lit red Tracks 46
Recording 1 . Press the [REC/PLAY] 1 switch to start
recording. The REC/PLAY indicator is lit red.
2 . Play your guitar or vocalize into your mic to input audio.
% Playback
1 . Press the [REC/PLAY] 1 switch. The REC/PLAY indicator is lit green.
The recorded phrase plays as a loop.
% Overdubbing
1 . Press the [REC/PLAY] 1 switch to start overdubbing. The REC/PLAY indicator is lit yellow.
2 . Overdub-record your performance (audio) onto the phrase thats playing as a loop.
% Playback
%$ Repeat as many times as necessary.
Overdubbing :
Stopping 1 . Press the [STOP] 1 switch.
The REC/PLAY indicator is lit white.
If you want to keep the recorded phrase, save it in a memory (p. 13).
Undo/Redo Press the [UNDO/REDO] switch during playback or overdubbing to Undo. Press the switch once again to Redo.
Indicator Explanation Lit green Undo available Lit red Redo available Unlit Undo/redo not available
11
Creating a Loop Phrase
Recording on Multiple Tracks You can use multiple tracks to create a single loop phrase.
This shows you how to record the tracks in ascending order (track 1 0 track 2 0 … track 6).
Press the [TRACK SELECT] switch to the tracks 13.
The TRACK SELECT indicator is lit white.
% Track 1 Recording
1 . Press the [REC/PLAY] 1 switch to start recording. The REC/PLAY indicator is lit red.
2 . Play your guitar or vocalize into your mic to input audio.
% Track 1 Playback
1 . Press the [REC/PLAY] 1 switch. The REC/PLAY indicator is lit green.
The recorded phrase plays as a loop.
%$ Repeat as many times as necessary.
Track 1 Overdubbing 1 . Press the [REC/PLAY] 1 switch to start
overdubbing. The REC/PLAY indicator is lit yellow.
2 . Overdub-record your performance (audio) onto the phrase thats playing as a loop.
: Track 1 Playback
Press the [REC/PLAY] 1 switch.
% Track 2 Recording
1 . Press the [REC/PLAY] 2 switch to start recording. The REC/PLAY indicator is lit red.
2 . Play your guitar or vocalize into your mic to input audio.
% Track 2 Playback
1 . Press the [REC/PLAY] 2 switch. The REC/PLAY indicator is lit green.
The recorded phrase plays as a loop.
%
Track 2 Overdubbing
%$ Repeat as many times as necessary.
Track 2 Playback Press the [REC/PLAY] 2 switch.
% Track 3 As with track 2, record/playback/overdub tracks.
% Press the [TRACK SELECT] switch to the tracks 46.
The TRACK SELECT indicator is lit red.
% Track 46 As with track 2, record/playback/overdub tracks 40 5 0 6 in ascending order.
: Stopping
1 . Press the [ALL START/STOP] button. The ALL START/STOP indicator is go dark.
If you want to keep the recorded phrase, save it in a memory (p. 13).
Undo/Redo Press the [UNDO/REDO] switch during playback or overdubbing to Undo. Press the switch once again to Redo.
Indicator Explanation Lit green Undo available Lit red Redo available Unlit Undo/redo not available
12
Creating a Loop Phrase
Record While Listening to the Rhythm Sound In addition to the track, the RC-600 can also play a Rhythm.
You can record while sounding a rhythm at the tempo you specify.
Sounding a Rhythm
1 . Press the [RHYTHM] button. The rhythm switches on (lit)/off (unlit)/ready to play rhythm (blink) each time you press the button.
Setting the Tempo of Rhythm
1 . Press the [TAP TEMPO] button. The tempo setting screen appears.
2 . While the tempo setting screen is shown, turn the [4] knob to set the tempo.
Value 40.0300.0
MEMO
Press and then turn the [4] knob to set a value in decimal points.
Tap tempo You can set the tempo by pressing a button at the desired interval.
1 . Press the [TAP TEMPO] button several times in time with the desired tempo.
MEMO
If you long-press the [TAP TEMPO] button until it begins blinking red, the tempo returns to the default value.
5 The specified tempo can be saved as a setting in memory.
& Saving a Memory (WRITE) (p. 13)
5 You can specify the volume and type (variation) of rhythm, and how the rhythm plays.
& Editing the Rhythm Settings (p. 16)
Using the Input FX You can apply input FX to the input sound.
1 . Press the [LOOP] button. The LOOP screen appears.
2 . Use the PAGE [J] button to switch the page, and then press the [1] (INPUT FX) knob.
3 . Turn the [1][4] knobs to switch the effects (FX AD) on/off.
Switching between banks
4 . Use the PAGE [J] button to switch the page, and then turn the [1] (BANK) knob to select the bank.
Using the Track FX
5 . To apply track FX to a track thats already recorded, use the same operation as with the input FX after pressing the [2] (TRACK FX) knob mentioned in step 2.
5 You can save the effects you configured as settings in memory.
& Saving a Memory (WRITE) (p. 13)
5 You can switch between effect types that are assigned to the [A][D] buttons, and change how the effects sound.
& Editing the Input FX/Track FX Settings (p. 17)
13
Saving a Memory
Saving a Memory (WRITE) If you select a different memory or turn off the power after recording or editing the settings, the recorded content or edited settings are lost. If you want to keep the data, you must save it.
1 . Press the [EXIT] button and [ENTER] button simultaneously. The WRITE screen appears.
2 . Press the [1] or [2] (WRITE) knob.
3 . Turn the [1][4] knobs to select the memory to which you want to save.
5 This procedure is not required if the memory number is acceptable as is.
5 If you decide to cancel, press the [EXIT] button.
4 . Press the [ENTER] button. The memory is saved.
* Make sure not turn to off the power while the EXECUTING… message is shown.
MEMO You can assign a name to the memory. For details, refer to Parameter Guide (PDF).
Erasing Data from a Memory (CLEAR) You can erase the data that is saved in a memory, clearing that memory to an empty state.
1 . Press the [EXIT] button and [ENTER] button simultaneously. The WRITE screen appears.
2 . Press the [3] or [4] (CLEAR) knob.
3 . Turn the [1][4] knobs to select the memory you want to clear.
5 This procedure is not required if the memory number is acceptable as is.
5 If you decide to cancel, press the [EXIT] button.
4 . Press the [ENTER] button. The memory will be cleared.
* Make sure not turn to off the power while the EXECUTING… message is shown.
14
Editing a Memory
1 . Press the [LOOP] button. The LOOP screen appears.
2 . Use the PAGE [K] [J] buttons to switch to the page containing the item you want to edit.
3 . Press the [1][4] knobs to select the parameter to edit.
4 . Use the PAGE [K] [J] buttons to switch to the page containing the parameter you want to edit.
5 . Turn the [1][4] knobs to edit the values.
6 . Press the [EXIT] button a number of times to return to the play screen.
7 . If you want to save the edited settings, execute the Write operation (p. 13).
Item Explanation
TRACK Configures tracks 16. Turn the [1] knob to select the track to edit.
REC Configures the settings related to recording/ overdubbing.
PLAY Specifies how loop phrases play back.
INPUT FX Configures the input FX.
TRACK FX Configures the track FX.
RHYTHM Configures the rhythm settings.
NAME Specifies the memory name. * Maximum of 12 characters
Editing the Settings of a Memory Heres how to edit the settings of each memory.
For details on the parameters, refer to Parameter Guide (PDF).
15
Editing a Memory
Editing the Track Settings Heres how to configure the volume, playback method and other settings for tracks 16.
For details on the parameters, refer to Parameter Guide (PDF).
1 . Press the [LOOP] button. The LOOP screen appears.
2 . Turn the [1] (TRACK) knob to select the track to edit, and then press the [1] (TRACK) knob. The TRACK screen appears.
3 . Use the [K] [J] buttons to switch to the page containing the parameter you want to edit.
4 . Turn the [1][4] knobs to edit the values.
5 . Press the [EXIT] button a number of times to return to the play screen.
6 . If you want to save the edited settings, execute the Write operation (p. 13).
Item Explanation
REVERSE Specifies whether to play back normally or in reverse.
1SHOT Specifies whether to play back as one-shot or as the usual loop playback.
PAN Specifies the stereo position (pan) of the track.
PLAY LEVEL Adjusts the playback level of the track.
START MODE Specifies whether playback starts with a fade-in or immediately when the track plays.
STOP MODE Specifies how the track stops.
DUB MODE Specifies the overdubbing method.
FX
Turns the effects (input FX/track FX) on/off. * You can also press the [FX] button of the
currently selected track to switch the effect on/off.
PLAY MODE Specify how loop phrases play back. MEASURE Specifies the number of measures in the track.
LOOP SYNC
Specifies whether the phrases played back on tracks 16 are lined up at the beginning and then looped, or whether each phrase is looped separately according to their length.
TEMPO SYNC
SW
Sets whether each track plays at its original tempo (the tempo during recordinguse the OFF setting) or at the tempo that is specified in the memory (use the ON setting).
MODE
When TEMPO SYNC SW is ON, this sets whether to change the pitch according to the tempo, or to instead make the pitch stay the same.
SPEED Sets the playback speed for each track.
BOUNCE IN Sets whether to allow the playback sound from a different track as well to be recorded during recording or overdubbing.
INPUT
Sets whether the sound from each input jack/ connector and the rhythm should be inputted to the track (ON) or not (OFF). Turn the [1] knob to select the input jack/ connector or RHYTHM, and press the [1] knob to switch between ON/OFF. * When stereo link is ON, the MIC 1, 2 and L/R
channels are shown as a single connector.
16
Editing a Memory
1 . Press the [LOOP] button. The LOOP screen appears.
2 . Use the PAGE [J] button to switch the page, and then press the [3] (RHYTHM) knob. The RHYTHM screen appears.
3 . Use the [K] [J] buttons to switch between the parameters that you want to edit.
4 . Turn the [1][4] knobs to edit the values.
5 . Press the [EXIT] button a number of times to return to the play screen.
6 . If you want to save the edited settings, execute the Write operation (p. 13).
Item Explanation
GENRE Selects the genre of the rhythm pattern. PATTERN Selects the rhythm pattern.
VARIATION Selects the rhythm pattern variation.
KIT Selects the drum kit used to play the rhythm. BEAT Specifies the time signature of the rhythm. START TRIG Specifies how rhythm playback starts. STOP TRIG Specifies how rhythm playback stops.
INTRO REC Sets whether to add an intro or not when recording.
INTRO PLAY Specifies whether the rhythm plays with or without an intro.
ENDING Specifies whether the rhythm plays with or without an ending.
FILL Specifies whether the rhythm plays with a fill-in or without a fill-in.
VARI. CHANGE
Specifies the timing at which the rhythm patterns variation is changed.
Changing How the Rhythm Starts and Stops As appropriate for your recording method or the phrase that youre recording, you can change the way in which the rhythm starts and stops.
1 . From the RHYTHM screen, switch to the page on which START TRIG is shown.
2 . Turn the [2] (START TRIG) knob to set the rhythm playback method.
3 . Turn the [3] (STOP TRIG) knob to set the rhythm stop method.
4 . Press the [EXIT] button a number of times to return to the play screen.
5 . If you want to save the edited settings, execute the Write operation (p. 13).
Parameter Explanation START TRIG
LOOP START The rhythm plays when loop recording or playback starts.
REC END
The rhythm plays when loop recording ends and switches to playback. This is useful if you want to perform without specifying a tempo, start recording and then play the loop in time with the rhythm when playback starts.
BEFORE LOOP
The rhythm plays before loop recording or playback. The rhythm starts playing when you press the switch once, and recording/playback starts in time with the rhythm when you press the switch once again.
STOP TRIG
OFF
The rhythm always continues playing. If you are performing in synchronization with an external MIDI device, you can keep the rhythm playing continuously to allow synchronized playback.
LOOP STOP The rhythm stops when the loop stops.
REC END The rhythm stops when loop recording ends. This is useful when you want to use the rhythm as a guide during recording.
Editing the Rhythm Settings For details on the parameters, refer to Parameter Guide (PDF).
17
Editing a Memory
Editing the Input FX/Track FX Settings For details on the parameters, refer to Parameter Guide (PDF).
1 . Select the memory for which you want to edit the input FX/track FX settings.
2 . Press the [LOOP] button. The LOOP screen appears.
3 . Use the PAGE [J] button to switch the page, and then press the [1] (INPUT FX) or [2] (TRACK FX) knob. The INPUT FX screen/TRACK FX screen appears.
4 . Select the bank of the effect you wish to edit. 1 . Use the PAGE [J] button to switch the page, and then turn
the [1] (BANK) knob to select the bank.
2 . Press the PAGE [K] button to return to the previous page.
5 . Press the [1][4] knobs to select the effect to edit.
6 . Use the [K] [J] buttons to switch to the page containing the parameter you want to edit.
* The available parameters depend on the type of effect you select.
7 . Turn the [1][4] knobs to edit the values.
8 . Press the [EXIT] button a number of times to return to the play screen.
9 . If you want to save the edited settings, execute the Write operation (p. 13).
18
System Settings (MENU) For details on the parameters, refer to Parameter Guide (PDF).
1 . Press the [MENU] button. The MENU screen appears.
2 . Use the [K] [J] buttons to switch to the page containing the item you want to edit.
3 . Press the [1][4] knobs to select the item that you want to edit.
4 . If you see another screen with items to select, repeat steps 2 and 3.
5 . Use the [K] [J] buttons to switch to the page containing the parameter you want to edit.
6 . Turn the [1][4] knobs to change the value.
7 . Press the [EXIT] button a number of times to return to the play screen.
Item Parameter/Explanation
INPUT
SETUP
Settings related to the input and output jacks, such as phantom power on/off.
EQ
Settings for applying an equalizer effect to the input sound for each connector/jack.
DYNAMICS
Settings for applying a compressor or noise suppressor to the input sound.
OUTPUT
SETUP
Settings related to the output jacks, such as stereo link.
ROUTING
Settings for assigning the playback sound from tracks 16 and the input/rhythm sound from each input jack/connector to the output jacks.
EQ
Settings for applying an equalizer effect to the output sound, configured for each output jack.
MASTER FX
Settings for the compressor and reverb effects that are applied to the output sound.
MIXER Sets the input/output levels for each jack and connector (p. 8).
CTL FUNC
PANEL MODE 13
Settings for assigning functions to the [REC/PLAY] switches x 3, the [STOP] switches x 3, the [TRACK SELECT] switch, the [UNDO/REDO] switch and the [ALL START/STOP] switch.
CTL/EXP
Settings for assigning functions to a footswitch or expression pedal connected to the CTL 1, 2/EXP 1 jack or the CTL 3, 4/EXP 2 jack.
PREFERENCE
Selects whether to switch the PANEL MODE 13 and CTL/EXP settings to either the settings for each memory or to the system settings. * When switching to the settings for each
memory, use the write operation to save the settings to memory.
ASSIGN
ASSIGN 116
Settings for the ASSIGN section. By using the assign settings, you can control other parameters at the same time as the specified functions that are executed when you operate this units buttons/knobs, or a footswitch/expression pedal connected to the CTL 1, 2/EXP 1 jack or CTL 3, 4/EXP 2 jack. You can also configure this unit to be controlled from an external MIDI device. There are 16 different assign settings.
19
System Settings (MENU)
Item Parameter/Explanation
USB
STORAGE
Settings for how USB should operate.
AUDIO MODE
Settings for the USB driver when USB audio is used.
AUDIO ROUTING
Settings for where the USB audio is routed.
INPUT LEVEL
Configures the USB audio input level.
OUTPUT LEVEL
Configures the USB audio output level.
MIDI
RX CH CTL
Specifies the receive channel for messages (control changes) that switch memories or control the RC-600.
RX CH RHYTHM
Specifies the receive channel for note messages that play the drum sounds.
RX CH VOICE
Specifies the receive channel for note messages used to create harmonies or vocoder effects.
TX CH
Specifies the transmit channel for MIDI messages.
SYNC CLOCK
Specifies the input to which the tempo clock is synchronized.
SYNC OUT
Sets whether to output MIDI clock or not.
SYNC START
Specifies what starts in synchronization when a MIDI start message is received.
PC OUT
Sets whether to transmit program change messages or not.
THRU MIDI IN
Specifies the connector used to output the MIDI messages received through the MIDI IN connector.
THRU USB IN
Specifies the connector used to output the MIDI messages that are received through the USB port.
SETUP
CONTRAST
Adjusts the display contrast.
DISPLAY MODE
Sets which play screen is shown on startup.
INDICATOR
Settings for what the loop indicator should display.
FX KNOB MODE
Sets how the [INPUT FX] knob/[TRACK FX] knob operate.
AUTO OFF
Turns the AUTO OFF function on/off.
Item Parameter/Explanation
SETUP
MEMORY EXT MIN, MAX
Specifies the extent (lower limit and upper limit) to which memories can be switched.
KNOB FUNC 14
Specifies the functions that are assigned to the [1][4] knobs.
FACTORY RESET Restores the unit to its factory settings (p. 25).
20
Connecting to a Computer via USB
1 . Press the [MENU] button. The MENU screen appears.
2 . Use the [K] [J] buttons to switch to the page on which USB is shown, and press the [2] (USB) knob.
3 . Turn the [1] (STORAGE) knob to set PREPARING….
4 . Use a USB cable to connect the RC-600s USB port to your computers USB port. When a connection with the computer is established, the message CONNECTING… appears.
* USB connection is not possible if the unit is not stopped, or if there is a phrase that has not been saved.
5 . Open the BOSS RC-600 drive.
Windows Within My Computer (or Computer), open BOSS RC-600 (or Removable Disk).
macOS On the desktop, open the BOSS RC-600 icon.
6 . Back-up or recover the data.
Backup
Copy the entire ROLAND folder from the BOSS RC-600 drive to your computer.
Recover
* When you execute this operation, the memory currently saved in the RC-600 disappears. Back up in advance.
In the BOSS RC-600 drive, delete the ROLAND folder, and then copy the backed-up ROLAND folder from the computer into the BOSS RC-600 drive.
NOTE Do not delete the folders in the BOSS RC-600 drive other than when executing the recovery operation.
7 . Eject the BOSS RC-600 drive.
Windows In the lower right of your screen, click the [ ] and then the [ ] icon, and then click Eject BOSS RC-600.
macOS Drag the BOSS RC-600 icon to the trash (Eject icon).
Heres what you can do when you connect the RC-600 via USB to your computer.
5 Back up the RC-600s data to your computer.
5 Restore (recover) backup data from your computer to the RC-600.
5 Use BOSS TONE STUDIO to import or back up loop phrases (audio files).
5 Use the dedicated rhythm converter if you want to import and use your original rhythm patterns on the RC-600.
Using BOSS TONE STUDIO and the rhythm converter Access the website shown below to download BOSS TONE STUDIO or the rhythm converter.
&https://www .boss .info/support/
Connecting to your computer Use a commercially available USB cable to connect the RC-600s USB port to the USB port on your computer.
NOTE
5 Use a USB cable that supports USB 2.0 Hi-Speed.
5 This might not work correctly for some models of computer. Refer to the BOSS website for details on the operating systems that are supported.
Backing Up or Recovering Data
21
Controlling Devices via MIDI
Connect external MIDI devices to this unit according to your needs.
Connector Explanation MIDI IN Receives messages from another MIDI device. MIDI OUT Transmits messages from this device.
Connection
MIDI Settings Use of MIDI requires that the MIDI channels be matched with those of the connected device. Data cannot be transmitted to, nor received from another MIDI device unless the MIDI channels are set properly.
For details on each of the MIDI setting parameters, refer to Parameter Guide (PDF).
Controlling an External MIDI Device from the RC-600
Overview Explanation
Transmitting tempo data and data for starting and stopping playback
The RC-600s performance tempo data is transmitted to external MIDI devices as MIDI Clock.
Setting an external MIDI device to the same tempo as the RC-600 MIDI Clock messages are output from the RC-600 at all times. Set the external MIDI device beforehand so it is ready to receive MIDI Clock and MIDI Start and Stop messages. For details, refer to the owners manual of your device.
Playback start and stop operations with the RC-600s switches can be transmitted as MIDI Start and Stop messages.
Transmitting Start/Stop A MIDI Start message is transmitted at the moment that recording or playback of the track begins, when tracks had been stopped. This message is also transmitted when an All Start is carried out. A MIDI Stop message is transmitted when tracks have stopped. This is also transmitted when All Stop is carried out. * If you want MIDI synchronized performance to continue even after the track stops, set the
RHYTHM parameter STOP TRIG (p. 16) to OFF. * Tracks whose 1SHOT setting (p. 15) is ON and tracks whose LOOP SYNC setting (p. 15) is
OFF will not transmit Start/Stop data.
Transmitting Program Change messages
When a memory is selected with the RC-600, a Program Change message corresponding to the selected memory number is transmitted simultaneously.
Transmitting Program Change messages When memories are switched on the RC-600, a MIDI Program Change message is transmitted to the connected external MIDI device. You can transmit Program Change messages numbered 1 through 99, corresponding to the 99 individual memories 0199. * Set PC OUT (p. 19) to ON beforehand. * Program Change messages 100128 cannot be transmitted. * Bank Select MIDI messages (Control Change #0, #32) cannot be transmitted.
Transmitting Control Change messages
Operating information for the RC-600s switches, buttons, knobs, and an external expression pedal or footswitch is transmitted as Control Change messages.
Transmitting Control Change messages If you select a Control Change as the ASSIGN (p. 18) target, you can transmit MIDI control change messages by operating the buttons and knobs on the RC-600, or by using an external footswitch or expression pedal (connected to the CTL 1, 2/EXP 1 jack or the CTL 3, 4/EXP 2 jack).
22
Controlling Devices via MIDI
Controlling the RC-600 from an External MIDI Device
Overview Explanation
Receiving tempo data and data for starting and stopping playback
The RC-600 will synchronize to the tempo of MIDI Clock data from an external MIDI device.
Setting the RC-600 to the same tempo as an external MIDI device Make settings on your external MIDI device so that it will transmit MIDI Clock and MIDI Start/Stop data. For details, refer to the owners manual of your device. Set the RC-600s SYNC CLOCK (p. 19) to AUTO. * You cant switch the tempo during recording.
Start/stop data will be received from an external MIDI device to play/stop the RC-600.
Receiving MIDI Start When MIDI Start (FA) is received, all tracks will play (All Start).
Switching memories
The RC-600s memories switch simultaneously upon receipt of corresponding Program Change messages from external MIDI devices.
Switching memories You can switch the RC-600s memories with Program Change messages from external MIDI devices. You can receive Program Change messages numbered 1 through 99, corresponding to the 99 individual memories 0199. * Program Change messages 100128 cannot be received. * Even if received, Bank Select MIDI messages (Control Change #0, #32) are disregarded.
Receiving Control Change messages
The RC-600 can be controlled using Control Change messages from external MIDI devices.
Receiving Control Change messages You can use Control Change messages from an external MIDI device to control functions that would be difficult to control using the RC-600s own controllers. In the ASSIGN (p. 18) setting, set SOURCE to MIDI CC#1#31, CC#64#95, and select the parameter that you want to control in TARGET.
Connecting Two RC-600 Units Two RC-600 units can be synchronized after connecting them together using a MIDI cable.
MIDI OUT MIDI IN
Transmitting unit Receiving unit
5 Begin recording on the tracks of the transmitting RC-600.
5 When you press the [ALL START/STOP] button on the transmitting RC-600, the receiving RC-600 also plays back.
* To make playback stop, select SYNC ST/STP in the SOURCE Assign (p. 18) setting, and ALL ST/STP in the TARGET setting.
* The receiving RC-600 performs an all start when tracks start playing back on the transmitting RC-600.
5 Tracks for which TEMPO SYNC (p. 15) is ON play at the tempo set in the memory of the transmitting unit.
5 Tracks for which LOOP SYNC (p. 15) is ON loop in time with the first-recorded phrase on the transmitting RC-600.
23
Appendix
Troubleshooting
Problem Items to Check Action
Problems with sound
No sound/insufficient volume
Is this unit properly connected to other devices? Check the connections to other devices (p. 7).
Is the power to the connected amp or mixer not turned on, or is the volume turned down?
Check the settings for connected devices.
Is there a short in one of the connection cables? Try replacing the connection cable.
The [OUTPUT LEVEL] knob have been lowered? Adjust knob to suitable position.
Is the input/output level set correctly? Adjust the input/output levels on the MIXER screen for the input/output jacks and connectors respectively.
Are the levels for tracks 16 set correctly? Check the PLAY LEVEL setting for each track (p. 15).
Check whether an external expression pedal or other accessory has been set to adjust the levels (p. 18).
Are the audio output destinations for tracks 16 set correctly?
Check the ROUTING settings in OUTPUT on the MENU screen (p. 18).
Has anything been recorded to the tracks? Check the REC/PLAY indicator for each track to see whether the track has been recorded. If a tracks button is unlit, nothing has been recorded on that track.
No rhythm sound Is the rhythm volume set correctly? Check the RHYTHM OUT setting on the MIXER screen.
Is the output destination for the rhythm sound set correctly?
Check the RHYTHM settings in ROUTING, found in OUTPUT on the MENU screen (p. 18).
Sound is missing from the beginning and end of a recorded track
To prevent noise, a fade-in and a fade-out are applied at the beginning and end of a recording. In some cases, it may sound as if some of the sound has been cut out.
Unable to hear sounds from devices connected to the MIC IN 1, 2 connectors/INST IN 1, 2 jacks
Is the audio output destination set correctly? Check the MIC 1/MIC 2/INST 1/INST 2 settings in ROUTING, found in OUTPUT on the MENU screen (p. 18).
Problems with operation
Cannot switch between memories
Is something other than the play screen appearing in the display?
You cannot switch memories while any screen other than the play screen is displayed. Press the [EXIT] button to return to the play screen.
Recording/overdubbing stops before finishing
Is there enough memory remaining? If there isnt enough memory, clear any unneeded memories (p. 13) before recording or overdubbing.
Is LOOP SYNC (p. 15) set to ON for the track? When recording with LOOP SYNC set to ON, once the end of the longest track is reached, this unit automatically switches to overdubbing.
Playback tempo not changing
Is recording or overdubbing in progress? You cannot change the tempo of the memory while recording or overdubbing. Change the tempo while the tracks are stopped or playing back.
Is TEMPO SYNC (p. 15) set to ON for the track?
When TEMPO SYNC is not set to ON for a track, the playback speed does not change even if the tempo for the memory changes. To match the playback speed to the tempo of the memory, set the tracks TEMPO SYNC setting to ON.
Playback tempo not changing
Is the unit synchronized via MIDI?
If MIDI clocks are being received via the MIDI IN connector or the USB port, the RC-600 synchronizes its tempo to the MIDI clocks.
If you dont want to synchronize with an external device, set SYNC to INTERNAL.
MIDI messages not being transmitted/ received
Is the external MIDI device properly connected? Check the connections to the external MIDI device.
Could there be a short in the MIDI cable? Try replacing the MIDI cable.
Are the MIDI channels matched to those of the external MIDI device?
Confirm that both devices are set to the same MIDI channels.
If transmitting from the RC-600, have you made the necessary transmission settings?
Check the TX CH (transmit channel) setting and the PC OUT (program change message transmit) on/off setting.
Problems with USB
Unable to communicate with computer
Is the USB cable properly connected? Check the connection (p. 20).
(If exchanging files via USB with your computer) Could STORAGE be OFF?
Using the procedure shown in Backing Up or Recovering Data (p. 20), set STORAGE to PREPARING….
Is a memory now being edited? USB connection is not possible if there is an unsaved memory.
Save the memory (p. 13), and then try the USB connection again.
24
Appendix
Error Message List
Message Meaning Action
LOOPER
DATA DAMAGED Data may have been damaged. In the factory reset function (p. 25), choose SYS+MEM to return the RC-600 to its factory settings.
DATA READ ERR A problem has occurred with the content of the RC-600s memory.
Consult your dealer, a Roland service center, or an official Roland dealer.DATA WRITE ERR
DATA TOO LONG Playback is not possible because the recording time or audio file is too long.
The recording time or audio file length must not exceed 1.5 hours.
DATA TOO SHORT Playback is not possible because the recording time or audio file is too short.
The recording time or audio file length must be at least 0.1 seconds.
EVENT FULL Further overdubbing is not possible. Save the memory (p. 13).
MEMORY FULL
The recorded time of one track exceeded 1.5 hours (approximately).
No further recording is possible on the current track.
Save the memory (p. 13). If you want to continue recording, select a different memory.
The total recording time of all memories exceeded 13 hours (approximately).
No further recording is possible. Clear unneeded memories (p. 13).
NOT EMPTY You are attempting to overwrite-save onto a memory in which a phrase is already recorded.
Either clear the currently selected memory (p. 13), or select an empty memory.
TEMPO TOO FAST Since the track is being played at a much faster tempo than when it was recorded, it might not play back correctly.
Adjust the tempo.
TEMPO TOO SLOW Since the track is being played at a much slower tempo than when it was recorded, it might not play back correctly.
TOO BUSY
TOO BUSY OMSG
The RC-600 could not process the data completely.
For TOO BUSY OMSG:
Since you attempted to apply the loop FX to a phrase that was set to a significantly slower tempo than when it was recorded, the data could not be processed quickly enough.
Lower the performance tempo.
In the case of TOO BUSY OMSG, return to the tempo that was used during recording.
Save the current content to a memory.
If this appears frequently, back up the data to your computer, then execute factory reset SYS+MEM, and then recover the data (p. 25, p. 20).
UNDEFINED ERR An error of unknown cause has occurred during recording, playback, or overdubbing.
Consult your dealer, a Roland service center, or an official Roland dealer.
MIDI
BUFFER FULL An excessive volume of messages were received and could not be processed properly.
Reduce the number or size of MIDI messages transmitted to the RC-600.
OFFLINE There is a problem with the MIDI cable connection. Check to make sure the cable has not been disconnected and that there is no short in the cable.
Others
MEMORY FULL This units memory is insufficient. If this message appears, recording or overdubbing might end mid-way.
Clear unneeded memories (p. 13), and then try recording again.
STOP LOOPER The operation is not possible during recording, playback, or overdubbing.
Stop before performing the operation.
STOP ALL The operation is not possible during recording, playback, overdubbing, or rhythm playback.
Stop all of these before performing the operation.
STOP ALL&SAVE The operation is not possible during recording, playback, overdubbing, or rhythm playback when there is also unsaved data.
Stop all of these, and then save the memory (p. 13).
UNSUPPORTED FILE This audio file is unplayable. Check the format of the audio file.
To import an audio file into the RC-600, use BOSS TONE STUDIO.
25
Appendix
Restoring the Factory Default Settings (Factory Reset) You can restore all of the settings to their factory-set values, and you can also specify certain items to be reset.
* When you execute Factory Reset, the settings you made are lost. Back up any necessary data to your computer.
1 . Press the [MENU] button. The MENU screen appears.
2 . Use the [K] [J] buttons to switch to the page on which FACTORY RESET is shown, and press the [4] (FACTORY RESET) knob.
3 . Turn the [1][4] knobs to select the setting that you want to restore.
Value Explanation MEMORY Memory 0199 SYSTEM System settings MEMORY+SYSTEM Memory 0199 and system settings
* If you decide to cancel, press the [EXIT] button.
4 . Press the [ENTER] button. The factory reset is executed.
* Make sure not turn to off the power while the EXECUTING… message is shown.
Once the factory reset is complete, you are returned to the Play screen.
26
Appendix
Main Specifications
Sampling Frequency 44.1 kHz
AD/DA Conversion 32 bits
Processing 32-bit floating point
Recording/Playback Number of Tracks: 6 Data Format: WAV (44.1 kHz, 32-bit float, stereo) Maximum Recording Time: Approx. 1.5 hours (1 track), Approx.13 hours (total of All memories)
Rhythm Type 200 types or greater
Rhythm Kit 16 types
Effect INPUT FX: 49 types TRACK FX: 53 types MASTER FX: 2 types
Memory 99
Nominal Input Level MIC IN 1, 2: -40 dBu INST IN 1, 2: -10 dBu
Maximum Input Level MIC IN 1, 2: 0 dBu INST IN 1, 2: +7 dBu/+20 dBu (selectable)
Input Impedance MIC IN 1, 2: 3 k INST IN 1, 2: 1 M/25 k (selectable)
Nominal Output Level MAIN OUTPUT: -10 dBu SUB OUTPUT 1, 2: -10 dBu
Maximum Output Level MAIN OUTPUT: +7 dBu SUB OUTPUT 1, 2: +7 dBu
Output Impedance MAIN OUTPUT: 1 k SUB OUTPUT 1, 2: 1 k
Recommended Load Impedance MAIN OUTPUT: 10 k or greater SUB OUTPUT 1, 2: 10 k or greater
Display Graphic LCD (128 x 64 dots, backlit LCD)
Connectors
MIC IN 1, 2 connectors: XLR type (balanced, phantom power: DC 48 V, 10 mA Max) INST IN 1, 2 jacks, MAIN OUTPUT jacks, SUB OUTPUT 1, 2 jacks: 1/4-inch phone type PHONES jack: Stereo 1/4-inch phone type CTL1,2/EXP1 jack, CTL3,4/EXP2 jack: 1/4-inch TRS phone type USB port: USB B type MIDI (IN, OUT) connectors DC IN jack
Power Supply AC adaptor
Current Draw 1.2 A (with phantom power) 1.1 A (without phantom power)
Dimensions 435 (W) x163 (D) x 66 (H) mm 17-1/8 (W) x 6-7/16 (D) x 2-5/8 (H) inches
Weight 2.4 kg 5 lbs 5 oz
Accessories AC adaptor Owners Manual Leaflet USING THE UNIT SAFELY
Options (sold separately) Footswitch: FS-5U Dual F
Manualsnet FAQs
If you want to find out how the RC-600 Boss works, you can view and download the Boss RC-600 Owner’s Manual on the Manualsnet website.
Yes, we have the Owner’s Manual for Boss RC-600 as well as other Boss manuals. All you need to do is to use our search bar and find the user manual that you are looking for.
The Owner’s Manual should include all the details that are needed to use a Boss RC-600. Full manuals and user guide PDFs can be downloaded from Manualsnet.com.
The best way to navigate the Boss RC-600 Owner’s Manual is by checking the Table of Contents at the top of the page where available. This allows you to navigate a manual by jumping to the section you are looking for.
This Boss RC-600 Owner’s Manual consists of sections like Table of Contents, to name a few. For easier navigation, use the Table of Contents in the upper left corner.
You can download Boss RC-600 Owner’s Manual free of charge simply by clicking the “download” button in the upper right corner of any manuals page. This feature allows you to download any manual in a couple of seconds and is generally in PDF format. You can also save a manual for later by adding it to your saved documents in the user profile.
To be able to print Boss RC-600 Owner’s Manual, simply download the document to your computer. Once downloaded, open the PDF file and print the Boss RC-600 Owner’s Manual as you would any other document. This can usually be achieved by clicking on “File” and then “Print” from the menu bar.