
| Руководства по эксплуатации термостатов для теплого пола с Wi-Fi | |
| -TCR7WIFI Руководство по термостату нагрева |
-TGR 86 Руководство по термостату нагрева WIFI |
| -TCR8WIFI Руководство по термостату нагрева |
-TGR87WIFI Термостат нагрева Руководство |
| -TDR83WIFI Руководство по термостату нагрева |
-TGT70WIFI Термостат нагрева Руководство |
| -TDS21WIFI Руководство по термостату нагрева |
-TOL47WIFI Термостат нагрева Руководство |
| -TDS23WIFI Термостат нагрева Руководство |
-TR Series Руководство пользователя для приложения Smart Life |
| -TGP51WIFI Руководство по термостату нагрева |
-TR8BWIFI Руководство по термостату нагрева |
| -TGP53WIFI Термостат нагрева Руководство |
-TR9BWIFI Руководство по термостату нагрева |
| -TGR85WIFI Термостат нагрева Руководство |
-TR33WIFI Руководство по термостату нагрева |
| Сенсорные термостаты для подогрева пола — Руководства | |
| -TDR83 Термостат нагрева Руководство |
-TGR 86 Руководство по термостату нагрева |
| -TDS21 Руководство по термостату нагрева |
-TGR87 Термостат нагрева Руководство |
| -TDS23 Термостат нагрева Руководство |
-TGT70 Руководство по эксплуатации термостата отопления |
| -TGP51 Руководство по термостату нагрева |
-TR9B Руководство по эксплуатации термостата отопления |
| -TGR85 Термостат нагрева Руководство |
| Руководства по эксплуатации термостатов для подогрева пола с ЖК-экраном | |
| -TCR7 Руководство по термостату нагрева |
-TOL48 Термостат нагрева Руководство |
| -TCR8 Руководство по термостату нагрева |
-TR8B Руководство по эксплуатации термостата отопления |
| -TGP53 Руководство по термостату нагрева |
-TR33 Руководство по эксплуатации термостата отопления |
| -TOL47 Термостат нагрева Руководство |
| Инструкции по эксплуатации термостатов газовых котлов | |
| -BOT306RF-WIFI Руководство по термостату |
-BOT-323W Руководство по термостату |
| -BOT-313W Руководство по термостату |
-BOT-X306 Руководство по термостату |
| -BOT-313WIFI Руководство по термостату |
| Руководства по эксплуатации термостатов фанкойлов Wi-Fi | |
| -TCR7WIFI Fan Coil Термостат Руководство |
-TGT70WIFI Fan Coil Термостат Руководство |
| -TCR8WIFI Fan Coil Термостат Руководство |
-TR Series Руководство пользователя для приложения Smart Life |
| -TDS21WIFI Fan Coil Термостат Руководство |
-TR8BWIFI Руководство по термостату фанкойла |
| -TDS23WIFI Fan Coil Термостат Руководство |
-TR9BWIFI Руководство термостата фанкойла |
| -TGP51WIFI Руководство термостата фанкойла |
-TR33WIFI Fan Coil Термостат Руководство |
| -TGR87WIFI Fan Coil Термостат Руководство |
| Руководства по эксплуатации термостатов фанкойлов с сенсорным экраном | |
| -TDS21 Термостат фанкойла Руководство |
-TGR87 Термостат фанкойла Руководство |
| -TDS23 Fan Coil Термостат Руководство |
-TGT70 Fan Coil Термостат Руководство |
| -TGP51 Термостат фанкойла Руководство |
-TR9B Руководство по термостату фанкойла |
| Руководство по термостату фанкойла с ЖК-экраном | |
| -TCR7 Fan Coil Термостат Руководство |
-TR8B Руководство по термостату фанкойла |
| -TCR8 Fan Coil Термостат Руководство |
-TR33 Руководство по термостату фанкойла |
| -TOL43 Fan Coil Термостат Руководство |
-TOL63R Fan Coil Термостат Руководство |
BEOK TOL63R LCD Screen R/C Thermostat

Product Summary
TOL63R-AC Series thermostats are designed to control the fans and valves in air conditioner applications via comparison of the room temperature and setting temperature as reaching the aim of comfort and saving energy.
Technical Parameter
| Power Supply | AC200~240V, 50/60HZ |
| Current Load | 3A~5A |
| Power Consumption | <0.5W |
| External Material | PC+ABS (flame retardant) |
| Sensing Element | NTC |
| Set Temp. Range | 10℃ – 40℃ |
| Accuracy | ±1℃ |
| Dimension | 86x86x13.3mm |
| Ambient Temp. | 0-45℃,5-95%RH(Non-condensing) |
| Storage Temp. | -5~55℃ |
| Installation Box | 80x80mm |
Main Functions and Characteristics
- Square LCD screen display.
- BIue or White backlight for choosing;
- 2 pipe or 4 pipes for choose.
- 3 Fan speed + auto speed
- Timer on/off function for days or weekly.
- Room temp calibration function.
- Selectable 80mmx8Omm hidden box.
- Can be remote-controlled by the controller.
User Interface Explanation

Model Definition
AC 2: Two pipes, for air conditioning
AC 4: Four pipes, for air conditioning
For example: TOL63R-AC2
Model Spec
| Model | Spec | Fan Speed | Timer Switch | Remote controller |
| TOL43-AC2 | 2 Pipe | 3 Fan speed+Auto | √ | optional |
| TOL43-AC4 | 4 Pipe | 3 Fan speed+Auto | √ | optional |
Wiring Diagram

Operation Instruction
- Setting Power on/off
Press to turn on/off the power.
 - Setting Temperature
Press to set the temperature. - Setting the Clock
- Setting the System Mode
Press to select
  heating,
  cooling, or
  ventilation.
 - Setting the Fan Speed
- Setting the Day Program Schedules.
- Press and hold for 3 sec., hh will flash in the position of hh: mm.
- Press
 to adjust the hour.
 - Press, mm will flash in the position of hh: mm.
- Press to adjust the minute.
- The above are the steps to set real-time.
- Then go into a day programmable setting.
- Press, 1 (for example) will flash in the position of 1234567.
- Press to adjust the week.
- Press, period 1
 and hh will flash.
 - Press to adjust the hour.
- Press, period 1 and mm will flash.
- Press to adjust the minute.
- Press
 to confirm the setting;
 - Press, period 2
 , and hh will flash.
 - Press to adjust the hour.
- Press, period 2 and mm will flash.
- Press to adjust the minute.
- Press to confirm the setting;
- Press, period 3
 , and he will flash.
 - Press to adjust the hour.
- Press, period 3 and mm will flash.
- Press to adjust the minute.
- Press to confirm the setting;
- Press, period 4
 , and he will flash.
 - Press to adjust the hour.
- Press, period 4 and mm will flash.
- Press to adjust the minute.
- Press to confirm the setting;
- Press, the loop will display on the screen.
- Press and hold
The one-day programmable setting is finished.
Setting the Regular Boot
Press ![]() for more than 3 seconds, after setting the time, press
for more than 3 seconds, after setting the time, press![]() until
until![]() and “hh” twinkling. press
and “hh” twinkling. press![]() to adjust the hours.
to adjust the hours.
After the adjustment of hours, press![]() until the “mm” twinkling, press
until the “mm” twinkling, press ![]() to adjust the minutes. After the completion of all adjustments, press to confirm, then
to adjust the minutes. After the completion of all adjustments, press to confirm, then![]() does not twinkle, Regular boot setup is complete.
does not twinkle, Regular boot setup is complete.
The operation of canceling Regular boot is the same, press to the state of Regular boot, then press![]() , the
, the![]() is twinkling, Regular boot has been canceled.
is twinkling, Regular boot has been canceled.
Setting the Off Timer
After the setting of Regular boot, press![]() again, until
again, until![]() and “hh” twinkling, press
and “hh” twinkling, press![]() to adjust the hours. After the adjustment of hours is complete, press
to adjust the hours. After the adjustment of hours is complete, press ![]() until the “mm” twinkling, press
until the “mm” twinkling, press![]() to adjust the minutes.
to adjust the minutes.
After the completion of all adjustments, press![]() to confirm then does not twinkle, Off timer setup is complete.
to confirm then does not twinkle, Off timer setup is complete.
The operation of canceling Off timer is the same, press![]() to the state of Off timer, then pressing
to the state of Off timer, then pressing![]() , the
, the![]() is twinkling, Off timer has been canceled.
is twinkling, Off timer has been canceled.
The setting of the third period and fourth period are the same as the first and second period, the icons are![]()
![]() (on, off/into the room, out of the house)
(on, off/into the room, out of the house)
Setting the Circulation of Timer Switch
After setting the time of timer switch, press the![]() , there will be “LooP”, then press
, there will be “LooP”, then press![]() , the week display area will display the day of the week, or the transformation of “12345″ “123456″, or “1234567″.
, the week display area will display the day of the week, or the transformation of “12345″ “123456″, or “1234567″.
If the screen only displays the day of the week, then the timer switch setting is valid only for the day.
If it displays “12345″, then the timer switch is valid from Monday to Friday, and Saturday and Sunday will be invalid.
If it displays “123456″, then the timer switch is valid from Monday to Saturday, and Sunday will be invalid. If it displays “1234567″, then the timer switch is valid every day.
Advanced Setting Mode
Temperature Adjustment
(Attn: Only when your room temperature is different from the actual temperature, do you do this operation.)
In power-on status, press![]() about 7 seconds, then “XX X” will display on the bottom of the screen. For Example: “26 5” means temp is 26.5℃ then you can press
about 7 seconds, then “XX X” will display on the bottom of the screen. For Example: “26 5” means temp is 26.5℃ then you can press![]() to modify the temperature.
to modify the temperature.
It will confirm automatically after the correct temp twinkling 7 seconds.
Fan Coil Controlling Mode Setting(Only for 2 pipes)
(You can select the fan coil In control & Out of control.)
In power-on status, press![]() about 7 seconds, “XX X” will display on the bottom of the screen, then continue to press
about 7 seconds, “XX X” will display on the bottom of the screen, then continue to press![]() again, “F00” or “F01” will display. Press to choose “F00” or “F01”
again, “F00” or “F01” will display. Press to choose “F00” or “F01”
In “F00” mode, when room temperature reaches the set temp, the fan coil stops working.
In “F01” mode, when room temperature reaches the setted temp, the fan coil goes on working.
Installation Instruction
This product is suitable for standard 80*80mm wall boxes and 60 mm European round boxes.

- Connect the line of power and valve into the terminals. Fix the wall plate into the wall box by a screw driver.
- Connect the lines with the LCD board.
- Connect the LCD board to the wall plate.
NOTICE: The installation wire should be 1.5-2.5mm2.
ATT:
Thank you for buying this product!
Please read this manual for complete instructions on installing and operating your thermostat. If you require further assistance, please feel free to contact us.
In the box you will find:
| Model | TOL63R-AC2 |
| Thermostat | √ |
| User Manual | √ |
| Screws | √ |
| External sensor | √ |
PS: if you need a remote controller,you can order it separately.

Our Service:
We offer a warranty of 24 months from the sales day.
During the warranty, if it belongs to a quality issue, we will fix or replace them for you for free after testing them.
If it is not a quality problem or beyond the warranty time, we will charge for the after-sales service.
![]()
Warning:

The symbol means the unit is being installed, it may cause electrical shock hazards during maintenance, so please make sure it is operated by a professional technical worker.
REFERENCE
Download Manual
BEOK TOL63R LCD Screen R/C Thermostat Instruction Manual
![]()
BEOK TOL63R LCD Screen R/C Thermostat Instruction Manual
![]()

Речь идет об очень популярном термостате с достаточно вкусной ценой что и в принципе делает его популярным . ($25) Ali Express
По мне достаточно не плохое решение с не плохим дизайном и ценой .
Под рукой пока модель Beok BOT-313WiFi-WH. (На днях планирую взять еще некоторые модели с сенсорным экраном)
upd: Модели серии TDS «Beok TDS22 WP WiFi» также доступны для управления есть возможность подключения внешнего датчика температуры NTC 10K (Обратите внимание на маркировку WP — это означает 3A нагрузки EP — 16A)
Внимание !!!! Возможность подключения внешнего датчика (к примеру для теплого пола ) у Beok BOT-313WiFi-WH ОТСУТСВУЕТ , но можно вынуть из него внутренний элемент и протянуть его в нужную точку. Внутри темостата (в нижней части) установлен термистор NTC 10K
Подключение.
- Прежде всего нужно подать напряжение 220 в на устройство . Проверить нажатием кнопки вкл/выкл
- Подключаем устройство к сети Wi-Fi.
1. На мобильное устройство под управлением IOS или Android есть приложение «Beok Home» в AppStore и Play Market , скачиваем и устанавливаем его . После запуска в нижнем правом углу увидите «Конфигурация» — жмете и вводите свою точку доступа и пароль ! (Примечание — поддерживаются только сети 2.4G)(Советую почитать «Возможные проблемы при подключении через Wi-Fi»). В нижней части экрана есть кнопка «Установить соединение» но вы не нажимаете ее — так как мы еще не перевели термостат в режим сопряжения!


Режим сопряжения термостата!
2. Выключаем термостат кнопкой вкл/выкл . Нажимаем кнопку понижения температуры один раз и следом жмем кнопку включения .
3. В левом нижнем углу должна появится надпись «SEN» . Нажатием кнопки «М» 9 раз видим надпись «FAC» (значение скорее всего будет стоять 08). Нажатием кнопок изменения температуры меняем значение на 10 или 32 и выключаем термостат кнопкой вкл/выкл. Нажимаем кнопку понижения температуры один раз и следом жмем кнопку включения .


4 . Значок индикации сети Wi-Fi должен мигать очень быстро и это означает что осталось совсем немного . В момент быстрого мерцания индикации Wi-Fi жмем надпись «Установить соединение» в приложении на мобильном устройстве. Через короткое время должно появится уведомление об удачном подключении термостата к сети . Индикация сети Wi-Fi на термостате перестанет мерцать и будет гореть статично . В приложение жмем поиск — видим устройство — меняем название на нужное и переходим в MajorDoMo.
MajorDoMo
5.Открываем модуль Broadlink (У меня в настройках модуля API стоит PHP(module-only)) . Нажимаем «Сканировать устройства» и видим наш термостат в списке ниже. Нажимаем + (добавить) — выбираем тип устройства «Термостат» — устанавливаем время обновления (для начала советую поставить самые маленькие значение 1,2,3 с) — Сохраняем! Переходим во вкладку «Данные» и в скором времени там должны появиться параметры термостата с информацией . Далее всем знакомыми способами привязываем термостат к объектам . Я выбрал класс SThermostats
примечание: Управление термостатом из MajorDoMo работает только после привязки из самого ОБЪЕКТА ! ! !

Для чтения доступны все параметры ! Для установки (записи) были проверены следующие параметры и свойства :
- Питание (Состояние) термоста ( power )
- Заданная максимальная температура (thermostat_temp)
- Разница от максимальной температуры при котором реле включится снова (dif)
- Все параметры и свойства работают синхронно !!! термостат -> MajorDomo и MajorDoMo -> термостат . (Время (задержка) отображения изменений термостата в MajorDoMo зависит от времени обновлении в модуле Broadlink
Внимание !!!! Возможность подключения внешнего датчика (к примеру для теплого пола ) у Beok BOT-313WiFi-WH ОТСУТСВУЕТ , но можно вынуть из него внутренний элемент и протянуть его в нужную точку. Внутри темостата (в нижней части) установлен термистор NTC 10K

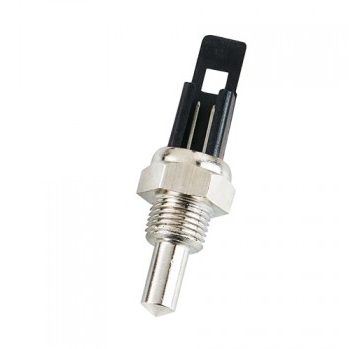

upd : Проверил термостат серии TDS. (TDS 23 WP) Все делается аналогично и подключается без проблем. Единственное — для входа в меню «вместо кнопки температуры — зажимаем на сенсоре кнопки ЧАСОВ и ПИТАНИЯ одновременно (в выключенном состоянии). Подключение внешнего датчика NTC 10K возможно и проверено. Для срабатывания и чтения температуры с внешнего датчика — необходимо войти в меню и изменить параметр SEN «0» на SEN «1» (Рекомендую прочитать документацию по настройке темостата)
Документация BEOK BOT 313 Wi-Fi
Документация BEOK TDS 21/22/23 Wi-FI
Теги:
История изменения цены
Видеообзор
1. Обзор и настройка недорогого и стильного Комнатного термостата теплого пола MH1822 с AliExpress
Видео:
2. Регулировка настройка -китайского- терморегулятора моделей E51

Видео: REMO-BLOG
3. Обзор сенсорного программируемого терморегулятора для теплого пола WarmLife -Китай-
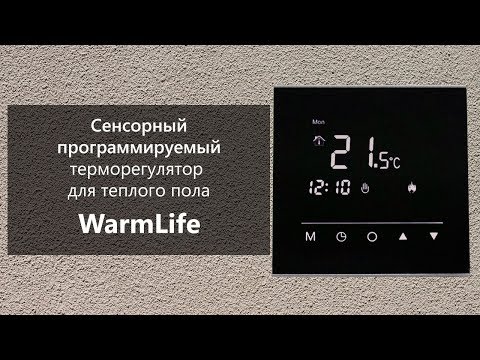
Видео: Теплый пол
4. Дешёвый или дорогой терморегулятор для пола- В чем отличие? Как выбрать?

Видео: Ремонт квартиры своими руками (Remontkv.pro)
Отзывы покупателей
*о других товарах на сайте
Отзывы о Еженедельный программируемый термостат для теплого пола TOL63R-EP отправляется
Здесь вы можете оставить свой отзыв о данном товаре.
Источник информации о товаре: Aliexpress.ru (33044616187)| Источник видеообзоров: Youtube.com
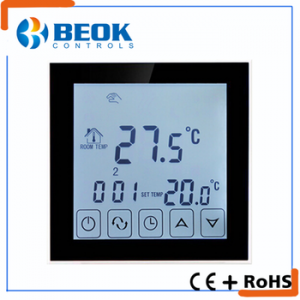
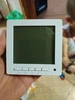
![]() TOL63R LCD Screen R/C Thermostat
TOL63R LCD Screen R/C Thermostat
Instruction Manual
View all BEOK thermostat manual
Product Summary:
TOL63R-AC Series thermostats are designed to control the fans and valves in air conditioner applications via comparison of the room temperature and setting temperature as reaching the aim of comfort and saving energy.
Technical Parameter:
| Power Supply | AC200~240V, 50/60HZ |
| Current Load | 3A~5A |
| Power Consumption | <0.5W |
| External Material | PC+ABS (flame retardant) |
| Sensing Element | NTC |
| Set Temp. Range | 10℃ — 40℃ |
| Accuracy | ±1℃ |
| Dimension | 86x86x13.3mm |
| Ambient Temp. | 0-45℃,5-95%RH(Non-condensing) |
| Storage Temp. | -5~55℃ |
| Installation Box | 80x80mm |
Main Functions and Characteristics
- Square LCD screen display.
- BIue or White backlight for choosing;
- 2 pipe or 4 pipes for choose.
- 3 Fan speed + auto speed
- Timer on/off function for days or weekly.
- Room temp calibration function.
- Selectable 80mmx8Omm hidden box.
- Can be remote-controlled by the controller.
User Interface Explanation
Model Definition
AC 2: Two pipes, for air conditioning
AC 4: Four pipes, for air conditioning
For example: TOL63R-AC2
Model Spec
| Model | Spec | Fan Speed | Timer Switch | Remote controller |
| TOL43-AC2 | 2 Pipe | 3 Fan speed+Auto | √ | optional |
| TOL43-AC4 | 4 Pipe | 3 Fan speed+Auto | √ | optional |
Wiring Diagram
Operation Instruction
- Setting Power on/off
Pressto turn on/off the power. - Setting Temperature
Press to set the temperature. - Setting the Clock
Press to set the minute, hour and week.
Press for adjusting. - Setting the System Mode
Press to select heating, cooling, or ventilation. - Setting the Fan Speed
Pressto select the fan speed.
 is Low speed(Factory default);
is Mid speed;
 is High speed;
 is Auto speed.
In auto mode, the fan will run according to the comparison of room temperature and set temperature. - Setting the Day Program Schedules.
Press and hold for 3 sec., hh will flash in the position of hh: mm.
Press to adjust the hour.
Press, mm will flash in the position of hh: mm.
Press to adjust the minute.
The above are the steps to set real-time.
Then go into a day programmable setting.
Press, 1 (for example) will flash in the position of 1234567.
Press to adjust the week.
Press, period 1 and hh will flash.
Press to adjust the hour.
Press, period 1 and mm will flash.
Press to adjust the minute.
Press to confirm the setting;
Press, period 2, and hh will flash.
Press to adjust the hour.
Press, period 2 and mm will flash.
Press to adjust the minute.
Press to confirm the setting;
Press, period 3, and he will flash.
Press to adjust the hour.
Press, period 3 and mm will flash.
Press to adjust the minute.
Press to confirm the setting;
Press, period 4, and he will flash.
Press to adjust the hour.
Press, period 4 and mm will flash.
Press to adjust the minute.
Press to confirm the setting;
Press, the loop will display on the screen.
One-day programmable setting is finished.
Setting the Regular Boot
Press ![]() for more than 3 seconds, after setting the time, press
for more than 3 seconds, after setting the time, press![]() until
until![]() and “hh” twinkling. press
and “hh” twinkling. press![]() to adjust the hours.
to adjust the hours.
After the adjustment of hours, press![]() until the “mm” twinkling, press
until the “mm” twinkling, press ![]() to adjust the minutes. After the completion of all adjustments, press to confirm, then
to adjust the minutes. After the completion of all adjustments, press to confirm, then![]() does not twinkle, Regular boot setup is complete.
does not twinkle, Regular boot setup is complete.
The operation of canceling Regular boot is the same, press to the state of Regular boot, then press![]() , the
, the![]() is twinkling, Regular boot has been canceled.
is twinkling, Regular boot has been canceled.
Setting the Off Timer
After the setting of Regular boot, press![]() again, until
again, until![]() and “hh” twinkling, press
and “hh” twinkling, press![]() to adjust the hours. After the adjustment of hours is complete, press
to adjust the hours. After the adjustment of hours is complete, press ![]() until the “mm” twinkling, press
until the “mm” twinkling, press![]() to adjust the minutes.
to adjust the minutes.
After the completion of all adjustments, press![]() to confirm then does not twinkle, Off timer setup is complete.
to confirm then does not twinkle, Off timer setup is complete.
The operation of canceling Off timer is the same, press![]() to the state of Off timer, then pressing
to the state of Off timer, then pressing![]() , the
, the![]() is twinkling, Off timer has been canceled.
is twinkling, Off timer has been canceled.
The setting of the third period and fourth period are the same as the first and second period, the icons are![]()
![]() (on, off/into the room, out of the house)
(on, off/into the room, out of the house)
Setting the Circulation of Timer Switch
After setting the time of timer switch, press the![]() , there will be “LooP», then press
, there will be “LooP», then press![]() , the week display area will display the day of the week, or the transformation of “12345″ “123456″, or “1234567″.
, the week display area will display the day of the week, or the transformation of “12345″ “123456″, or “1234567″.
If the screen only displays the day of the week, then the timer switch setting is valid only for the day.
If it displays “12345″, then the timer switch is valid from Monday to Friday, and Saturday and Sunday will be invalid.
If it displays “123456″, then the timer switch is valid from Monday to Saturday, and Sunday will be invalid. If it displays “1234567″, then the timer switch is valid every day.
Advanced Setting Mode
Temperature Adjustment
(Attn: Only when your room temperature is different from the actual temperature, do you do this operation.)
In power-on status, press![]() about 7 seconds, then “XX X” will display on the bottom of the screen. For Example: “26 5” means temp is 26.5℃ then you can press
about 7 seconds, then “XX X” will display on the bottom of the screen. For Example: “26 5” means temp is 26.5℃ then you can press![]() to modify the temperature.
to modify the temperature.
It will confirm automatically after the correct temp twinkling 7 seconds.
Fan Coil Controlling Mode Setting(Only for 2 pipes)
(You can select the fan coil In control & Out of control.)
In power-on status, press![]() about 7 seconds, “XX X” will display on the bottom of the screen, then continue to press
about 7 seconds, “XX X” will display on the bottom of the screen, then continue to press![]() again, “F00” or “F01” will display. Press to choose “F00” or “F01”
again, “F00” or “F01” will display. Press to choose “F00” or “F01”
In “F00” mode, when room temperature reaches the set temp, the fan coil stops working.
In “F01” mode, when room temperature reaches the setted temp, the fan coil goes on working.
Installation Instruction
This product is suitable for standard 80*80mm wall boxes and 60 mm European round boxes.
- Connect the line of power and valve into the terminals. Fix the wall plate into the wall box by a screw driver.
- Connect the lines with the LCD board.
- Connect the LCD board to the wall plate.
NOTICE: The installation wire should be 1.5-2.5mm2.
X. ATT:
Thank you for buying this product!
Please read this manual for complete instructions on installing and operating your thermostat. If you require further assistance, please feel free to contact us.
In the box you will find:
| Model | TOL63R-AC2 |
| Thermostat | √ |
| User Manual | √ |
| Screws | √ |
| External sensor | √ |
PS: if you need a remote controller,
you can order it separately.
Our Service:
We offer a warranty of 24 months from the sales day.
During the warranty, if it belongs to the quality issue, we will fix or replace them for you for free after testing them.
If it is not a quality problem or beyond the warranty time, we will charge for the after-sales service.
![]()
Warning:
The symbol means the unit is being installed, it may cause electrical shock hazards during maintenance, so please make sure it is operated by a professional technical worker.
![]()
BEOK TOL63R LCD Screen R/C Thermostat Instruction Manual
Documents / Resources
Documents — beok – TOL63R
tags: BEOK, LCD Screen C Thermostat, LCD Screen R Thermostat, TOL63R,
1 770,93 — 1 957,80 ₽
Цена ориентировочная, точную цену смотрите на официальной странице товара
Доставка из:CHINAРоссийская Федерация
Цвет:

Отзывы23
Вопросы30
Краткое описание
Полное описание
пришло всё в целости и сохранности. ещё не проверяли
Товар соответствует описанию.В Украину товар пришел быстро,но по украине шел почти месяц,но в этом продавец не виновен.Так работает Украинская почта.Товар хорошо упакован.Повреждений нет.Работоспособность еще не проверял.Продавцом доволен,рекомендую.Товар покупал у него по рекомендации своего товарища,который тоже доволен,продавцом и товаром.
при установке в оьычный подрозетник важно чтобы посадочные отверстия (в которых саморезы) были в горизонтальной плоскости. тк по вкртикали в терморегуляторе нет отверстий. ставить проще в более глубокий подрозетник чтобы для проводов больше места было. хотя в обычный тоже влазит- проверено
доставка в мск 13 дней при заказе из РФ, привезли курьером. Продавец хорошо общается — по моей просьбе выслал скриншот треккинга с сайта компании перевозчика (iml). устройство как в описании, уже подключил — работает исправно. Интересно реализован угол обзора экрана, если смотришь на него сверху то это 180 гр. если снизу то наверное от силы 15 гр.
Регулятор получил в целости и сохранности. Заказывал доставку из России 11 ноя 2019, а получил 22. Быстро. Продавца рекомендую, товар отправляет на следующий день после оплаты. Надеюсь, что терморегулятор работает.
Изготовлен очень аккуратно и качественно! Пока придраться не к чему — всё работает отлично. Из особенностей — дисплей хорошо читается, если на него смотреть прямо или чуть сверху, если же снизу — контрастность резко падает. Что же касается надёжности — это покажет только долговременная эксплуатация.
Самая быстрая доставка до Вологды — 2 ДНЯ!!! Я аж обалдел!!! В понедельник сделала заказ, во вторник с обеда звонок курьера, а в среду (во вторник работал) сам забрал с офиса службы доставки. Подключил на стенде (на столе) — всё работает, а дальше покажет время, продавцу БОЛЬШОЕ СПАСИБО!!!
Просто супер! Продавец отличный , приехало за 5 дней в Краснодар. У нас подобное раза в 3 дороже.
Три недели до Москвы. Для теплого пола на даче. у меня включается через пускатель по СМС. По умолчанию не включился, пришлось все-таки прочитать инструкцию и в настройках включить функцию Power memory. Прекрасно работает, шикарный экран!
Всё суппер

супер, доставка неделя, курьер принёс домой, такой же в Астрахани — 3.5к
Очень быстрая доставка принёс курьер. Терморегулятор огонь! Подсветка яркая цифры крупные да ещё и цена отличная. Заказывал 2шт очень доволен и продавцом и товаром.
получил, быстро. всё работает. Продавцу спасибо.
Отличный регулятор, всё работает, только бы ещё инструкцию на русском, вообще огонь будет. Доставка быстрая, курьером на третий день. С продавцом не общался.
Очень качественная сборка, все работает, не забывайте в комплекте заказывать выносной датчик (если берете для теплого пола). Спасибо.
Привет читатель отзывов, посылка пришла за 2 недели, упаковка никакая но все пришло целое и рабочее. Пока ремонт, ещё не установил, но подключил все работает. Советую к покупке, посмотрим сколько прослужит. Продавец общаеться;-}.
Товар отличный. Качество заводское. Всё прекрасно работает!!! Спасибо.
пришло быстро но ещё не проверял
Отличные датчики, заказываю второй раз
все понравилось, весит солидно, рамка металлическая добротная, настройки понятные в инете все подробно расписано и показано, думаю теперь остальные менять датчики
Релевантные товары:

1 000,45 ₽
1 282,86 ₽

879,74 ₽
1 026,76 ₽

264,62 — 456,51 ₽
692 ₽
1 222,51 ₽

9 957,29 ₽
891 ₽

1 175,31 ₽

1 052,29 — 1 199,30 ₽

688,63 — 2 939,45 ₽

108,32 ₽

1 081,69 — 1 313,81 ₽

802,37 — 3 341,02 ₽

1 444,58 ₽
1 111,09 ₽

94,40 — 242,18 ₽

135 ₽
154,75 ₽
603,52 — 793,09 ₽

308,72 ₽
716,49 — 1 391,96 ₽

2 282,54 ₽

633,69 — 1 391,96 ₽

1 662,77 ₽

308,72 ₽

1 259,18 ₽

1 591,59 — 3 356,49 ₽

251,47 — 266,94 ₽

270,04 ₽
85,89 ₽

1 856,21 ₽
572,57 — 895,22 ₽

115,29 — 282,42 ₽

347,41 — 519,18 ₽

264,62 — 386,10 ₽

2 987,42 — 3 404,46 ₽

547,04 ₽

1 218,64 ₽