
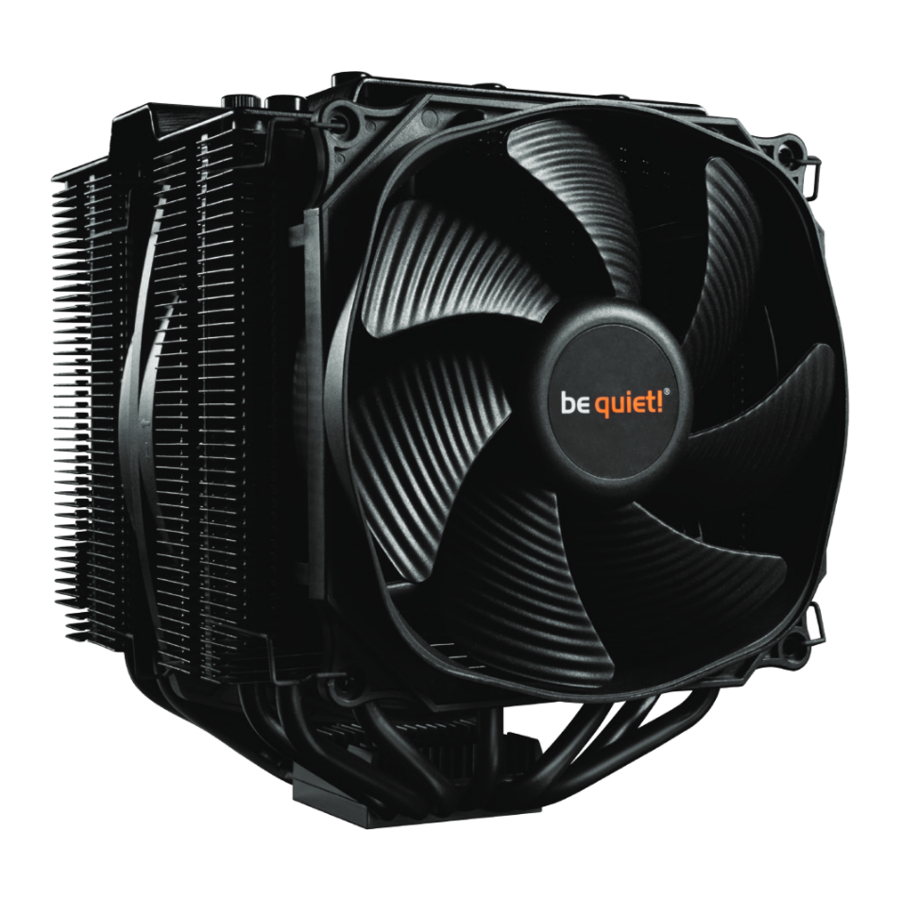
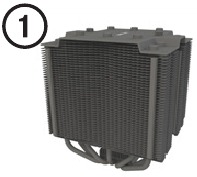
Кулер для процессора be quiet! DARK ROCK PRO 4 [BK022]
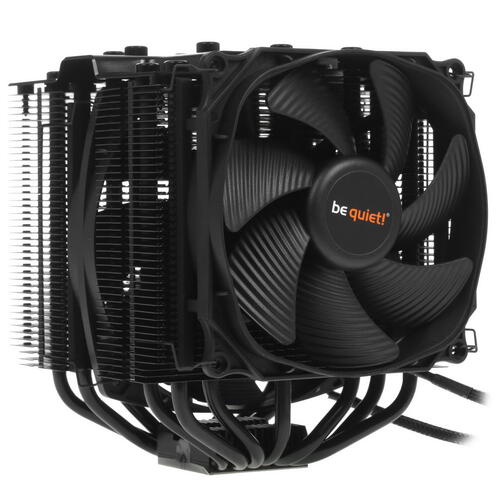
основание — медь, 1500 об/мин, 24.3 дБ, 4 pin, 250 Вт
подробнее

2.1k
Код товара: 1267332
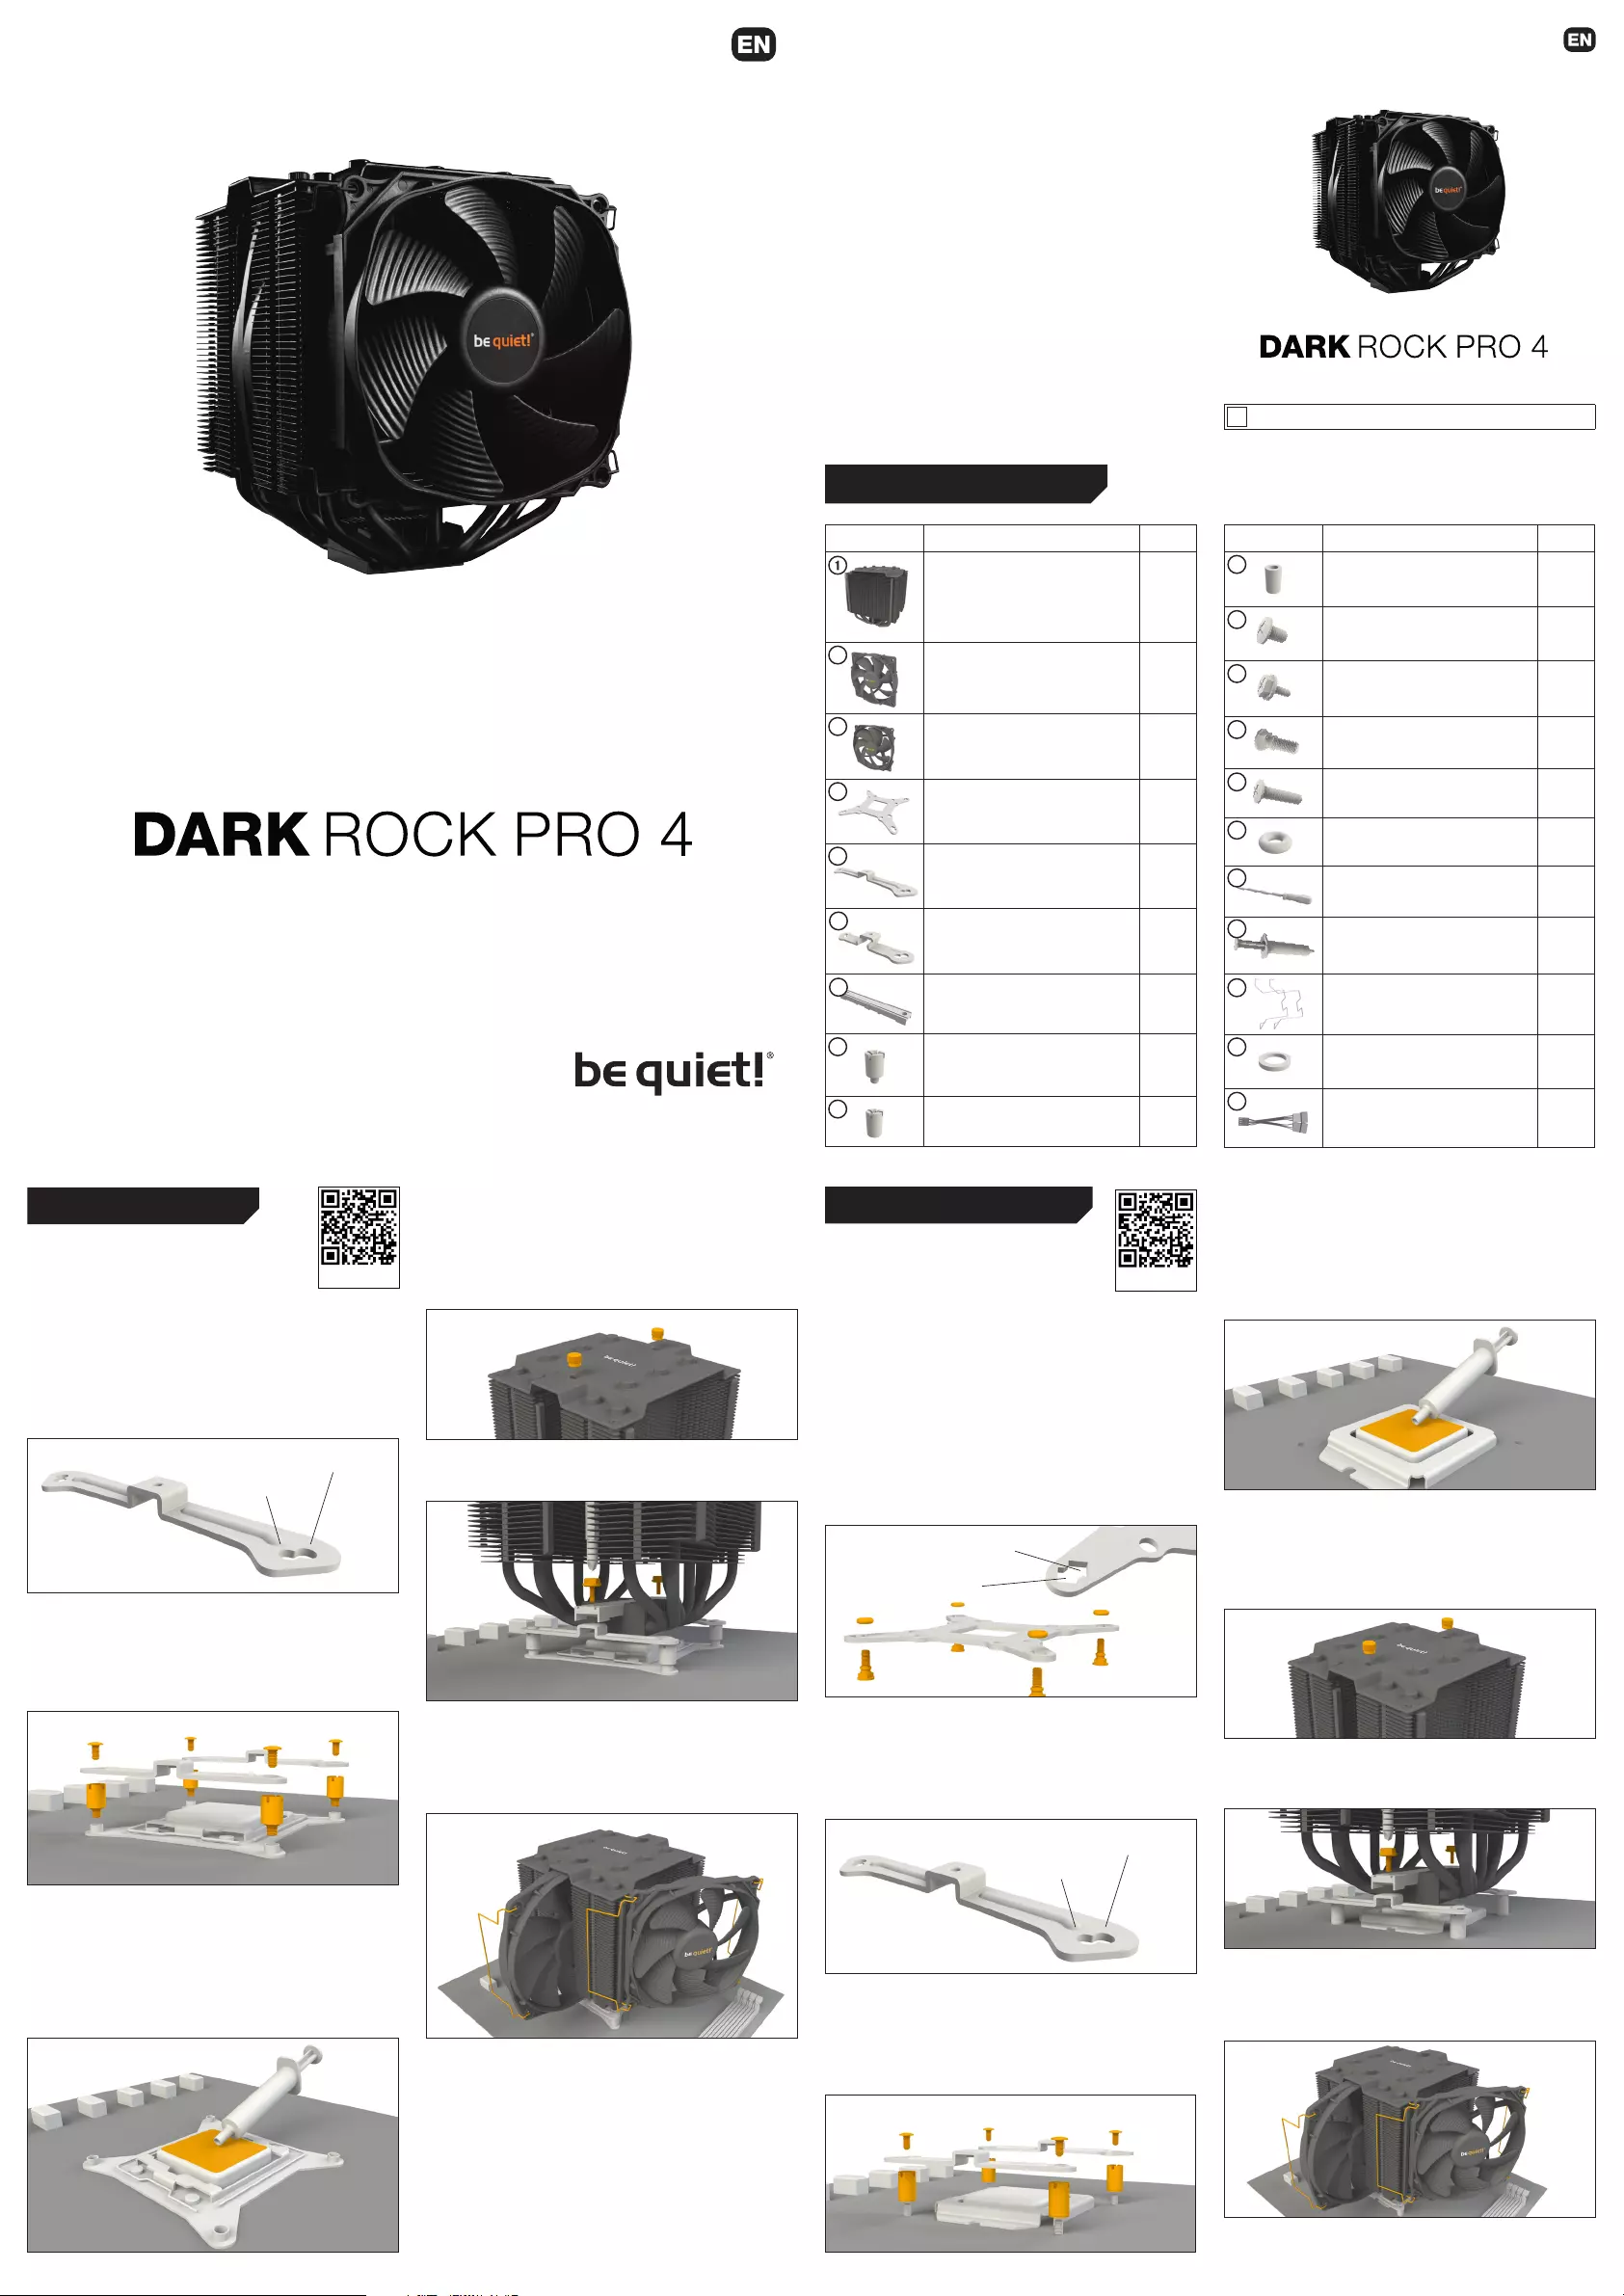
First remove the protective foil from the underside of the cooler.
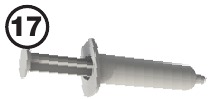
Spread the thermal paste (17) on the surface of the CPU. The
amount supplied is sufficient for one or two applications.
Caution: The thermal paste supplied is not suitable for human
consumption. If swallowed, drink lots of water and urgently
seek medical attention. Keep it out of the reach of children.
Avoid contact with skin and eyes.
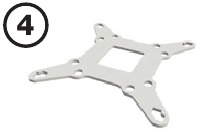
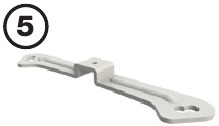
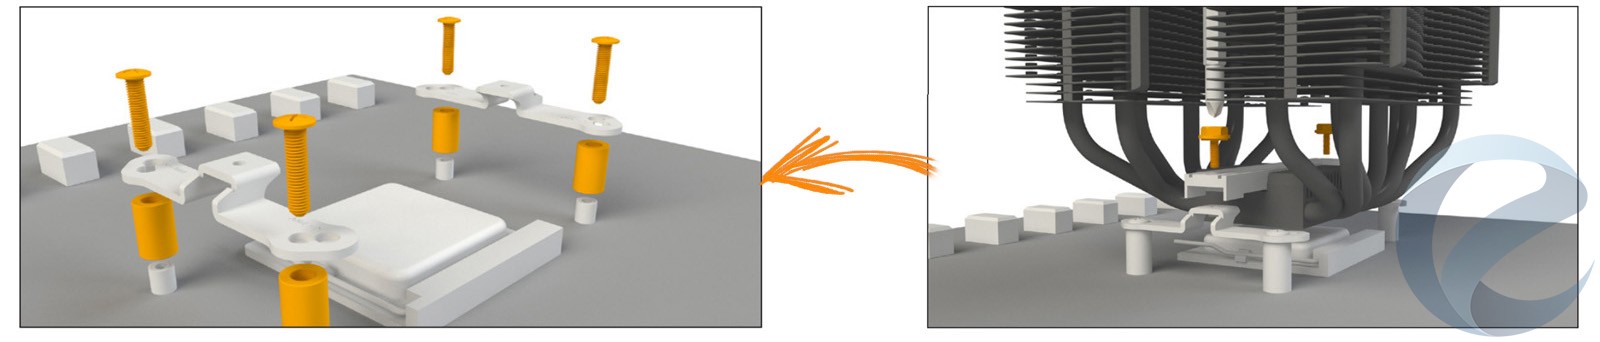
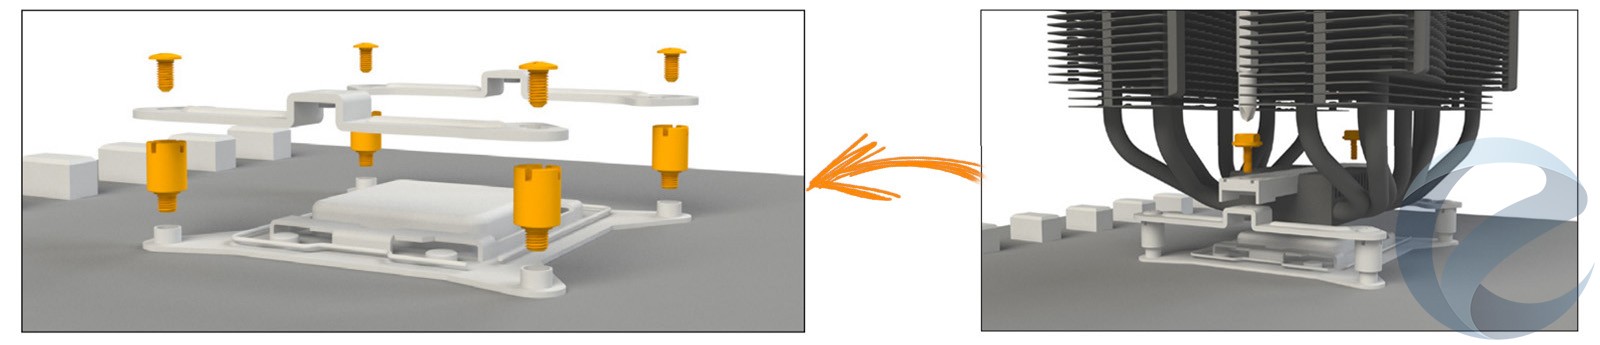
Position the cooler mounting bridge (7) centrally on the cooler.
Next place the cooler unit over the CPU. Loosen both heatpipe
caps that are found in the middle of the top side of the cooler.
Insert the Intel/AMD mounting bridge fastening screws (12)
from above into the cooler mounting bridge and then screw
these alternately tight.
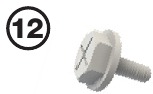
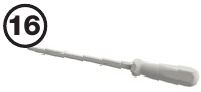
You can use the cross-tip screwdriver (16) for this.
Subsequently retighten both heatpipe caps on the top side of
the cooler.
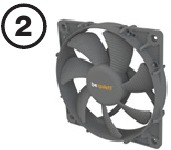
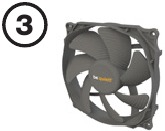
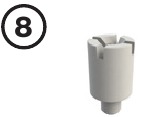
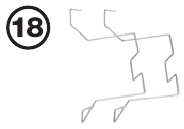
Fasten the 120mm fan (3) using fan clips (18) onto the front
side of the cooler. Slide the 135mm fan (2) between the two
heatsinks and also fasten this with fan clips (18). Connect
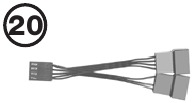
both fans using the the Y cable (20). Connect this to the
CPU fan connector on the motherboard.
When dismantling the fans, push the notches of the fan
clips (18) away from the fan.
Position the cooler mounting bridge (7) centrally on the cooler
(1). Next place the cooler unit over the CPU. Loosen both
heatpipe caps that are found in the middle of the topside of the
cooler (rotate as illustrated). Insert the Intel/AMD mounting
bridge fastening screws (12) from above into the cooler
mounting bridge (7) and then screw these alternately tight. You
can use the cross-tip screwdriver (16) for this.
Subsequently retighten both heatpipe caps on the top side of
the cooler.
Fasten the 120mm fan (3) using fan clips (18) onto the front
side of the cooler. Slide the 135mm fan (2) between the two
heatsinks and also fasten this with fan clips (18). Connect
both fans using the the Y cable (20). Connect this to the
CPU fan connector on the motherboard.
When dismantling the fans, push the notches of the fan
clips (18) away from the fan.
Introduction: Thank you for deciding to purchase a be quiet!
product. The following instructions will guide you through the
installation process. If you do encounter installation problems,
please don’t hesitate to contact our customer services by
mailing service@bequiet.com. Please note that be quiet!
cannot accept liability for damage caused by compatibility
problems.
Warranty:
• 3 years manufacturer guarantee for consumers (original
purchase from authorized be quiet! dealers only)
• Guarantee work can only be processed with an included
copy of the purchase receipt from an authorized be quiet!
dealer
• Manipulation and structural changes of any kind as well
as damages through external mechanical forces lead to a
complete voiding of the guarantee
• Our General Warranty Conditions apply, which can be
viewed on bequiet.com
Listan GmbH & Co.KG . Biedenkamp 3a . 21509 Glinde
Germany
For further information contact us via e-mail:
service@bequiet.com
SCOPE OF DELIVERY
General
We recommend preparatory mounting of the
cooler outside the PC case for subsequent
installation.
The following parts are needed for this:
1x Dark Rock Pro 4 CPU cooler (1), 1x 135mm fan (2), 1x 120mm
fan (3), 2x Intel mounting brackets (5), 1x cooler mounting
bridge (7), 4x Intel spacer nuts (8), 4x mounting bracket
fastening screws (11), Intel/AMD mounting bridge fastening
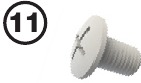
screws (12), 1x cross-tip screwdriver (16), 1x thermal paste
(17), 4x fan clips (18), 1x Y cable (20)
Assembly of the cooler mounting frame
First screw the Intel spacer nuts (8) onto the threads of the
socket frame. Place the Intel mounting brackets (5) over the
Intel spacer nuts and screw these tight with the mounting
bracket fastening screws (11). You can use the cross-tip
screwdriver (16) for this.
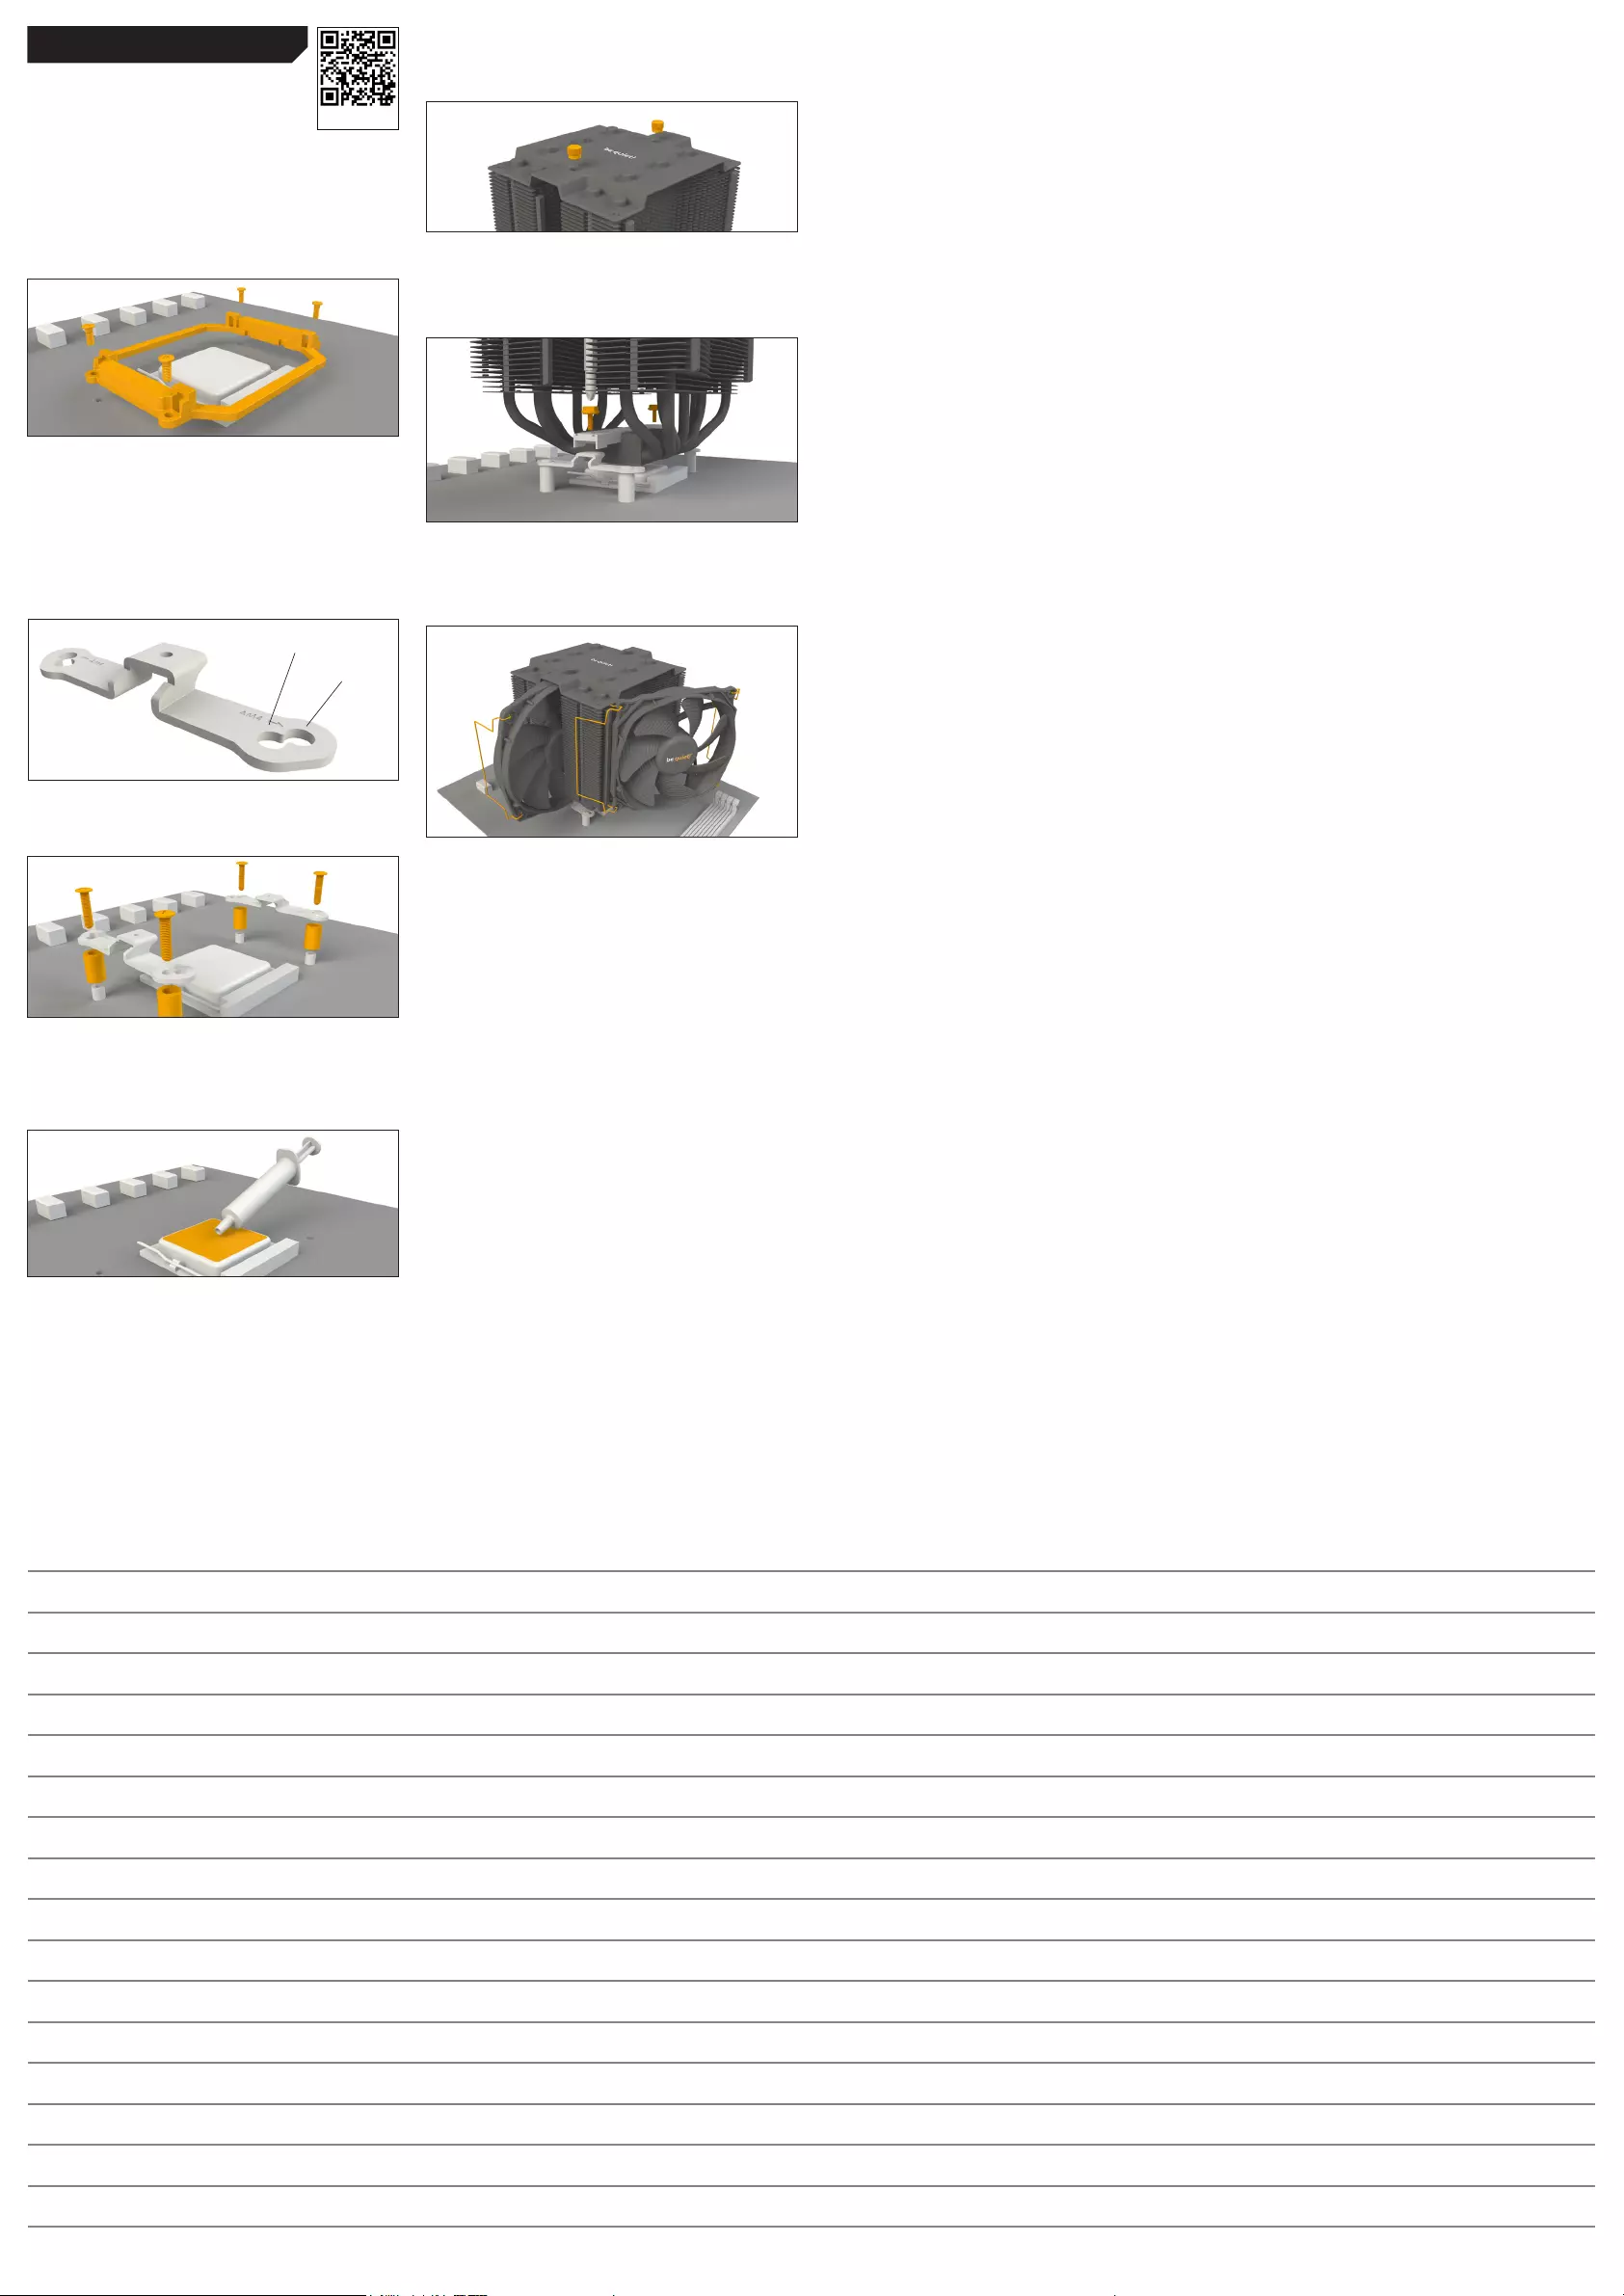
First remove the protective foil from the underside of the cooler.
Spread the thermal paste (17) on the surface of the CPU. The
amount supplied is sufficient for one or two applications.
Caution: The thermal paste supplied is not suitable for
human consumption. If swallowed, drink lots of water and
urgently seek medical attention. Keep it out of the reach of
children. Avoid contact with skin and eyes.
Installation video
1366, 2011(-3) square ILM, 2066
1150, 1151, 1155, 1156
General
We recommend preparatory mounting of the
cooler outside the PC case for subsequent
installation.
The following parts are needed for this:
1x Dark Rock Pro 4 CPU cooler (1), 1x 135mm fan (2), 1x 120mm
fan (3), 1x Intel backplate (4), 2x Intel mounting brackets (5),
1x cooler mounting bridge (7), 4x Intel 115X/1366 nuts (9), 4x
mounting bracket fastening screws (11), 2x Intel/AMD mounting
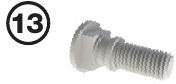
bridge fastening screws (12), 4x Intel backplate screws (13), 4x
O-rings (15), 1x cross-tip screwdriver (16), 1x thermal paste (17),
4x fan clips (18), 1x Y cable (20)
Mounting the backplate
Position the Intel backplate screws (13) in the notches situated
on the rear side of the Intel backplate (4). Pay attention in so
doing to align with the holes specially drilled for each socket.
For fixing the backplate screws onto the Intel backplate use
the O-rings (15). Once assembly of the Intel backplate for the
respective Intel socket is complete, position it under the
motherboard. In so doing make sure that the Intel backplate
screws (13) are precisely positioned inside the motherboard
holes.
Assembly of the cooler mounting frame
Screw the Intel 115X/1366 nuts (9) onto the previously
positioned Intel backplate (4). Then position the Intel mounting
brackets (5) over the Intel 115X/1366 nuts and affix these with
the mounting bracket fastening screws (11). You can use the
cross-tip screwdriver for this (16).
1366, 2011(-3) square ILM, 2066
1150, 1151, 1155, 1156
Intel LGA 2011(-3) square ILM / LGA 2066 Intel LGA 1150 / 1151 / 1155 / 1156 / 1366
We recommend removal of the cooler prior to transportation.
January 2018
!
Part name Quantity
be quiet! Dark Rock Pro 4 cooler 1
135mm fan 1
120mm fan 1
Intel backplate 1
Intel mounting brackets 2
Short AMD mounting brackets 2
Cooler mounting bridge 1
Intel spacer nuts 4
Intel 115X/1366 nuts 4
Part name Quantity
AMD spacer nuts 4
Mounting bracket fastening
screws 4
Intel/AMD mounting bridge
fastening screws 2
Intel backplate screws 4
AMD backplate screws 4
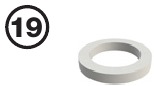
O-rings 4
Cross-tip screwdriver 1
Thermal paste 1
Fan clips 2
AM3 washers 4
Y cable 1
2
3
4
5
6
7
8
9
10
11
12
13
14
15
16
17
18
19
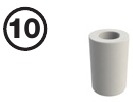
20
Installation video
1366
1150, 1151,
1155, 1156
Position the cooler mounting bridge (7) centrally on the cooler.
Next place the cooler unit onto the CPU. Loosen both heatpipe
caps that are found in the middle of the topside of the cooler
(rotate as illustrated).
Insert the Intel/AMD mounting bridge fastening screws (12)
from above into the cooler mounting bridge and then screw
these alternately tight. You can use the cross-tip screwdriver
(16) for this. Subsequently retighten both heatpipe caps on the
topside of the cooler.
Fasten the 120mm fan (3) using fan clips (18) onto the front
side of the cooler. Slide the 135mm fan (2) between the two
heatsinks and also fasten this with fan clips (18). Connect
both fans using the Y cable (20). Connect this to the CPU
fan connector on the motherboard.
When dismantling the fans, push the notches of the fan clips
(18) away from the fan.
General
We recommend preparatory mounting of the
cooler outside the PC case for subsequent
installation.
The following parts are needed for this:
1x Dark Rock Pro 4 CPU cooler (1), 1x 135mm fan (2), 1x 120mm
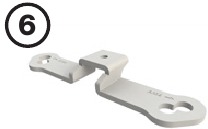
fan (3), 2x short AMD mounting brackets (6), 1x cooler mounting
bridge (7), 4x AMD spacer nuts (10), 2x Intel/AMD mounting
bridge fastening screws (12), 4x AMD backplate screws (14), 1x
cross-tip screwdriver (16), 1x thermal paste (17), 4x fan clips (18),
4x AM3 washers (19), Y cable (20)
Assembly of the cooler mounting frame
To permit mounting of the cooler please remove both the
plastic retainers of the AMD retention module. The factory-
fitted backplate affixed to the rear side of the motherboard will
be needed for subsequent installation of the cooler.
Note: To mount the Dark Rock Pro 4 on an AM3 motherboard,
please use the AM3 washers (19), placing these over the
backplate bolts protruding through the front side of the
motherboard.
Place the 4x AMD spacer nuts (10) onto the backplate bolts
protruding through the front side and affix both short AMD
mounting brackets (6) with the AMD backplate screws (14).
Mounting the CPU cooler:
First remove the protective foil from the underside of the
cooler. Spread the thermal paste (17) on the surface of the
CPU. The amount supplied is sufficient for one or two
applications.
Caution: The thermal paste supplied is not suitable for human
consumption. If swallowed, drink lots of water and urgently
seek medical attention. Keep it out of the reach of children.
Avoid contact with skin and eyes.
AMD AM2(+) / AM3(+) / AM4 / FM1 / FM2(+)
AM4
AM2(+) / AM3(+) / FM1 / FM2(+)
Notes
bequiet.com
Installation video
Limited Warranty
Per the terms and conditions of this limited warranty as given below,
be quiet! warrants its new products to be free of defects resulting
from faulty materials and faulty manufacturing for the length of the
warranty period.
I. APPLICABILITY
This non-transferable warranty is applicable to newly purchased,
previously unopened be quiet! products and is enforceable by only
the original consumer purchaser. Proof of purchase is required for
warranty service, so should be retained. be quiet! does not provide
warranty registration services.
II. WARRANTY PERIOD
For eligible products, parts and labor are warranted for the appli-
cable warranty period from the date of purchase. The applicable
warranty period varies by product model, and is identied in your
user documentation, on the product package, or as listed below.
Should any of these warranty periods dier, the longest specied
warranty period will apply. Replaced products will be warranted
for the remainder of the original warranty period or thirty days,
whichever is longer.
III. EXCLUSIONS
The following are not covered by the warranty:
1. Normal wear and tear.
2. Any product which has been modied without permission from
be quiet!, or on which the serial number or warranty sticker has been
defaced, modied, or removed.
3. Damage, deterioration or malfunction resulting from:
Accident, abuse, misuse or improper use, neglect, connection to
an improper voltage source, unauthorized product modication, or
failure to follow instructions included with the product.
Fire, water, lightning, or other acts of nature.
Repair or attempted repair by anyone not authorized by be quiet!.
Shipping or transport damage (claims must be made with the carrier).
Any other cause which does not relate to a defect in materials or
manufacturing workmanship.
4. Cartons, cases, batteries, cabinets, tapes, accessories or other
consumables used with this product.
5. be quiet!, Inc. does not warrant that this product will meet your
requirements. It is your responsibility to determine the suitability of
this product for your purpose.
6. Removal or installation charges.
7. Shipping charges.
8. Any incidental charges.
IV. EXCLUSION OF DAMAGES
be quiet!‘s sole obligation and liability under this warranty is limited
to the repair or replacement of a defective product at its option.
be quiet! shall not, in any event, be liable for any special, incidental,
indirect, or consequential damages whatsoever, including but not
limited to loss of prots, revenue, or data (whether direct or indirect),
damages resulting from interruption of service and loss of business,
or for liability in tort relating to this product or resulting from its use
or possession, even if be quiet! has been advised previously of the
possibility of such damages.
V. LIMITATIONS OF IMPLIED WARRANTIES
There are no other warranties, expressed or implied, including but not
limited to those of merchantability or tness for a particular purpose.
The duration of implied warranties is limited to the warranty length
specied in Paragraph II.50
VI. LOCAL LAW AND YOUR WARRANTY
This warranty gives you specic legal rights. You may also have other
rights granted under local law. These rights may vary.
VII. NO OTHER WARRANTY
No be quiet! employee, dealer, or other agent is authorized to make
any modication, extension, or addition to this warranty.
VIII. TO OBTAIN TECHNICAL SUPPORT OR WARRANTY SERVICE
Please see your product owner’s manual or visit the Online Support
section at www.bequiet.com for details and contact information. You
will need to provide proof of purchase for warranty service.
bequiet.com

Intel LGA 2011(-3) square ILM / LGA 2066
General
We recommend preparatory mounting of the
cooler outside the PC case for subsequent Installation video installation.
The following parts are needed for this:
1x Dark Rock Pro 4 CPU cooler (1), 1x 135mm fan (2), 1x 120mm fan (3), 2x Intel mounting brackets (5), 1x cooler mounting bridge (7), 4x Intel spacer nuts (8), 4x mounting bracket fastening screws (11), Intel/AMD mounting bridge fastening screws (12), 1x cross-tip screwdriver (16), 1x thermal paste (17), 4x fan clips (18), 1x Y cable (20)
1366, 2011(-3) square ILM, 2066
1150, 1151, 1155, 1156
Assembly of the cooler mounting frame
First screw the Intel spacer nuts (8) onto the threads of the socket frame. Place the Intel mounting brackets (5) over the Intel spacer nuts and screw these tight with the mounting bracket fastening screws (11). You can use the cross-tip screwdriver (16) for this.
First remove the protective foil from the underside of the cooler. Spread the thermal paste (17) on the surface of the CPU. The amount supplied is sufficient for one or two applications.
Caution: The thermal paste supplied is not suitable for human consumption. If swallowed, drink lots of water and urgently seek medical attention. Keep it out of the reach of children. Avoid contact with skin and eyes.
Introduction: Thank you for deciding to purchase a be quiet! product. The following instructions will guide you through the installation process. If you do encounter installation problems, please don’t hesitate to contact our customer services by mailing service@bequiet.com. Please note that be quiet! cannot accept liability for damage caused by compatibility problems.
Warranty:
•3 years manufacturer guarantee for consumers (original purchase from authorized be quiet! dealers only)
•Guarantee work can only be processed with an included copy of the purchase receipt from an authorized be quiet! dealer
•Manipulation and structural changes of any kind as well as damages through external mechanical forces lead to a complete voiding of the guarantee
•Our General Warranty Conditions apply, which can be viewed on bequiet.com
Listan GmbH & Co.KG . Biedenkamp 3a . 21509 Glinde
Germany
For further information contact us via e-mail: service@bequiet.com
SCOPE OF DELIVERY
|
Part name |
Quantity |
|
|
be quiet! Dark Rock Pro 4 cooler |
1 |
|
|
2 |
||
|
135mm fan |
1 |
|
|
3 |
||
|
120mm fan |
1 |
|
|
4 |
||
|
Intel backplate |
1 |
|
|
5 |
||
|
Intel mounting brackets |
2 |
|
|
6 |
||
|
Short AMD mounting brackets |
2 |
|
|
7 |
||
|
Cooler mounting bridge |
1 |
|
|
8 |
||
|
Intel spacer nuts |
4 |
|
|
9 |
Intel 115X/1366 nuts |
4 |

 ! We recommend removal of the cooler prior to transportation.
|
January 2018 |
|||
|
Part name |
Quantity |
||
|
10 |
AMD spacer nuts |
4 |
|
|
11 |
Mounting bracket fastening |
4 |
|
|
screws |
|||
|
12 |
Intel/AMD mounting bridge |
2 |
|
|
fastening screws |
|||
|
13 |
Intel backplate screws |
4 |
|
|
14 |
AMD backplate screws |
4 |
|
|
15 |
O-rings |
4 |
|
|
16 |
Cross-tip screwdriver |
1 |
|
|
17 |
|||
|
Thermal paste |
1 |
||
|
18 |
|||
|
Fan clips |
2 |
||
|
19 |
AM3 washers |
4 |
|
|
20 |
|||
|
Y cable |
1 |
||
Position the cooler mounting bridge (7) centrally on the cooler
(1). Next place the cooler unit over the CPU. Loosen both heatpipe caps that are found in the middle of the topside of the cooler (rotate as illustrated). Insert the Intel/AMD mounting bridge fastening screws (12) from above into the cooler mounting bridge (7) and then screw these alternately tight. You can use the cross-tip screwdriver (16) for this.
Subsequently retighten both heatpipe caps on the top side of the cooler.
Fasten the 120mm fan (3) using fan clips (18) onto the front side of the cooler. Slide the 135mm fan (2) between the two heatsinks and also fasten this with fan clips (18). Connect both fans using the the Y cable (20). Connect this to the CPU fan connector on the motherboard.
Intel LGA 1150 / 1151 / 1155 / 1156 / 1366
General
We recommend preparatory mounting of the
cooler outside the PC case for subsequent Installation video installation.
The following parts are needed for this:
1x Dark Rock Pro 4 CPU cooler (1), 1x 135mm fan (2), 1x 120mm fan (3), 1x Intel backplate (4), 2x Intel mounting brackets (5), 1x cooler mounting bridge (7), 4x Intel 115X/1366 nuts (9), 4x mounting bracket fastening screws (11), 2x Intel/AMD mounting bridge fastening screws (12), 4x Intel backplate screws (13), 4x O-rings (15), 1x cross-tip screwdriver (16), 1x thermal paste (17), 4x fan clips (18), 1x Y cable (20)
Mounting the backplate
Position the Intel backplate screws (13) in the notches situated on the rear side of the Intel backplate (4). Pay attention in so doing to align with the holes specially drilled for each socket.
1150, 1151, 1155, 1156
1366 
For fixing the backplate screws onto the Intel backplate use the O-rings (15). Once assembly of the Intel backplate for the respective Intel socket is complete, position it under the motherboard. In so doing make sure that the Intel backplate screws (13) are precisely positioned inside the motherboard holes.
First remove the protective foil from the underside of the cooler. Spread the thermal paste (17) on the surface of the CPU. The amount supplied is sufficient for one or two applications.
Caution: The thermal paste supplied is not suitable for human consumption. If swallowed, drink lots of water and urgently seek medical attention. Keep it out of the reach of children.
Avoid contact with skin and eyes.
Position the cooler mounting bridge (7) centrally on the cooler. Next place the cooler unit over the CPU. Loosen both heatpipe caps that are found in the middle of the top side of the cooler. Insert the Intel/AMD mounting bridge fastening screws (12) from above into the cooler mounting bridge and then screw these alternately tight.
You can use the cross-tip screwdriver (16) for this. Subsequently retighten both heatpipe caps on the top side of the cooler.
When dismantling the fans, push the notches of the fan clips (18) away from the fan.
1366, 2011(-3) square ILM, 2066
1150, 1151, 1155, 1156
Assembly of the cooler mounting frame
Screw the Intel 115X/1366 nuts (9) onto the previously positioned Intel backplate (4). Then position the Intel mounting brackets (5) over the Intel 115X/1366 nuts and affix these with the mounting bracket fastening screws (11). You can use the cross-tip screwdriver for this (16).
Fasten the 120mm fan (3) using fan clips (18) onto the front side of the cooler. Slide the 135mm fan (2) between the two heatsinks and also fasten this with fan clips (18). Connect both fans using the the Y cable (20). Connect this to the CPU fan connector on the motherboard.
When dismantling the fans, push the notches of the fan clips (18) away from the fan.
 Loading…

DARK ROCK PRO 4

Dark Rock Pro 4 подходит для современных флагманских процессоров, таких как Core i9 от Intel или Ryzen 9 от AMD.
Дополнительная информация.
DARK ROCK PRO 4
БЕСКОМПРОМИССНАЯ ТИШИНА И ЭФФЕКТИВНОСТЬ ОХЛАЖДЕНИЯ
Dark Rock Pro 4 обеспечивает максимальную производительность охлаждений 250Вт TDP и практически бесшумную работу. Идеальный выбор для разогнанных систем и требовательных рабочих станций.
- Два практически бесшумных вентилятора Silent Wings PWM
- Воронкообразный воздухозаборник фронтального вентилятора для высокого давления воздуха
- Уровень шума не превышает 24.3 дБ (А) при максимальных оборотах
- Семь высокопроизводительных медных тепловых трубок
- Оптимизированный для лучшего воздушного потока контур пластин радиатора с вырезами для максимальной совместимости с ОЗУ
- Комплект креплений черного цвета обеспечивает удобный монтаж сверху материнской платы
- Шлифованная алюминиевая верхняя крышка
- 3 года гарантии от производителя
- Немецкая разработка, дизайн и контроль качества

Функциональные Cookies не настроены..
Вы не можете продолжать без функциональных cookies. Пожалуйста, активируйте их..
Больше информации.
ПРАКТИЧЕСКИ БЕСШУМНАЯ РАБОТА
Даже при 100% скорости вентиляторов уровень шума не превышает 24.3 дБ(A)
Два вентилятора Silent Wings PWM оснащены улучшенным гидродинамическим подшипником, плавным 6-полюсным моторчиком и оптимизированными для лучшего воздушного потока лопастями. Воронкообразный воздухозаборник фронтального вентилятора Silent Wings 3 обеспечивает очень высокое давление воздуха. Независимое крепление вентиляторов с изолирующими вибрации элементами, установленными на радиаторе.
ОГРОМНАЯ МОЩНОСТЬ ОХЛАЖДЕНИЯ
Невероятное соотношение производительности и тишины работы
Бескомпромиссная тишина и эффективность охлаждения для разогнанных систем и требовательных графических станций! Dark Rock Pro 4 обеспечивает впечатляющую эффективность охлаждения 250Вт TDP и низкую температуру даже при пиковой производительности процессора.
ПРОГРЕССИВНАЯ КОНСТРУКЦИЯ
Ключевая особенность высокой эффективности охлаждения
Dark Rock Pro 4 имеет семь высокопроизводительных медных тепловых трубок, обеспечивающих максимальный отвод тепла. Оптимизированный волновой контур пластин радиатора и микро-точки на их поверхности улучшают циркуляцию воздуха. Специальное черное покрытие с керамическими частицами обеспечивает идеальную передачу тепла.
ДВУХБАШЕННАЯ КОНСТРУКЦИЯ
Мощное охлаждение вашей системы
Dark Rock Pro 4 оснащен двумя радиаторами из алюминия. Ребра радиатора имеют вырезы для максимальной совместимости с ОЗУ. Установлены два вентилятора и поддерживается установка дополнительного 120-мм вентилятора для наилучшего охлаждения.
УДОБСТВО И ЭЛЕГАНТНОСТЬ
Стиль и легкость установки
Комплект креплений Dark Rock Pro 4 полностью черного цвета идеально сочетается с дизайном кулера и обеспечивает удобный монтаж сверху материнской платы. Шлифованная алюминиевая верхняя крышка подчеркивает привлекательность high-end кулера.
“Олицетворение высокого класса: Dark Rock Pro 4 — это лучшее из воздушных систем охлаждения, что может предложить be quiet!. Он гарантированно охлаждает даже самые требовательные, разогнанные сборки.”
Marius Sabisz, Head of BU Cooling

Краткий обзор всех моделей:
Серия продуктов
Общая информация
| Модель | Dark Rock Pro 4 |
| TDP (Ватт) | 250 |
| Варианты цвета | Black |
| Общие размеры без крепления (Д x Ш x В), (мм) | 121 x 136 x 163 |
| Общий вес (кг) | 1.13 |
| Совместимость с сокетами Intel | 1700 / 1200 / 2066 / 1150 / 1151 / 1155 / 2011(-3) Square ILM |
| Совместимость с сокетами AMD | AM5 / AM4 |
| Уровень шума (dB(A)) @ 50/75/100% (об/мин) | 12.8 / 17.9 / 24.3 |
| Number of fans | 2 |
| Разъем подсветки | — |
Инфографика
Открыть все / Закрыть все
| Размеры (Д x Ш x Г), (мм) | 146 x 136 x 163 |
| Материал радиатора | Aluminum |
| Обработка покрытия | Ceramic coating |
| Материал основания | Copper |
| Обработка основания | CNC machined |
| Кол-во тепловых трубок, диаметр (мм) | 7 / 6 |
| Антивибрационное крепление вентилятора | ✓ |
| Модель вентилятора | Silent Wings 3 120mm PWM / Silent Wings 135mm PWM |
| Размеры вентилятора (мм) | 135 x 135 x 22 / 120 x 120 x 25 |
| Скорость вращения @ 100% PWM /12В (об\мин) | 1200 / 1500 |
| Технология подшипника | Fluid Dynamic Bearing |
| Технология моторчика | 6-pole fan motor |
| Номинальное напряжение постоянного тока (V) | 12 |
| Ток при номинальном напряжении ток (A) | 0.08 / 0.08 |
| Потребляемая мощность (W) | 0.96 / 0.96 |
| Разъем | 4-pin PWM |
| Разъем подсветки | — |
| Длина кабеля (мм) | 220 / 220 |
| Время работы (ч / 25°C) | 300,000 |
| Y-кабель | — |
| Thermal grease (Type) | Included |
| Набор креплений | Intel & AMD |
| Y-кабель | ✓ |
| Языки руководства пользователя | CN, DE, EN, ES, FR, JP, PL, RU, TW |
| Гарантия (лет) | 3 |
| Международная горячая линия / Бесплатно | ✓ / DE, FR |
| Артикул | BK022 |
| Код EAN | 4260052186268 |
| Размеры, упаковка (Д х Ш х В), (мм) | 181 x 205 x 212 |
| Вес брутто, упаковка (кг) | 1.39 |
| Штук в упаковке | 12 |
| Размеры, упаковочная коробка (Д x Ш x В), (мм) | 427 x 561 x 459 |
| Вес брутто, упаковочная коробка (кг) | 22.1 |
| РРЦ ( € ) | 92.90 |
DARK ROCK PRO 4
Артикул: BK022
Сохранить в pdf:
Изображения
Видео
Свойства
Лучше всего сочетается с

Наименование Количество
Процессорный кулер
1
135мм вентилятор 1
Silent Wings 3 120мм
вентилятор
1
Задняя пластина Intel 1
Кронштейны Intel 2
Кронштейны Intel LGA 1700 2
Короткие AMD кронштейны 2
Крепежный мост для
кулера
1
Крепежные гайки Intel A 4
Крепежные Гайки Intel B 4
Наименование Количество
Распорные гайки AMD 4
Винты крепежных
кронштейнов
4
Винты крепежного моста 2
Винты задней пластины
Intel
4
Винты задней пластины
AMD
4
Крестообразная отвертка 1
Термопаста 1
Клипсы для вентилятора 6
Y-кабель 1
Сначала снимите защитное покрытие с нижней части
кулера. Нанесите термопасту на поверхность проц-
ессора. Количество комплектной термопасты достаточно
для одного или двух нанесений.
Внимание: термопаста опасна для человеческого
организма. В случае проглатывании, выпейте много воды
и срочно обратитесь за медицинской помощью. Храните
ее в недоступном для детей месте. Избегайте попадания
на кожу и глаза.
Открутите декоративные колпачки на верхней крышке
радиатора кулера
Расположите крепежный мост для кулера по центру
кулера. Затем установите кулер на процессор. Вставьте
винты крепежного моста сверху в крепежный мост для
кулера и затяните их попеременно. Используйте для этого
крестообразную отвертку.
Установите Silent Wings 3 120мм вентилятор, используя
клипсы для вентилятора на передней стороне кулера.
Установите 135мм вентилятор между двумя
радиаторами и закрепите его с помощью клипс для
вентилятора. Подключите оба вентилятора с помощью
Y-кабеля к разъему для вентилятора процессора на
материнской плате.
Для демонтажа вентиляторов вытащите клипсы для
вентилятора с отверстий рамок вентиляторов.
Открутите декоративные колпачки на верхней крышке
радиатора кулера.
Расположите крепежный мост для кулера по центру
кулера. Затем установите кулер на процессор. Вставьте
винты крепежного моста сверху в крепежный мост для
кулера и затяните их попеременно. Используйте для этого
крестообразную отвертку.
Установите Silent Wings 3 120мм вентилятор, используя
клипсы для вентилятора на передней стороне кулера.
Установите 135мм вентилятор между двумя
радиаторами и закрепите его с помощью клипс для
вентилятора. Подключите оба вентилятора с помощью
Y-кабеля к разъему для вентилятора процессора на
материнской плате.
Для демонтажа вентиляторов вытащите клипсы для
вентилятора с отверстий рамок вентиляторов.
Введение: Спасибо за выбор в пользу be quiet! Инструкция
поможет вам в процессе установки. Если возникнут
трудности при установке, пожалуйста свяжитесь с нашей
службой поддержки с помощью электронной почты
(service@bequiet.com). Обратите внимание: be quiet! не
несет ответственности за повреждения, возникшие из-за
проблем совместимости.
Гарантия:
• 3 года гарантии от производителя для конечного
покупателя (от первоначальной покупки у официального
дилера be quiet!)
• Гарантийный ремонт может быть выполнен только
при наличии копии документа о покупке устройства у
официального дилера be quiet!
• Манипуляции и структурные изменения любого рода,
а также наличие внешних механических повреждений
автоматически приводит к лишению гарантии
• На продукт распространяются наши стандартные
условия гарантии, которые можно посмотреть в
интернете на сайте www.bequiet.com
Listan GmbH
Wilhelm-Bergner-Straße 11c
.
21509 Glinde
.
Germany
Для получения дополнительной информации Вы можете
связаться с нами по электронной почте:
service@bequiet.com
НАБОР АКСЕССУАРОВ
Общие сведения
Мы рекомендуем устанавливать кулер за пределами
корпуса ПК.
Необходимы следующие крепежные элементы:
1x процессорный кулер Dark Rock Pro 4 (1), 1x 135мм
вентилятор (2), 1x Silent Wings 3 120мм вентилятор (3),
2x кронштейны Intel (5), 1x крепежный мост для кулера (8),
4x крепежные гайки Intel A (9), 4x винты крепежных
кронштейнов (12), винты крепежного моста Intel/AMD (13),
1x крестообразная отвертка (17), 1x термопаста (18),
4x клипсы для вентилятора (19), 1x Y-кабель (20)
Сборка крепежной рамки кулера
Сначала навинтите крепежные гайки Intel A на резьбу
рамки сокета. Поместите кронштейны Intel поверх
крепежных гаек Intel и закрутите их крепко с помощью
винтов крепежных кронштейнов. Используйте для этого
крестообразную отвертку.
Сначала снимите защитное покрытие с нижней части
кулера. Нанесите термопасту на поверхность проц-
ессора. Количество комплектной термопасты достаточно
для одного или двух нанесений.
Внимание: термопаста опасна для человеческого
организма. В случае проглатывании, выпейте много воды
и срочно обратитесь за медицинской помощью. Храните
ее в недоступном для детей месте. Избегайте попадания
на кожу и глаза.
2011(-3) square ILM, 2066
Общие сведения
Мы рекомендуем устанавливать кулер за пределами
корпуса ПК.
Необходимы следующие крепежные элементы:
1x процессорный кулер be quiet! Dark Rock Pro 4 (1),
1x 135мм вентилятор (2), 1x Silent Wings 3 120мм вентилятор
(3), 1x задняя пластина Intel (4), 2x кронштейны Intel (5),
1x крепежный мост для кулера (8), 4x Крепежные гайки
Intel B (10), 4x винты крепежных кронштейнов (12), 2x винты
крепежного моста (13), 4x винты задней пластины Intel (14),
4x уплотнительные кольца (16), 1x крестообразная отвертка
(17), 1x термопаста (18), 4x клипсы для вентилятора (19),
1x Y-кабель (20)
Монтаж задней пластины
Установите винты задней пластины Intel в вырезы на
задней стороне задней пластины Intel. Обратите
внимание на соответствие вырезов для каждого сокета.
Для фиксации винтов на задней пластине Intel используйте
уплотнительные кольца. После сборки пластины Intel
для соответствующего сокета расположите ее под
материнской платой. Убедитесь, что винты задней
пластины Intel расположены точно внутри отверстий
материнской платы.
Сборка крепежной рамки кулера
Вкрутите Крепежные гайки Intel B на установленную
заднюю пластину Intel. Затем установите кронштейны Intel
на гайки Intel B и закрепите их винтами крепежных
кронштейнов. Используйте для этого крестообразную
отвертку.
1200, 1150,
1151, 1155
Intel: LGA 2011 (-3) square ILM / LGA 2066
Intel: LGA 1200 / 1150 / 1151 / 1155
2
3
5
7
8
9
10
11
12
13
14
15
16
17
18
19
20
V1/22
www.bequiet.com/bk022
» Product information for this CPU cooler
» Produktinformationen zu diesem CPU-Kühler
» Informations produit pour ce système de refroidissement
» Información del producto para este refrigerador de CPU
» Informacje produktowe dla tego coolera CPU
» Engelstalige productinformatie voor deze processorkoeler
» Produktinformation för den här processorkylaren, på
engelska
» Подробная информация о данном кулере для
процессора
» 此CPU散熱器的產品資訊
» 此CPU散热器的产品信息
» 製品情報(クーラー)
NL
SE
4
6
Be quiet! DARK ROCK PRO 4 — Cpu Cooler Manual
SCOPE OF DELIVERY
| Part name | Quantity | |
 |
be quiet! Dark Rock Pro 4 cooler | 1 |
 |
135mm fan | 1 |
 |
120mm fan | 1 |
 |
Intel backplate | 1 |
 |
Intel mounting brackets | 2 |
 |
Short AMD mounting brackets | 2 |
 |
Cooler mounting bridge | 1 |
 |
Intel spacer nuts | 4 |
 |
Intel 115X/1366 nuts | 4 |
 |
AMD spacer nuts | 4 |
 |
Mounting bracket fastening screws | 4 |
 |
Intel/AMD mounting bridge fastening screws | 2 |
 |
Intel backplate screws | 4 |
 |
AMD backplate screws | 4 |
 |
O-rings | 4 |
 |
Cross-tip screwdriver | 1 |
 |
Thermal paste | 1 |
 |
Fan clips | 2 |
 |
AM3 washers | 4 |
 |
Y cable | 1 |
Intel LGA 2011(-3) square ILM / LGA 2066
General
We recommend preparatory mounting of the cooler outside the PC case for subsequent installation.
Installation video 
The following parts are needed for this:
1x Dark Rock Pro 4 CPU cooler (1), 1x 135mm fan (2), 1x 120mm fan (3), 2x Intel mounting brackets (5), 1x cooler mounting bridge (7), 4x Intel spacer nuts (8), 4x mounting bracket fastening screws (11), Intel/AMD mounting bridge fastening screws (12), 1x cross-tip screwdriver (16), 1x thermal paste (17), 4x fan clips (18), 1x Y cable (20)
Assembly of the cooler mounting frame
First screw the Intel spacer nuts (8) onto the threads of the socket frame. Place the Intel mounting brackets (5) over the Intel spacer nuts and screw these tight with the mounting bracket fastening screws (11). You can use the cross-tip screwdriver (16) for this.
First remove the protective foil from the underside of the cooler. Spread the thermal paste (17) on the surface of the CPU. The amount supplied is sufficient for one or two applications.
The thermal paste supplied is not suitable for human consumption. If swallowed, drink lots of water and urgently seek medical attention. Keep it out of the reach of children. Avoid contact with skin and eyes.
Position the cooler mounting bridge (7) centrally on the cooler (1). Next place the cooler unit over the CPU. Loosen both heatpipe caps that are found in the middle of the topside of the cooler (rotate as illustrated). Insert the Intel/AMD mounting bridge fastening screws (12) from above into the cooler mounting bridge (7) and then screw these alternately tight. You can use the cross-tip screwdriver (16) for this.
Subsequently retighten both heatpipe caps on the top side of the cooler.
Fasten the 120mm fan (3) using fan clips (18) onto the front side of the cooler. Slide the 135mm fan (2) between the two heatsinks and also fasten this with fan clips (18). Connect both fans using the the Y cable (20). Connect this to the CPU fan connector on the motherboard.
When dismantling the fans, push the notches of the fan clips (18) away from the fan.
Intel LGA 1150 / 1151 / 1155 / 1156 / 1366
General
We recommend preparatory mounting of the cooler outside the PC case for subsequent installation.
Installation video 
The following parts are needed for this:
1x Dark Rock Pro 4 CPU cooler (1), 1x 135mm fan (2), 1x 120mm fan (3), 1x Intel backplate (4), 2x Intel mounting brackets (5), 1x cooler mounting bridge (7), 4x Intel 115X/1366 nuts (9), 4x mounting bracket fastening screws (11), 2x Intel/AMD mounting bridge fastening screws (12), 4x Intel backplate screws (13), 4x O-rings (15), 1x cross-tip screwdriver (16), 1x thermal paste (17), 4x fan clips (18), 1x Y cable (20)
Mounting the backplate
Position the Intel backplate screws (13) in the notches situated on the rear side of the Intel backplate (4). Pay attention in so doing to align with the holes specially drilled for each socket.
For fixing the backplate screws onto the Intel backplate use the O-rings (15). Once assembly of the Intel backplate for the respective Intel socket is complete, position it under the motherboard. In so doing make sure that the Intel backplate screws (13) are precisely positioned inside the motherboard holes.
Assembly of the cooler mounting frame
Screw the Intel 115X/1366 nuts (9) onto the previously positioned Intel backplate (4). Then position the Intel mounting brackets (5) over the Intel 115X/1366 nuts and affix these with the mounting bracket fastening screws (11). You can use the cross-tip screwdriver for this (16).
First remove the protective foil from the underside of the cooler. Spread the thermal paste (17) on the surface of the CPU. The amount supplied is sufficient for one or two applications.
The thermal paste supplied is not suitable for human consumption. If swallowed, drink lots of water and urgently seek medical attention. Keep it out of the reach of children.
Avoid contact with skin and eyes.
Position the cooler mounting bridge (7) centrally on the cooler. Next place the cooler unit over the CPU. Loosen both heatpipe caps that are found in the middle of the top side of the cooler. Insert the Intel/AMD mounting bridge fastening screws (12) from above into the cooler mounting bridge and then screw these alternately tight.
You can use the cross-tip screwdriver (16) for this. Subsequently retighten both heatpipe caps on the top side of the cooler.
Fasten the 120mm fan (3) using fan clips (18) onto the front side of the cooler. Slide the 135mm fan (2) between the two heatsinks and also fasten this with fan clips (18). Connect both fans using the the Y cable (20). Connect this to the CPU fan connector on the motherboard.
When dismantling the fans, push the notches of the fan clips (18) away from the fan.
AMD AM2(+) / AM3(+) / AM4 / FM1 / FM2(+)
General
We recommend preparatory mounting of the cooler outside the PC case for subsequent Installation video installation.
Installation video 
The following parts are needed for this:
1x Dark Rock Pro 4 CPU cooler (1), 1x 135mm fan (2), 1x 120mm fan (3), 2x short AMD mounting brackets (6), 1x cooler mounting bridge (7), 4x AMD spacer nuts (10), 2x Intel/AMD mounting bridge fastening screws (12), 4x AMD backplate screws (14), 1x cross-tip screwdriver (16), 1x thermal paste (17), 4x fan clips (18), 4x AM3 washers (19), Y cable (20)
Assembly of the cooler mounting frame
To permit mounting of the cooler please remove both the plastic retainers of the AMD retention module. The factoryfitted backplate affixed to the rear side of the motherboard will be needed for subsequent installation of the cooler.
Note: To mount the Dark Rock Pro 4 on an AM3 motherboard, please use the AM3 washers (19), placing these over the backplate bolts protruding through the front side of the motherboard.

Place the 4x AMD spacer nuts (10) onto the backplate bolts protruding through the front side and affix both short AMD mounting brackets (6) with the AMD backplate screws (14).
Mounting the CPU cooler
First remove the protective foil from the underside of the cooler. Spread the thermal paste (17) on the surface of the CPU. The amount supplied is sufficient for one or two applications.
The thermal paste supplied is not suitable for human consumption. If swallowed, drink lots of water and urgently seek medical attention. Keep it out of the reach of children.
Avoid contact with skin and eyes.
Position the cooler mounting bridge (7) centrally on the cooler. Next place the cooler unit onto the CPU. Loosen both heatpipe caps that are found in the middle of the topside of the cooler (rotate as illustrated).
Insert the Intel/AMD mounting bridge fastening screws (12) from above into the cooler mounting bridge and then screw these alternately tight. You can use the cross-tip screwdriver (16) for this. Subsequently retighten both heatpipe caps on the topside of the cooler.
Fasten the 120mm fan (3) using fan clips (18) onto the front side of the cooler. Slide the 135mm fan (2) between the two heatsinks and also fasten this with fan clips (18). Connect both fans using the Y cable (20). Connect this to the CPU fan connector on the motherboard.
When dismantling the fans, push the notches of the fan clips (18) away from the fan.

Documents / Resources
Download manual
Here you can download full pdf version of manual, it may contain additional safety instructions, warranty information, FCC rules, etc.
Download Be quiet! DARK ROCK PRO 4 — Cpu Cooler Manual

First remove the protective foil from the underside of the cooler.
Spread the thermal paste (17) on the surface of the CPU. The
amount supplied is sufficient for one or two applications.
Caution: The thermal paste supplied is not suitable for human
consumption. If swallowed, drink lots of water and urgently
seek medical attention. Keep it out of the reach of children.
Avoid contact with skin and eyes.
Position the cooler mounting bridge (7) centrally on the cooler.
Next place the cooler unit over the CPU. Loosen both heatpipe
caps that are found in the middle of the top side of the cooler.
Insert the Intel/AMD mounting bridge fastening screws (12)
from above into the cooler mounting bridge and then screw
these alternately tight.
You can use the cross-tip screwdriver (16) for this.
Subsequently retighten both heatpipe caps on the top side of
the cooler.
Fasten the 120mm fan (3) using fan clips (18) onto the front
side of the cooler. Slide the 135mm fan (2) between the two
heatsinks and also fasten this with fan clips (18). Connect
both fans using the the Y cable (20). Connect this to the
CPU fan connector on the motherboard.
When dismantling the fans, push the notches of the fan
clips (18) away from the fan.
Position the cooler mounting bridge (7) centrally on the cooler
(1). Next place the cooler unit over the CPU. Loosen both
heatpipe caps that are found in the middle of the topside of the
cooler (rotate as illustrated). Insert the Intel/AMD mounting
bridge fastening screws (12) from above into the cooler
mounting bridge (7) and then screw these alternately tight. You
can use the cross-tip screwdriver (16) for this.
Subsequently retighten both heatpipe caps on the top side of
the cooler.
Fasten the 120mm fan (3) using fan clips (18) onto the front
side of the cooler. Slide the 135mm fan (2) between the two
heatsinks and also fasten this with fan clips (18). Connect
both fans using the the Y cable (20). Connect this to the
CPU fan connector on the motherboard.
When dismantling the fans, push the notches of the fan
clips (18) away from the fan.
Introduction: Thank you for deciding to purchase a be quiet!
product. The following instructions will guide you through the
installation process. If you do encounter installation problems,
please don’t hesitate to contact our customer services by
mailing service@bequiet.com. Please note that be quiet!
cannot accept liability for damage caused by compatibility
problems.
Warranty:
• 3 years manufacturer guarantee for consumers (original
purchase from authorized be quiet! dealers only)
• Guarantee work can only be processed with an included
copy of the purchase receipt from an authorized be quiet!
dealer
• Manipulation and structural changes of any kind as well
as damages through external mechanical forces lead to a
complete voiding of the guarantee
• Our General Warranty Conditions apply, which can be
viewed on bequiet.com
Listan GmbH & Co.KG . Biedenkamp 3a . 21509 Glinde
Germany
For further information contact us via e-mail:
service@bequiet.com
SCOPE OF DELIVERY
General
We recommend preparatory mounting of the
cooler outside the PC case for subsequent
installation.
The following parts are needed for this:
1x Dark Rock Pro 4 CPU cooler (1), 1x 135mm fan (2), 1x 120mm
fan (3), 2x Intel mounting brackets (5), 1x cooler mounting
bridge (7), 4x Intel spacer nuts (8), 4x mounting bracket
fastening screws (11), Intel/AMD mounting bridge fastening
screws (12), 1x cross-tip screwdriver (16), 1x thermal paste
(17), 4x fan clips (18), 1x Y cable (20)
Assembly of the cooler mounting frame
First screw the Intel spacer nuts (8) onto the threads of the
socket frame. Place the Intel mounting brackets (5) over the
Intel spacer nuts and screw these tight with the mounting
bracket fastening screws (11). You can use the cross-tip
screwdriver (16) for this.
First remove the protective foil from the underside of the cooler.
Spread the thermal paste (17) on the surface of the CPU. The
amount supplied is sufficient for one or two applications.
Caution: The thermal paste supplied is not suitable for
human consumption. If swallowed, drink lots of water and
urgently seek medical attention. Keep it out of the reach of
children. Avoid contact with skin and eyes.
Installation video
1366, 2011(-3) square ILM, 2066
1150, 1151, 1155, 1156
General
We recommend preparatory mounting of the
cooler outside the PC case for subsequent
installation.
The following parts are needed for this:
1x Dark Rock Pro 4 CPU cooler (1), 1x 135mm fan (2), 1x 120mm
fan (3), 1x Intel backplate (4), 2x Intel mounting brackets (5),
1x cooler mounting bridge (7), 4x Intel 115X/1366 nuts (9), 4x
mounting bracket fastening screws (11), 2x Intel/AMD mounting
bridge fastening screws (12), 4x Intel backplate screws (13), 4x
O-rings (15), 1x cross-tip screwdriver (16), 1x thermal paste (17),
4x fan clips (18), 1x Y cable (20)
Mounting the backplate
Position the Intel backplate screws (13) in the notches situated
on the rear side of the Intel backplate (4). Pay attention in so
doing to align with the holes specially drilled for each socket.
For fixing the backplate screws onto the Intel backplate use
the O-rings (15). Once assembly of the Intel backplate for the
respective Intel socket is complete, position it under the
motherboard. In so doing make sure that the Intel backplate
screws (13) are precisely positioned inside the motherboard
holes.
Assembly of the cooler mounting frame
Screw the Intel 115X/1366 nuts (9) onto the previously
positioned Intel backplate (4). Then position the Intel mounting
brackets (5) over the Intel 115X/1366 nuts and affix these with
the mounting bracket fastening screws (11). You can use the
cross-tip screwdriver for this (16).
1366, 2011(-3) square ILM, 2066
1150, 1151, 1155, 1156
Intel LGA 2011(-3) square ILM / LGA 2066
Intel LGA 1150 / 1151 / 1155 / 1156 / 1366
We recommend removal of the cooler prior to transportation.
January 2018
!
Part name Quantity
be quiet! Dark Rock Pro 4 cooler 1
135mm fan 1
120mm fan 1
Intel backplate 1
Intel mounting brackets 2
Short AMD mounting brackets 2
Cooler mounting bridge 1
Intel spacer nuts 4
Intel 115X/1366 nuts 4
Part name Quantity
AMD spacer nuts 4
Mounting bracket fastening
screws
4
Intel/AMD mounting bridge
fastening screws
2
Intel backplate screws 4
AMD backplate screws 4
O-rings 4
Cross-tip screwdriver 1
Thermal paste 1
Fan clips 2
AM3 washers 4
Y cable 1
2
3
4
5
6
7
8
9
10
11
12
13
14
15
16
17
18
19
20
Installation video
1366
1150, 1151,
1155, 1156
Be quiet! DARK ROCK PRO 4 — Cpu Cooler Manual
SCOPE OF DELIVERY
| Part name | Quantity | |
| |
be quiet! Dark Rock Pro 4 cooler | 1 |
| |
135mm fan | 1 |
| |
120mm fan | 1 |
| |
Intel backplate | 1 |
| |
Intel mounting brackets | 2 |
| |
Short AMD mounting brackets | 2 |
| |
Cooler mounting bridge | 1 |
| |
Intel spacer nuts | 4 |
| |
Intel 115X/1366 nuts | 4 |
|
AMD spacer nuts | 4 |
|
Mounting bracket fastening screws | 4 |
|
Intel/AMD mounting bridge fastening screws | 2 |
|
Intel backplate screws | 4 |
|
AMD backplate screws | 4 |
|
O-rings | 4 |
|
Cross-tip screwdriver | 1 |
|
Thermal paste | 1 |
|
Fan clips | 2 |
|
AM3 washers | 4 |
|
Y cable | 1 |
Intel LGA 2011(-3) square ILM / LGA 2066
General
We recommend preparatory mounting of the cooler outside the PC case for subsequent installation.
Installation video
The following parts are needed for this:
1x Dark Rock Pro 4 CPU cooler (1), 1x 135mm fan (2), 1x 120mm fan (3), 2x Intel mounting brackets (5), 1x cooler mounting bridge (7), 4x Intel spacer nuts (8), 4x mounting bracket fastening screws (11), Intel/AMD mounting bridge fastening screws (12), 1x cross-tip screwdriver (16), 1x thermal paste (17), 4x fan clips (18), 1x Y cable (20)
Assembly of the cooler mounting frame
First screw the Intel spacer nuts (8) onto the threads of the socket frame. Place the Intel mounting brackets (5) over the Intel spacer nuts and screw these tight with the mounting bracket fastening screws (11). You can use the cross-tip screwdriver (16) for this.
First remove the protective foil from the underside of the cooler. Spread the thermal paste (17) on the surface of the CPU. The amount supplied is sufficient for one or two applications.
The thermal paste supplied is not suitable for human consumption. If swallowed, drink lots of water and urgently seek medical attention. Keep it out of the reach of children. Avoid contact with skin and eyes.
Position the cooler mounting bridge (7) centrally on the cooler (1). Next place the cooler unit over the CPU. Loosen both heatpipe caps that are found in the middle of the topside of the cooler (rotate as illustrated). Insert the Intel/AMD mounting bridge fastening screws (12) from above into the cooler mounting bridge (7) and then screw these alternately tight. You can use the cross-tip screwdriver (16) for this.
Subsequently retighten both heatpipe caps on the top side of the cooler.
Fasten the 120mm fan (3) using fan clips (18) onto the front side of the cooler. Slide the 135mm fan (2) between the two heatsinks and also fasten this with fan clips (18). Connect both fans using the the Y cable (20). Connect this to the CPU fan connector on the motherboard.
When dismantling the fans, push the notches of the fan clips (18) away from the fan.
Intel LGA 1150 / 1151 / 1155 / 1156 / 1366
General
We recommend preparatory mounting of the cooler outside the PC case for subsequent installation.
Installation video
The following parts are needed for this:
1x Dark Rock Pro 4 CPU cooler (1), 1x 135mm fan (2), 1x 120mm fan (3), 1x Intel backplate (4), 2x Intel mounting brackets (5), 1x cooler mounting bridge (7), 4x Intel 115X/1366 nuts (9), 4x mounting bracket fastening screws (11), 2x Intel/AMD mounting bridge fastening screws (12), 4x Intel backplate screws (13), 4x O-rings (15), 1x cross-tip screwdriver (16), 1x thermal paste (17), 4x fan clips (18), 1x Y cable (20)
Mounting the backplate
Position the Intel backplate screws (13) in the notches situated on the rear side of the Intel backplate (4). Pay attention in so doing to align with the holes specially drilled for each socket.
For fixing the backplate screws onto the Intel backplate use the O-rings (15). Once assembly of the Intel backplate for the respective Intel socket is complete, position it under the motherboard. In so doing make sure that the Intel backplate screws (13) are precisely positioned inside the motherboard holes.
Assembly of the cooler mounting frame
Screw the Intel 115X/1366 nuts (9) onto the previously positioned Intel backplate (4). Then position the Intel mounting brackets (5) over the Intel 115X/1366 nuts and affix these with the mounting bracket fastening screws (11). You can use the cross-tip screwdriver for this (16).
First remove the protective foil from the underside of the cooler. Spread the thermal paste (17) on the surface of the CPU. The amount supplied is sufficient for one or two applications.
The thermal paste supplied is not suitable for human consumption. If swallowed, drink lots of water and urgently seek medical attention. Keep it out of the reach of children.
Avoid contact with skin and eyes.
Position the cooler mounting bridge (7) centrally on the cooler. Next place the cooler unit over the CPU. Loosen both heatpipe caps that are found in the middle of the top side of the cooler. Insert the Intel/AMD mounting bridge fastening screws (12) from above into the cooler mounting bridge and then screw these alternately tight.
You can use the cross-tip screwdriver (16) for this. Subsequently retighten both heatpipe caps on the top side of the cooler.
Fasten the 120mm fan (3) using fan clips (18) onto the front side of the cooler. Slide the 135mm fan (2) between the two heatsinks and also fasten this with fan clips (18). Connect both fans using the the Y cable (20). Connect this to the CPU fan connector on the motherboard.
When dismantling the fans, push the notches of the fan clips (18) away from the fan.
AMD AM2(+) / AM3(+) / AM4 / FM1 / FM2(+)
General
We recommend preparatory mounting of the cooler outside the PC case for subsequent Installation video installation.
Installation video
The following parts are needed for this:
1x Dark Rock Pro 4 CPU cooler (1), 1x 135mm fan (2), 1x 120mm fan (3), 2x short AMD mounting brackets (6), 1x cooler mounting bridge (7), 4x AMD spacer nuts (10), 2x Intel/AMD mounting bridge fastening screws (12), 4x AMD backplate screws (14), 1x cross-tip screwdriver (16), 1x thermal paste (17), 4x fan clips (18), 4x AM3 washers (19), Y cable (20)
Assembly of the cooler mounting frame
To permit mounting of the cooler please remove both the plastic retainers of the AMD retention module. The factoryfitted backplate affixed to the rear side of the motherboard will be needed for subsequent installation of the cooler.
Note: To mount the Dark Rock Pro 4 on an AM3 motherboard, please use the AM3 washers (19), placing these over the backplate bolts protruding through the front side of the motherboard.
Place the 4x AMD spacer nuts (10) onto the backplate bolts protruding through the front side and affix both short AMD mounting brackets (6) with the AMD backplate screws (14).
Mounting the CPU cooler
First remove the protective foil from the underside of the cooler. Spread the thermal paste (17) on the surface of the CPU. The amount supplied is sufficient for one or two applications.
The thermal paste supplied is not suitable for human consumption. If swallowed, drink lots of water and urgently seek medical attention. Keep it out of the reach of children.
Avoid contact with skin and eyes.
Position the cooler mounting bridge (7) centrally on the cooler. Next place the cooler unit onto the CPU. Loosen both heatpipe caps that are found in the middle of the topside of the cooler (rotate as illustrated).
Insert the Intel/AMD mounting bridge fastening screws (12) from above into the cooler mounting bridge and then screw these alternately tight. You can use the cross-tip screwdriver (16) for this. Subsequently retighten both heatpipe caps on the topside of the cooler.
Fasten the 120mm fan (3) using fan clips (18) onto the front side of the cooler. Slide the 135mm fan (2) between the two heatsinks and also fasten this with fan clips (18). Connect both fans using the Y cable (20). Connect this to the CPU fan connector on the motherboard.
When dismantling the fans, push the notches of the fan clips (18) away from the fan.
Documents / Resources
Download manual
Here you can download full pdf version of manual, it may contain additional safety instructions, warranty information, FCC rules, etc.
Download Be quiet! DARK ROCK PRO 4 — Cpu Cooler Manual
Содержание
- Обзор и тест кулера be quiet! Dark Rock Pro 4
- Спецификация
- Упаковка и комплектация
- Внешний вид и конструкция
- Особенности установки
- Пример установки на Socket AM4
- Пример установки на Socket LGA 2066
- Тестирование
- Скорость вентилятора
- Оценка основания
- Тестирование под нагрузкой
- Заключение
Обзор и тест кулера be quiet! Dark Rock Pro 4

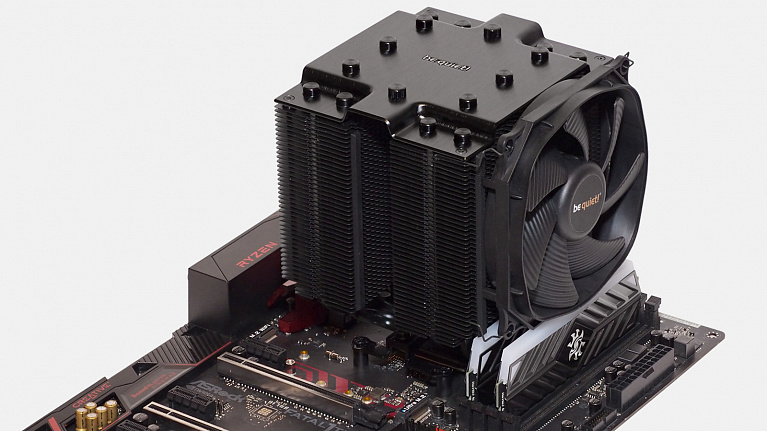
Флагманская серия классических воздушных систем охлаждения Dark Rock от компании be quiet! изначально позиционируется производителем как выбор для разогнанных систем и требовательных рабочих станций. В неё входит две модификации кулеров разной производительности, обновляемые на периодической основе. В этом году на CES 2018 имела место демонстрация четвертого поколения этих систем охлаждения центральных процессоров. Презентованные модели be quiet! Dark Rock 4 и be quiet! Dark Rock 4 Pro отличаются количеством секций охлаждающего радиатора и предустановленных вентиляторов. Отсюда вытекают и разные значения заявленной эффективности теплоотведения. TDP простой версии- 200 Вт, у Pro- 250 Вт. Ранее мы уже писали о возможностях младшей модели, пришла пора взглянуть и на Dark Rock Pro 4.
Спецификация
В характеристиках совместимости кулера отражены все процессорные сокеты массового домашнего сегмента. HEDT процессоры Intel с сокетом LGA 2066 не обошли стороной, а вот TR4 не вписался в спецификацию. Вес be quiet! Dark Rock Pro 4 перевалил за 1,1 кг, но и рекордным его не назовешь, для сокетов чрезмерной нагрузки быть не должно.
- Производитель: be quiet!;
- Модель: Dark Rock Pro 4;
- Совместимость с сокетами процессоров AMD: AM2(+) / AM3(+) / AM4 / FM1 / FM2(+);
- Совместимость с сокетами процессоров Intel: 1150 / 1151 / 1155 / 1156 / 1366 / 2011(-3) Square ILM / 2066;
- Дополнительно: в комплекте термопаста Corning TC-5121C / 0.5;
- Размер (Д/Ш/Г): 145,7 x 136 x 162,8 мм;
- Вес: 1,130 кг;
- Гарантия: 3 года.
- Рассеиваемая мощность (TDP): 250 Вт;
- Тип конструкции: башенная;
- Материал основания: медь;
- Материал радиатора: алюминий;
- Количество тепловых трубок: 7 шт.;
- Диаметр тепловых трубок: 6 мм.
- Разъем для подключения вентиляторов: 4-pin;
- Количество вентиляторов в комплекте: 2;
- Модель вентиляторов: be quiet! Silent Wings 3;
- Размер вентиляторов:120 x 120 x 25 мм / 135 x 135 x 22 мм;
- Скорость вращения: 1200 / 1500 об. в мин;
- Подсветка вентилятора: нет;
- Регулировка скорости вращения: автоматическая (PWM);
- Длина кабеля: 220 мм;
- Тип подшипника: гидродинамический;
- Время наработки на отказ: 300 000 часов.
Упаковка и комплектация
Кулер Dark Rock Pro 4 поставляется в немаленькой коробке (204 x 212 x 181 мм) фирменного черного цвета с привычной стилистикой оформления. Особой премиальности не ощущается, но и выглядит, как всегда у be quiet!, стильно и брутально.
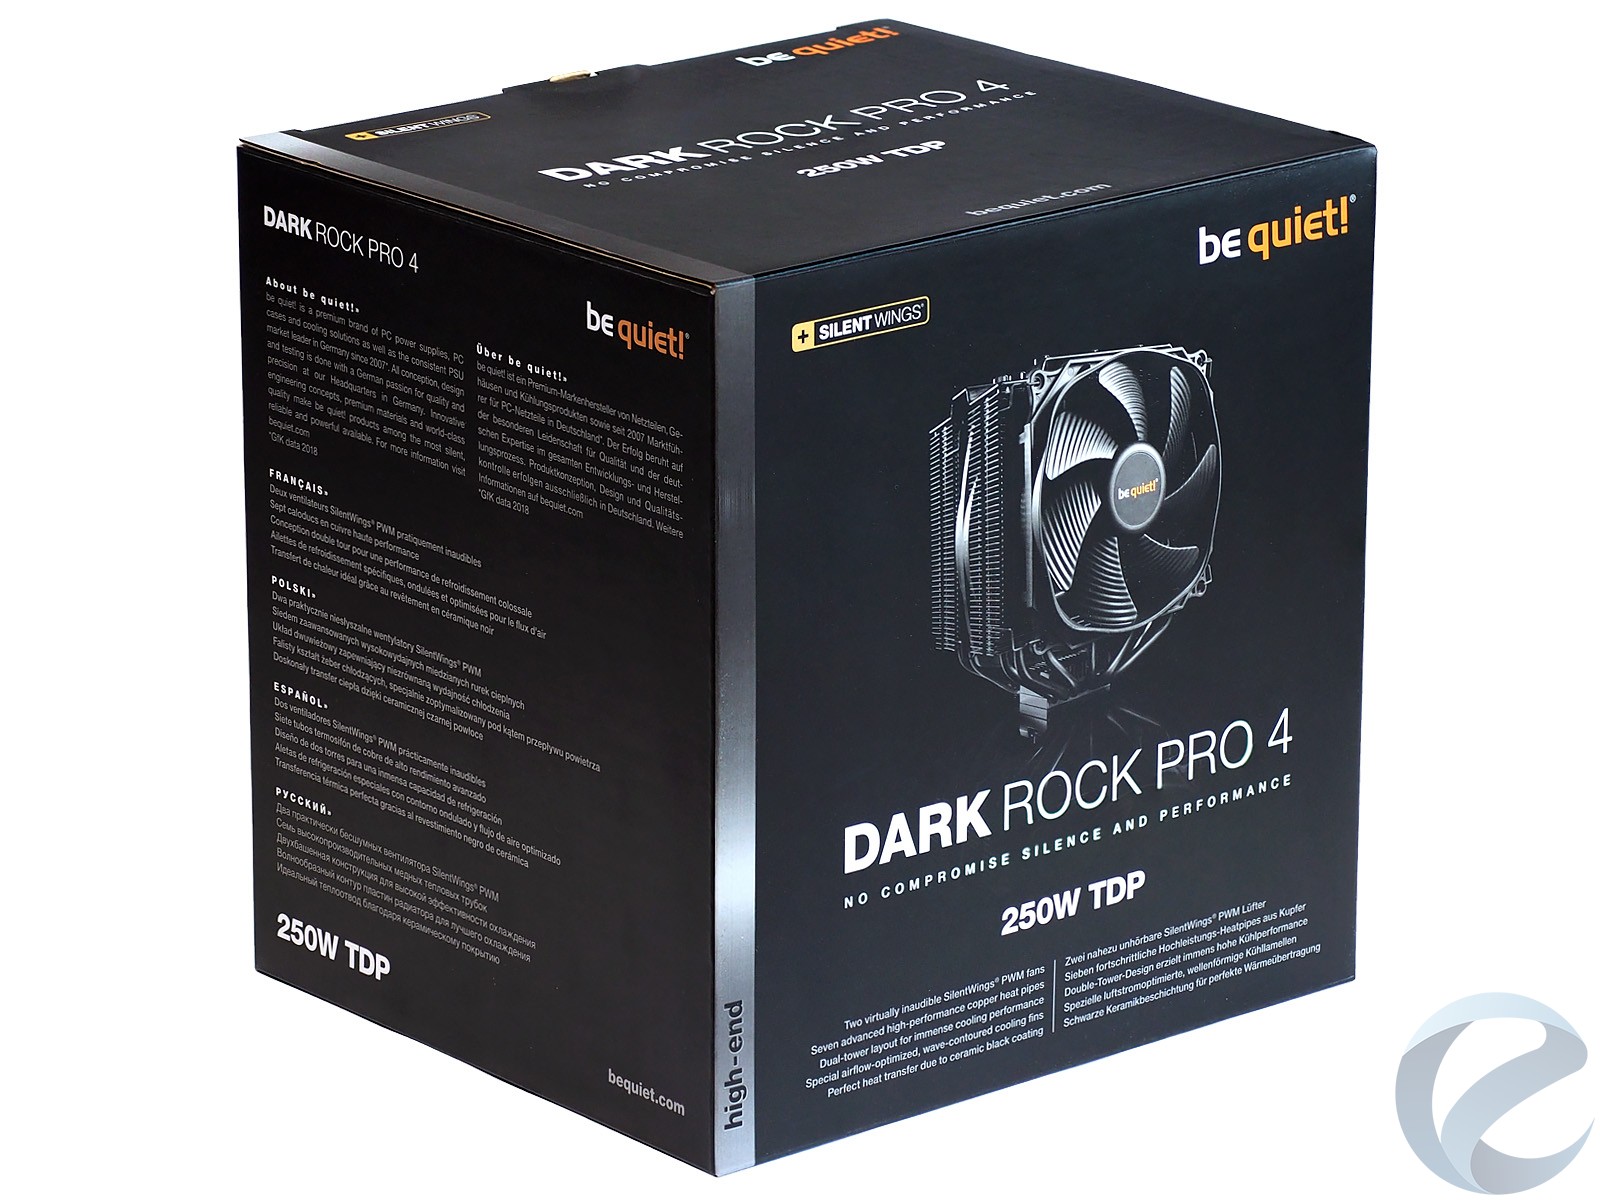
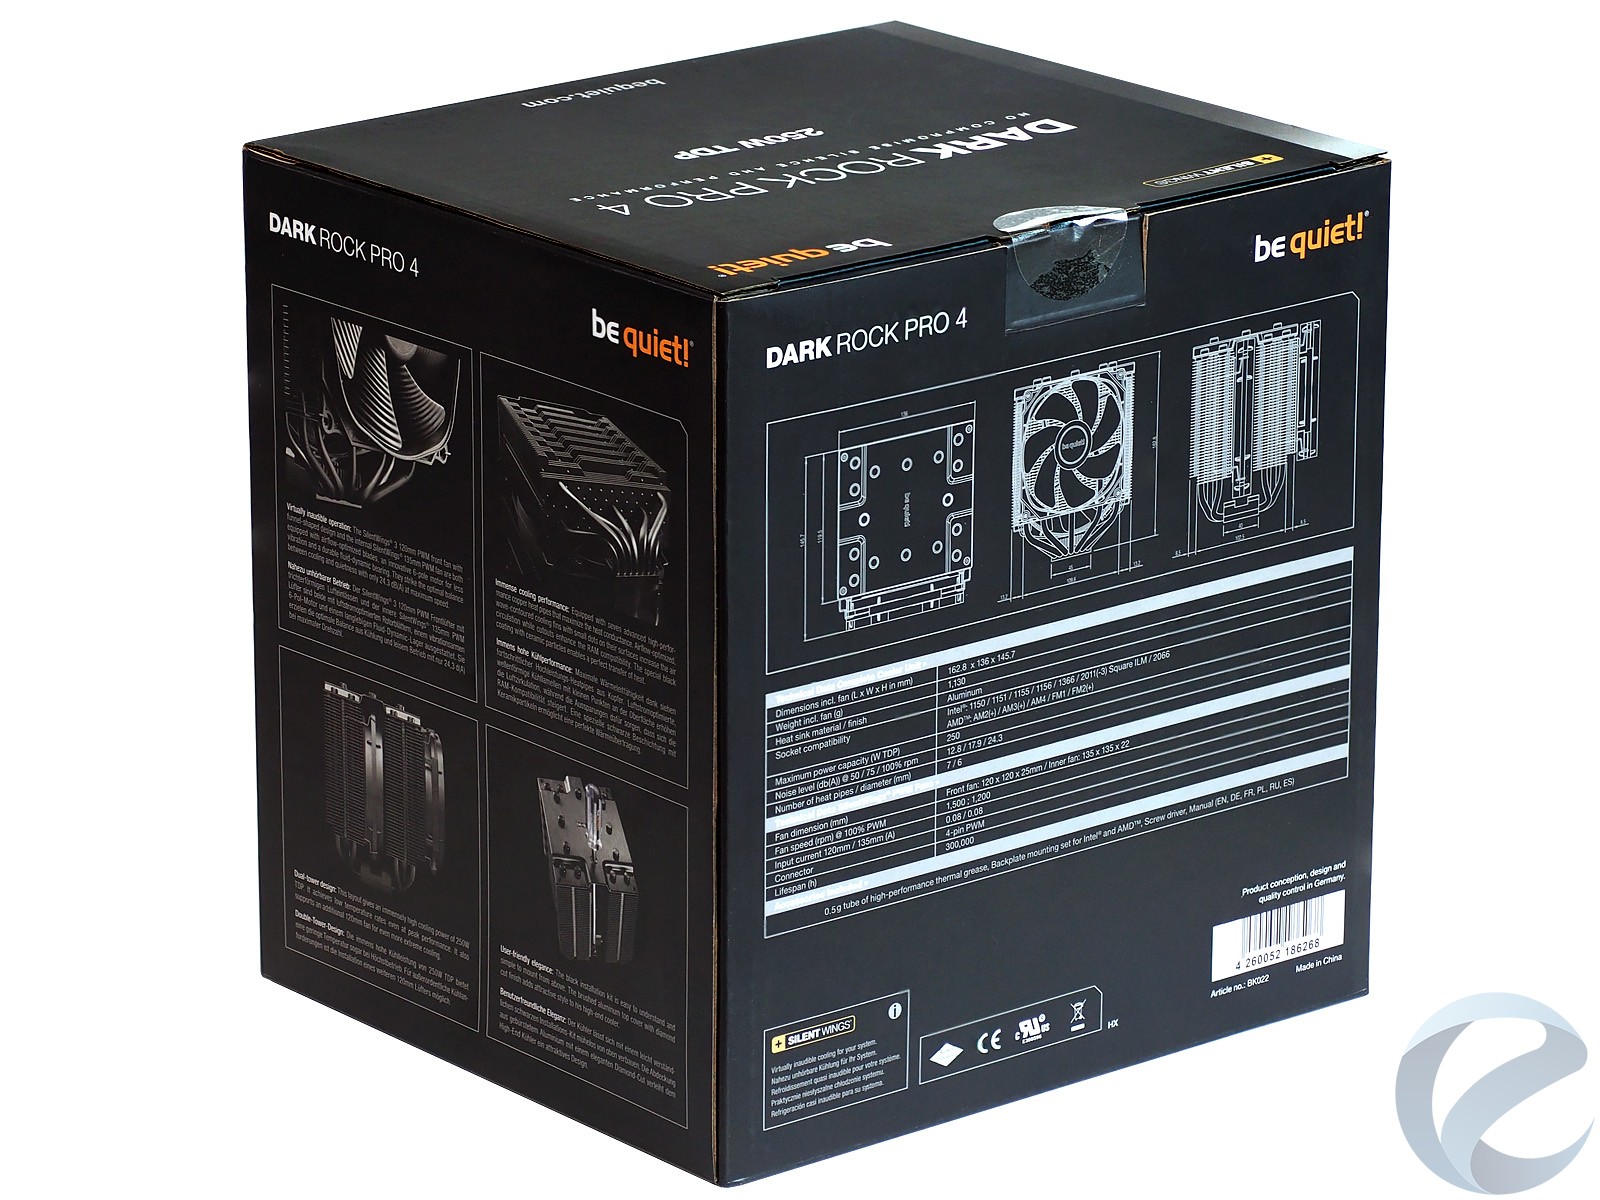
При этом боковые грани несут на себе много полезной информации, в частности, подробную спецификацию и схематичное изображение габаритных размеров.

Большую часть доступного объема внутри коробки занимает сам кулер в мягких защитных вставках из вспененного материала. Кроме того, вложена интересная коробка, открывающаяся как книга, в кармашке которой — инструкции на разных языках, а в основном отсеке — элементы крепления. В боковом вспененном уплотнителе хранится отвертка. Один из комплектных вентиляторов размером 120 х 120 х 25 мм уже закреплен на кулере, второй -большего размера (135 х 135 х 22 мм)вставлен в транспортировочныйкартонныйвкладышмежду секциями радиатора.
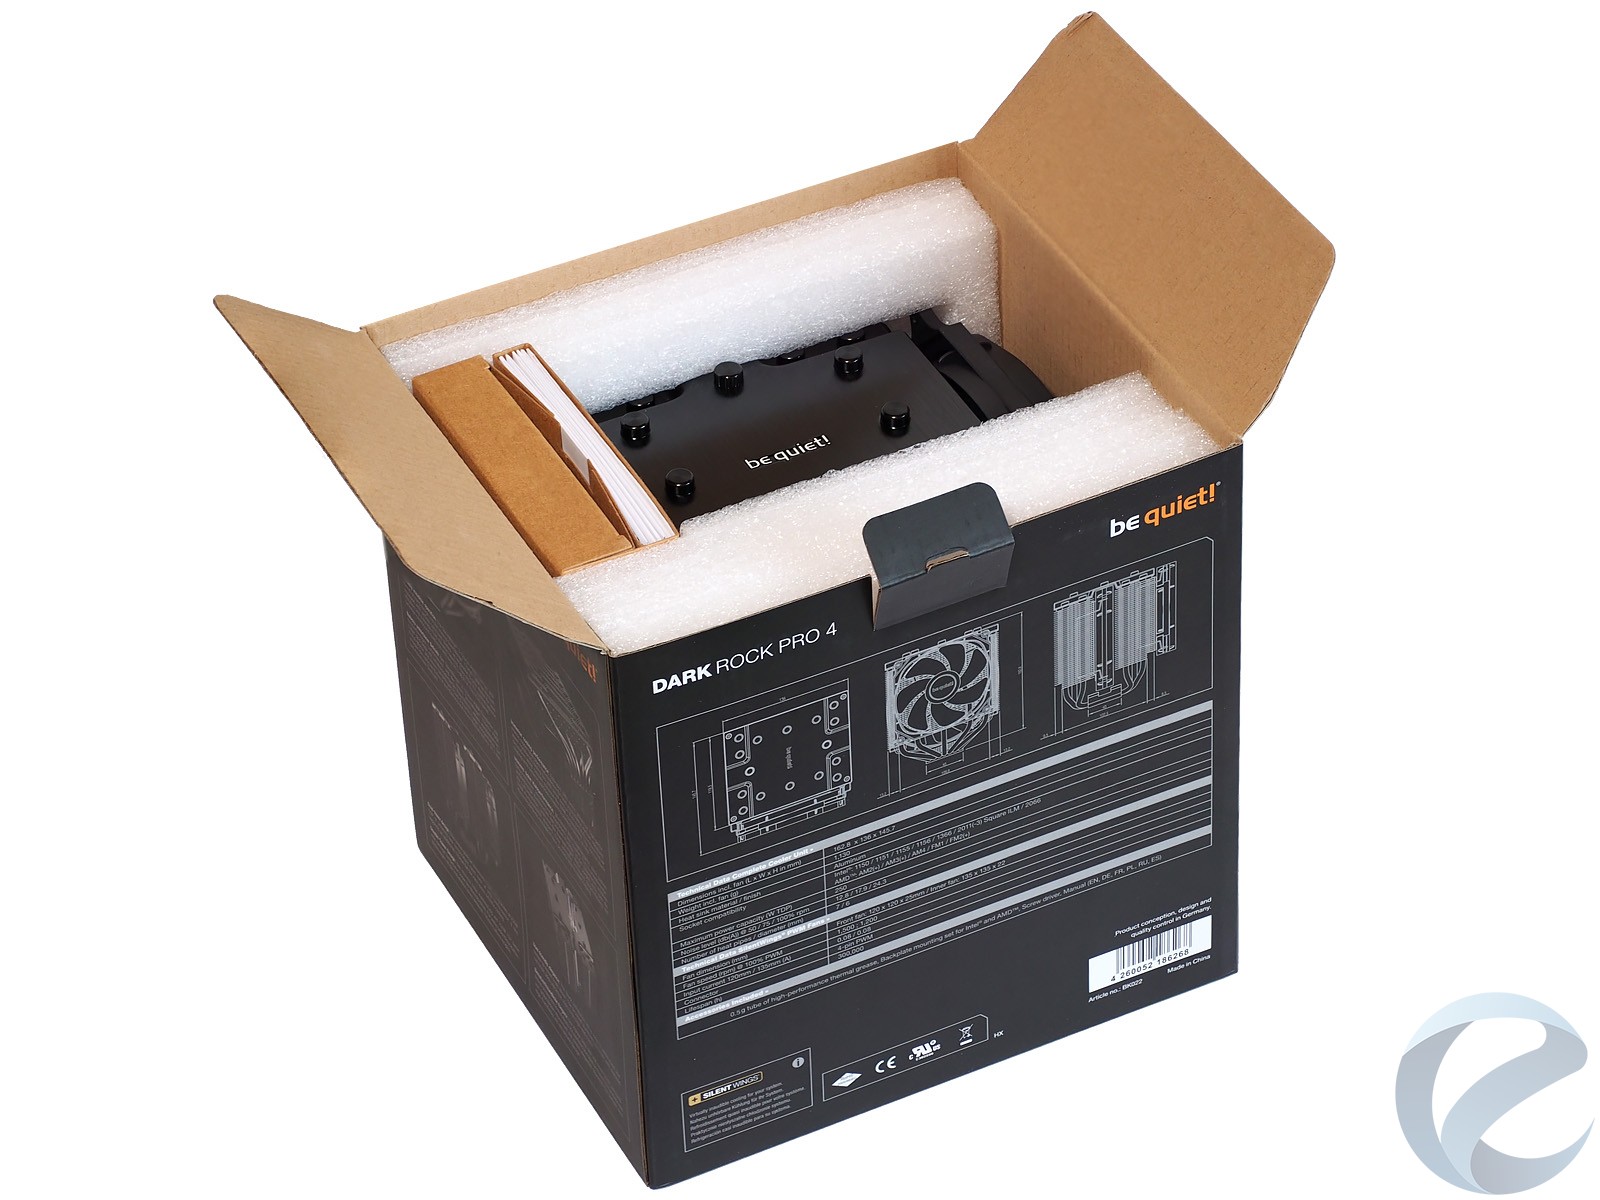
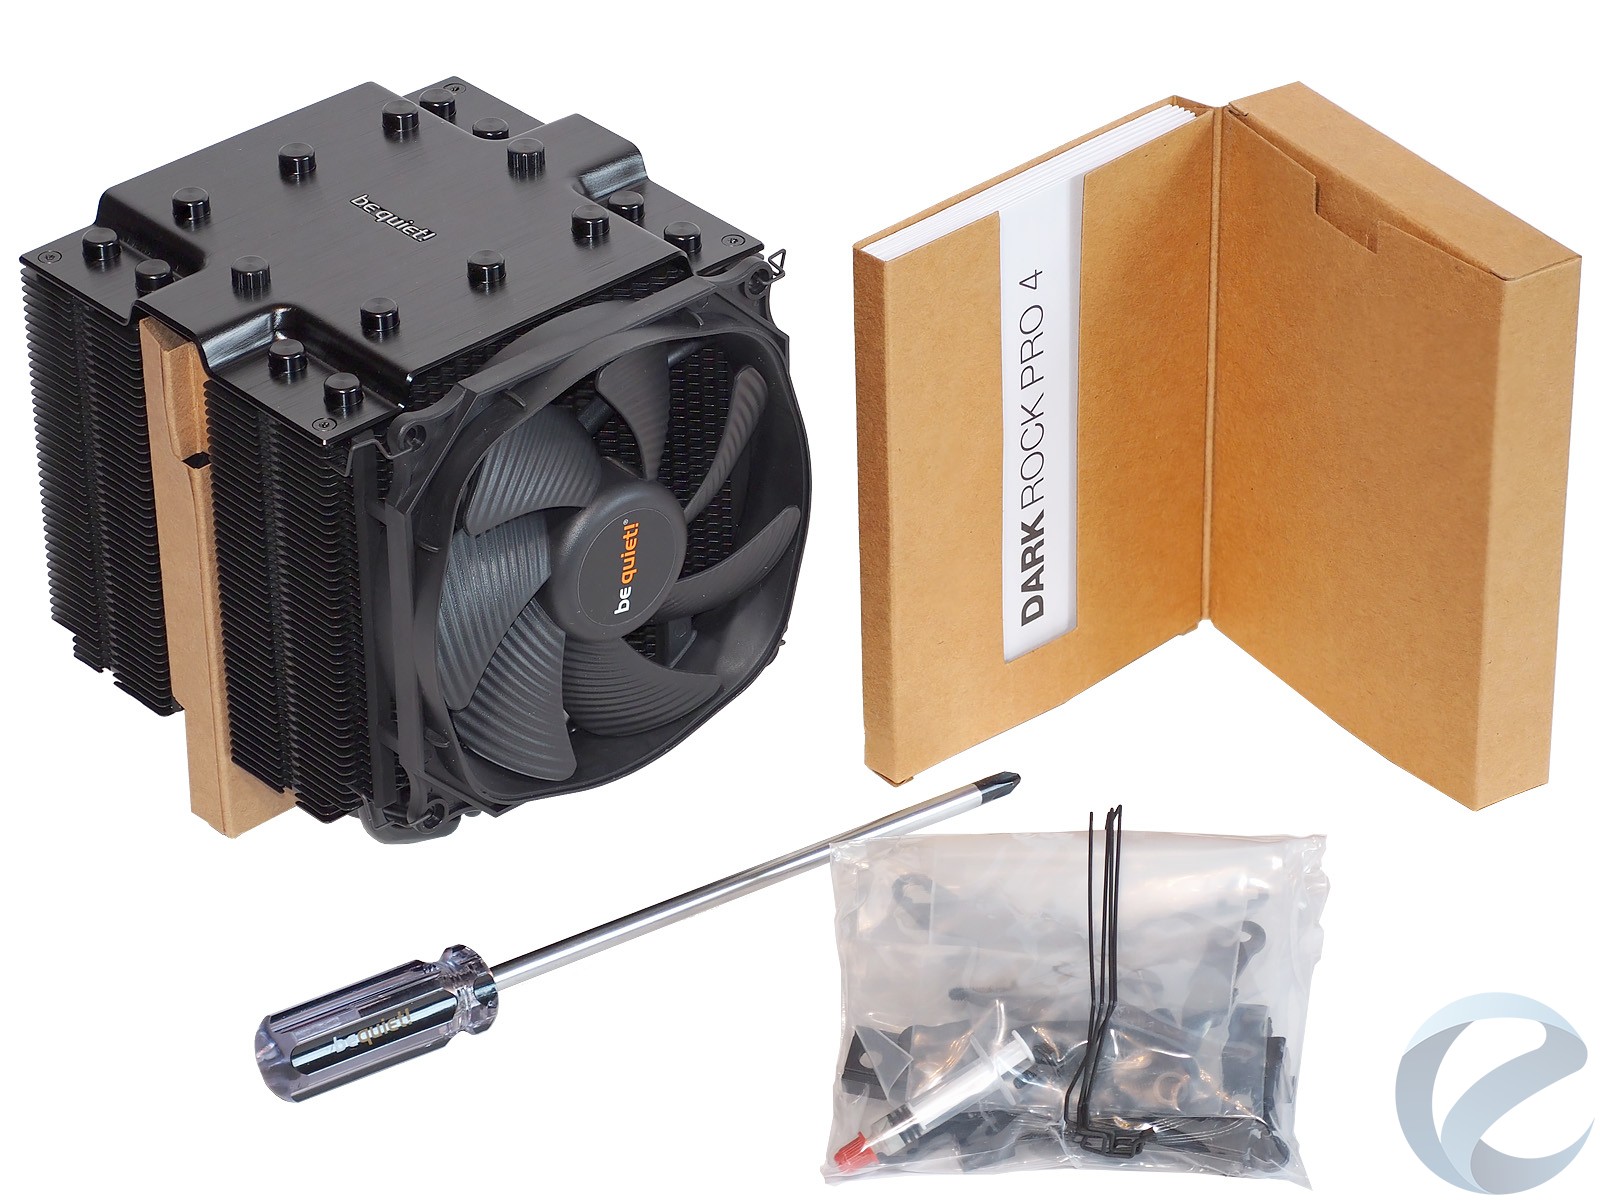
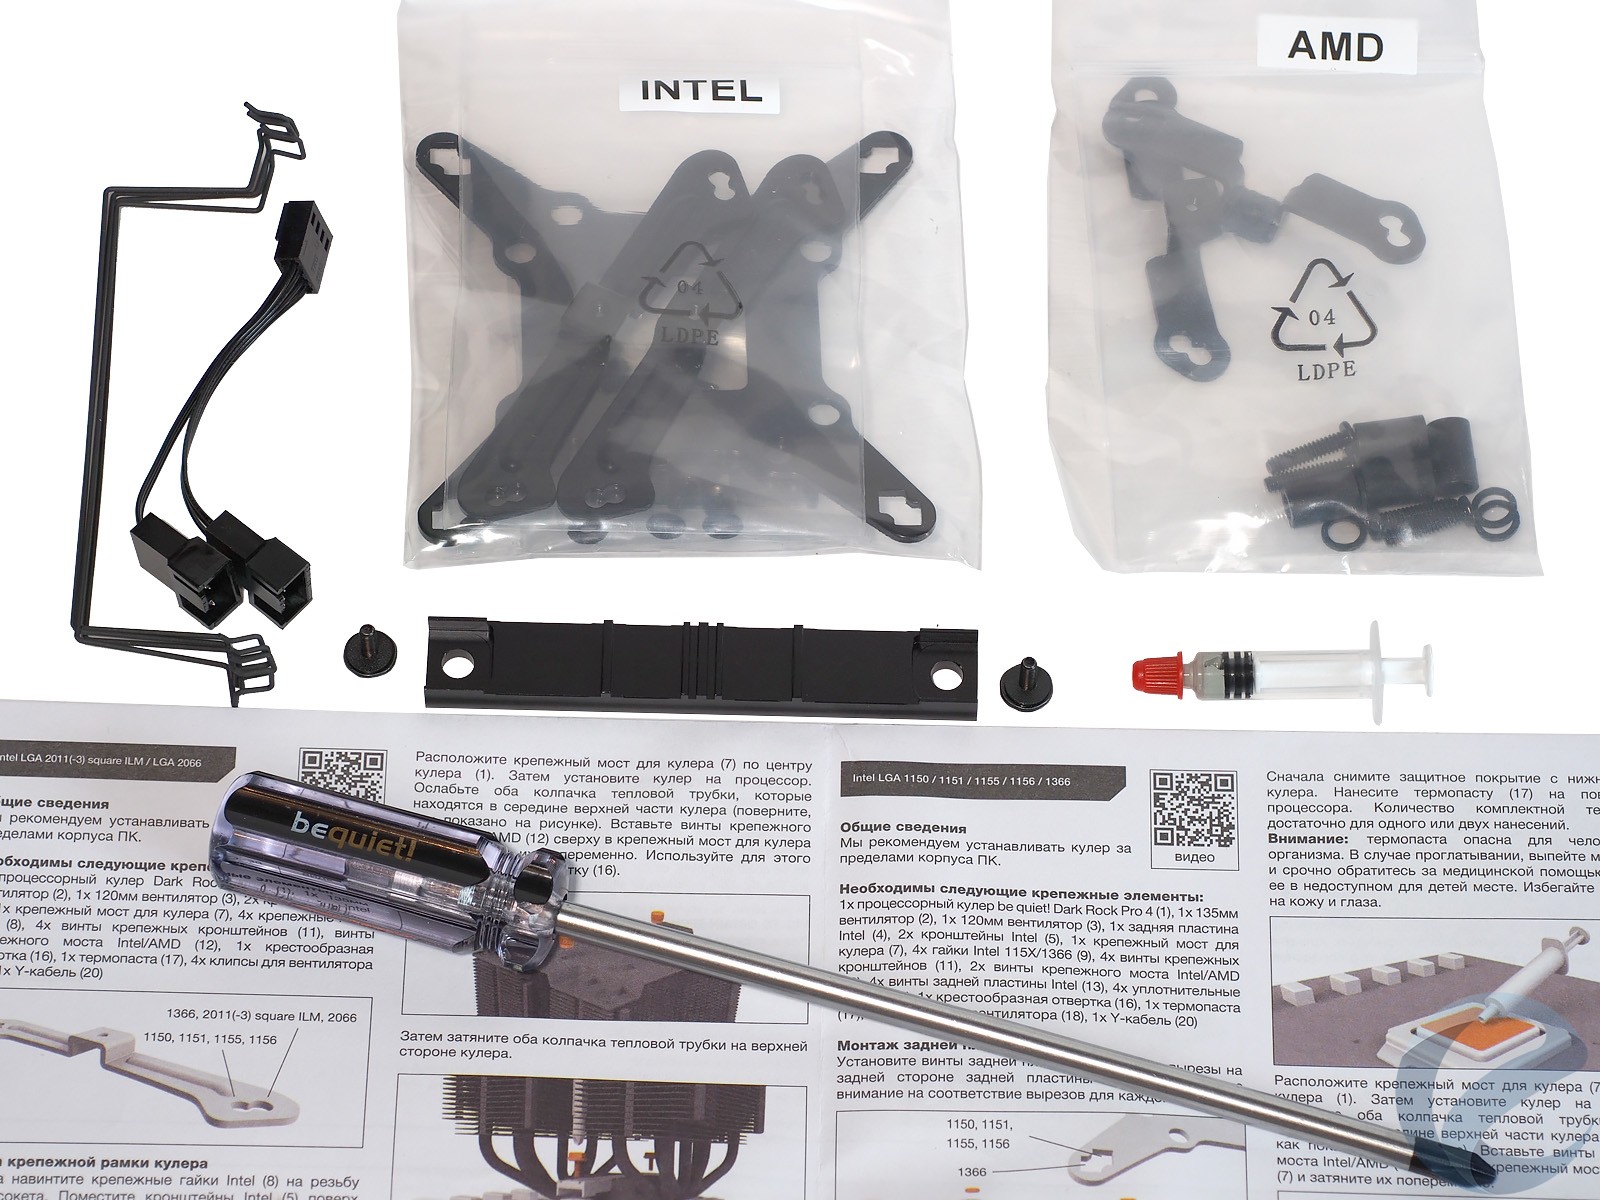
Итоговая комплектация включает: пакет с креплениями для сокетов Intel, пакет с креплениями для сокетов AMD, крепежный мост для кулера и два винта к нему, шприц с термопастой, разветвитель для четырехпиновых штекеров вентиляторов, запасные клипсы для подвеса вентиляторов и удлиненную крестообразную отвертку.
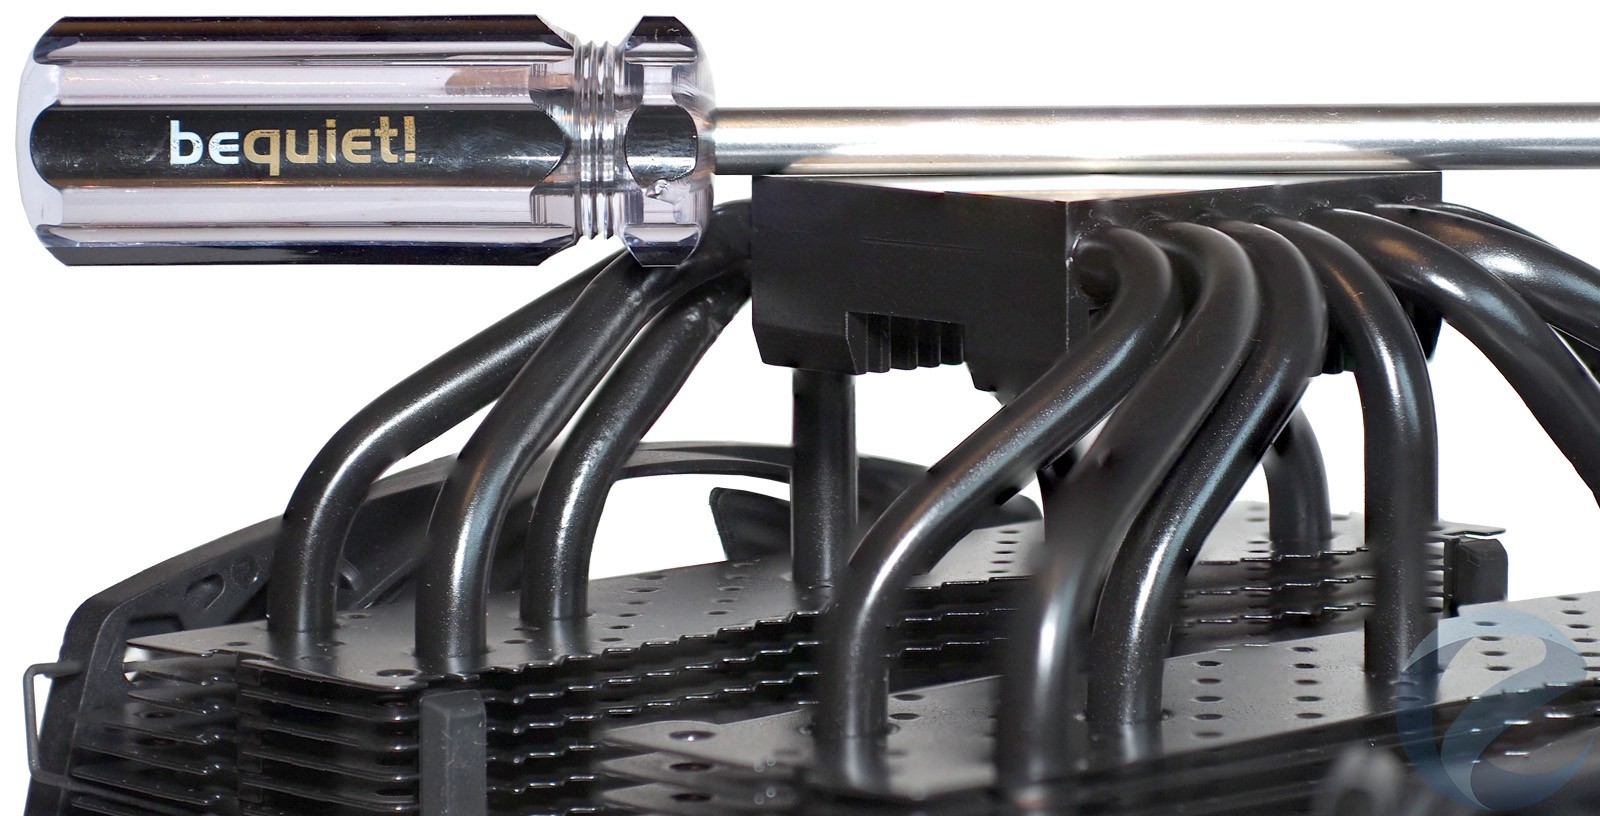
Инструкция на русском языке входит в комплект. По подробности, качеству перевода и иллюстраций она даст фору многим другим. Длинная отвертка с логотипом be quiet! на ручке понадобится для прикручивания крепежного моста к околосокетным рамкам.
Внешний вид и конструкция
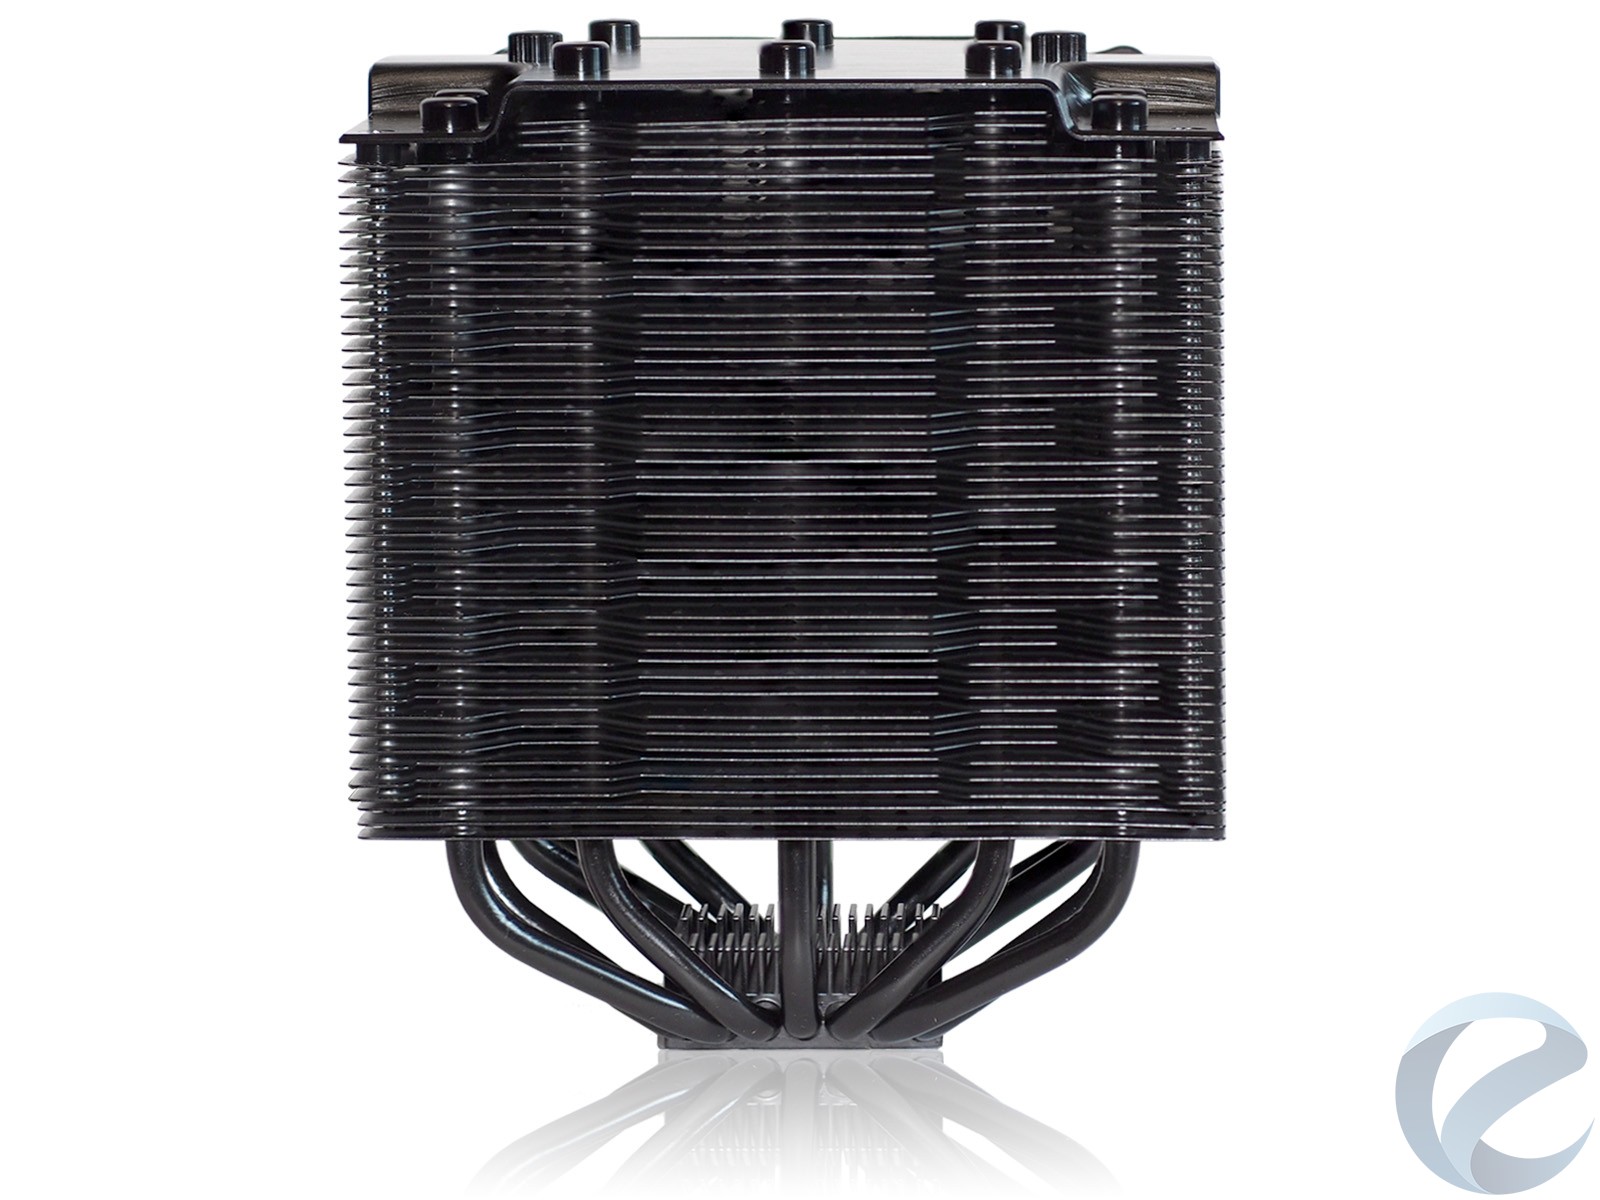
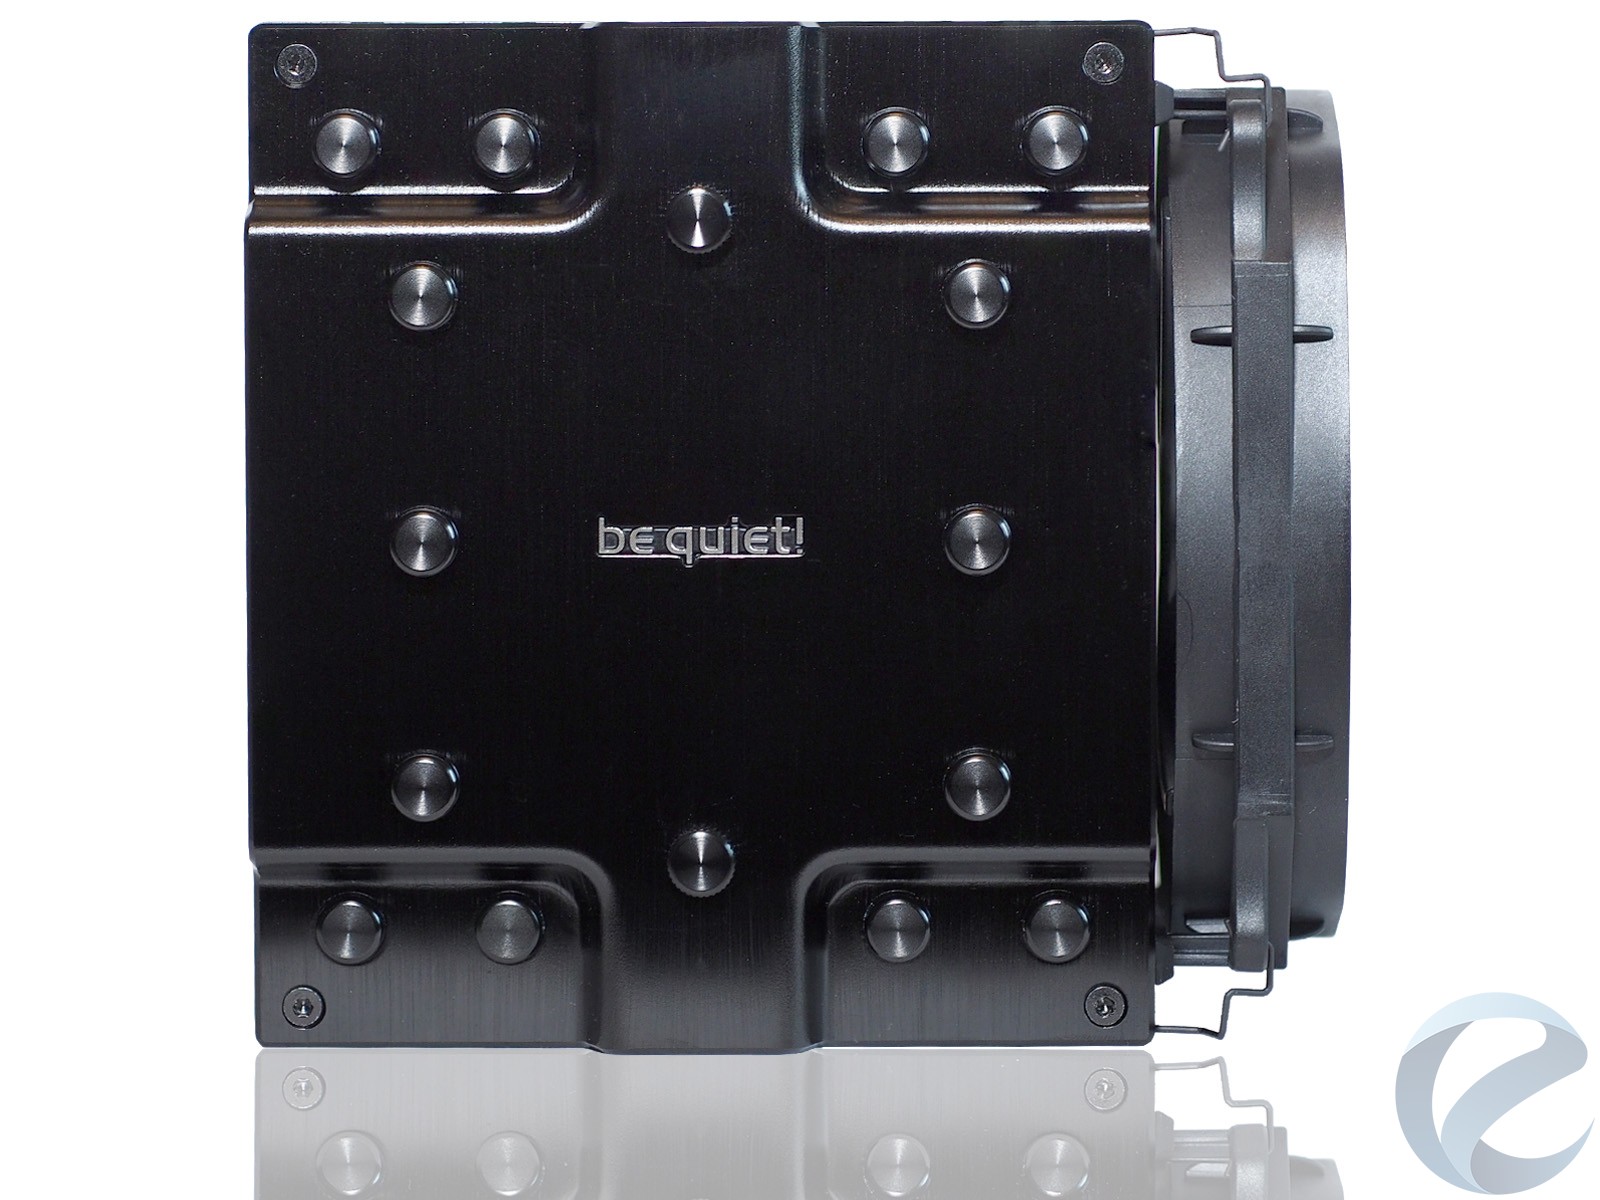
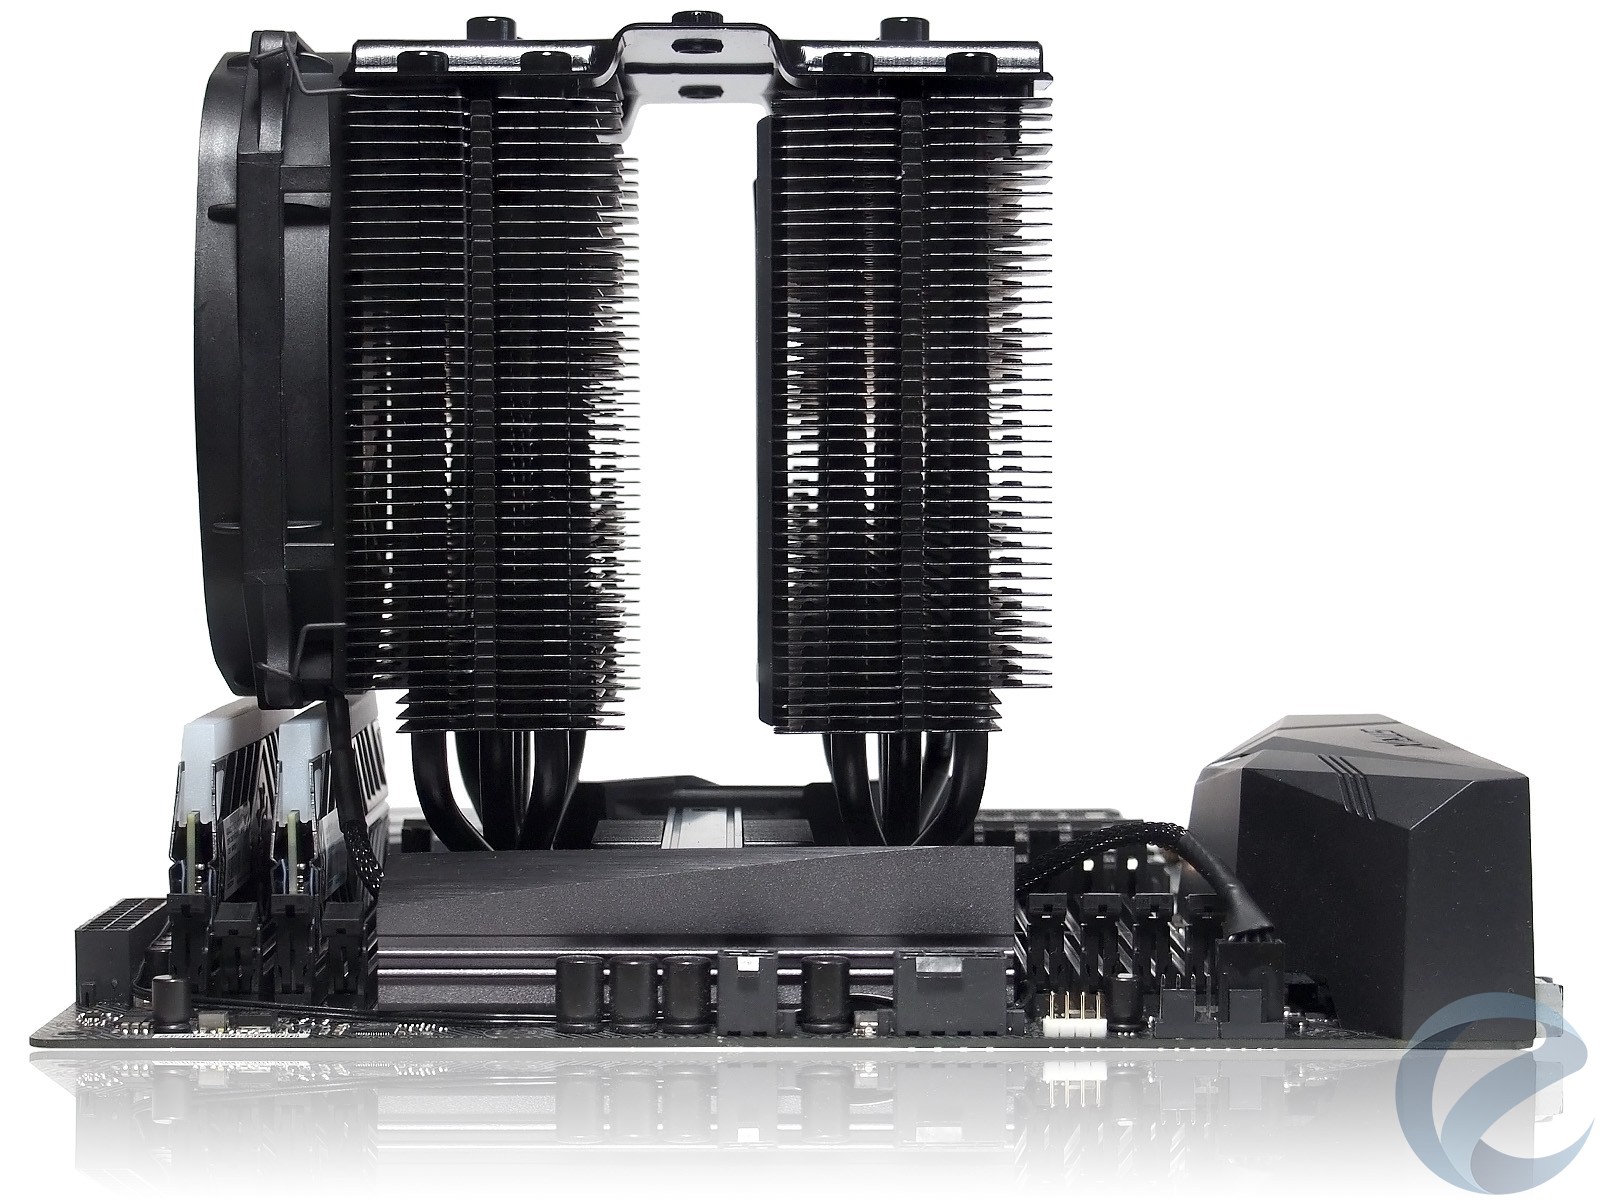
Кулер полностью оправдывает название, строгим видом черных пластин сложной геометрии напоминая скалу из сланца. Качество покраски — премиального уровня. Используется индивидуальное нанесение слоя краски на каждый элемент еще до сборки, а не метод поверхностной покраски уже готовой конструкции. Учитывая высокий заявленный уровень TDP (до 250 Вт), неудивительно, что кулер в целом массивен. Конструкция башенного типа в высоту достигает 162,8 мм, ширину -136 мм, глубину — 145,7 мм.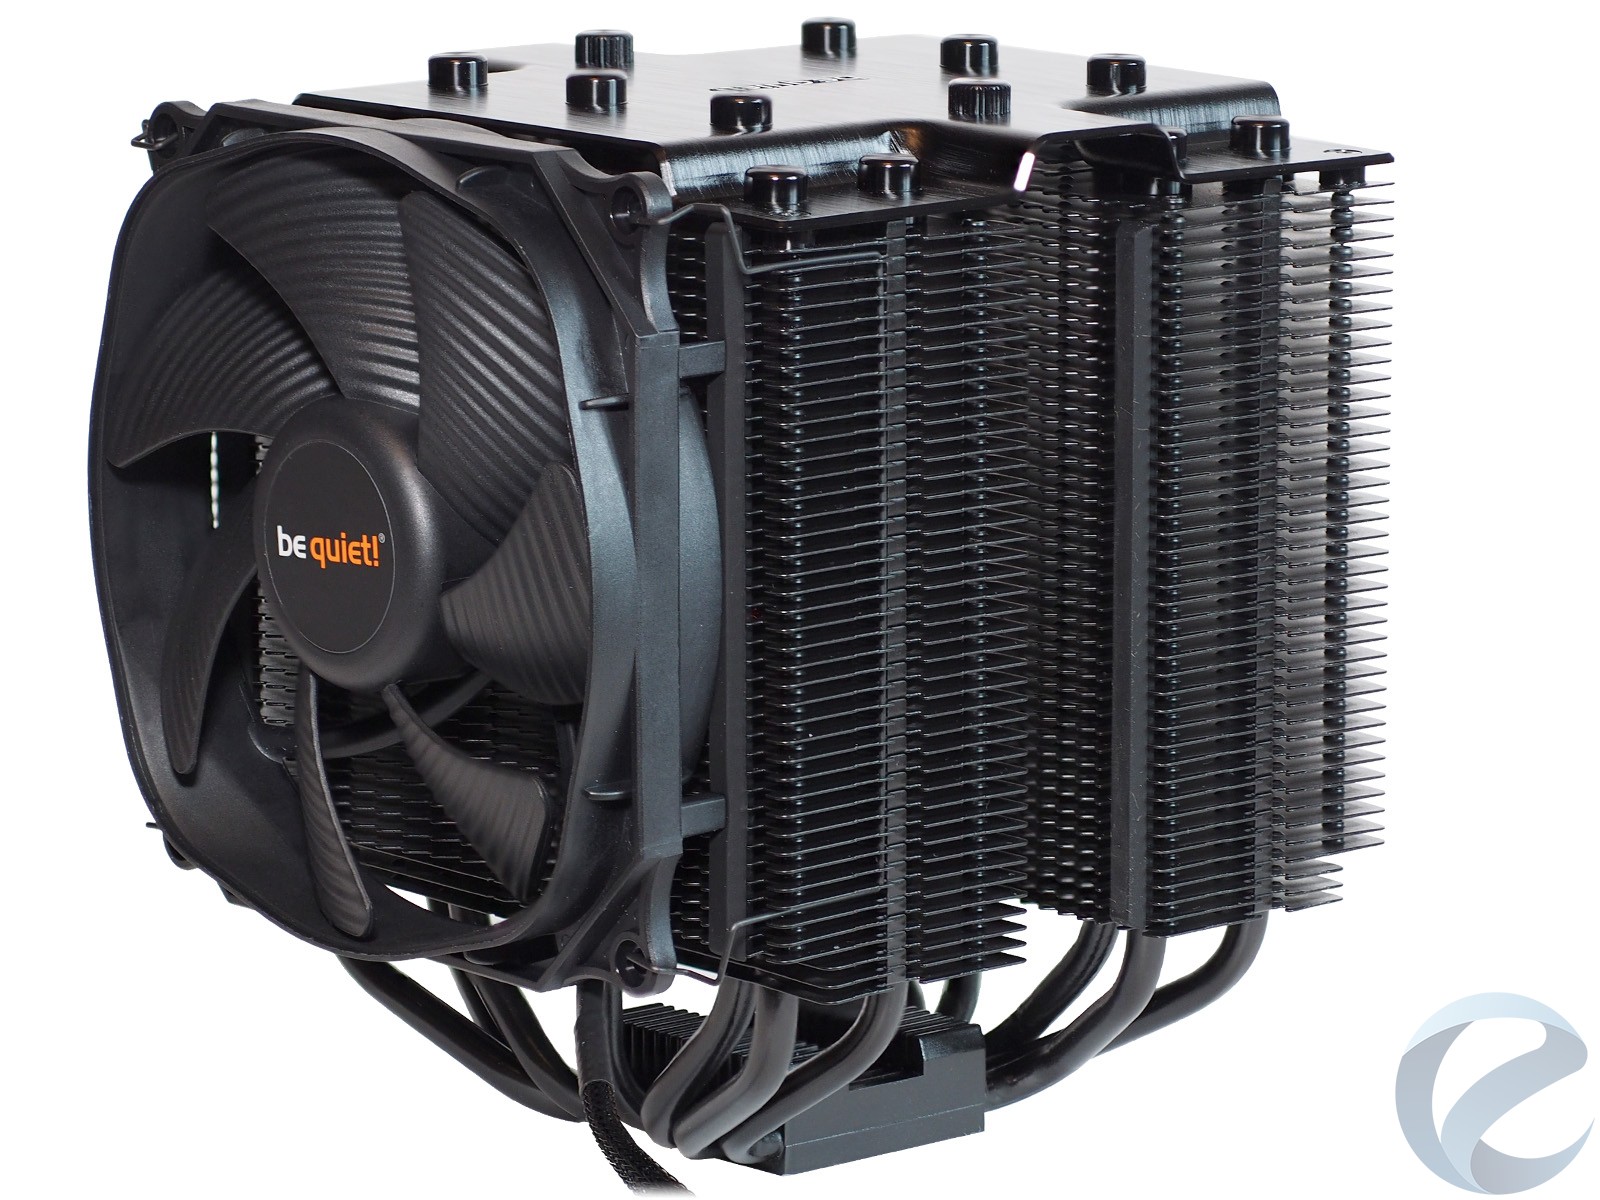
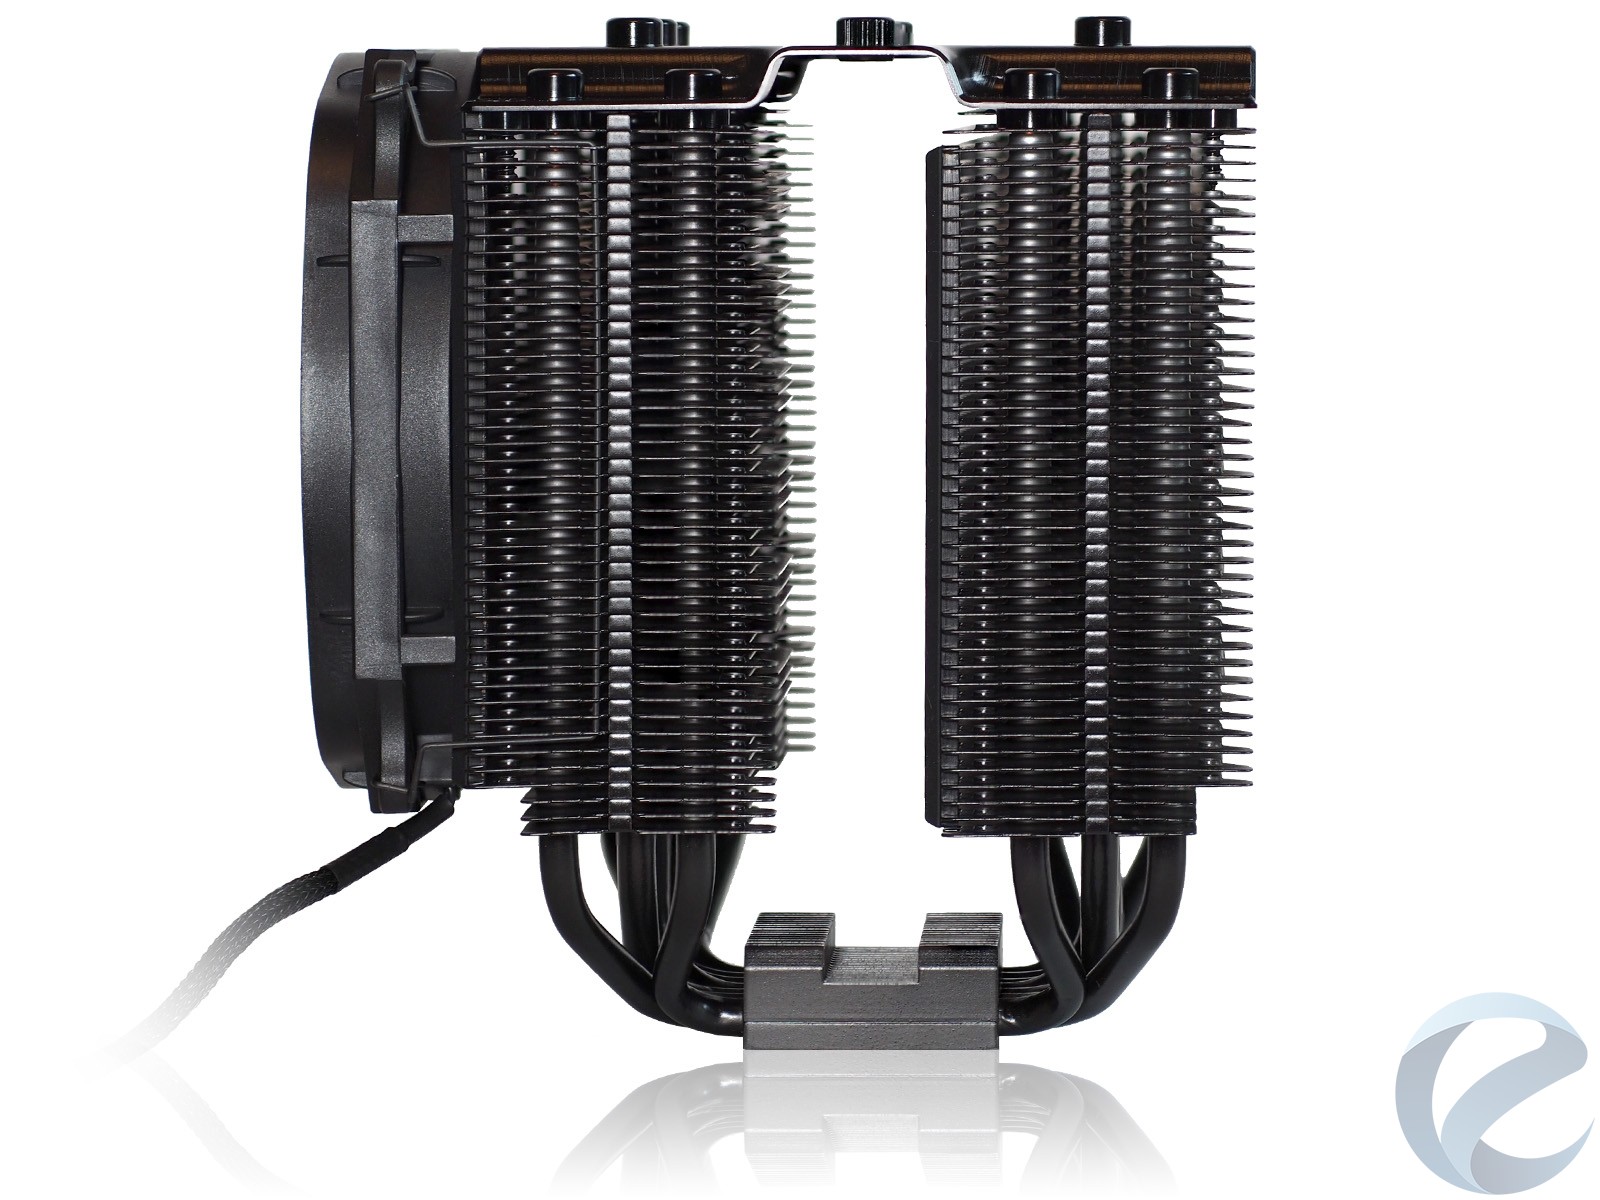
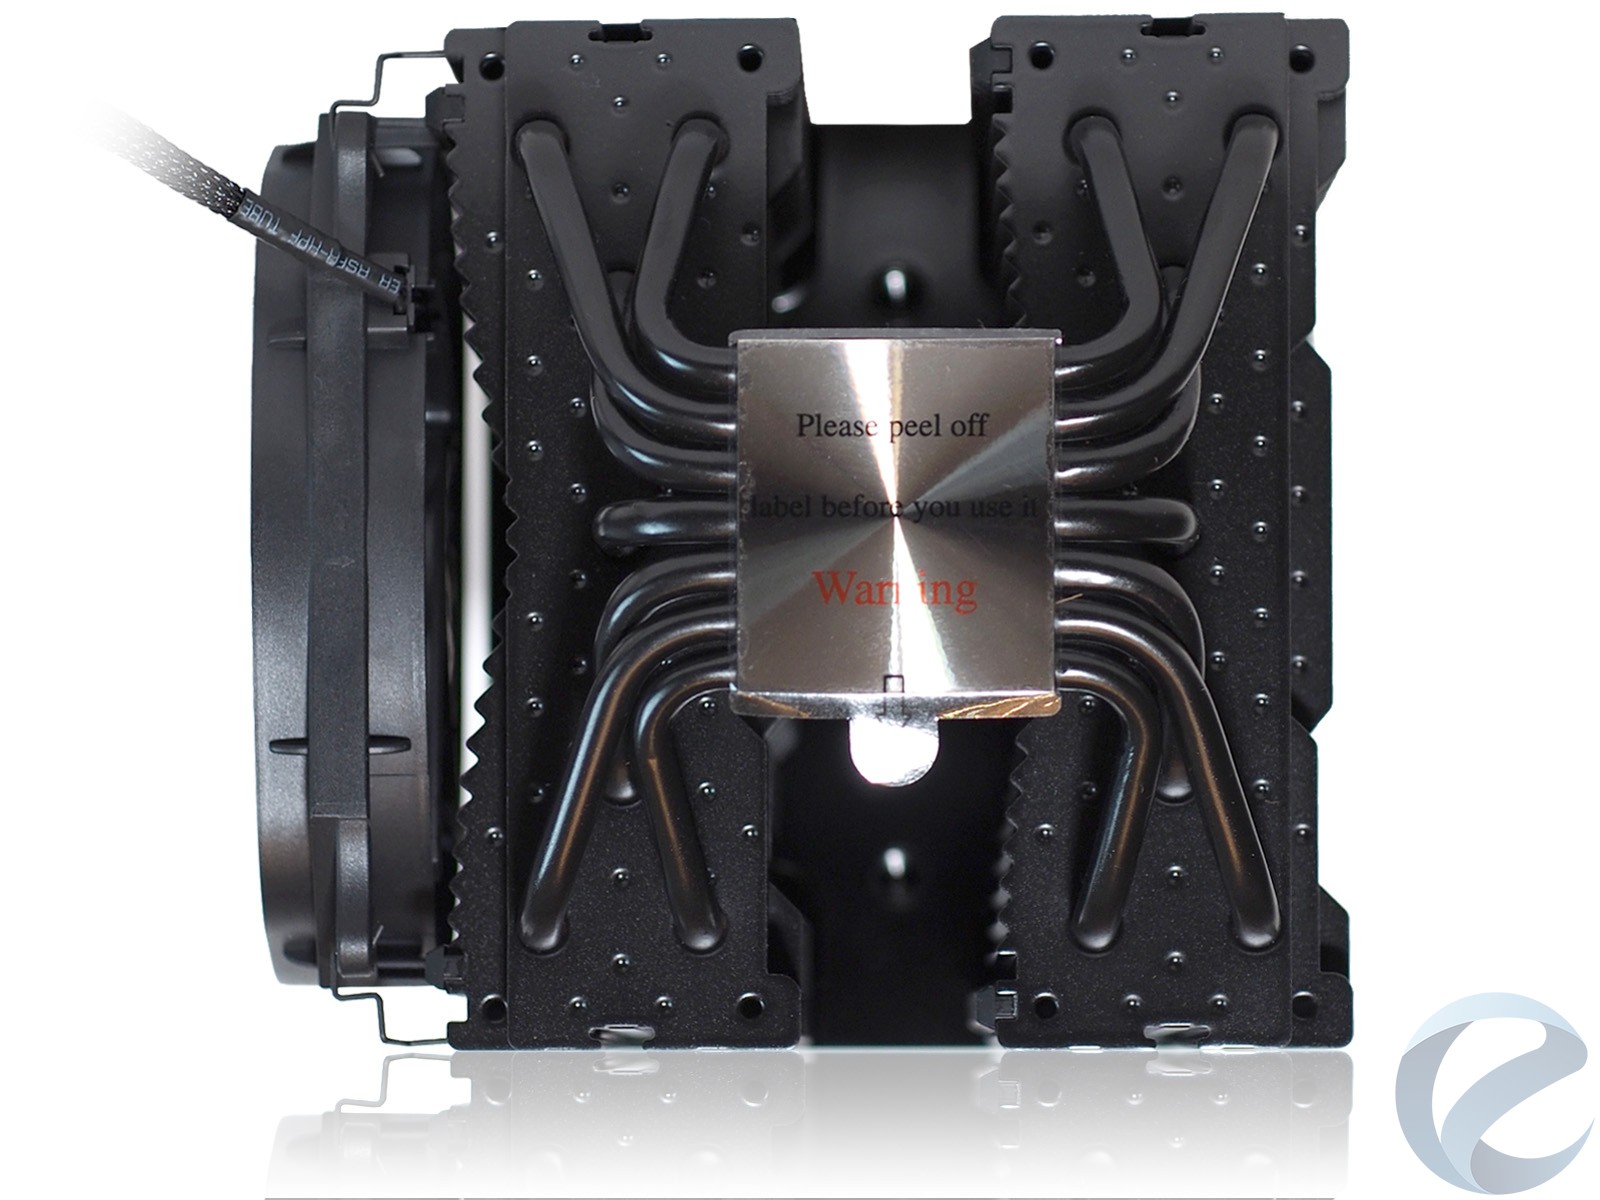
Алюминиевый радиатор набран из двух секций по 45 пластин толщиной 0,5 мм каждая. Межреберное расстояние — 2 мм. Необычная геометрия пластин — уникальная разработка be quiet! Кроме оптимизированных волнообразных выступов, снижающих сопротивление выходящим потокам воздуха и шум, каждая пластина усеяна точечными выступами, создающими правильные завихрения для лучшего обдува поверхности радиатора.
Комплектный 120-мм вентилятор уже установлен на одной из сторон радиатора с помощью металлических клипс. Второй135-ммвентилятор при необходимости устанавливается между блоками пластин в центральную часть радиатора. Для этой операции используются две клипсы из комплекта. Еще одна пара остается на случай опциональной установки третьего вентилятора (не идет в комплекте). Металлические клипсы очень жестко защелкиваются на специальных выступах радиатора, после чегоснять вентилятор для профилактики или замены непросто. Приходится их поддевать чем-то типа плоской отвертки, неизбежно оставляя задиры на черной краске. В местах планируемой установки вентиляторов по краям приклеены тонкие резиновые виброгасящие демпферы на всю высоту конструкции.
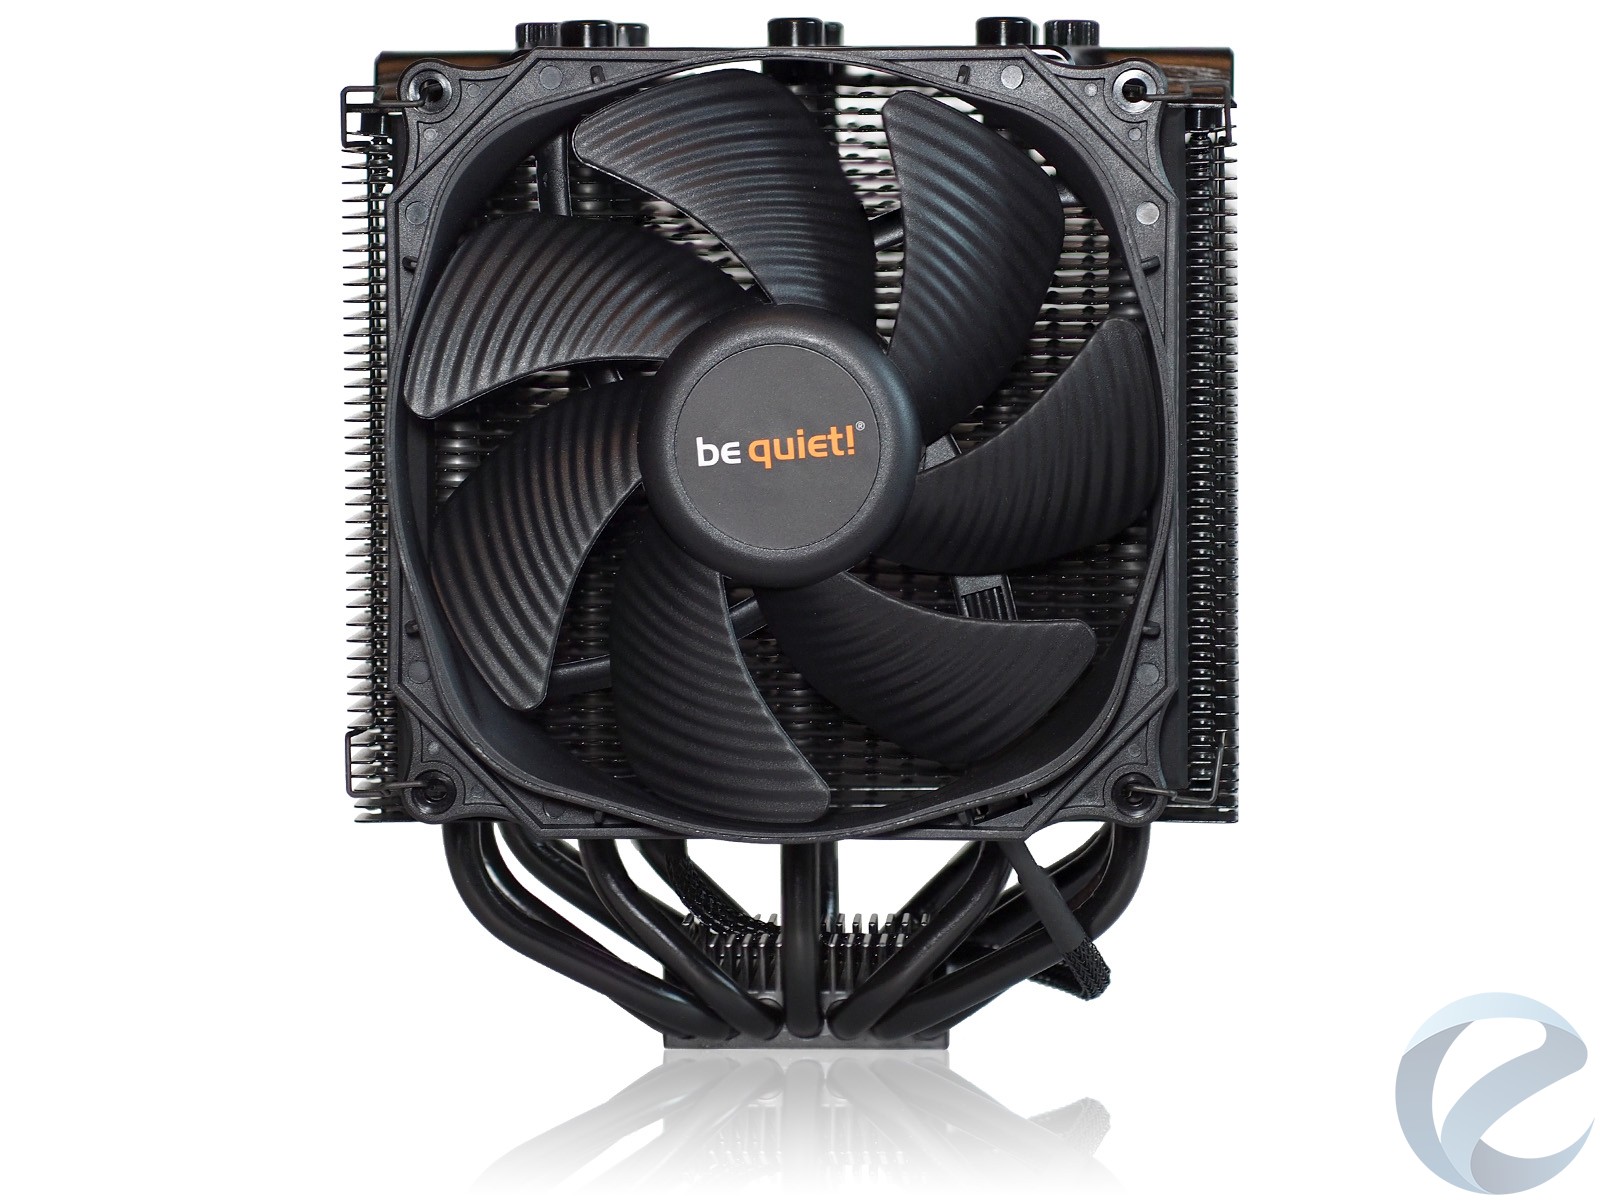
Верхняя часть кулера накрыта металлической крышкой, фиксирующей концы семи медных тепловых трубок диаметром 6 мм каждая. Они имеют U-образную форму и равномерно пронизывают обе секции пластин радиатора. В основании трубки запрессованы в теплосъемную никелированную медную площадку с легким оребрением и крепежной канавкой сверху.
Снизу также хорошо виден разный профиль пластин на входе потока воздуха от вентилятора и в зоне выброса горячих потоков наружу.
Эстетике внешнего вида уделено много внимания. Даже кончики трубок в верхней части закрыты декоративными металлическими колпачками. Двое из них выкручиваются. Под ними нет трубок, а находятся отверстия для доступа удлиненной отвертки к винтам крепления в основании кулера.
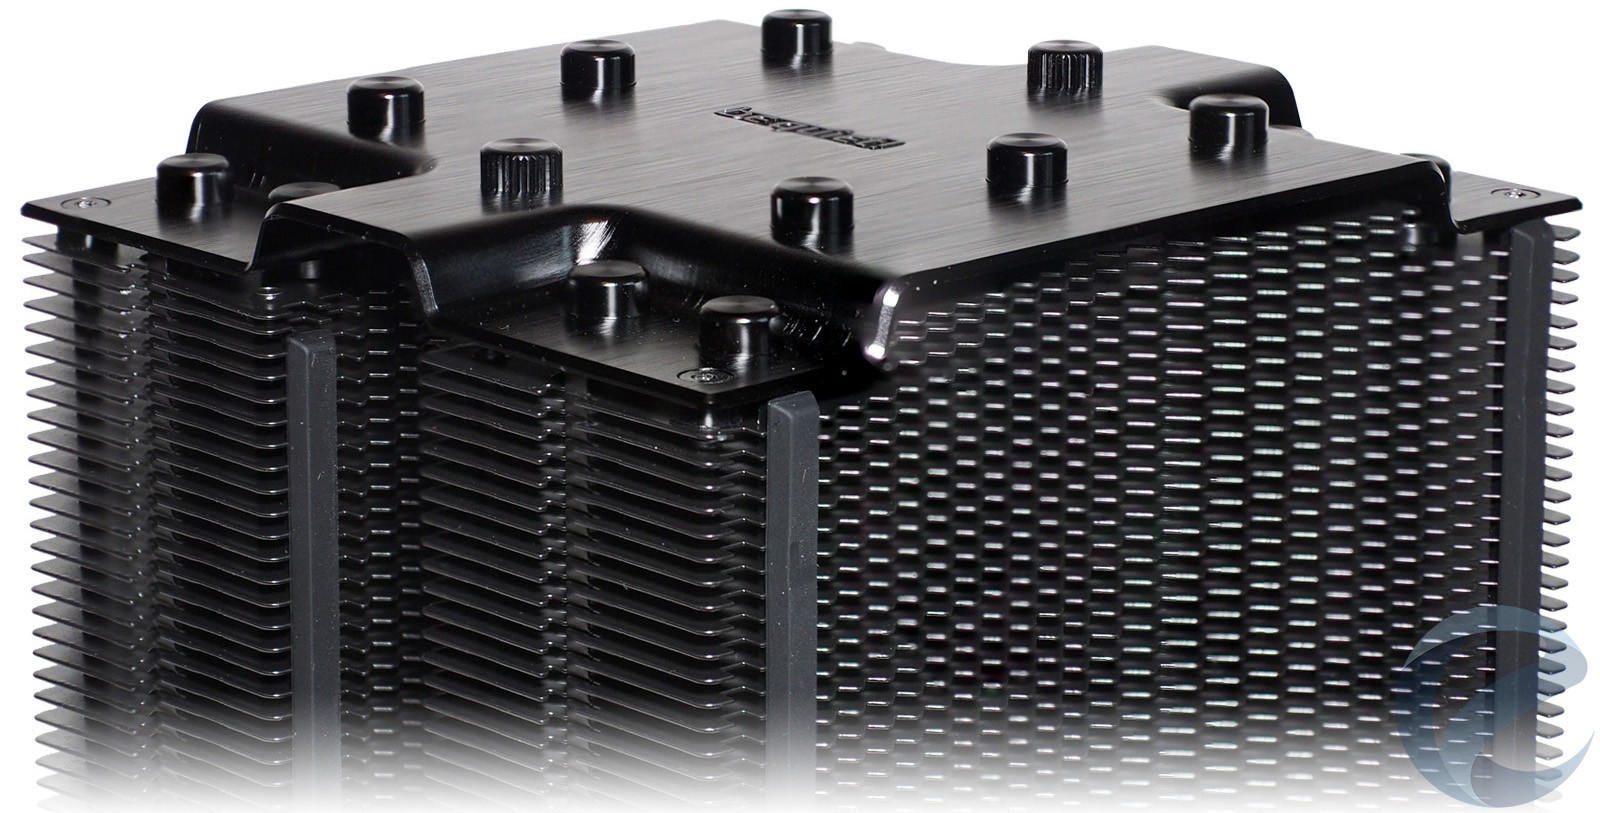
Подошва кулераразмером 40 х 45 ммхорошо выровнена, с едва заметным скосом по самому краю. На ней заметны следы фрезеровального станка, полировки до зеркального блеска нет.
Особенности установки
Набор креплений be quiet! Dark Rock Pro 4 совместим с актуальнымии сокетами двух лидеров производства центральных процессоров для домашних систем — Intel и AMD. Фасовка разных крепежей сделана в отдельные пакетики с пометками. В комплекте вложено 0,5 мг силиконовой теплопроводящей пасты серого цвета Corning TC-5121C в маленьком шприце.
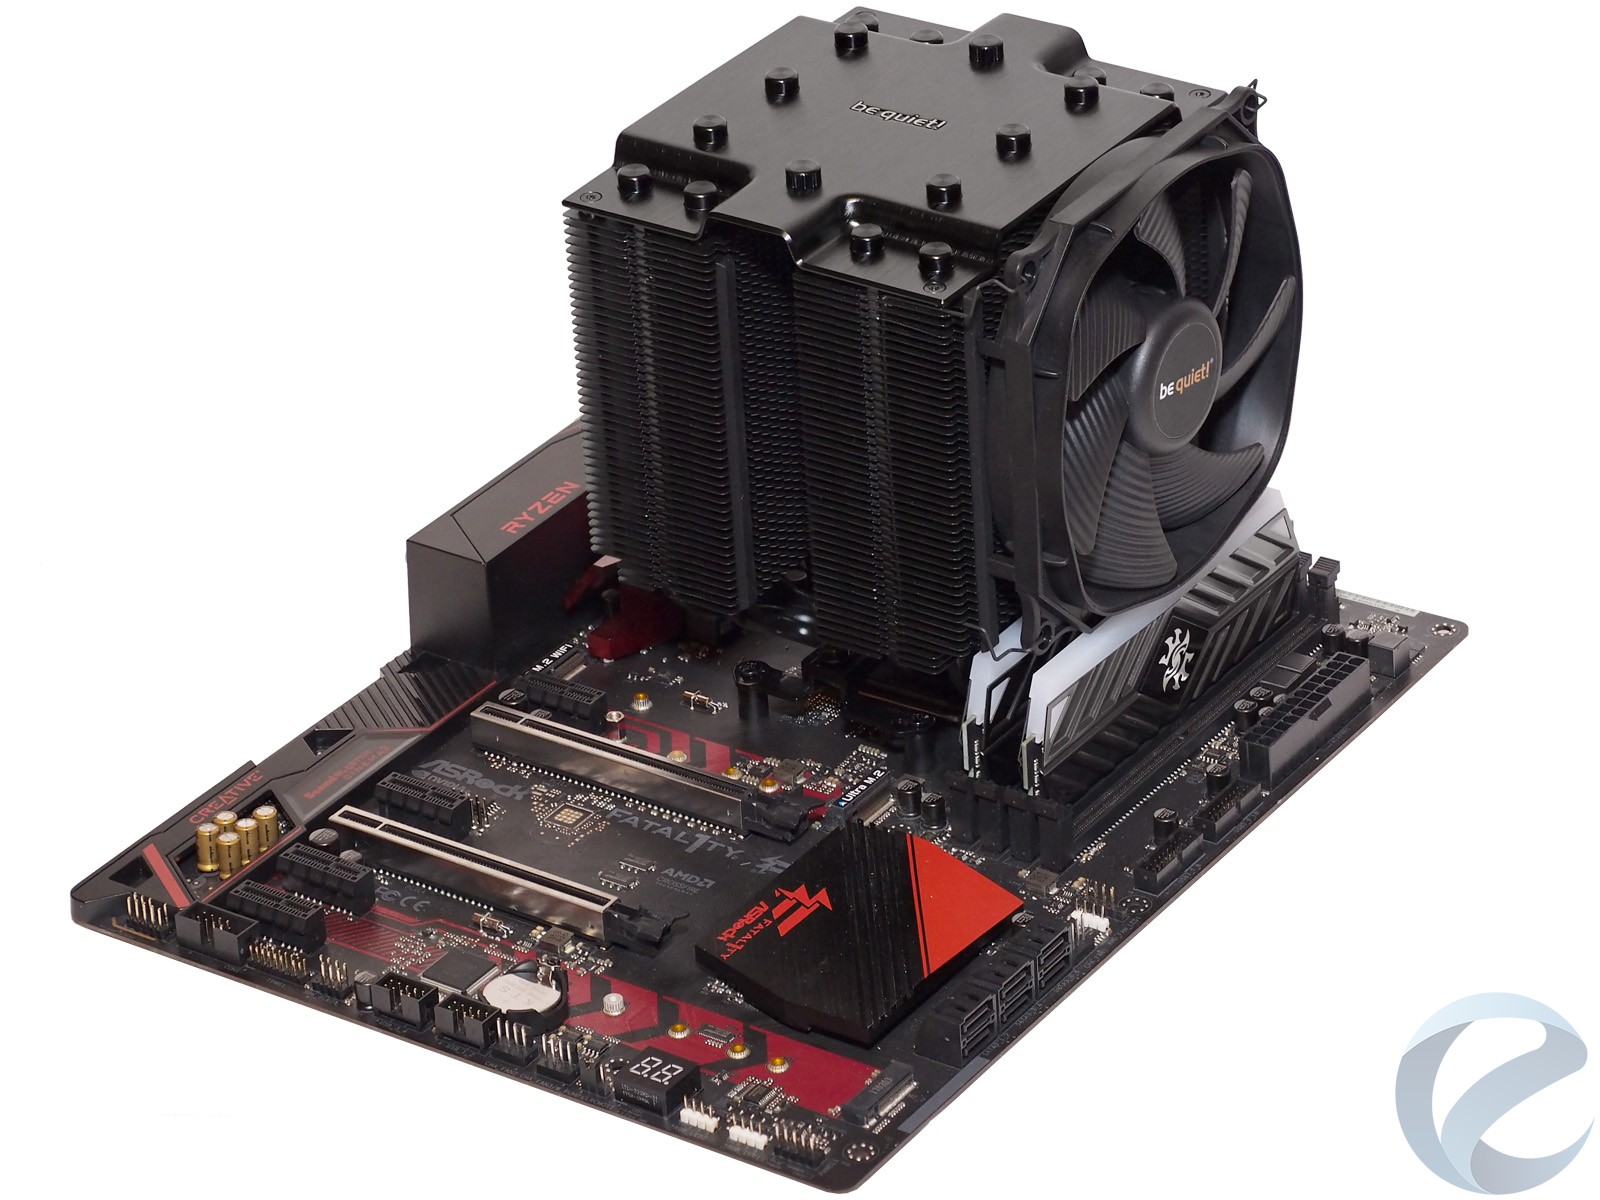
Пример установки на Socket AM4
Ограничений по установке кулера на сокеты AM4 с пластиковыми штифтами производитель не заявляет. Крепежные кронштейны кулера ставятся на комплектную заднюю пластину материнской платы, с которой демонтированы пластиковые фиксаторы крепежного модуля AMD.
С помощью четырех распорных гаек из комплекта кулера и длинных винтов прикручиваются короткие AMD-кронштейны, образующие посадочное место для кулера. Установка на AM3 сокет отличается только необходимостью подложить под распорные гайки дополнительные пластиковые шайбы.


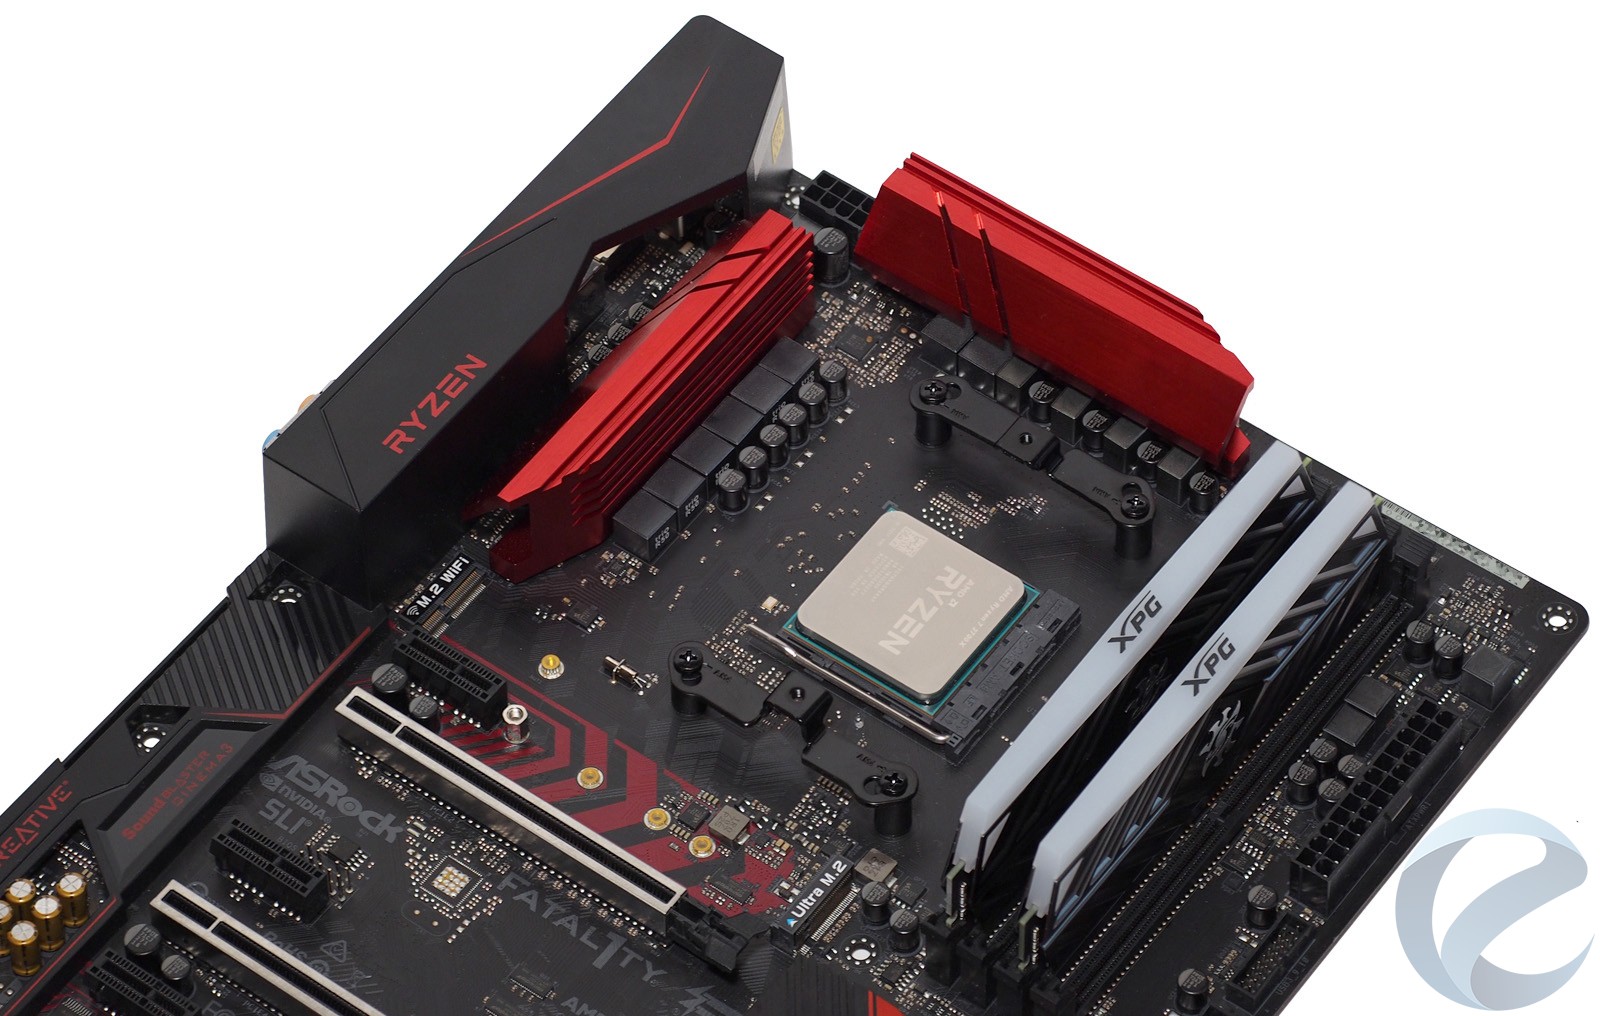
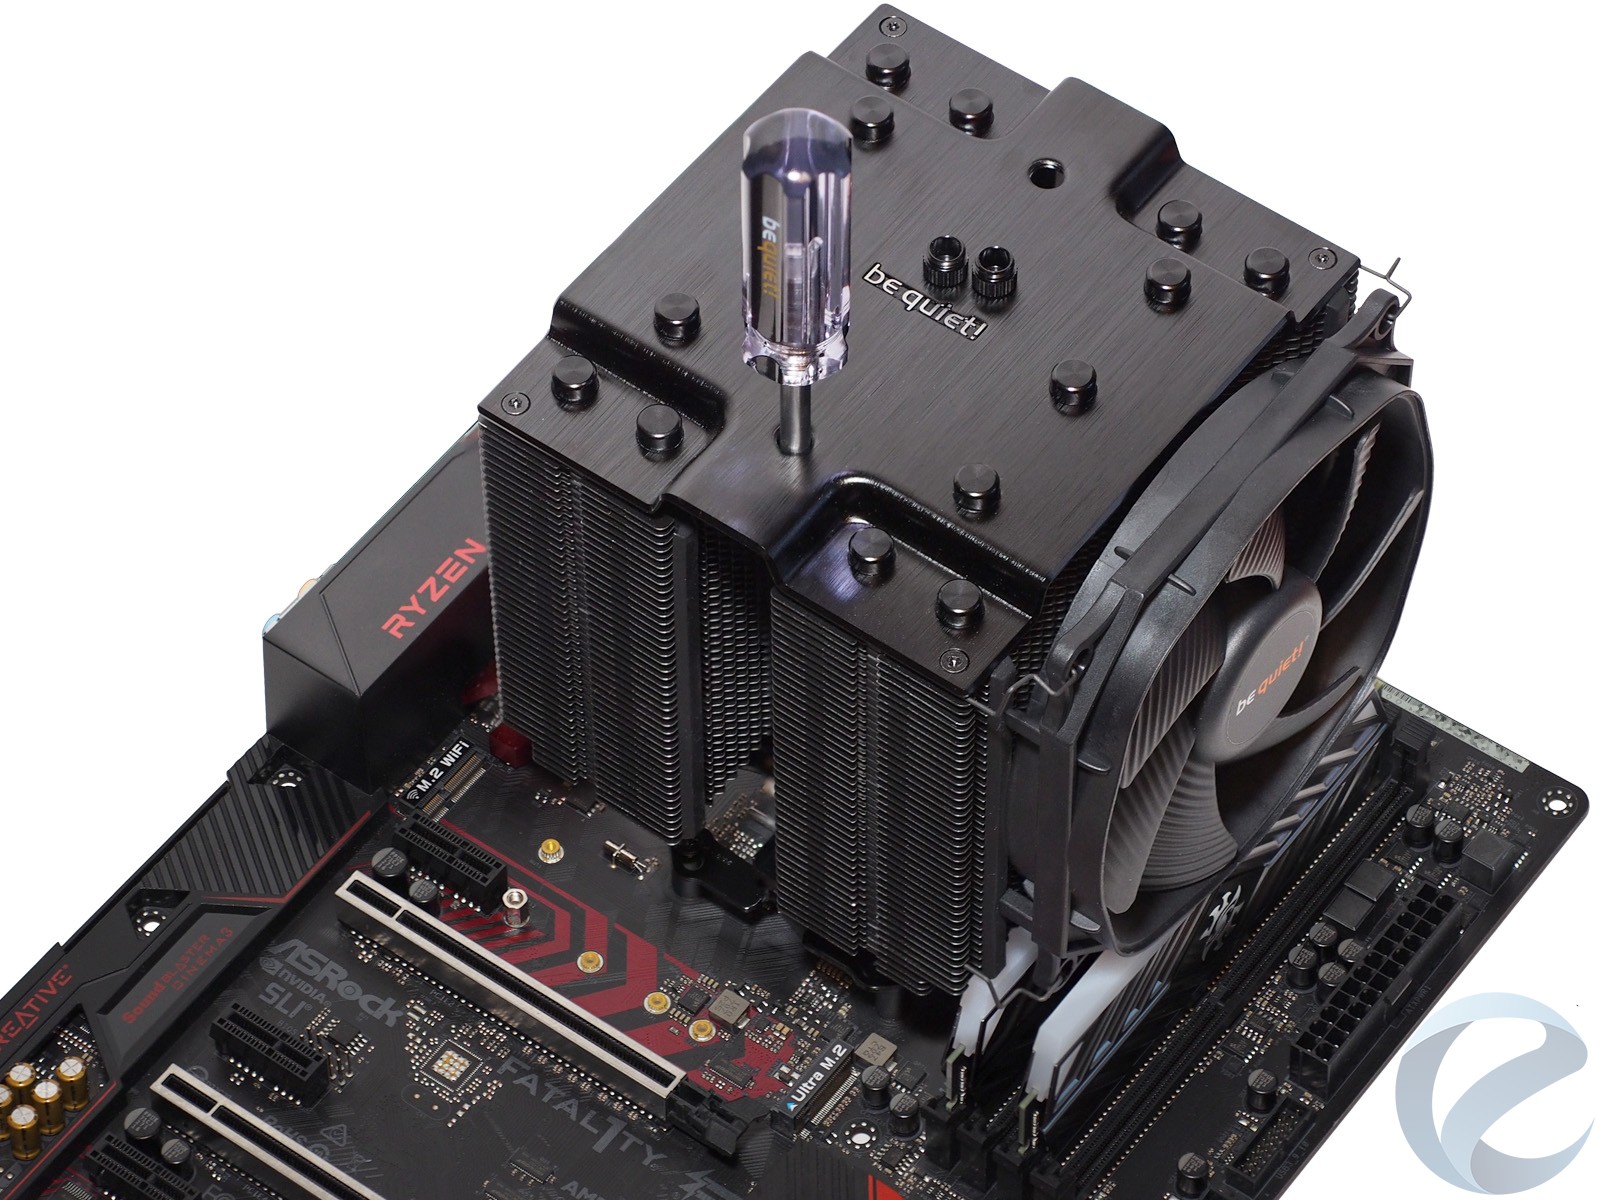
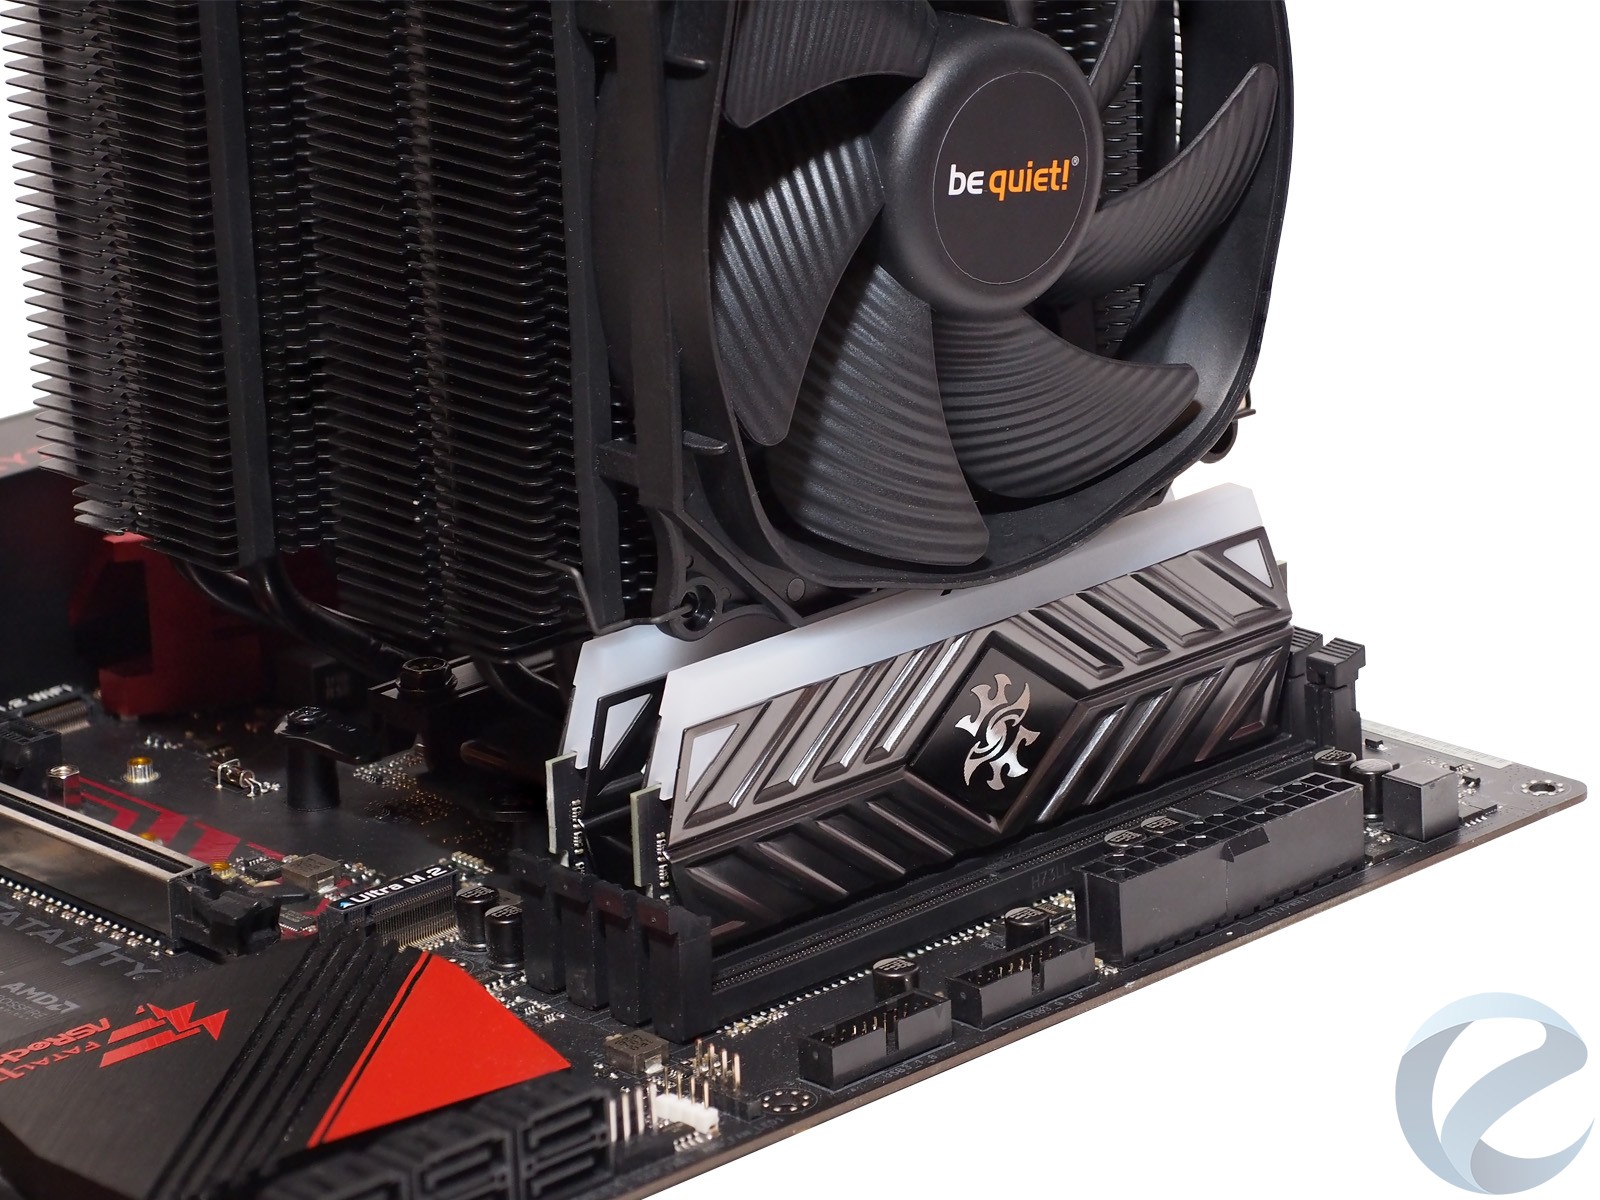
Кулер накрывает собой разъемы памяти, но в большинстве случаев останется совместим с высокими радиаторами модулей оперативной памяти.
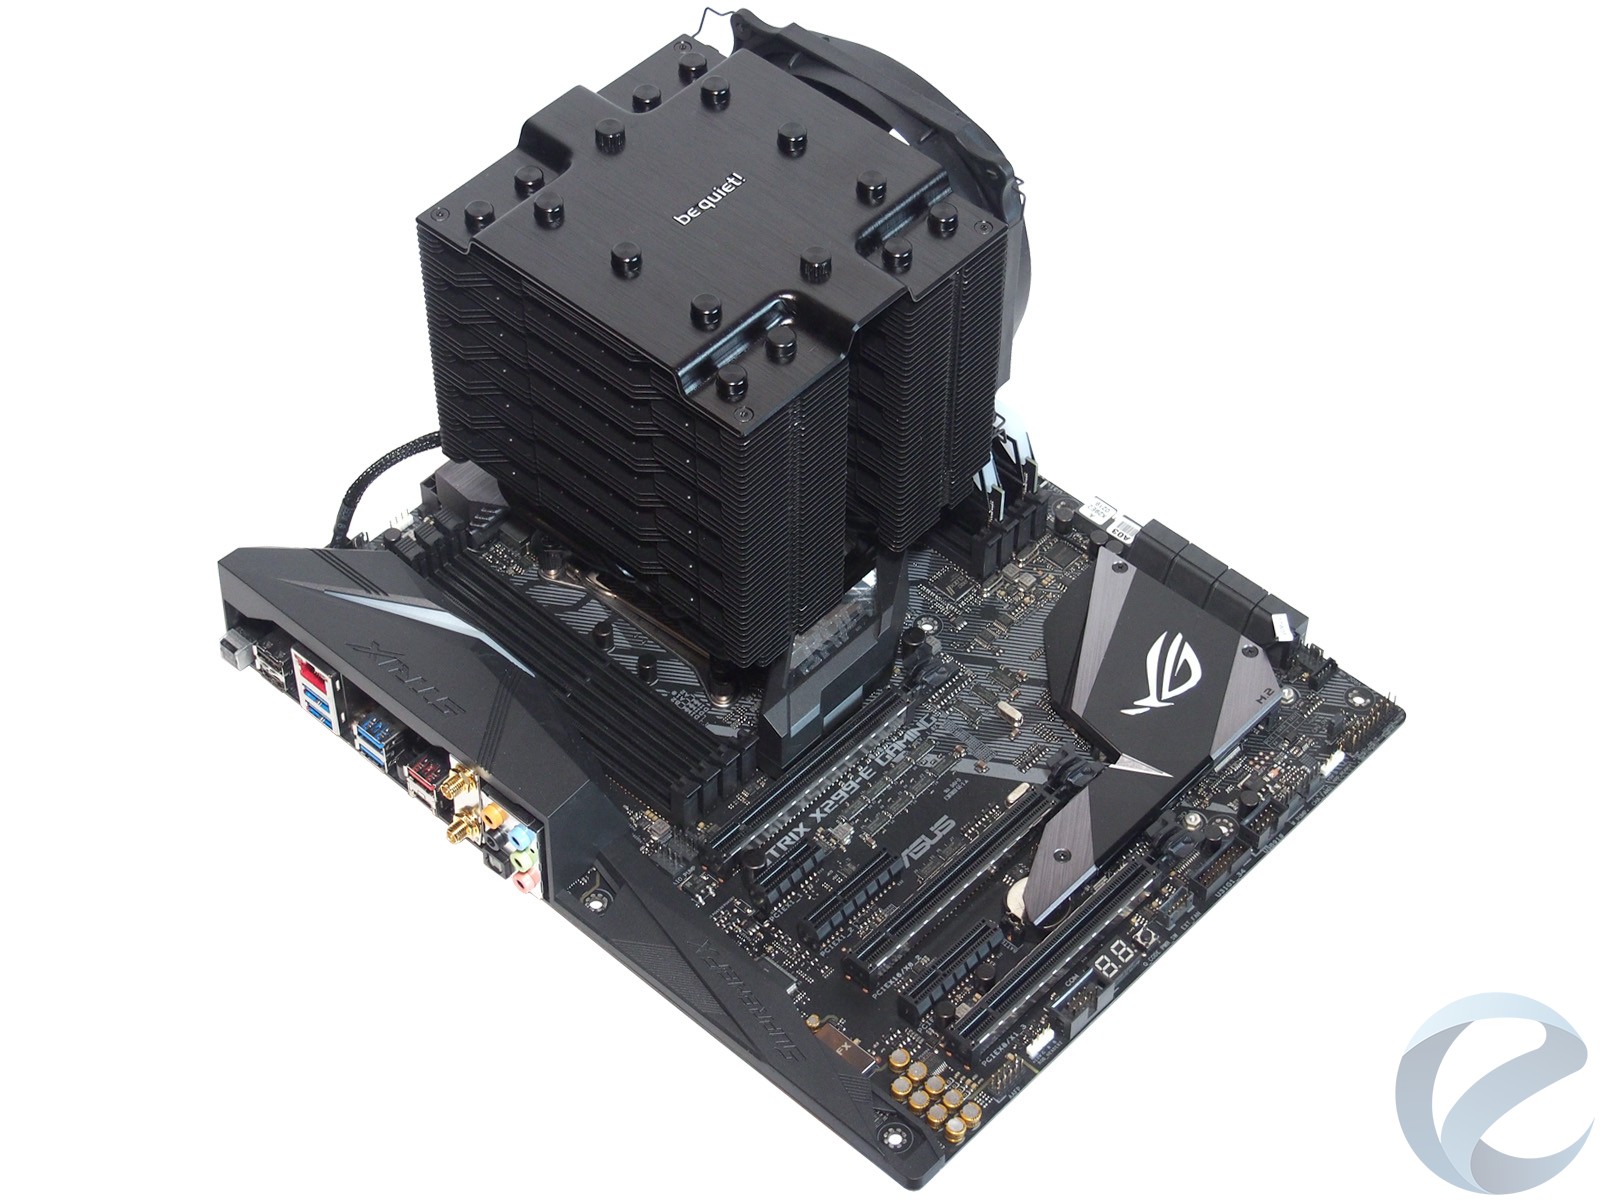
Пример установки на Socket LGA 2066
Установка на сокет LGA 2066 еще проще. Используются штатные места для крепежных винтов.
Сначала вкручиваются крепежные гайки Intel на резьбу рамки сокета, затем к ним винтами притягиваются кронштейны.
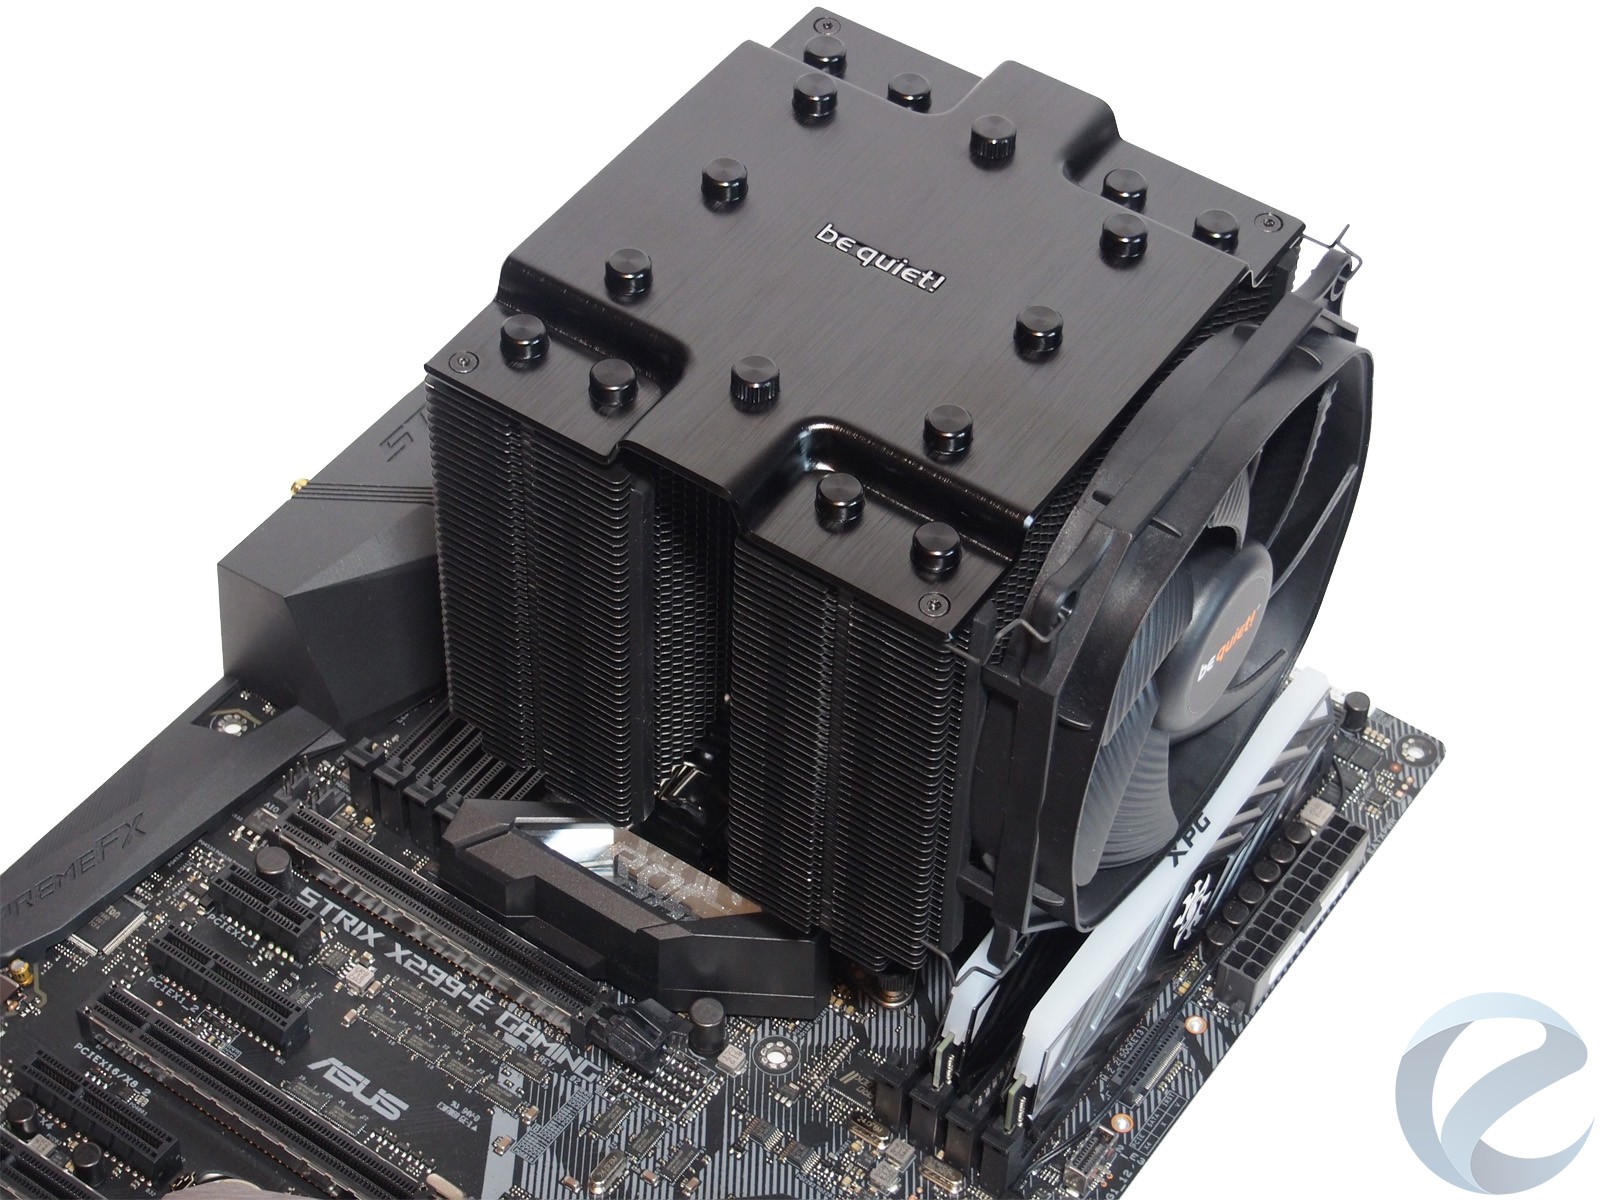
За счет усеченных нижних пластин, из которых набран радиатор, и возможности закрепить вентилятор повыше обеспечивается неплохая совместимость с высокими модулями памяти. Проблем не должно быть даже на платах с четырьмя каналами и размещением слотов по обе стороны от сокета процессора.
Тестирование
Конфигурация тестовых платформ
Стенд № 1 Стенд №2 Центральный процессор AMD Ryzen 7 2700X Intel Core i7-7740X (инженерный образец) Материнская плата ASRock Fatal1ty X370 Gaming K4 (BIOS: 4.70) ASUS STRIX X299-E (BIOS: 1301) Оперативная память 2 х 8 ГБ ADATA XPG Spectrix D41 (в режиме DDR4-2666 МГц) 2 х 8 ГБ ADATA XPG Spectrix D41 (в режиме DDR4-2666 МГц) Видеоадаптер ASUS GeForce GT 740 4 ГБ ASUS GeForce GT 740 4 ГБ Блок питания Corsair CS550M (550 Вт) Corsair CS550M (550 Вт) Операционная система Windows 10 Professional x64 версии 1803 Windows 10 Professional x64 версии 1803
Скорость вентилятора
С помощью программы ASUS Fan Xpert 4 были получены скоростные диаграммы комплектных вентиляторов.
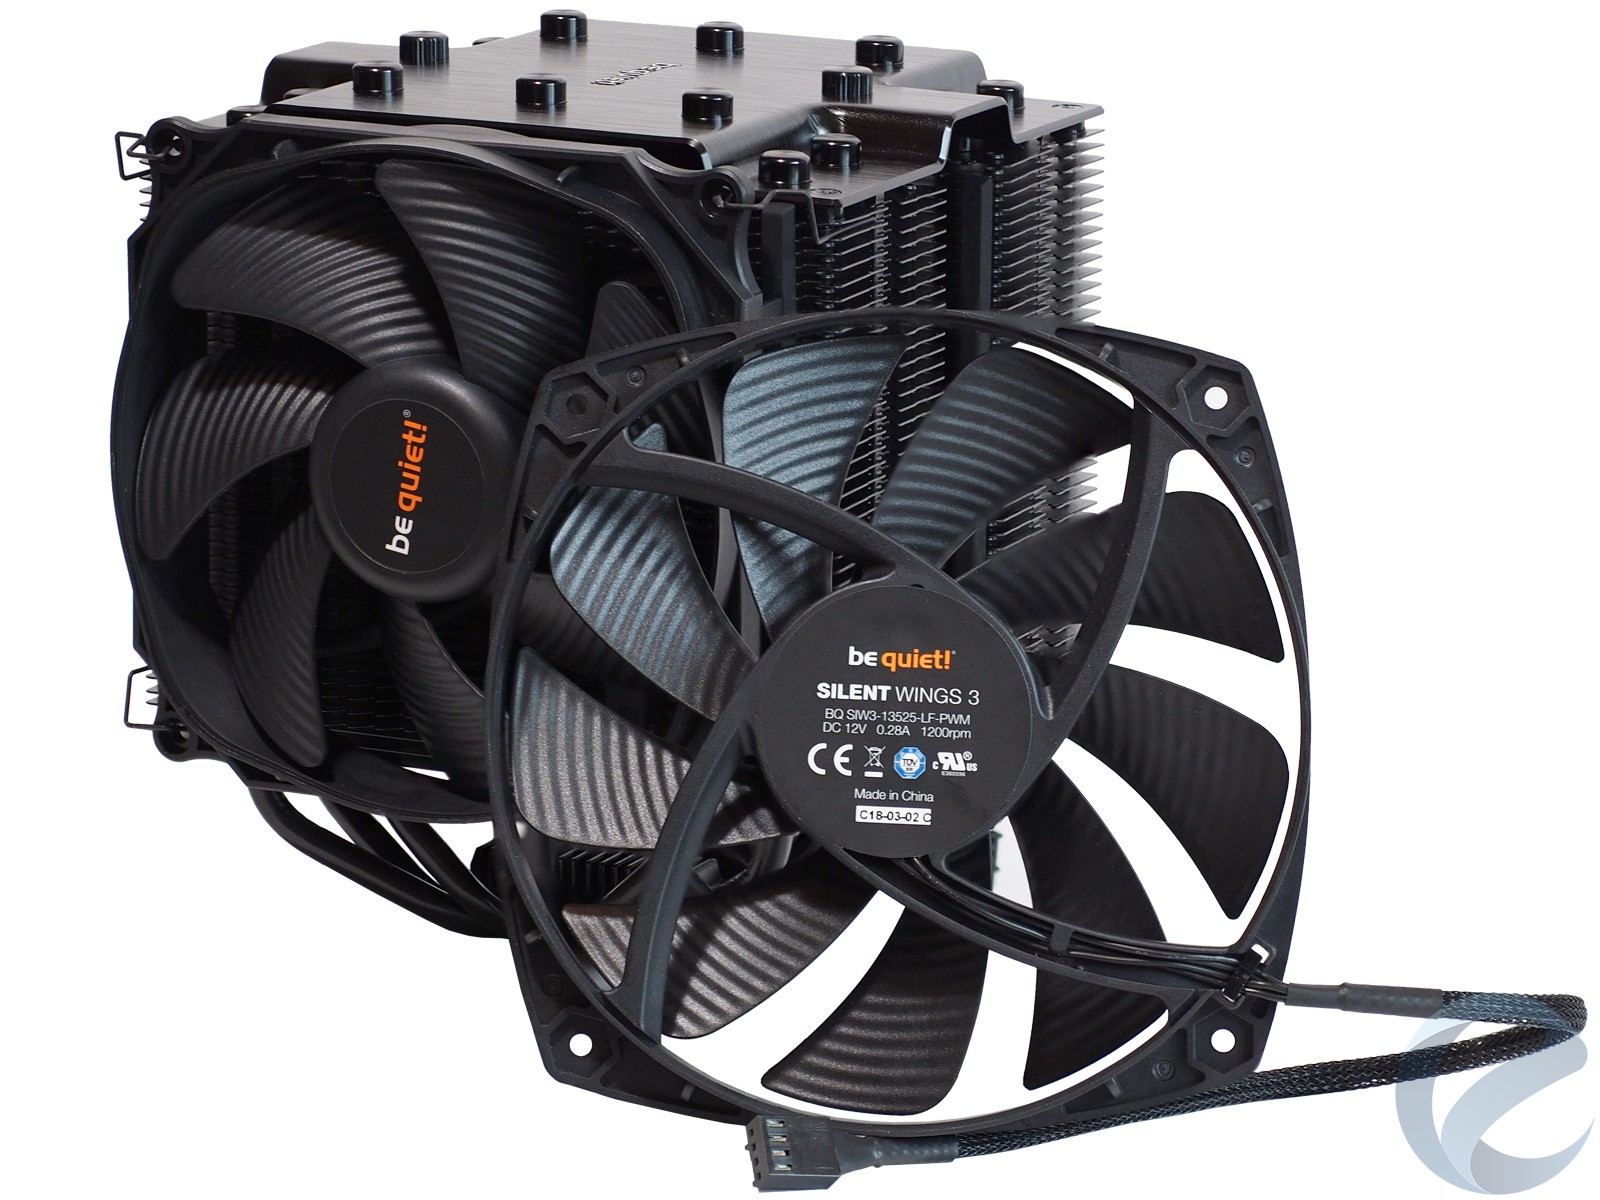
be quiet! Silent Wings 3 BQ SIW3-13525-LF-PWM выполнен в размере 135 х 135 х 22 мм. В его характеристиках указана максимальная скорость вращения 1200 оборотов в минуту, напряжение питания — 12 В, ток потребления — до 0,28 А.
У be quiet! Silent Wings 3 BQ SIW3-12025-LF-PWM размер 120 х 120 х 25 мм, максимальная скорость вращения крыльчатки — 1200 оборотов в минуту при напряжении питания 12 В и токе 0,12 А.
Оба вентилятора на гидродинамическом подшипнике и очень тихо работают. На фоне воздушного охлаждения блока питания, видеокарты и звука работы шпинделя жесткого диска едва заметны на слух они становятся только на максимальных оборотах.

Оценка основания
Отпечатки термопасты от крышек процессоров AMD Ryzen 7 2700X (слева) и Intel Core i7-7740X (справа) получились хорошие, площадь соприкосновения без явных проблемных зон с максимумом прижима в центре.
Тестирование под нагрузкой
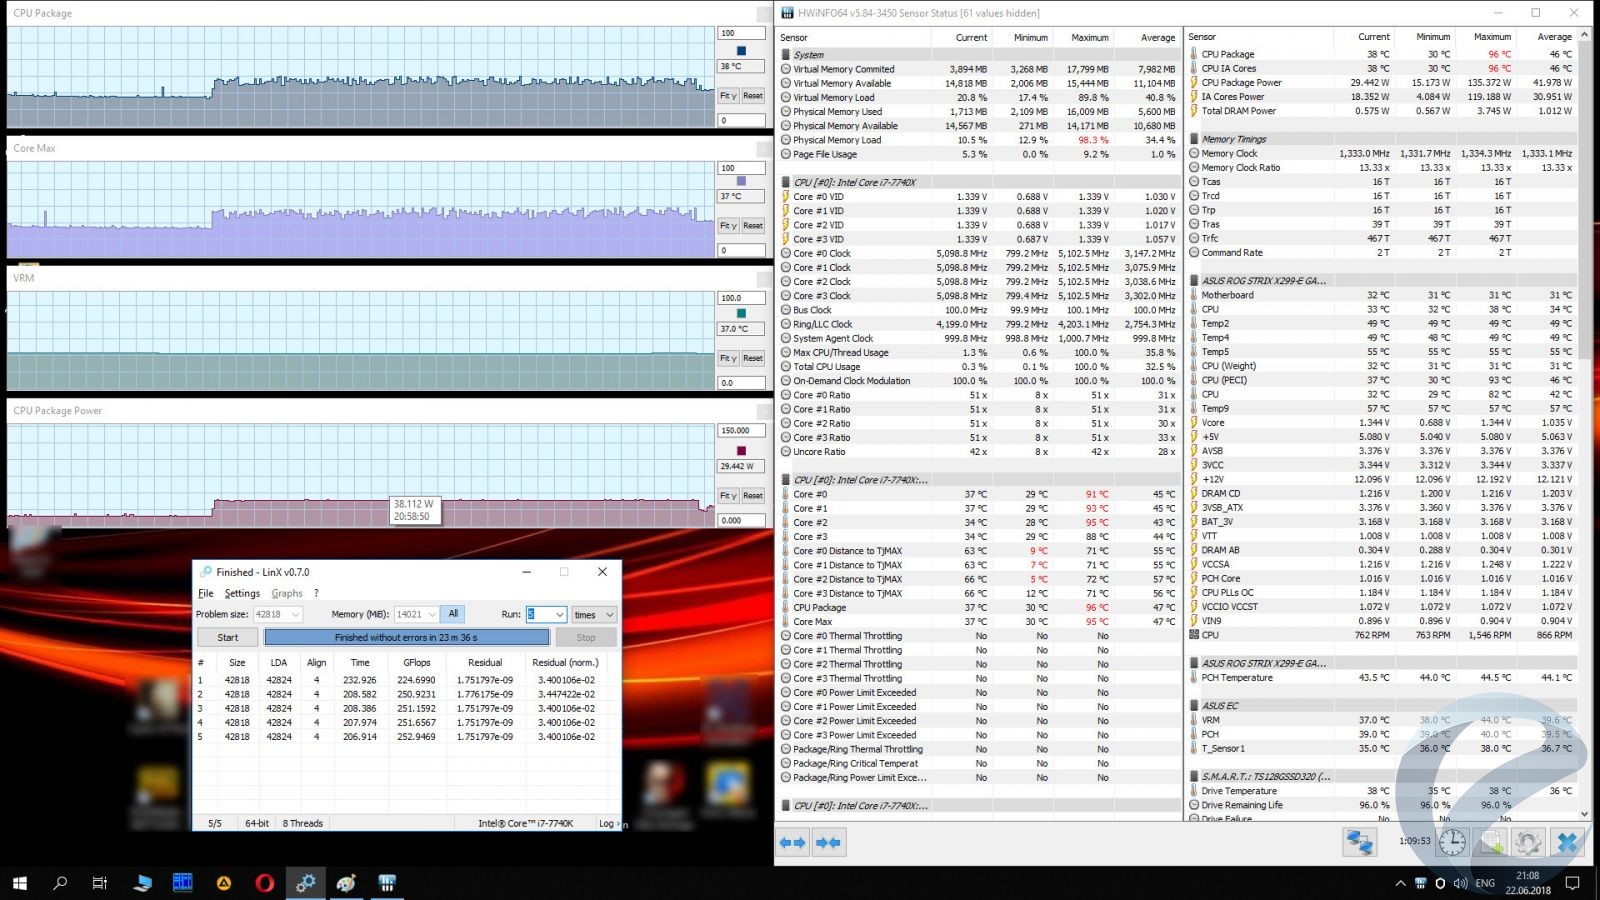
Эффективность охлаждения проверялась путем нагрузки на процессоры с помощью утилиты LinX версии 0.7.0 (для i7-7740X) и 0.7.0а (для Ryzen 7 2700X), запускаемой с параметрами Problem Size = 43829 и Memory = 14690 (вся доступная из 16 ГБ). Мониторинг температуры и энергопотребления процессора осуществлялся по показаниям программы контроля состава и состояния оборудования HWiNFO версии 5.84. Так как кулер подразумевает возможность работы с разными вариантами установки вентиляторов, замеры были проведены в двух рекомендованных производителем вариантах: с одним вентилятором на вдув и с двумя, один из которых размещен между секциями радиатора в центре.
Полученные результаты сведены в единую диаграмму.
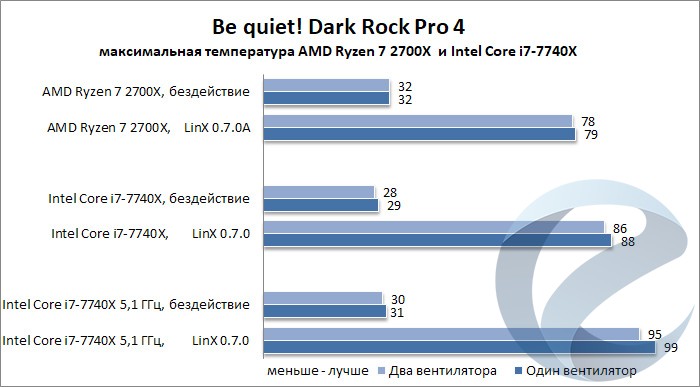
Официальное значение TDP тестовых процессоров составляет 105 Вт для AMD Ryzen 7 2700X и 112 Вт для Intel Core i7-7740X. Это с запасом укладывается в заявленный TDP кулера. В штатных режимах работы обоих процессоров Dark Rock Pro 4 закономерно спокойно справляется с охлаждением даже с одним вентилятором. При разгоне Intel Core i7-7740X до 5,1 ГГц потребность в хорошем потоке воздуха резко возрастает, и второй вентилятор позволяет избежать режима троттлинга на предельной вычислительной нагрузке и TDP процессора, достигающего 135 Вт.
Кулера хватит для большинства разогнанных процессоров.
Заключение
Постоянный тюнинг вполне успешных моделей компьютерных комплектующих собственной разработки и производства — отличительная черта компании be quiet! Благодаря анализу отзывов сообщества энтузиастов и проведению исследований в области тихой работы систем охлаждения, компании удается раз за разом создавать малошумные устройства, занимающие лидирующие позиции в топ-сегменте. Обновление be quiet! Dark Rock Pro до четвертой версии устранило мелкие придирки к прошлому поколению. Более простой монтаж измененного крепления, укороченные нижние пластины радиатора для лучшей совместимости с высокими модулями оперативной памяти и благородная покраска в черный цвет пошли на пользу кулеру. На наш взгляд, придраться можно только к неудобным клипсам вентиляторов, которые очень жесткие и тяжело снимаются, затрудняя периодическую чистку от пыли. Даже несмотря на свои крупные габариты и приличный вес, кулер обладает хорошей совместимостью с другими комплектующими и отлично подойдет для малошумных сборок на высокопроизводительных процессорах, в том числе в разгоне.
- Высокое качество исполнения;
- Совместимость с актуальными процессорными сокетами;
- Тихие комплектные вентиляторы;
- Достаточно простой монтаж;
- Неплохая совместимость с высокими модулями памяти (вырезы в нижней части радиатора);
- Отличный внешний вид.
- Неудобный механизм крепления вентиляторов (тяжело снимать);
- Кулер перекрывает модули оперативной памяти.
Источник