
Фонарик с Anduril. Полное руководство по управлению
Для многих станет сюрпризом сочетание таких слов как «интерфейс» и «фонарик». Казалось бы, что тут может быть сложного — жми на кнопку, да включай. В случае с чем-то простым типа Convoy (хотя и тут есть варианты) или Fenix так и есть. И для своего круга пользователей это однозначно удобно.
Но есть и те, кто хочет чего-то более гибкого. Намного более гибкого. И в результате таких запросов свет увидел Anduril. Помимо него есть еще и Narsil, к слову.
Если вы ищете по-настоящему яркий фонарик (этак 5-7 тысяч люмен), то велики шансы того что вы столкнетесь именно с Anduril. И фонарик с таким выхлопом и таким интерфейсом обойдется вам кардинально дешевле чем вы отдали бы за что-то с привычным простым управлением и производства кого-то из именитых брендов. Тут, по большому счету, речь идет о том, что предлагает Mateminco.
Так как руководства фонариками с таким типом управления содержат лишь англоязычный вариант. Изрядной длины портянка с целым комиксом с разномастными стрелочкам и вариантами блужданий по настройккам. Поэтому неудивительно что в комментариях к обзорам на канале меня просили помочь. И я решил свести все это к одному посту, посвящённому исключительно такой специфической, но крайне полезной для своей аудитории теме как руководство по управлению фонариком с интерфейсом Андурил.
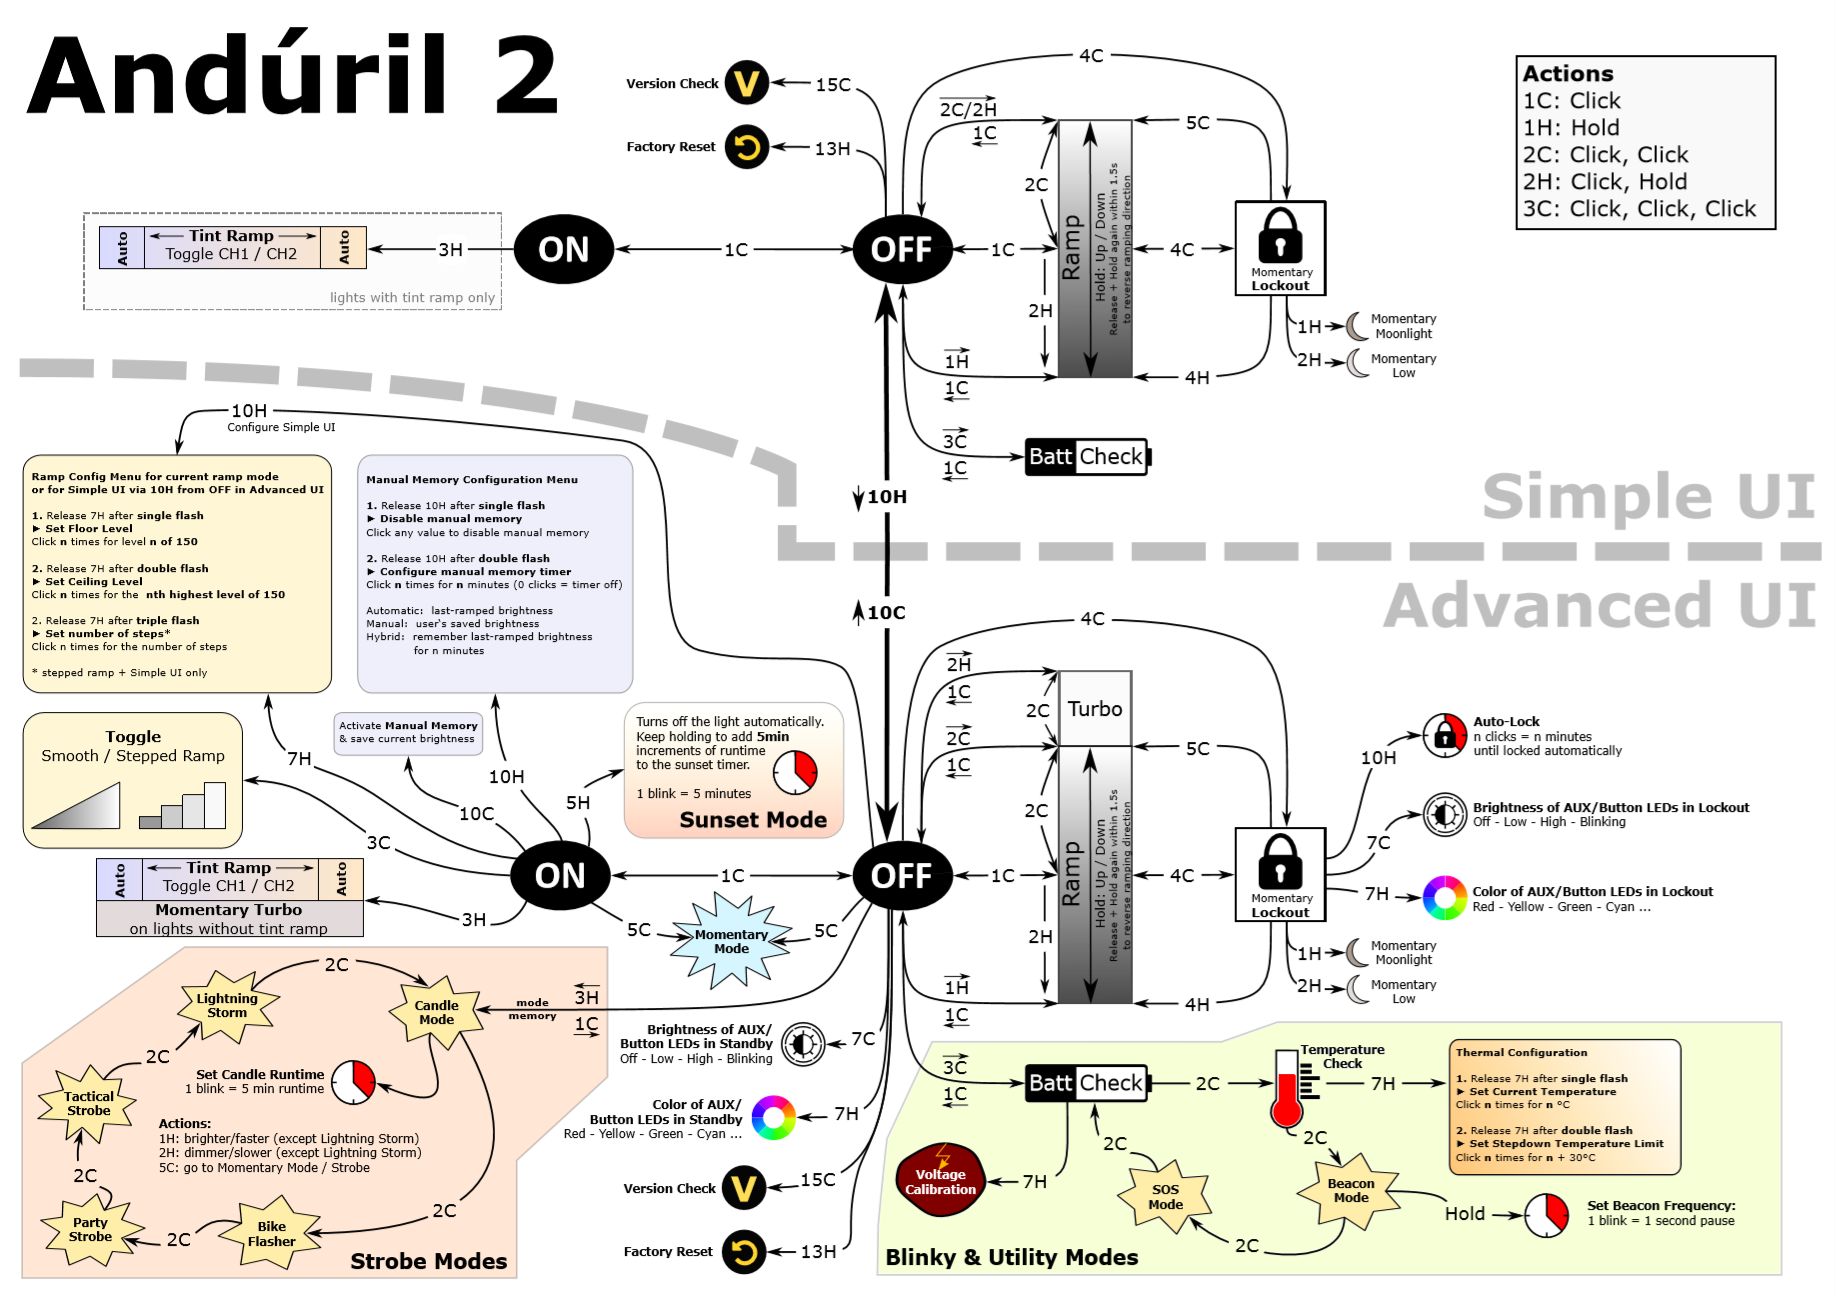
По умолчанию идет бесступенчатая регулировка яркости
из ВЫКЛ
Включение на последнем запомненном уровне. — по щелчку, выключение аналогично.
Удержание – старт на минимальной яркости и увеличения до потолка (именно потолка, не турбо). Плавное или ступенчатое, смотря в каком типе перебора яркости вы находитесь.
2 клика – потолок яркости.
Клик -удержание – потолок (если из ВЫКЛ)и уменьшение яркости
3 клика – спец режимы (проверка напряжение, маяк, температура)
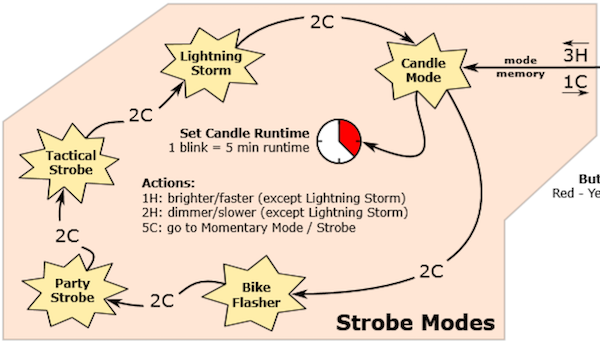
Клик-клик-удержание – режимы стробов (свеча, вело-сигнал, party-strobe, тактический строб, «вырви глаз»). Переход между ними по 2 щелчку. Запускается последний использованный режим
4 клика – блокировка\разблокировка. Тут при удержании будет запускаться минимальная яркость. Удобно.
5 кликов – моментальный режим (работает только из ступенчатой регулировки!)– запускает последний использованный в бесступенчатой регулировке уровень яркости. Чтобы выйти из него надо разомкнуть контакт хвостокрышкой. Удобно для ситуаций когда вам надо чтобы постоянно запускался только один режим на одной яркости.
6 кликов – режим Маггла. Т.е. настраиваете яркость, даете кому-то фонарик, включатся будет только в этой яркости. Ну чтобы дать тем же детям и не волноваться что ослепят друг друга. Тут он на уровне 5-240 люмен. Вполне пригодно как подножный свет или свет в помещении.
Из ВКЛ
По щелчку ВЫКЛ
Удержание – яркость вверх
Щелчок и удержание – яркость вниз
2 щелчка – турбо
3 переключение между плавной и ступенчатой сменой яркости.
4 щелчка – регулировка бесступенчатой регулировки.
Попадает в выбор минимальной яркости, N нажатий задает минимальную яркость. Т.е. 10 щелчков сделает минимальной яркостью 10 из 150 возможных.
2 щелчка чтобы попасть в настройку макс яркость по формуле 1+турбо-N. Т.е. при 1 щечке максимальная яркость будет равнятся турбо. При 20 щелчках это будет турбо-19.
Еще 2 щелчка – количество ступенек в разбросе мин-макс. По умолчанию их кажется идет 7, уже это вполне достаточно.
Из того что стоит упомянуть – тут надо калибровать датчик температуры. у меня он показывал 42 градуса вместо 25 реальных, то есть нагревался очень быстро.
Т.е. зайти в настройки температуры (3 щелчка) потом 3 раза по 2 раза — попадаем в temp chec. надо сравнить показания фонарика с внешним термометром. если вы видете 4 и 2 мигания, то есть 42 градуса, в то время как градусник показывает 26 — надо вмешаться. Вам надо сделать 4 щелчка, увидите пару мигания и бзззз. во время первого безз надо надо отщелкать реальную температуру. Вы ее отщелкаете, будет пауза и вторая пара миганий, после которой будет еще один бзззз — тут идем в настройку термоотсечки. Она работает по принципу 30С+количество щелчков. т.е. если щелкнуть 40 раз, то температуры термоотсечки будет выставлена на 70 градусов. По умолчанию она выставлена на 45 градусов, я выставил ее на 50.
Ну вот как-то так. Базово, разумеется. Еще, к примеру, можно задавать уровень потолка (напоминаю — проматывается до потолка, не до турбо), играться с частой стробов.
Можно задать нижний и верхний уровень (floor\ceiling). из ВКЛ делаем 4 щелчка, фонарик отвечает бзззз. Во время первого количеством нажатий задается нужный порог яркости (N\150). Во время второго — верхний по принципу (151-N). То есть сделав одно нажатие, потолком выставляется не идущий по умолчанию 130\150 (для этого надо нажать 21раз), а максимально доступная яркость в 150\150х.
In July 2020, ToyKeeper, posted on BudgetLightForum about
work on Anduril 2: a major rewrite of
the Anduril 1 firmware.
Based on the
original text manual found in the source code, this is a formatted version of that manual for easy readability
on mobile devices and to make linking to specific sections possible.
A big thanks again to ToyKeeper for continued
innovation and updates on the great Anduril UI firmware.
Table of Contents
Anduril 2 User Manual
Anduril is an open-source firmware for flashlights, distributed under
the terms of the GPL v3. The sources can be obtained here:
- Link 1
- Link 2
Quick Start
After putting a battery in the light and tightening the parts together,
the light should quickly blink once to confirm it has power and is now
operational. After that, basic usage is simple:
- Click to turn the light on or off.
- Hold the button to change brightness.
- Release and hold again to change brightness the other way.
That is all the user needs to know for basic use, but there are many
more modes and features available for people who want more.
Before reading the rest of this manual, it is recommended that users
look at the Anduril UI diagram(s), which should be provided along with the
flashlight.
With great power comes great complexity 😵.
Button presses
Button presses are abbreviated using a simple notation:
| Button | Meaning | |
|---|---|---|
1C |
One click | Press and then quickly release the button |
1H |
Hold | Press the button, but keep holding it |
2C |
Two clicks | Press and release quickly, twice |
2H |
Click, hold | Click two times, but hold the second press |
3C |
Three clicks | Press and release quickly, three times |
3H |
Click, click, hold | Click three times, but hold the final press |
The same pattern is used with higher numbers too. For example, 10C
means ten clicks… and 10H means ten clicks but hold the final press.
Simple UI
By default, the light uses a simple UI. This is useful if you lend the
light to someone else, or if you just don’t want to bother with any
crazy disco modes.
Simple UI has all the basic functions needed to work as a flashlight,
but the minimum and maximum brightness are limited by default to make it
safer, and any complex or advanced functions are blocked.
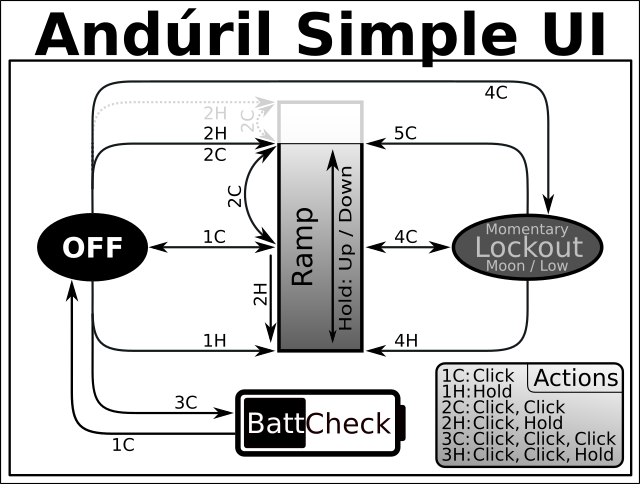
Simple UI diagram/flowchart.
Functions available in Simple UI include:
| Button | Action |
|---|---|
1C |
On / off |
1H |
Ramp up (or down, if button was released less than a second ago) |
2H |
If light is on : ramp down / If light is Off: momentary high mode |
2C |
Double click to go to / from highest safe level |
3H |
Tint ramping (on lights that have it) |
4C |
Lockout mode |
Some other modes and functions are available too. When the light is
Off, these are the options:
| Button | Action |
|---|---|
3C |
Battery check mode (displays voltage once, then turns off) |
4C |
Lockout mode |
10H |
Switch to Advanced UI |
15C or more |
Version check |
In Lockout mode with Simple UI, there are a few functions:
| Button | Action |
|---|---|
1H |
Momentary moon |
2H |
Momentary low |
3C |
Unlock and turn off |
4C |
Unlock and turn on |
4H |
Unlock and turn on at low level |
5C |
Unlock and turn on at high level |
To change between Simple UI and Advanced UI, turn the light Off and then
do one of these:
| UI | Button | Action |
|---|---|---|
| Simple UI | 10H |
Go to Advanced UI |
| Advanced UI | 10C |
Go to Simple UI |
| Advanced UI | 10H |
Configure Simple UI |
If you get lost, or if you want to auto-calibrate the temperature sensor, do a factory reset.
The process for this is:
- Loosen tailcap
- Hold button
- Tighten tailcap
- Keep holding button for about 4s
The light should flicker while getting brighter, then briefly burst to
full power. Hold until it reaches full power to do a reset, or let go
of the button early to abort.
On some lights, like products where the tailcap method is impossible,
use 13H from Off to do a factory reset. If this is difficult, try
counting it like music to make it easier:
1 2 3 4
1 2 3 4
1 2 3 4
HOLD
Simple UI is enabled after each factory reset.
Simple UI can be configured in several ways, but not while Simple UI is
active. So go to the Advanced UI, configure things, then go back to
Simple UI.
Configurable options include:
- floor level
- ceiling level
- number of steps (in stepped ramp)
- turbo style
Other options are inherited from Advanced UI:
- ramp style (smooth / stepped)
- smooth ramp speed
- ramp-after-moon style
- memory settings
- auto-lock settings
- aux LED settings
- voltage calibration
- thermal regulation settings
- hardware-specific “misc menu” settings
Advanced UI
Most of the information below this is for the Advanced UI. Anything not
already noted above is blocked in the Simple UI.
Ramping / Stepped Ramping Modes
Anduril’s ramping mode uses a smooth ramp or a stepped ramp, depending
on which style the user prefers.
Each ramp has its own settings:
- floor (lowest level)
- ceiling (highest level)
- and the stepped ramp can also have a configurable number of
steps
Additionally, Simple UI has its own ramp settings for floor, ceiling,
and number of steps. The smooth/stepped style is inherited from the
Advanced UI’s ramp.
There are four ways to access Ramping mode when the light is Off:
| Button | Action |
|---|---|
1C |
Turn on at the memorized brightness. (see below for details about what “memorized” means) |
1H |
Turn on at the floor level. Let go after the light turns on to stay at the floor level, or keep holding to ramp up. |
2C |
Turn on at the ceiling level. |
2H |
Turn on at full power, turn off when released. (momentary turbo) (in Simple UI, this uses the ceiling level instead of turbo) |
While the light is on, a few actions are available:
| Button | Action |
|---|---|
1C |
Turn Off. |
2C |
Go to or from the turbo level. (or if it has regulated down, “bump” back up to turbo) (turbo level / behavior is configurable) |
1H |
Change brightness (up). If the button was released less than a second ago, or if it’s already at the ceiling, it goes down instead. |
2H |
Change brightness (down) |
3C |
Switch to the other ramp style. (smooth / stepped) |
3H |
Tint ramping (on lights which have it). |
3H |
Momentary turbo (on lights with no tint ramping). |
4C |
Go to Lockout mode. |
5C |
Go to Momentary mode. |
5H |
Start a Sunset Timer. |
7H |
Ramp config menu.
|
10C |
Activate Manual memory and save the current brightness. |
10H |
Ramp extras config menu.
|
Memory determines which brightness level the light goes to with 1C
from Off. There are three types of brightness memory to choose from:
| Memory Style | Brightness |
|---|---|
| Automatic | Always uses the last-ramped brightness. (does not memorize levels accessed by a shortcut, like turbo, 2C for ceiling, or 1H-from-off for floor) |
| Manual | Always uses the user’s saved brightness. |
| Hybrid | Uses the Automatic memory brightness if the light was only off for a short time, or resets to the Manual memory level if it was off for a longer time. The timer for this is configurable from 0 to ~140 minutes. |
Another way to think of it is: There are three styles of memory for the
last-ramped brightness level…
- Always remember (Automatic)
- Remember for N minutes (Hybrid)
- Never remember (Manual)
To choose a memory style, set the configuration accordingly:
| Mem Style | Manual mem | Manual mem timer |
|---|---|---|
| Automatic | off | any |
| Manual | on | zero |
| Hybrid | on | non-zero |
Sunset Timer
In the Ramp mode or Candle mode, it’s possible to make the light turn
itself off after a while.
To activate the timer, go to the brightness you want and then use a 5H. Keep holding the button, and the light should blink once per
second. Each blink adds 5 minutes to the timer.
In Ramp mode, it slowly dims until it’s at the lowest level, then shuts
off. In Candle mode, it stays at the same brightness until the final
minute, at which point it dims and dies out.
The user can change the brightness while the timer is active. If this
happens during the final few minutes, it also “bumps” the timer up to a
minimum of 3 minutes. So if it’s getting really dim and you need a
little more time, you could do a 5H to add 5 minutes, or simply ramp up
to the desired brightness.
Other Modes
Anduril has several other modes too. To access these, press the button
more than 2 times when the light is off:
| Button | Action |
|---|---|
3C |
Blinky / utility modes, starting with battery check |
3H |
Strobe modes, starting with the most recently used strobe |
4C |
Lockout mode |
5C |
Momentary mode |
7C / 7H |
Aux LED configuration |
9H |
Misc configuration menu (only on some lights) |
10H |
Simple UI configuration menu |
13H |
Factory reset (on some lights) |
15C or more |
Version check |
Lockout Mode
4C from Off to enter Lockout mode. Or 4C from Ramp mode.
This makes the light safe to carry in a pocket or a bag or anywhere else
the button might be pressed by accident.
To exit Lockout mode, 4C. The light should blink briefly and
then turn on at the memorized level. Or 4H to turn on
at the floor level instead:
| Button | Action |
|---|---|
4C |
Go to Ramp mode (memorized level). (uses manual mem level if there is one) |
3C |
Unlock and go to Off mode |
4H |
Go to Ramp mode (floor level). |
5C |
Go to Ramp mode (ceiling level). |
Lockout mode also doubles as a momentary moon mode, so the user can do
quick tasks without having to unlock the light. The brightness in
Lockout mode has two levels:
| Button | Action |
|---|---|
1H |
Light up at the lowest floor level. |
2H |
Light up at the highest floor level. (or the manual mem level, if there is one) |
It is also possible to make the light lock itself automatically after
being turned off. To enable this, go to Lockout mode and use 10H
to activate the auto-lock config menu. Release the button after
the first blink. Then at the prompt, click N times to set the auto-lock
timeout to N minutes.
10H: Auto-lock config menu. Click N times to set timeout to N minutes.
A value of zero disables the auto-lock feature.
So, to turn off auto-lock, don’t click at all.
And on lights which have aux LEDs, there may be additional functions:
7C/7H: Change Lockout Mode’s aux LED pattern. More details on
this below, in a separate section.
Blinky / Utility Modes
3C from Off to access Anduril’s blinky / utility modes. This
always starts at Battery check and the user can proceed to other blinky
modes if Advanced UI is enabled. The sequence is:
- Battery check
- Temperature check (if light has a temperature sensor)
- Beacon mode
- SOS mode (if enabled)
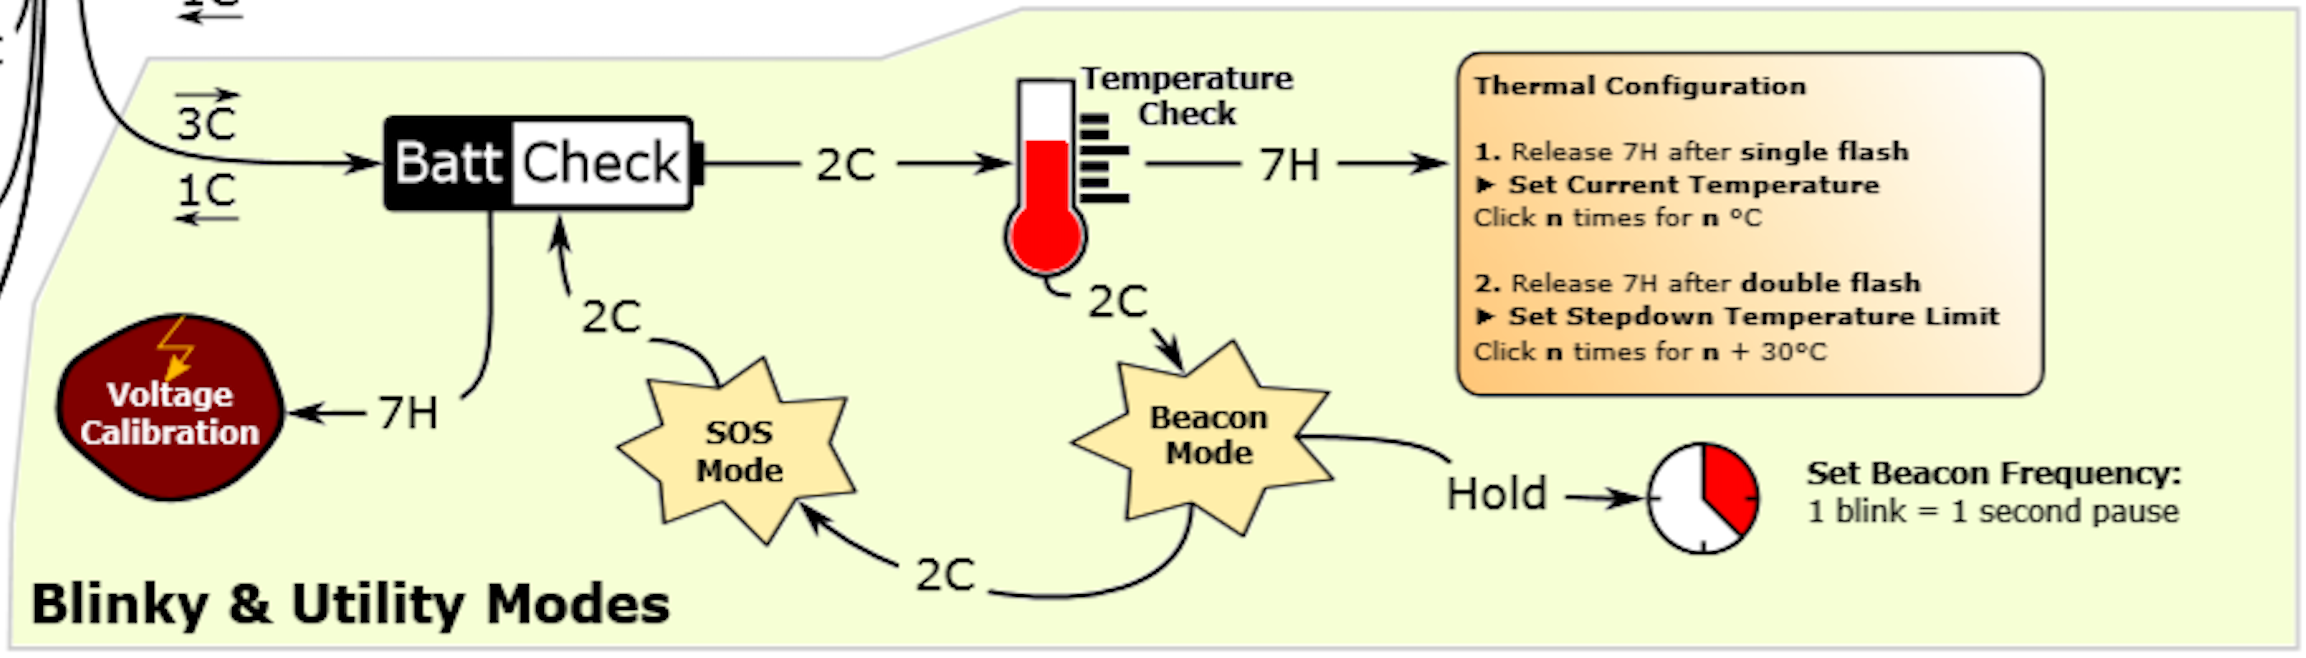
In all of these modes, some basic actions are available:
1C: Turn off.2C: Next blinky mode.
Additionally, in Battery check and Temperature check modes:
7H: Go to the voltage config menu or thermal config menu.
In more detail, this is what each blinky / utility mode does:
Battery check
Blinks out the battery voltage per cell. Full is 4.2V, empty is
about 3.0V. The light blinks the whole-number digit first, pauses,
then blinks out the “tenths” digit. Then a longer pause, and it
repeats.
So for 4.2V, it would be “blink-blink-blink-blink .. blink-blink”.
A “zero” digit is represented by a very quick blink.
The voltage config menu has one setting:
- Voltage correction factor. This adjusts the battery
measurement sensor, allowing the user to add or subtract up to
0.30V in 0.05V steps. Click N times to enter a value:Clicks Value 1C-0.30V 2C-0.25V 3C-0.20V 4C-0.15V 5C-0.10V 6C-0.05V 7Cdefault, 0V 8C+0.05V 9C+0.10V 10C+0.15V 11C+0.20V 12C+0.25V 13C+0.30V
Temperature check
Blinks out the current temperature in degrees C. This number
should be pretty close to what a real thermometer says. If not, it
would be a good idea to enter the thermal config menu and calibrate
the sensor. Or let the light settle to room temperature, then use
factory reset to auto-calibrate the sensor.
The thermal config menu has two settings:
-
Current temperature.
Clickonce per degree C to calibrate the
sensor. For example, if the ambient temperature is 21 C, then
click 21 times. -
Temperature limit. This sets the maximum temperature the light
can reach before it will start doing thermal regulation to keep
itself from overheating.Clickonce per degree C above 30. For
example, to set the limit to 50 C,click 20 times. The default
is 45 C, and the highest value it will allow is 70 C.
Beacon mode
Blinks at a slow speed. The light stays on for 100ms, and then
stays off until the next blink. The brightness and the number of
seconds between pulses are configurable:
-
Brightness is the user’s memorized ramp level, so set this in
ramping mode before activating beacon mode. Follows the same
memory rules as ramping – automatic, manual, or hybrid. -
Speed is configured by holding the button. The light should
blink once per second while holding the button. Release it
after the desired amount of time has passed, to set a new
beacon speed.
For example, to do a 10-second alpine beacon, hold the button
for 10 seconds.
SOS mode
Blinks out a distress signal.
Three short, three long, three short.
Repeats until light is turned off or until battery is low.
The memorized ramp level determines the brightness of SOS Mode.
Strobe / Mood Modes
Anduril includes a few extra modes for a variety of purposes:
- Candle mode
- Bike flasher
- Party strobe
- Tactical strobe
- Lightning storm mode
Beware: fast blinking lights ahead
3H from Off to access these. The last-used strobe mode is remembered,
so it will return to whichever one you used last.
In all of these modes, a few actions are available:
| Button | Action |
|---|---|
1C |
Turn off |
2C |
Next strobe / mood mode |
1H |
Increase brightness, or strobe faster (except lightning) |
2H |
Decrease brightness, or strobe slower (except lightning) |
5C |
Go to momentary mode, for a momentary strobe (this is useful for light painting) |
Additionally, Candle mode has one more action:
| Button | Action |
|---|---|
5H |
Activate Sunset Timer, and/or add 5 minutes to the timer |
In more detail, here is what each mode does:
-
Candle mode
Brightness changes randomly in a pattern resembling a candle flame.
If a timer is set, it will run until the timer expires, then get
dimmer for one minute, then sputter and turn itself off. Without a
timer, candle mode runs until the user turns it off. Brightness is
configurable. -
Bike flasher
Runs at a medium level, but stutters to a brighter level once per
second. Designed to be more visible than a normal ramping mode, but
otherwise works mostly the same. Brightness is configurable. -
Party strobe
Motion-freezing strobe light. Can be used to freeze spinning fans
and falling water. Speed is configurable. -
Tactical strobe
Disorienting strobe light. Can be used to irritate people. Speed
is configurable, and the duty cycle is always 33%.Be careful about heat in this mode, if using it for a long time.
-
Lightning storm mode
Flashes at random brightness and random speed to simulate lightning
strikes during a busy lightning storm. Do not look directly at the
flashlight when this mode is running, because it may suddenly go to
full power without warning.
Momentary Mode
5C from Off to enter Momentary mode. Or 5C from Ramp mode,
or 5C from a strobe mode.
This locks the flashlight into a single-mode interface where the LEDs
are only on when the button is held down. It is intended for Morse
code, light painting, and other tasks where the light should be on only
for a short time and probably in a pattern.
Momentary mode does either a steady brightness level or a strobe,
depending on which was active before going to Momentary mode. To select
which one, go to the mode you want to use, adjust the brightness and
speed and other settings, then 5C to enter Momentary mode.
In steady mode, brightness is the memorized ramp level, so adjust that
in Ramp Mode before entering Momentary mode.
In momentary strobe mode, the settings are copied from the last-used
strobe mode, such as party strobe, tactical strobe, or lightning.
To exit this mode, physically disconnect power by unscrewing the tailcap
or battery tube.
Every config menu has the same interface. It has one or more options
the user can configure, and it will go through them in order. For each
menu item, the light follows the same pattern:
-
Blink once, then go to a lower brightness. The user can keep
holding the button to skip this menu item, or release the button to
dive in and enter a new value. -
If the user released the button:
-
Stutter or “buzz” quickly between two brightness levels for a few
seconds. This indicates that the user can click one or more times
to enter a number. It will keep buzzing until the user stops
clicking, so there is no need to hurry.The actions here are:
- click: add 1
- hold: add 10 (only in versions 2021-09 or later)
- wait: exit
-
After entering a number, or after skipping every menu item, it waits
until the button is released then exits the menu. It should return to
whatever mode the light was in before entering the config menu.
While the light is on in a Ramping mode, 7H to access the config menu for the current ramp.
Or, to access the ramp config for Simple UI, make sure the Simple UI is
not active, then do a 10H from Off.
For smooth ramping mode, there are three menu options:
- Floor. (default = 1/150)
- Ceiling. (default = 120/150)
- Ramp speed. (default = 1, fastest speed)
For the stepped ramping mode, there are three menu options:
- Floor. (default = 20/150)
- Ceiling. (default = 120/150)
- Number of steps. (default = 7)
For the Simple UI mode, there are four menu options. The first three
are the same as stepped ramping mode.
- Floor. (default = 20/150)
- Ceiling. (default = 120/150)
- Number of steps. (default = 5)
- Turbo style. (default = 0, no turbo)
Default values are different for each model of flashlight. The numbers
above are only examples.
To configure the floor level, click the button equal to the number of
ramp levels (out of 150) at which the floor should be. To set the
lowest possible level, click once.
To configure the ceiling level, each click goes one level lower. So
1 click sets the highest possible level, 2 clicks is the 2nd-highest,
3 clicks is the 3rd-highest level, etc. To set the default of 120/150,
click 31 times.
When configuring the number of steps, the value can be anything from 1
to 150. A value of 1 is a special case. It places the step halfway
between the floor and ceiling levels.
Version Check Mode
This allows people to see which version of the firmware is installed on
their light. The format for this is (usually) 12 digits – a date
followed by a model number.
YYYYMMDDBBPP
- YYYY: Year
- MM: Month
- DD: Day
- BB: Brand ID
- PP: Product ID
The date is when the firmware was compiled. If the vendor did not set
this value, it defaults to 1969-07-20, the date of first human contact
with the moon. However, it might not be a date at all; some vendors may
specify a completely different type of value here.
The brand/product values are also known as the model number. These are
hard-coded in the source code for each light’s build target, and can be
looked up in the “MODELS” file or by using the “make models” command.
Protection Features
Anduril includes low voltage protection (LVP) and thermal regulation.
LVP makes the light step down to a lower level when the battery is low,
and if the light is already at the lowest level, it shuts itself off.
This activates at 2.8V. LVP adjustments happen suddenly, in large
steps.
Thermal regulation attempts to keep the light from overheating, and
otherwise adjusts output to stay as close as possible to the
user-configured temperature limit. Thermal adjustments happen
gradually, in steps so small they are difficult for humans to perceive.
WARNING: thermal regulation only works in Ramping Mode (both Stepped/Smooth and Turbo, but not Momentary Turbo).
Aux LEDs / Button LEDs
Some lights have aux LEDs or button LEDs. These can be configured to do
different things while the main emitters are off. There is one aux LED
mode for the regular Off mode, and another aux LED mode for Lockout
mode. This allows the user to see at a glance whether the light is
locked.
Aux LED modes typically include:
- Off
- Low
- High
- Blinking
To configure the aux LEDs, go to the mode you want to configure and then
7C. This should change the aux LEDs to the next
mode supported on this light.
7C: Next aux LED mode.
If the aux LEDs can change color, there are additional actions to change
the color. It is the same as above, but hold the button on the last
click and then let go when the desired color is reached.
7H: Next aux LED color.
On most lights, the colors follow this sequence:
- Red
- Yellow (Red+Green)
- Green
- Cyan (Green+Blue)
- Blue
- Purple (Blue+Red)
- White (Red+Green+Blue)
- Disco (fast random colors)
- Rainbow (cycles through all colors in order)
- Voltage (uses color to display battery charge)
In voltage mode,
the colors follow the same sequence, in the same order
as a rainbow…
with red indicating a low battery and purple indicating
a full battery.
For lights with a button LED, the button LED typically stays on while
the main emitters are on. Its brightness level is set in a way which
mirrors the main LED – off, low, or high.
For lights with a RGB button LED, the button LED indicates battery
charge during use in the same manner as the aux LED voltage mode.
For lights with front-facing aux LEDs, the aux LEDs typically stay off
when the main emitters are on, and when the light is otherwise awake.
The aux LEDs on most lights only turn on when the light is asleep.
Some models may have an extra config menu for settings which don’t fit
anywhere else. These settings are, in order:
-
Tint ramp style:
0 = smooth (blend channels in any proportion)
1 = toggle (only one channel active at a time) -
Jump Start level:
Some lights are prone to starting up slowly at low levels, so they
have an option to “jump start” the engine by pulsing a higher power
level for a few milliseconds when changing from off to a low level.
This setting specifies how bright that pulse should be.The value can be from 1 to 150, but is usually between 20 and 50.
These settings are hardware-specific and may not be present on all
lights. The number of settings in the global menu depends on the
hardware model and the firmware version.
Tint Ramping
Some lights have more than one set of LEDs which can be adjusted to
change the color temperature of the light. On these models, there is a
global button mapping which works at all times unless it’s overridden by
the mode the light is in:
3H: Tint ramping
So, at almost any time, 3H, and it
can change the color of the light. This is best done with the light at
a moderately high level, because it makes the changes smooth. Low
levels have more coarse resolution and will typically change in very
visible steps.
At both ends of the tint ramp, there is an “auto tint” mode. This
automatically chooses a tint based on the brightness level… so it can
be warm white while dim, or cool white while bright. Or vice-versa. To
access this, ramp to the end of the tint range, then keep holding until
the light blinks a second time.
The misc config menu also has a setting to choose a tint ramp style.
This can be smooth, allowing the user to smoothly blend both channels in
whatever ratio they desire… or it can be “tint toggle” style, where
only one channel is active at a time.
UI Reference Table
This is a table of all button mappings in Anduril, in one place:
| Mode | UI | Button | Action |
|---|---|---|---|
| Off | Any | 1C |
On (ramp mode, memorized level) |
| Off | Any | 1H |
On (ramp mode, floor level) |
| Off | Any | 2C |
On (ramp mode, ceiling level) |
| Off | Simple | 2H |
On (momentary ceiling level) |
| Off | Full | 2H |
On (momentary turbo) |
| Off | Any | 3C |
Battcheck mode |
| Off | Full | 3H |
Strobe mode (whichever was used last) |
| Off | Any | 4C |
Lockout mode |
| Off | Full | 5C |
Momentary mode |
| Off | Full | 7C |
Aux LEDs: Next pattern |
| Off | Full | 7H |
Aux LEDs: Next color |
| Off | Full | 9H |
Misc config menu (varies per light) |
| Off | Full | 10C |
Enable Simple UI |
| Off | Simple | 10H |
Disable Simple UI |
| Off | Full | 10H |
Simple UI ramp config menu: 1: floor, 2: ceiling, 3: steps, 4: turbo style |
| Off | Any | 13H |
Factory reset (on some lights) |
| Off | Any | 15+C |
Version check |
| Ramp | Any | 1C |
Off |
| Ramp | Any | 1H |
Ramp (up, with reversing) |
| Ramp | Any | 2H |
Ramp (down) |
| Ramp | Any | 2C |
Go to/from ceiling or turbo (configurable) |
| Ramp | Full | 3C |
Change ramp style (smooth / stepped) |
| Ramp | Any | 3H |
Tint ramping (on some lights) |
| Ramp | Full | 3H |
Momentary turbo (on lights without tint ramping) |
| Ramp | Any | 4C |
Lockout mode |
| Ramp | Full | 5C |
Momentary mode |
| Ramp | Full | 5H |
Sunset timer on, and add 5 minutes |
| Ramp | Full | 7H |
Ramp config menu (1: floor, 2: ceiling, 3: speed/steps) |
| Ramp | Full | 10C |
Turn on Manual memory and save current brightness |
| Ramp | Full | 10H |
Ramp Extras config menu: 1: enable automatic mem, 2: set manual mem timeout, 3: ramp after moon or not, 4: advanced UI turbo style |
| Lockout | Any | 1C/1H |
Momentary moon (lowest floor) |
| Lockout | Any | 2C/2H |
Momentary moon (highest floor, or manual mem level) |
| Lockout | Any | 3C |
Unlock (go to Off mode) |
| Lockout | Any | 4C |
On (ramp mode, memorized level) |
| Lockout | Any | 4H |
On (ramp mode, floor level) |
| Lockout | Any | 5C |
On (ramp mode, ceiling level) |
| Lockout | Full | 7C |
Aux LEDs: Next pattern |
| Lockout | Full | 7H |
Aux LEDs: Next color |
| Lockout | Full | 10H |
Auto-lock config menu (1: set timeout) |
| Strobe (any) | Full | 1C |
Off |
| Strobe (any) | Full | 2C |
Next strobe mode |
| Strobe (any) | Full | 3H |
Tint ramping (on some lights) |
| Strobe (any) | Full | 5C |
Momentary mode (using current strobe) |
| Candle | Full | 1H/2H |
Brighter / dimmer |
| Candle | Full | 5H |
Sunset timer on, add 5 minutes |
| Party strobe | Full | 1H/2H |
Faster / slower |
| Tactical strobe | Full | 1H/2H |
Faster / slower |
| Biking | Full | 1H/2H |
Brighter / dimmer |
| Lightning | Full | 1H |
Interrupt current flash or start new one |
| Batt check | Any | 1C |
Off |
| Batt check | Full | 2C |
Next blinky mode (Temp check, Beacon, SOS) |
| Batt check | Full | 7H |
Voltage config menu |
| Temp check | Full | 1C |
Off |
| Temp check | Full | 2C |
Next blinky mode (Beacon, SOS, Batt check) |
| Temp check | Full | 7H |
Thermal config menu |
| Beacon | Full | 1C |
Off |
| Beacon | Full | 1H |
Configure beacon timing |
| Beacon | Full | 2C |
Next blinky mode (SOS, Batt check, Temp check) |
| SOS | Full | 1C |
Off |
| SOS | Full | 2C |
Next blinky mode (Batt check, Temp check, Beacon) |
| Momentary | Full | Any | On (until button is released) |
| Momentary | Full | Disconnect power | Exit Momentary mode |
| Config menus | Full | Hold | Skip current item with no changes |
| Config menus | Full | Release | Configure current item |
| Number entry | Full | Click | Add 1 to value for current item |
| Number entry | Full | Hold | Add 10 to value for current item |
Additional Resources
- BudgetLightForum: Anduril … 2?
- BudgetLightForum: Anduril 2 UI diagrams
- /r/flashlight: Anduril 2 explained
- Patreon: ToyKeeper
Начну с простого, а именно с описания основных возможностей этого фонаря, которые понятны по характеристикам. Во-первых, у фонаря есть несколько версий, и судя по моим наблюдениям — версия с SST20 самая нераспространенная (на данный момент, как минимум). Во-вторых, Lumintop стали использовать начинку с Anduril UI, которую лично я встретил недавно в Astrolux по мотивам англоязычного форума BLF (BudgetLightForum). Таким образом, в фонаре появилась плавная регулировка яркости. Помимо этого Lumintop’ы добавили сюда свой фирменный, так сказать, дизайн (шарм), качество, светящуюся кнопку с логотипом кролика и встроенный магнит. Из того, чего тут не хватает изначально — встроенного разъёма для зарядки. В таком случае тут был бы самый полный набор всего, что нужно в среднестатистическом фонаре. Но вещь может и не каждому нужна, так что фонарь и без разъёма выглядит очень выгодно. Подробности, впечатления и фото — всё дальше.
Составляющая обзора:
— коробка и комплект поставки.
— внешний вид и сборка фонаря.
— управление и режимы, Anduril UI.
— нагрев.
— примеры фото внутри/снаружи.
— выводы.
Не забудем и про характеристики:
— Brand: LUMINTOP
— Model: EDC18
— Emitter: SST20 4000K
— Optic: Standard TIR optical lens
— Flux: ~2800 lm (XP-L Hi)
— Intensity: ~12 500 cd ANSI throw ~223 m (XP-L Hi)
— Firmware:
> The EDC18 uses free software called Andúril, distributed under the terms of the GPL v3.
— User interfaces:
[1] By default the EDC18 is set to use SMOOTH RAMPING. Instant access to TURBO mode is also provided.
[2] A more conventional STEPPED RAMPING UI is available if you like discrete modes level. You can choose how many steps you want
[3] MOMENTARY mode is useful for signaling purposes or rapidly/briefly lighting up targets. To exit this mode, physically disconnect power
[4] MUGGLE mode uses a reduced output.
[5] It has an electronic LOCKOUT for safety, but acts also as momentary low light.Other functions: Battery check, sunset, beacon tactical strobe, party strobe, bike flasher, candlelight, lightning storm
— Battery: One flat-top or button-top 18650 cell. Anunprotected cell is recommended.
— Max. length of battery is 66 mm. Cell is not included.
— Driver: FET+7+1 driver. Low parasitic drain while OFF
— Body: Aluminum with hard-coat anodizing
— Ingress rating: Equivalent to IPX7
— Weight: Approximately 53 g without cells
Характеристики кинул на английском, официальные. Если кто-то будет в чем-то заинтересован — сможет найти и в них. В остальном, подробнее будет в обзоре (в т.ч. про управление, и про режимы; это отдельная тема при использовании интерфейса Anduril UI).
А теперь приступим к обзору. Приятного чтения.

— Коробка и комплект поставки.
Коробка у Люминтопов довольно стандартная, и сейчас мне бы хотелось сказать, что, возможно, пора что-то менять. Она, конечно, плотная, и почту выдерживает, но о презентабельности говорить нельзя. А ведь фонари у них не самые дешевые, отнюдь, потому можно было бы придумать и что-то получше. 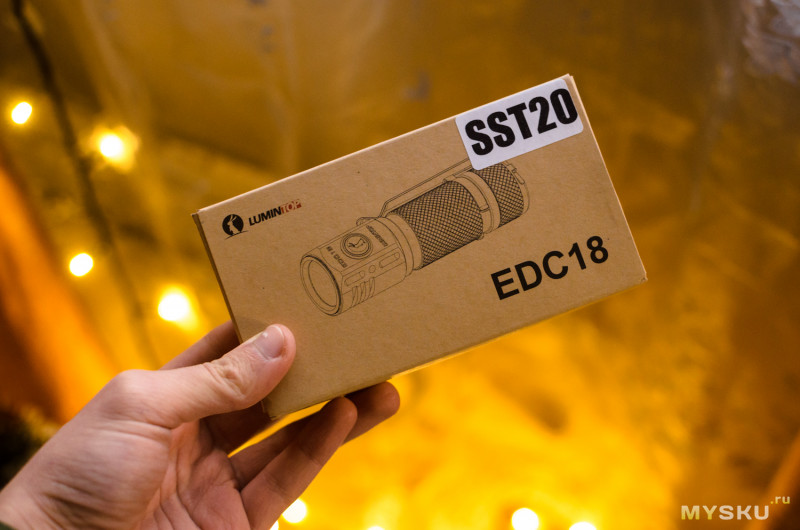
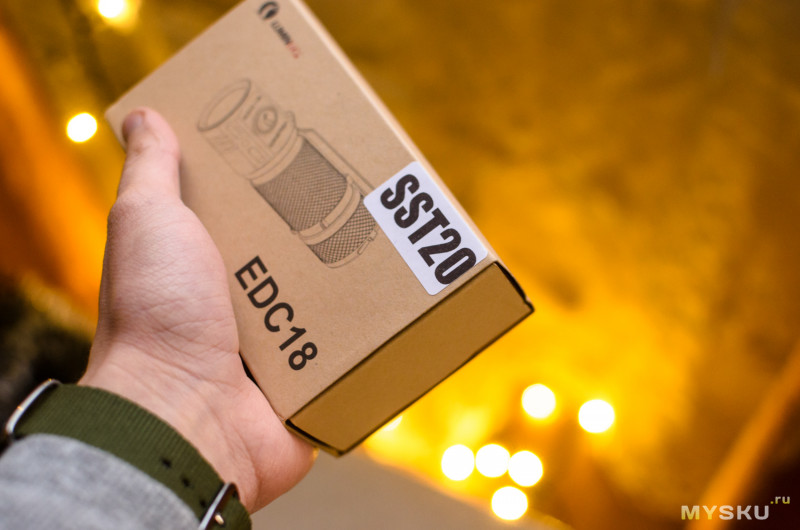
Как видите, на внешней стороне (это картонный рукав) имеется наклейка, которая указывает на используемый светодиод. В остальном, на коробке даже характеристик не найти.
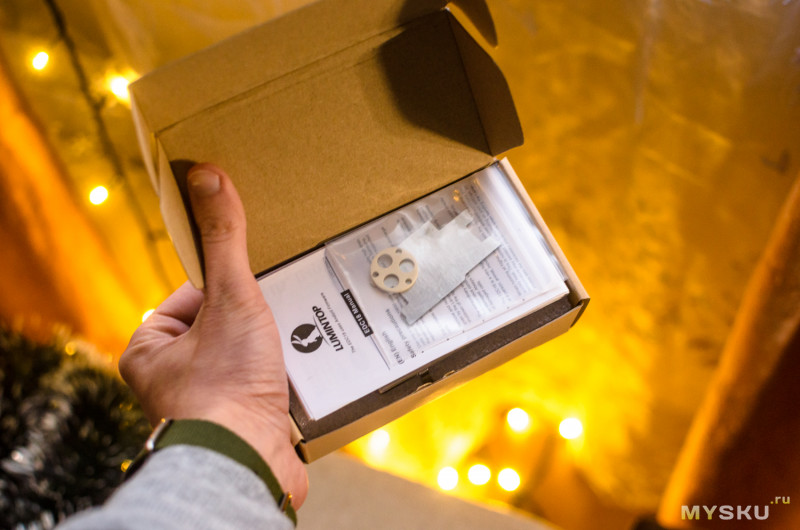
Стоит отдать должное только за то, что в такую небольшую коробочку уложили вполне себе приличный комплект.
И состоит он из:
— фонаря
— стальной клипсы
— диффузора
— темляка
— двух доп. насадок на светодиоды
— двух запасных уплотнительных колец
— стального кольца для ключей
— специального инструмента для снятия безеля
— инструкции
Как видите, для полного счастья тут не хватает только аккумулятора, но и без него есть на что посмотреть.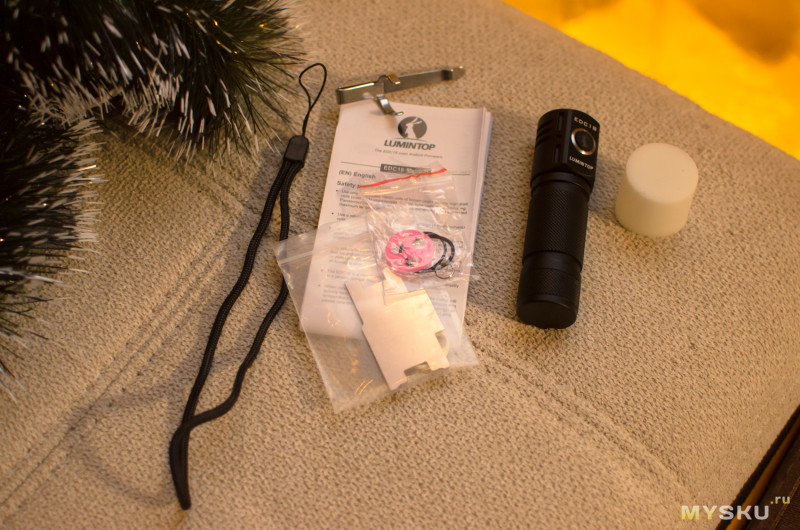
Хотя особого смысла разбирать всё слишком детально — нет. Потому буду краток, чтобы быстрее перейти к самому предмету обзора и его сопутствующих особенностей. Так что: клипса в меру тугая, прицепить можно и со стороны хвоста, и со стороны головы. Темляк (т.е. ремешок для руки) самый обычный, внимания не стоит; диффузор силиконовый, и мы на него еще посмотрим в пункте с проверкой работоспособности фонаря; то же касается и насадок для светодиода (у меня они остались под небольшим вопросом); а что касается инструмента для снятия безеля — совсем скоро мы его будем использовать. 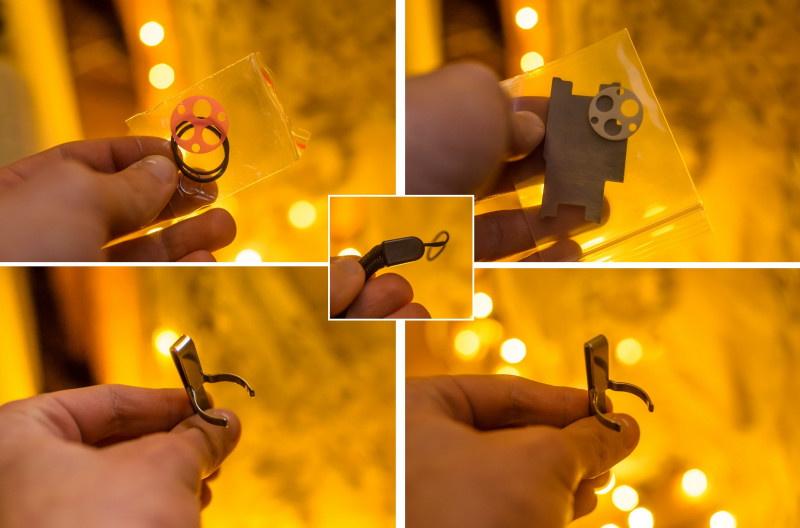
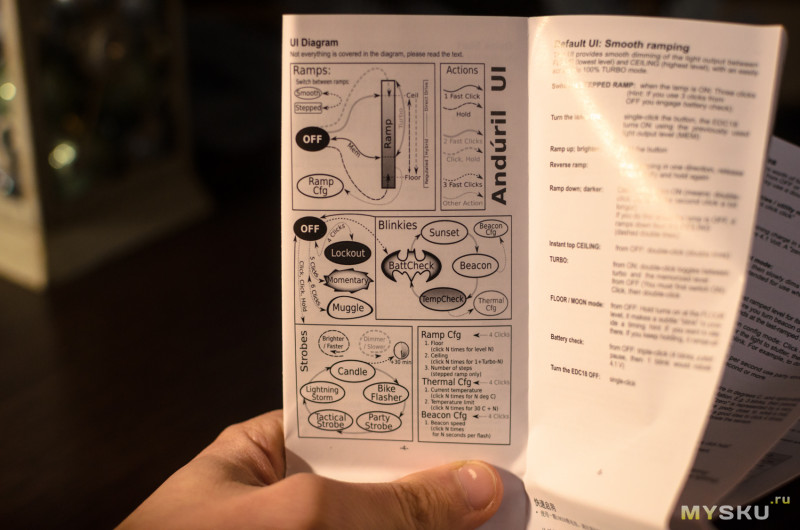
Что и правда стоит изучить заранее, так это инструкцию. Она тут только на английском и подробно описывает все возможности фонаря и его управление.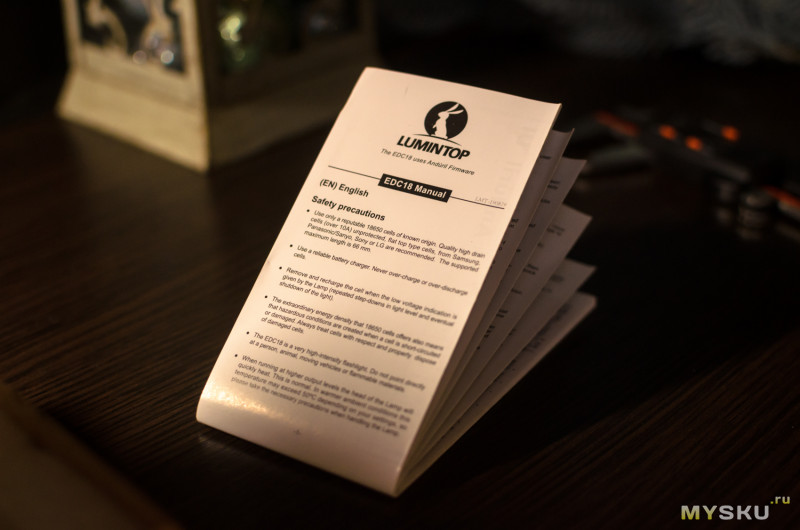
На этом с осмотром комплектующих закончим.
***
— Внешний вид и сборка Lumintop EDC18.
Дизайн фонаря не агрессивный. Он выглядит плавным, таким и является. Более того, размеры составляют ~28мм в диаметре головы и 94мм по длине. Это очень мало, из-за чего даже рядом с 18650 фонарь выглядит небольшим, не говоря уже про сравнение с 20700. В руке маленькие габариты ощущаются в полной мере: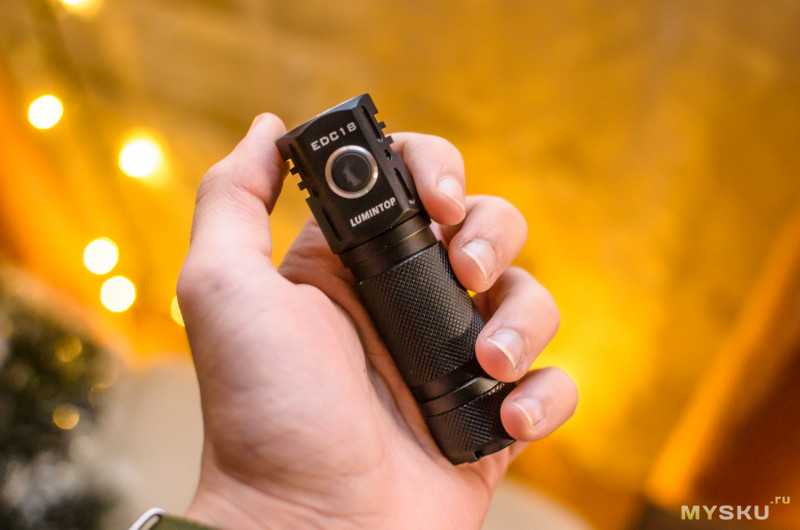
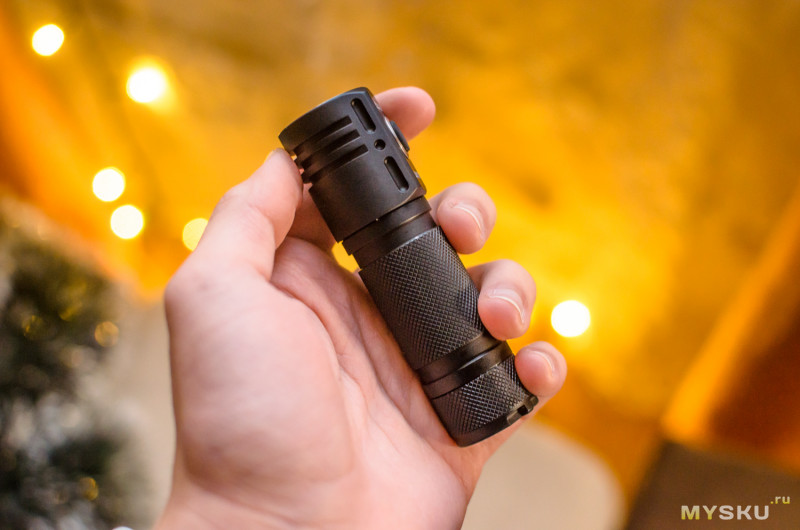 *я уж извиняюсь за то, что почти все фото сделаны в руке, а то уже пару раз встречал негодующих; но съёмка в руке позволяет заснять объект со всех сторон и позволяет добиться более красивого фона; и самое главное то, что меня это устраивает, как и большинство читающих
В общем, модель явно спроектирована на славу. К слову, её и правда спроектировали (кто бы сомневался), и это был человек с никнеймом Fritz15 с ранее упомянутого BLF. Так что все связано. Но всё, что и правда нужно знать, так это то, что EDC18 и правда получился очень удобным и компактным фонарем, который можно положить в почти любой карман (и кармашек), и который, благодаря клипсе, можно еще и прицепить на ремень/рюкзак. Универсально.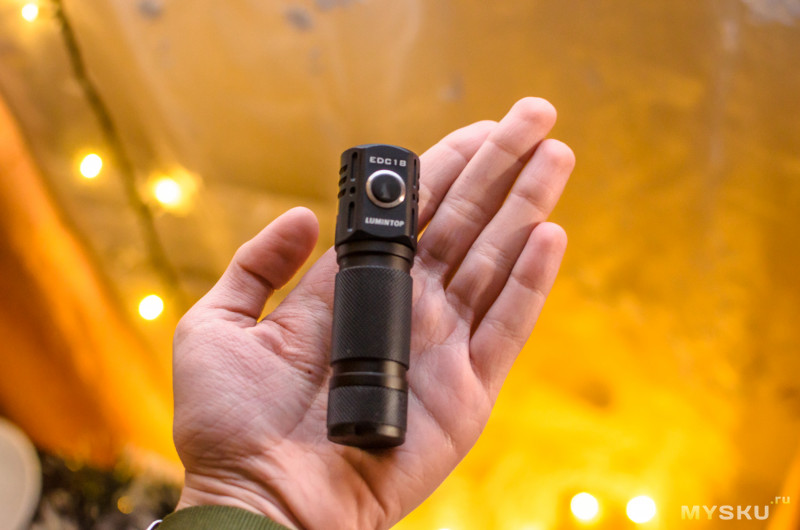
Не забываем про магнит в хвосте. Так что модель еще более универсальная (это еще речь не заходила за комплектный диффузор!):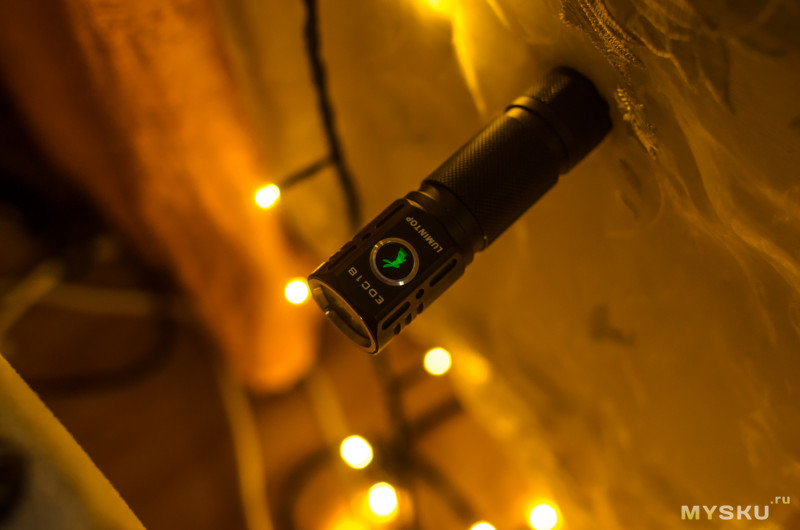
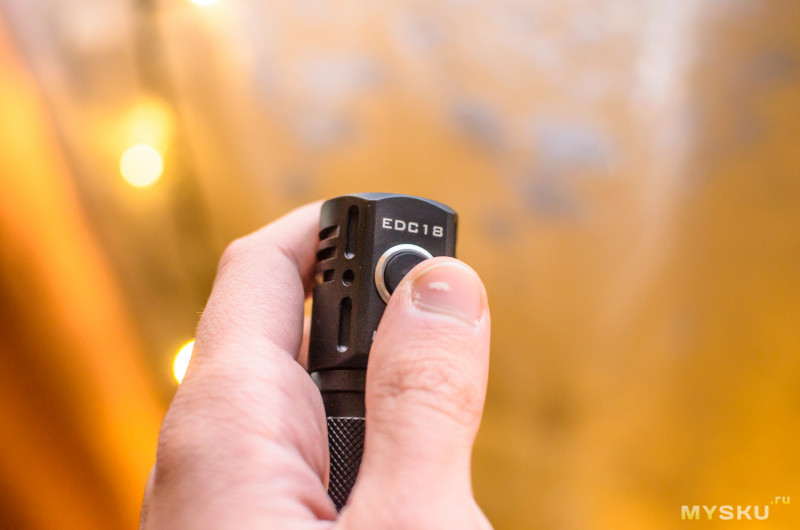
Но давайте не будем разгоняться и осмотрим фонарь с ног, как говорится, и до головы. Как самые внимательные могли уже рассмотреть, на голове у фонаря имеется кнопка с логотипом (и зеленой подсветкой) и название самого фонаря. Кнопка для такого небольшого фонаря немаленькая и нажимается очень приятно.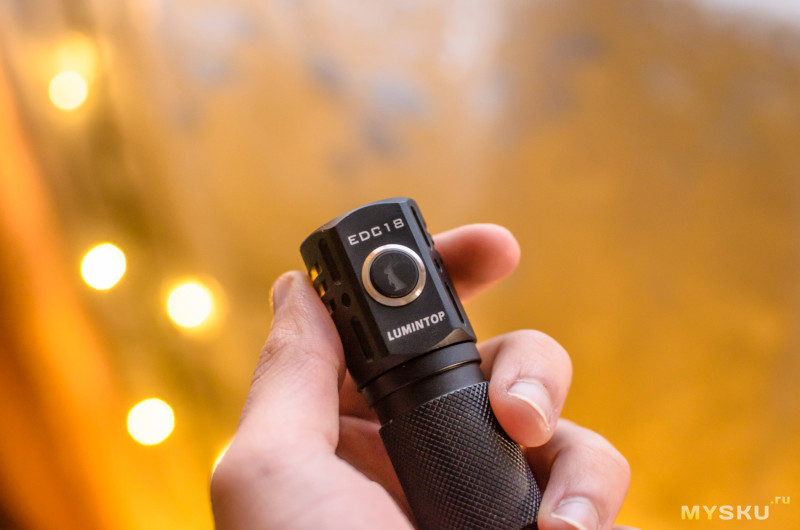
Подсветка не разрядит ваш фонарь и за две недели, но для тех, кто переживает, точно не составит труда просто чуть-чуть открутить голову фонаря — тогда не будет контакта и кнопка не будет светить.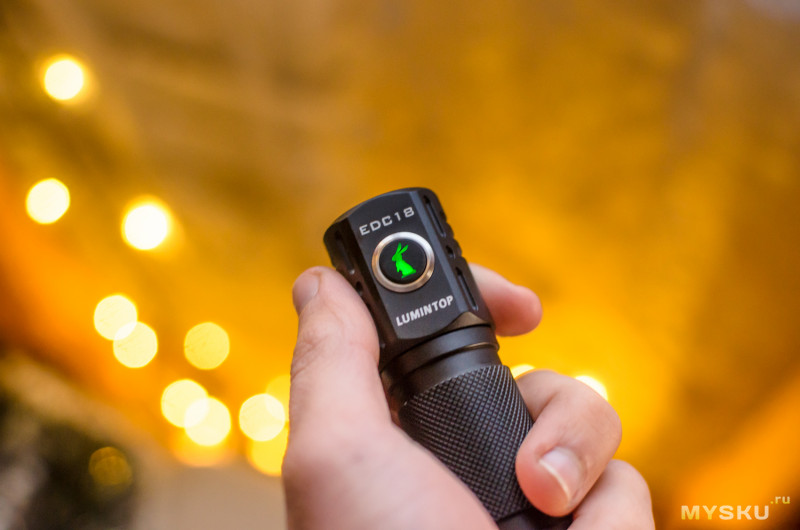
С обратной стороны от кнопки рёбра для охлаждения. Относительно маленькие.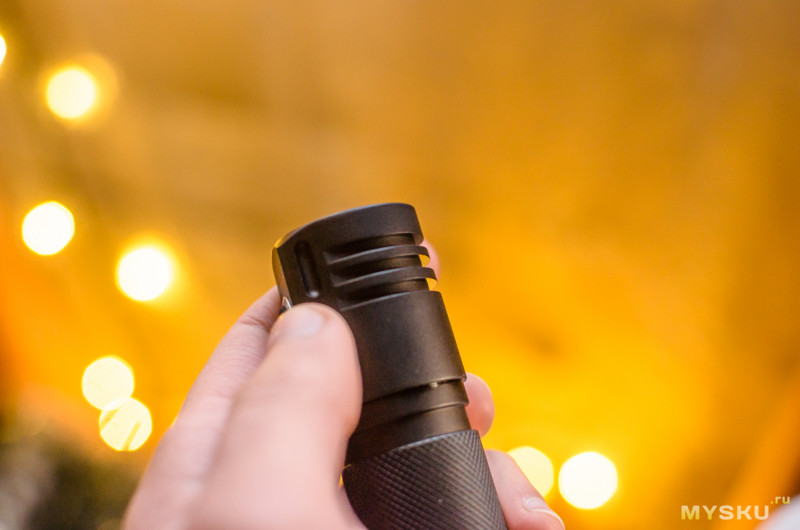
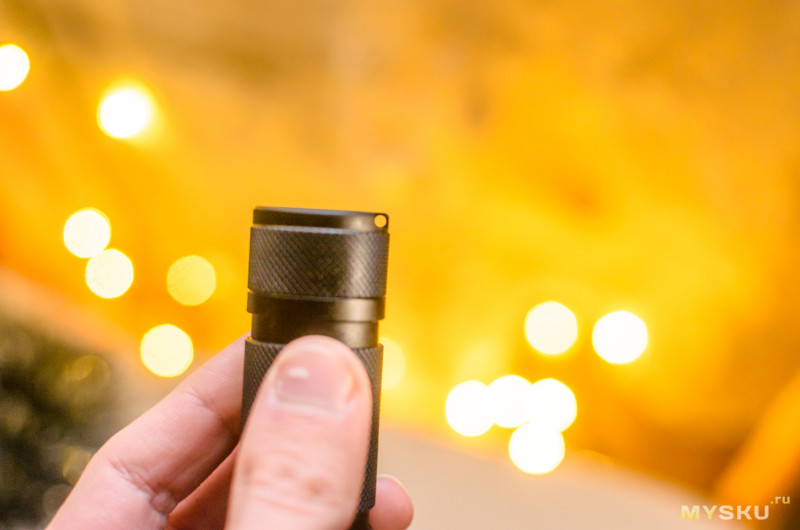
Основной корпус с мелкой накаткой, ничего особенного сказать не могу. Да и про покрытие тоже — такое ощущение, что анодирование у всех фонарей прямо-таки одинаковое, как и материал изготовления всего корпуса. Так что жаловаться не на что.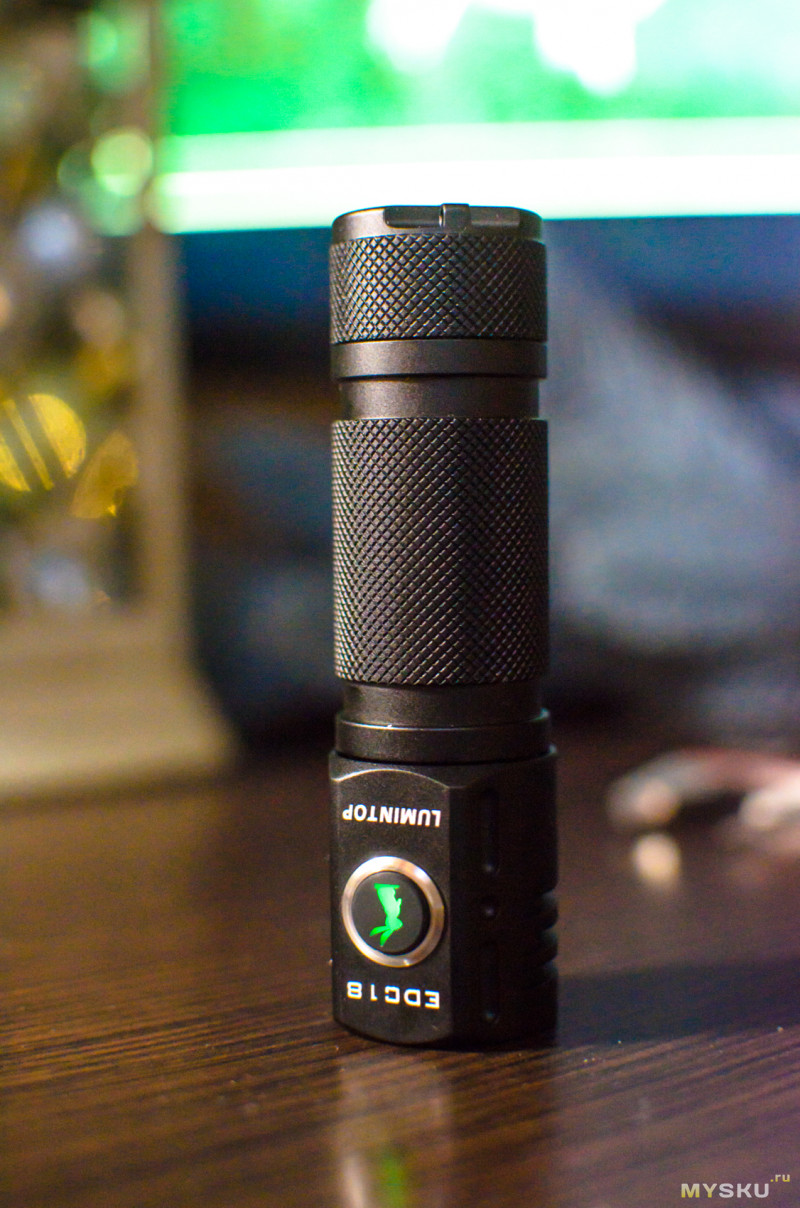
Хвост простой, не считая встроенного магнита и «ушка» для темляка.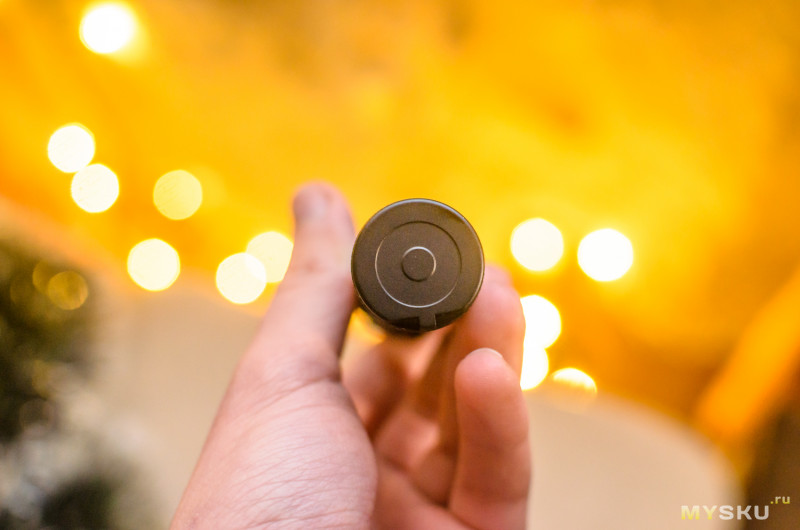
 *фокус, так сказать, отдалился
Раз мы тут, то можно поговорить и про качество резьбы. Хотя, чего тут говорить — за весь опыт использования фонарей Lumintop (и не только), резьба у них не слетала и не подавала каких-либо дурных признаков. И смазана она тут, у EDC18, хорошо. Полностью анодирована.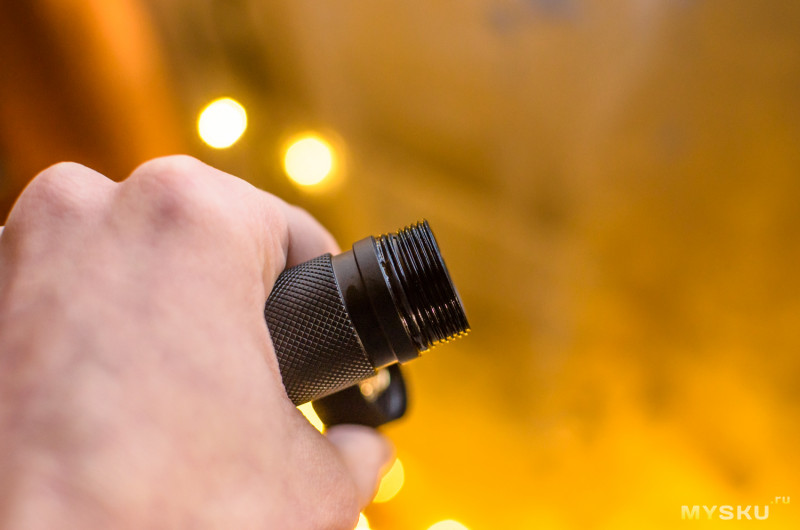
Диаметр батарейного отсека составляет 19мм, что с небольшим запасом для 18650.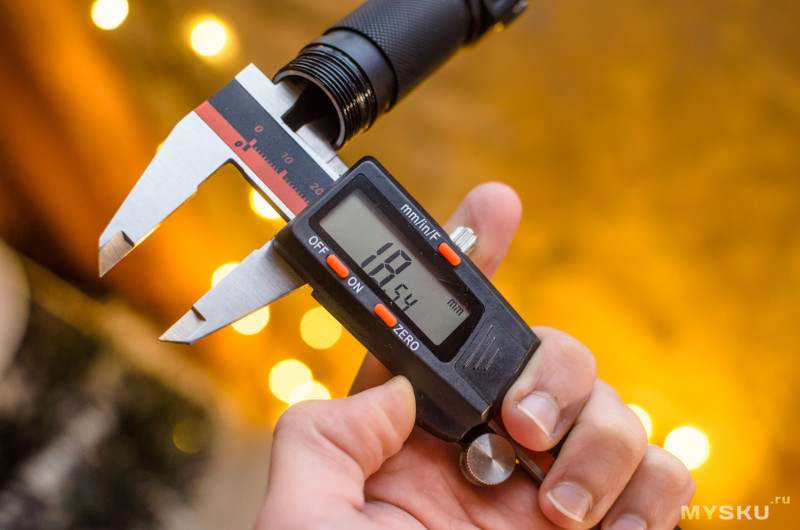
Хоть в описании к фонарю и говорится, что использовать рекомендуется аккумуляторы без защиты, я поставил качественный защищенный Xtar 18650 на 2600mAh (высокотоковый) и вышло все очень даже.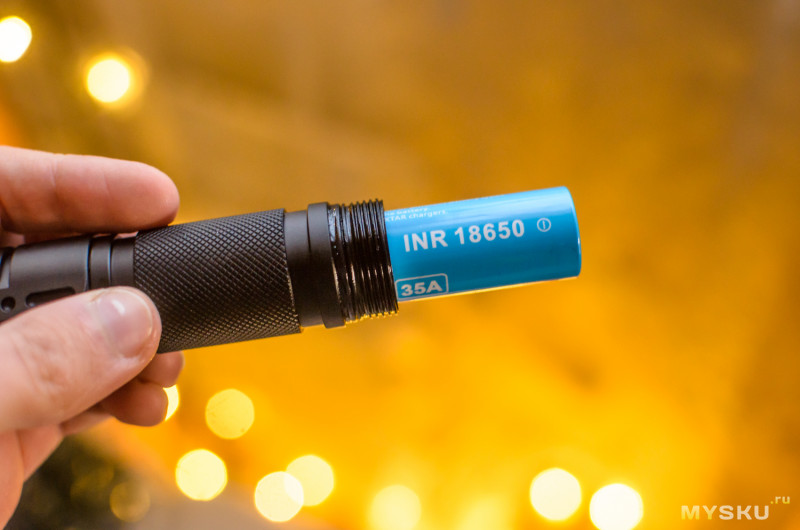
Внутренняя часть хвоста с пружиной: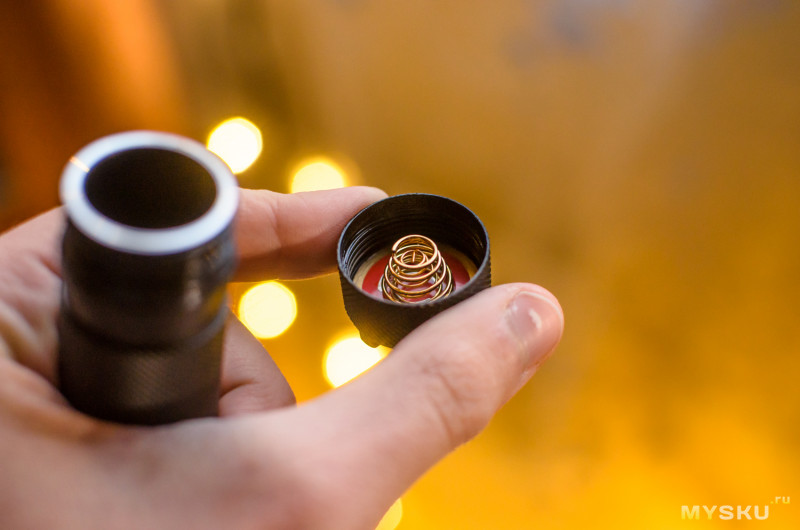
Как и внешняя часть драйвера (да, голова у фонаря откручивается, как было упомянуто выше, так что модель разбирается на три условных составляющих). Внешняя часть драйвера еще и пестрит шестью чипами L7135. Дабы не гуглить, вот.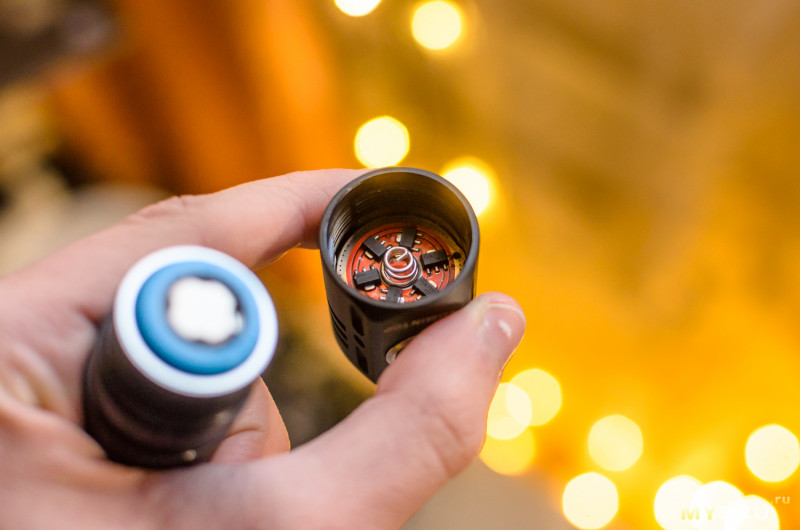
Вот и плавно добрались до головы, с более детальным осмотром конструкции. Тут-то нам и пригодится комплектный инструмент для снятия безеля. Раньше мне этим инструментом служил штангенциркуль, тут же есть специальная металлическая вырезка, которая идеально становится в пазы. Очень удобно. И встречаю впервые. Гениально!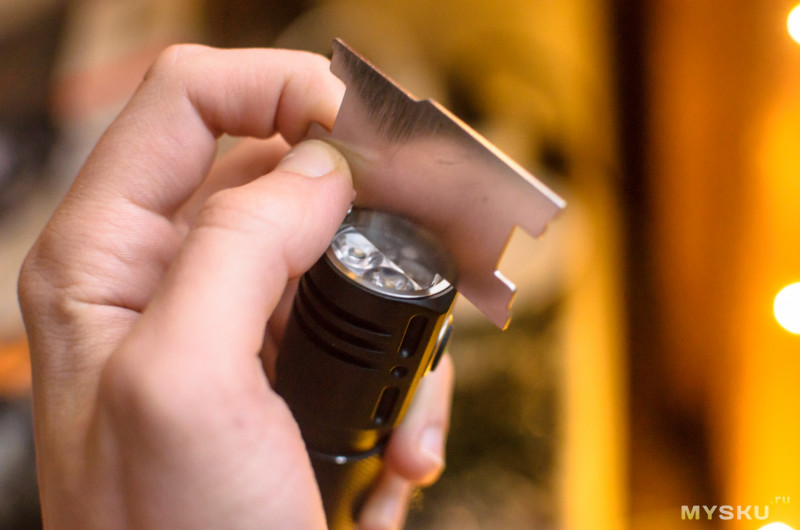

Под безелем находится встроенное стекло, которое вытащить у меня не удалось. Старался как мог, но поддеть его негде, и с обратной стороны драйвер тоже не поддался. В общем и целом, это и не столь важно. Светодиоды с оригинальными рефлекторами на фото ближе: 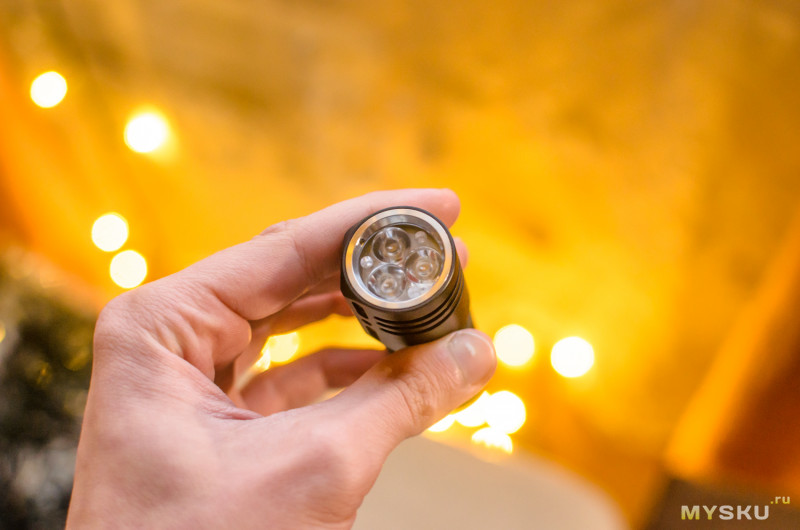
Пора заканчивать с этим осмотром и перейти к действиям.
И это будет разбор режимов
***
— Управление и режимы, Anduril UI.
Мне этот интерфейс понравился, скажу я сразу. Во-первых, это плавная регулировка яркости по умолчанию. Во-вторых — мне нравится плавная регулировка. Без этих двух составляющих ничего бы и не было, вот так вот всё просто.
А если серьёзно, то описания режимов есть в инструкции, как и всех шорткатов. Более того, в одном из недавних своих обзоров у меня был Astrolux EC01, с этим же Anduril UI. Почитать его можно тут (фонарь побольше, и с XHP50.2).
Если вы позволите, я не буду заново описывать то, что я писал в этом же пункте в обзоре EC01, а просто процитирую с минимальными правками (благо, автор мне разрешил).
Начнём с простого, с состояния, когда фонарь выключен:
— одно нажатие на кнопку включает фонарь на прошлом включенном режиме. Память работает на всё, за исключением пары очень редких исключений.
— зажатие на кнопку включает фонарь на минимальном режиме, после чего удержание медленно поднимает его яркость вплоть до максимума.
— двойное зажатие, но без отпускания кнопки, включает фонарь на максимальном режиме, после чего удержание кнопки уменьшает яркость.Турбо включается двойным кликом. Этого всего уже достаточно, чтобы жить с этим фонарем. Всё удобно и понятно.
А теперь пойдёмте в пучину функциональности. Всё так же, с выключенного фонаря:
— быстрых три нажатия активируют проверку аккумулятора на напряжение. Сделано неудобно, но иначе, наверное, никак: первая часть миганий показывает первую цифру, вторая — вторую. Понять по ним, что у твоего аккумулятора напряжение 3.9В можно за секунд 10, но только при условии, что вы не собьётесь со счёта.
— четыре быстрых нажатия на кнопку блокируют фонарь. Такой же манипуляцией происходит разблокировка. Удобная функция, которая расположена не так и далеко от основного функционала.
— пять быстрых нажатий переводят фонарь в режим «Momentary». Что это значит? В общем-то, ничего сложного. В этом режиме фонарь будет работать только тогда, когда вы зажимаете кнопку. Как говорит инструкция, это удобно, чтобы использовать Морзянку. Нельзя не согласиться. А вот чтобы выйти из этого режима, нужно открутить хвост, так как пятью нажатиями чисто физически нельзя выйти из режима — ведь он мигает каждый раз, когда вы нажимаете на кнопку. Важно знать, что яркость в этом режиме фиксируется. Хотите максимальную — включайте уже на максимальном.Теперь, что касается мигалок. Они тут есть, конечно. И их тут так же много, и расписывать каждый я не буду. Лишь напишу, что для того, чтобы зайти в режим мигалок, нужно из выключенного состояния фонаря два раза нажать на кнопку, а на третий держать палец.
Из режима с проверкой напряжения, можно пройти в другие мигания, в режим Beacon (маяк), а так же настроить его мануально, с помощью четырёх нажатий и дальнейших манипуляций; отсюда же можно пройти и в другие несколько режимов, которые описаны тут: комментарий от ув. validall
Вот как-то так, слов вышло много, но если прочитать и вдуматься — хватит одного раза.
***
— Нагрев.
В этом фонаре это отдельная и правда интересная тема для обсуждения. 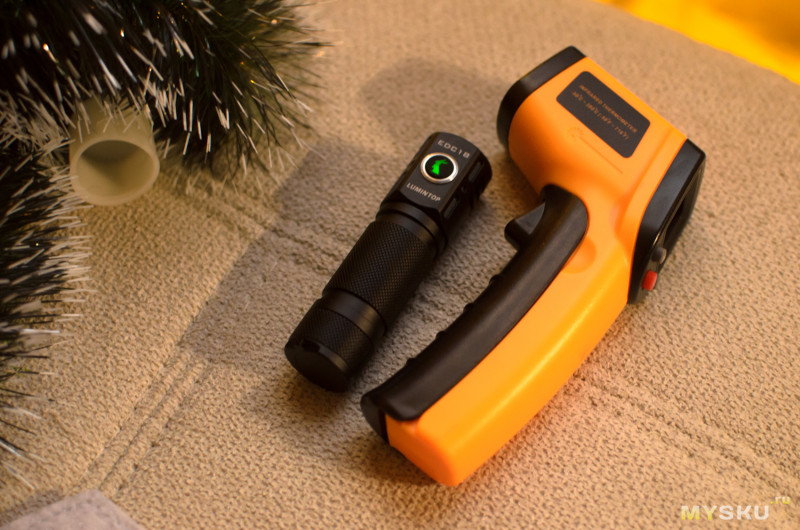
Фонарь греется, и греется он сильно. Как только вы повысите яркость до максимальной, уже можно будет начать чувствовать плавное увеличение температуры корпуса, а если включите турбо — это будет происходить в считанные секунды. Уже через минуту корпус станет невозможно держать, яркость упадет и корпус начнет приходить в норму. 
Что можно сказать? Это вполне ожидаемо. Фонарь маленький, светодиода три и очень даже хорошие. Логично, что на максимальной мощности этого компактного зверя можно будет обжечь себе пальцы. А поблагодарить стоит за степдаун, который значительно продлит жизнь вашего фонаря, если вы будете мучить его длительными сессиями на турбо. На максимальном режиме, особенно на улице, фонарь будет «lite» грелкой для рук, не более.
***
— Примеры фото внутри/снаружи.
Итак, в нашем распоряжении три SST20, цветовая температура которых 4000k (в этом фонаре, причем выбора в случае EDC18 больше нет). Официальный даташит прилагаю. Насколько я могу судить, это мода уходящего года — в разделе новинок у магазинов много таких фонарей, у которых один или несколько SST20 фирмы Luminous. Лично я их выделить не могу, потому что это мой первый фонарь на этой основе, но пока что мне нравится.
Lumintop EDC18 из-за строения головы имеет три оригинальных рефлектора, вкупе которые дают следующую форму луча: 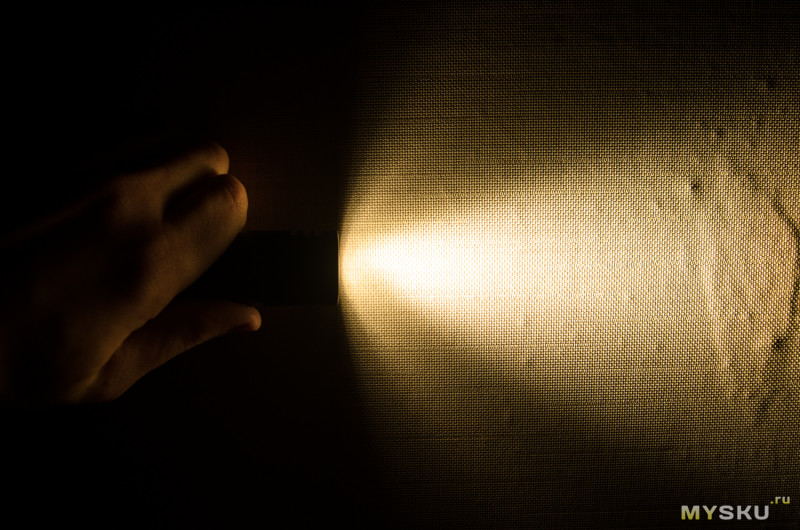
Четкого хотспота тут нет, фонарь явно не для дали и ничуть не дальнобой. Оно и логично, фонарь карманного ношения логически должен быть для «подсветить под ноги», хотя нынешние фонари уже давным-давно отошли от этого и умеют куда-куда больше.
Бимшоты получаются очень плавными. И цвет у светодиодов приятный. 4000k хорошая середина, хоть и это и субъективный параметр. Ниже гифка составленная на кадрах с минимального (к слову, это натуральный мунлайт, 1лм) по турбо режим:
***
И теперь пройдём (буквально) к примерам фото на улице. В качестве основной проверочной области стал переулок с минимальным количеством освещения в ночное время суток. На этот раз продемонстрирую турбо (первый кадр), максимальный, средний и около-минимальный (но не мунлайт, так как его на улице уже не видно).
Плавная регулировка вместе с турбо продемонстрирована на гифке ниже:
Бонус с сюрпризом:
С фонарем в зимнее время года можно делать что-то типа такого прямо на ровном месте: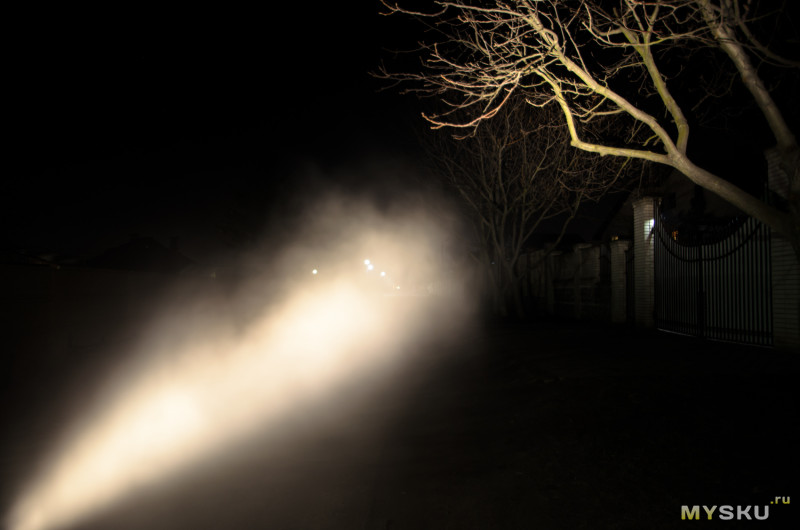
В домашних условиях
Что насчет диффузора, спросите вы. Спросите? Ну, наверное
Выглядит он странновато, чисто из-за того, что на голову фонаря он становится как не родной.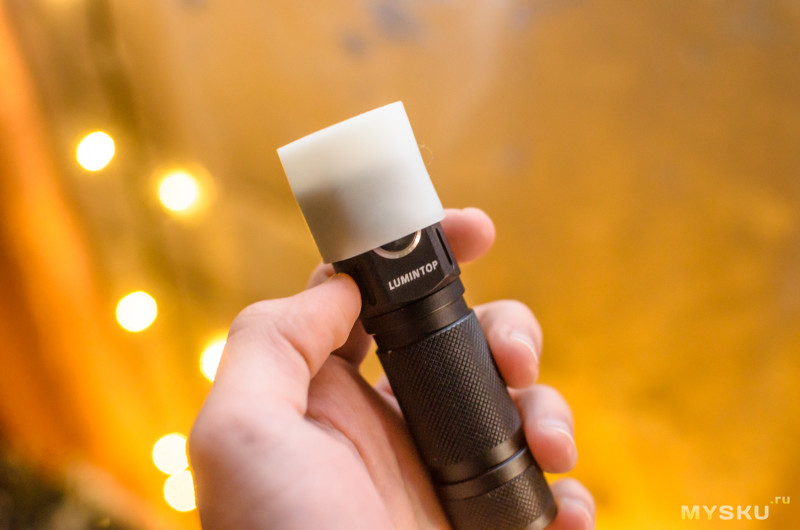
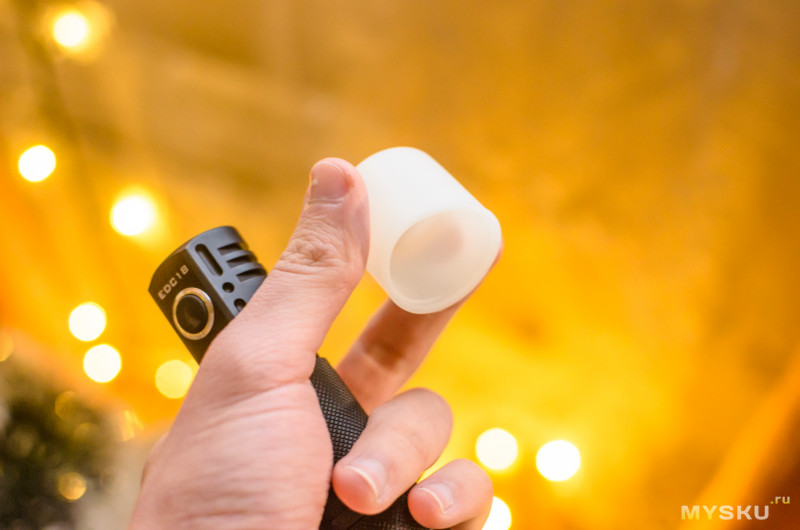
Но держится крепко, другого и не нужно. 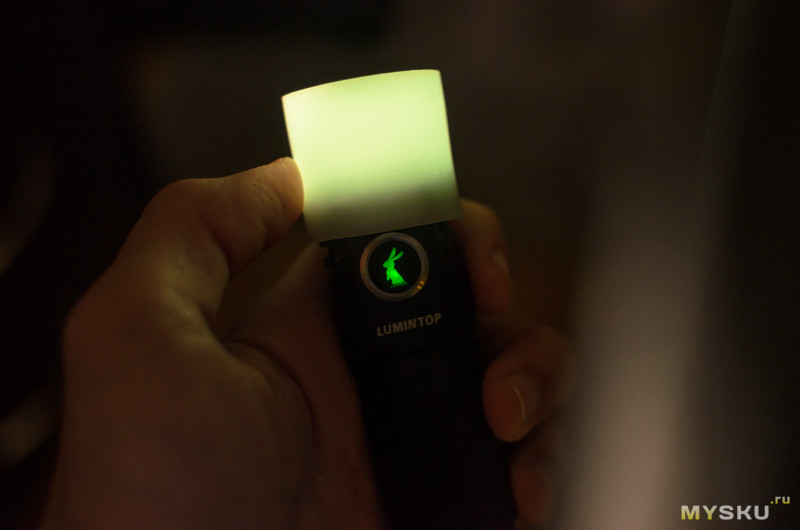
Если внутрь, на стекло, положить силиконовую розоватую насадку (которая хорошо держится на стекле), то можно получить более мягкий и приятный розоватый свет: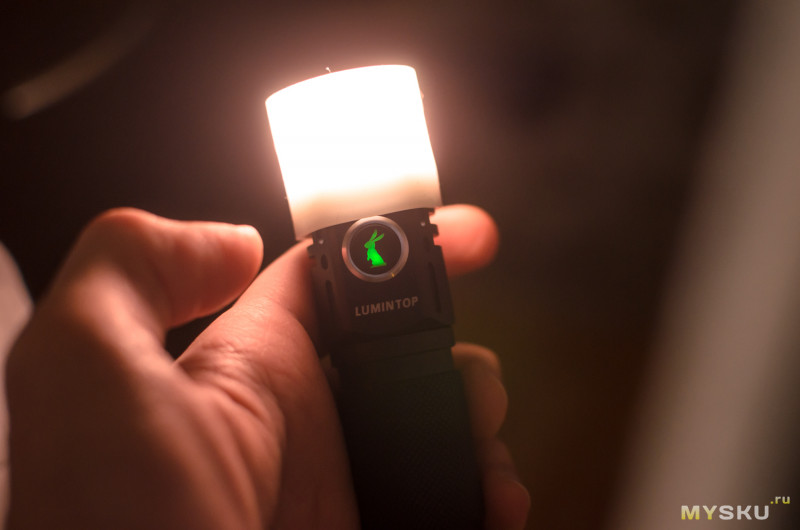
Диффузор есть диффузор, штука хороша для кемпинга или для тех мест жительства, где могут выключать электричество (думаю, многие в этой категории). Комнату освещает замечательно уже со средней яркости. Без проблем можно читать книги и прочее. На улице это дело выглядит в кое-каких условиях даже эпично:
Фото: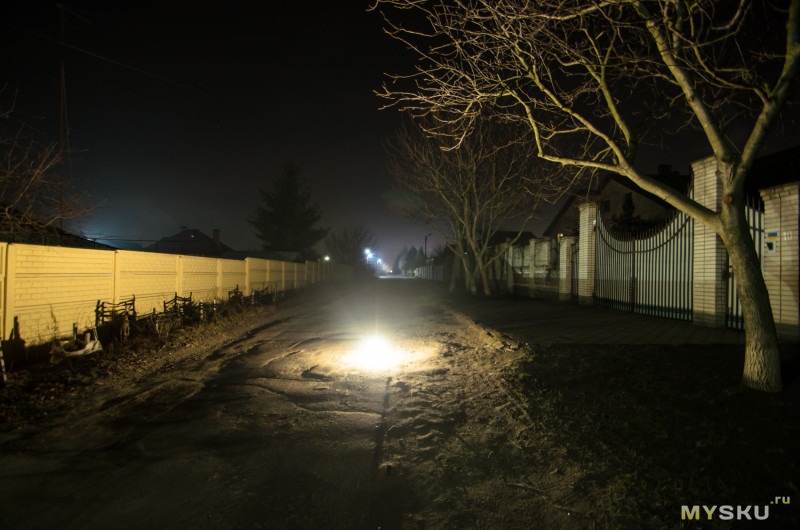
В общем, диффузор хорошее дополнение к фонарю за предлагаемую стоимость. Хоть и сама стоимость его составляет в районе всего 1-3 долларов.
***
— Выводы.
Так как текста вышло немало, обзор получился объёмным, давайте тезисно о плюсах и минусах.
Плюсы:
— комплект поставки (диффузор, как минимум, и прочая мелочевка, причем редкая)
— качество сборки, которая привычно всем Lumintop’ам
— множество режимов и плавная регулировка яркости благодаря Anduril UI.
— мощный свет, как для компактного EDC фонаря на 1х18650.
Минусы:
— большой нагрев на турбо.
— все же неприглядная упаковка при цене в $40+.
Итак, Lumintop EDC18 — вполне себе удался. Я бы его оценил в 18 из 20, а то причем тут цифра 18 (если только не к диаметру используемых аккумуляторов). Лично мне тут не хватает встроенного разъёма для зарядки, тем более фонарь мощный и заряжать аккум. 18650 придется как минимум пару раз в месяц-два, при среднем уровне использования, хотя и вещь сугубо индивидуальная — фонарем на постоянной основе пользуется далеко не каждый второй владелец фонаря в своем шкафу/кладовке.
Модель привычно качественная и приятная, и имеет кучу потенциала благодаря хорошему интерфейсу. В довесок к этому в комплект докинули «ништяков» — чего еще нужно?
При цене в 40-45 долларов EDC18 стоит рядом с другими моделями от таких же именитых брендов. Кто-то в чем-то лучше, кто-то в чем-то хуже. Дело обычное. 
Если вам подошел этот фонарь — значит подошел. Звучит логично
На сим всё, спасибо за внимание и не забывайте новогоднее настроение!
Товар для написания обзора предоставлен магазином. Обзор опубликован в соответствии с п.18 Правил сайта.
Фонарик с Anduril. Полное руководство по управлению
Для многих станет сюрпризом сочетание таких слов как «интерфейс» и «фонарик». Казалось бы, что тут может быть сложного — жми на кнопку, да включай. В случае с чем-то простым типа Convoy (хотя и тут есть варианты) или Fenix так и есть. И для своего круга пользователей это однозначно удобно.
Но есть и те, кто хочет чего-то более гибкого. Намного более гибкого. И в результате таких запросов свет увидел Anduril. Помимо него есть еще и Narsil, к слову.
Если вы ищете по-настоящему яркий фонарик (этак 5-7 тысяч люмен), то велики шансы того что вы столкнетесь именно с Anduril. И фонарик с таким выхлопом и таким интерфейсом обойдется вам кардинально дешевле чем вы отдали бы за что-то с привычным простым управлением и производства кого-то из именитых брендов. Тут, по большому счету, речь идет о том, что предлагает Mateminco.
Так как руководства фонариками с таким типом управления содержат лишь англоязычный вариант. Изрядной длины портянка с целым комиксом с разномастными стрелочкам и вариантами блужданий по настройккам. Поэтому неудивительно что в комментариях к обзорам на канале меня просили помочь. И я решил свести все это к одному посту, посвящённому исключительно такой специфической, но крайне полезной для своей аудитории теме как руководство по управлению фонариком с интерфейсом Андурил.
По умолчанию идет бесступенчатая регулировка яркости
из ВЫКЛ
Включение на последнем запомненном уровне. — по щелчку, выключение аналогично.
Удержание – старт на минимальной яркости и увеличения до потолка (именно потолка, не турбо). Плавное или ступенчатое, смотря в каком типе перебора яркости вы находитесь.
2 клика – потолок яркости.
Клик -удержание – потолок (если из ВЫКЛ)и уменьшение яркости
3 клика – спец режимы (проверка напряжение, маяк, температура)
Клик-клик-удержание – режимы стробов (свеча, вело-сигнал, party-strobe, тактический строб, «вырви глаз»). Переход между ними по 2 щелчку. Запускается последний использованный режим
4 клика – блокировкаразблокировка. Тут при удержании будет запускаться минимальная яркость. Удобно.
5 кликов – моментальный режим (работает только из ступенчатой регулировки!)– запускает последний использованный в бесступенчатой регулировке уровень яркости. Чтобы выйти из него надо разомкнуть контакт хвостокрышкой. Удобно для ситуаций когда вам надо чтобы постоянно запускался только один режим на одной яркости.
6 кликов – режим Маггла. Т.е. настраиваете яркость, даете кому-то фонарик, включатся будет только в этой яркости. Ну чтобы дать тем же детям и не волноваться что ослепят друг друга. Тут он на уровне 5-240 люмен. Вполне пригодно как подножный свет или свет в помещении.
Из ВКЛ
По щелчку ВЫКЛ
Удержание – яркость вверх
Щелчок и удержание – яркость вниз
2 щелчка – турбо
3 переключение между плавной и ступенчатой сменой яркости.
4 щелчка – регулировка бесступенчатой регулировки.
Попадает в выбор минимальной яркости, N нажатий задает минимальную яркость. Т.е. 10 щелчков сделает минимальной яркостью 10 из 150 возможных.
2 щелчка чтобы попасть в настройку макс яркость по формуле 1+турбо-N. Т.е. при 1 щечке максимальная яркость будет равнятся турбо. При 20 щелчках это будет турбо-19.
Еще 2 щелчка – количество ступенек в разбросе мин-макс. По умолчанию их кажется идет 7, уже это вполне достаточно.
Из того что стоит упомянуть – тут надо калибровать датчик температуры. у меня он показывал 42 градуса вместо 25 реальных, то есть нагревался очень быстро.
Т.е. зайти в настройки температуры (3 щелчка) потом 3 раза по 2 раза — попадаем в temp chec. надо сравнить показания фонарика с внешним термометром. если вы видете 4 и 2 мигания, то есть 42 градуса, в то время как градусник показывает 26 — надо вмешаться. Вам надо сделать 4 щелчка, увидите пару мигания и бзззз. во время первого безз надо надо отщелкать реальную температуру. Вы ее отщелкаете, будет пауза и вторая пара миганий, после которой будет еще один бзззз — тут идем в настройку термоотсечки. Она работает по принципу 30С+количество щелчков. т.е. если щелкнуть 40 раз, то температуры термоотсечки будет выставлена на 70 градусов. По умолчанию она выставлена на 45 градусов, я выставил ее на 50.
Ну вот как-то так. Базово, разумеется. Еще, к примеру, можно задавать уровень потолка (напоминаю — проматывается до потолка, не до турбо), играться с частой стробов.
Можно задать нижний и верхний уровень (floorceiling). из ВКЛ делаем 4 щелчка, фонарик отвечает бзззз. Во время первого количеством нажатий задается нужный порог яркости (N150). Во время второго — верхний по принципу (151-N). То есть сделав одно нажатие, потолком выставляется не идущий по умолчанию 130150 (для этого надо нажать 21раз), а максимально доступная яркость в 150150х.
Начну с простого, а именно с описания основных возможностей этого фонаря, которые понятны по характеристикам. Во-первых, у фонаря есть несколько версий, и судя по моим наблюдениям — версия с SST20 самая нераспространенная (на данный момент, как минимум). Во-вторых, Lumintop стали использовать начинку с Anduril UI, которую лично я встретил недавно в Astrolux по мотивам англоязычного форума BLF (BudgetLightForum). Таким образом, в фонаре появилась плавная регулировка яркости. Помимо этого Lumintop’ы добавили сюда свой фирменный, так сказать, дизайн (шарм), качество, светящуюся кнопку с логотипом кролика и встроенный магнит. Из того, чего тут не хватает изначально — встроенного разъёма для зарядки. В таком случае тут был бы самый полный набор всего, что нужно в среднестатистическом фонаре. Но вещь может и не каждому нужна, так что фонарь и без разъёма выглядит очень выгодно. Подробности, впечатления и фото — всё дальше.
Составляющая обзора:
— коробка и комплект поставки.
— внешний вид и сборка фонаря.
— управление и режимы, Anduril UI.
— нагрев.
— примеры фото внутри/снаружи.
— выводы.
Не забудем и про характеристики:
— Brand: LUMINTOP
— Model: EDC18
— Emitter: SST20 4000K
— Optic: Standard TIR optical lens
— Flux: ~2800 lm (XP-L Hi)
— Intensity: ~12 500 cd ANSI throw ~223 m (XP-L Hi)
— Firmware:
> The EDC18 uses free software called Andúril, distributed under the terms of the GPL v3.
— User interfaces:
[1] By default the EDC18 is set to use SMOOTH RAMPING. Instant access to TURBO mode is also provided.
[2] A more conventional STEPPED RAMPING UI is available if you like discrete modes level. You can choose how many steps you want
[3] MOMENTARY mode is useful for signaling purposes or rapidly/briefly lighting up targets. To exit this mode, physically disconnect power
[4] MUGGLE mode uses a reduced output.
[5] It has an electronic LOCKOUT for safety, but acts also as momentary low light.Other functions: Battery check, sunset, beacon tactical strobe, party strobe, bike flasher, candlelight, lightning storm
— Battery: One flat-top or button-top 18650 cell. Anunprotected cell is recommended.
— Max. length of battery is 66 mm. Cell is not included.
— Driver: FET+7+1 driver. Low parasitic drain while OFF
— Body: Aluminum with hard-coat anodizing
— Ingress rating: Equivalent to IPX7
— Weight: Approximately 53 g without cells
Характеристики кинул на английском, официальные. Если кто-то будет в чем-то заинтересован — сможет найти и в них. В остальном, подробнее будет в обзоре (в т.ч. про управление, и про режимы; это отдельная тема при использовании интерфейса Anduril UI).
А теперь приступим к обзору. Приятного чтения.
— Коробка и комплект поставки.
Коробка у Люминтопов довольно стандартная, и сейчас мне бы хотелось сказать, что, возможно, пора что-то менять. Она, конечно, плотная, и почту выдерживает, но о презентабельности говорить нельзя. А ведь фонари у них не самые дешевые, отнюдь, потому можно было бы придумать и что-то получше.
Как видите, на внешней стороне (это картонный рукав) имеется наклейка, которая указывает на используемый светодиод. В остальном, на коробке даже характеристик не найти.
Стоит отдать должное только за то, что в такую небольшую коробочку уложили вполне себе приличный комплект.
И состоит он из:
— фонаря
— стальной клипсы
— диффузора
— темляка
— двух доп. насадок на светодиоды
— двух запасных уплотнительных колец
— стального кольца для ключей
— специального инструмента для снятия безеля
— инструкции
Как видите, для полного счастья тут не хватает только аккумулятора, но и без него есть на что посмотреть.
Хотя особого смысла разбирать всё слишком детально — нет. Потому буду краток, чтобы быстрее перейти к самому предмету обзора и его сопутствующих особенностей. Так что: клипса в меру тугая, прицепить можно и со стороны хвоста, и со стороны головы. Темляк (т.е. ремешок для руки) самый обычный, внимания не стоит; диффузор силиконовый, и мы на него еще посмотрим в пункте с проверкой работоспособности фонаря; то же касается и насадок для светодиода (у меня они остались под небольшим вопросом); а что касается инструмента для снятия безеля — совсем скоро мы его будем использовать.
Что и правда стоит изучить заранее, так это инструкцию. Она тут только на английском и подробно описывает все возможности фонаря и его управление.
На этом с осмотром комплектующих закончим.
***
— Внешний вид и сборка Lumintop EDC18.
Дизайн фонаря не агрессивный. Он выглядит плавным, таким и является. Более того, размеры составляют ~28мм в диаметре головы и 94мм по длине. Это очень мало, из-за чего даже рядом с 18650 фонарь выглядит небольшим, не говоря уже про сравнение с 20700. В руке маленькие габариты ощущаются в полной мере:*я уж извиняюсь за то, что почти все фото сделаны в руке, а то уже пару раз встречал негодующих; но съёмка в руке позволяет заснять объект со всех сторон и позволяет добиться более красивого фона; и самое главное то, что меня это устраивает, как и большинство читающих
В общем, модель явно спроектирована на славу. К слову, её и правда спроектировали (кто бы сомневался), и это был человек с никнеймом Fritz15 с ранее упомянутого BLF. Так что все связано. Но всё, что и правда нужно знать, так это то, что EDC18 и правда получился очень удобным и компактным фонарем, который можно положить в почти любой карман (и кармашек), и который, благодаря клипсе, можно еще и прицепить на ремень/рюкзак. Универсально.
Не забываем про магнит в хвосте. Так что модель еще более универсальная (это еще речь не заходила за комплектный диффузор!):
Но давайте не будем разгоняться и осмотрим фонарь с ног, как говорится, и до головы. Как самые внимательные могли уже рассмотреть, на голове у фонаря имеется кнопка с логотипом (и зеленой подсветкой) и название самого фонаря. Кнопка для такого небольшого фонаря немаленькая и нажимается очень приятно.
Подсветка не разрядит ваш фонарь и за две недели, но для тех, кто переживает, точно не составит труда просто чуть-чуть открутить голову фонаря — тогда не будет контакта и кнопка не будет светить.
С обратной стороны от кнопки рёбра для охлаждения. Относительно маленькие.
Основной корпус с мелкой накаткой, ничего особенного сказать не могу. Да и про покрытие тоже — такое ощущение, что анодирование у всех фонарей прямо-таки одинаковое, как и материал изготовления всего корпуса. Так что жаловаться не на что.
Хвост простой, не считая встроенного магнита и «ушка» для темляка.*фокус, так сказать, отдалился
Раз мы тут, то можно поговорить и про качество резьбы. Хотя, чего тут говорить — за весь опыт использования фонарей Lumintop (и не только), резьба у них не слетала и не подавала каких-либо дурных признаков. И смазана она тут, у EDC18, хорошо. Полностью анодирована.
Диаметр батарейного отсека составляет 19мм, что с небольшим запасом для 18650.
Хоть в описании к фонарю и говорится, что использовать рекомендуется аккумуляторы без защиты, я поставил качественный защищенный Xtar 18650 на 2600mAh (высокотоковый) и вышло все очень даже.
Внутренняя часть хвоста с пружиной:
Как и внешняя часть драйвера (да, голова у фонаря откручивается, как было упомянуто выше, так что модель разбирается на три условных составляющих). Внешняя часть драйвера еще и пестрит шестью чипами L7135. Дабы не гуглить, вот.
Вот и плавно добрались до головы, с более детальным осмотром конструкции. Тут-то нам и пригодится комплектный инструмент для снятия безеля. Раньше мне этим инструментом служил штангенциркуль, тут же есть специальная металлическая вырезка, которая идеально становится в пазы. Очень удобно. И встречаю впервые. Гениально!
Под безелем находится встроенное стекло, которое вытащить у меня не удалось. Старался как мог, но поддеть его негде, и с обратной стороны драйвер тоже не поддался. В общем и целом, это и не столь важно. Светодиоды с оригинальными рефлекторами на фото ближе:
Пора заканчивать с этим осмотром и перейти к действиям.
И это будет разбор режимов 
***
— Управление и режимы, Anduril UI.
Мне этот интерфейс понравился, скажу я сразу. Во-первых, это плавная регулировка яркости по умолчанию. Во-вторых — мне нравится плавная регулировка. Без этих двух составляющих ничего бы и не было, вот так вот всё просто.
А если серьёзно, то описания режимов есть в инструкции, как и всех шорткатов. Более того, в одном из недавних своих обзоров у меня был Astrolux EC01, с этим же Anduril UI. Почитать его можно тут (фонарь побольше, и с XHP50.2).
Если вы позволите, я не буду заново описывать то, что я писал в этом же пункте в обзоре EC01, а просто процитирую с минимальными правками (благо, автор мне разрешил).
Начнём с простого, с состояния, когда фонарь выключен:
— одно нажатие на кнопку включает фонарь на прошлом включенном режиме. Память работает на всё, за исключением пары очень редких исключений.
— зажатие на кнопку включает фонарь на минимальном режиме, после чего удержание медленно поднимает его яркость вплоть до максимума.
— двойное зажатие, но без отпускания кнопки, включает фонарь на максимальном режиме, после чего удержание кнопки уменьшает яркость.Турбо включается двойным кликом. Этого всего уже достаточно, чтобы жить с этим фонарем. Всё удобно и понятно.
А теперь пойдёмте в пучину функциональности. Всё так же, с выключенного фонаря:
— быстрых три нажатия активируют проверку аккумулятора на напряжение. Сделано неудобно, но иначе, наверное, никак: первая часть миганий показывает первую цифру, вторая — вторую. Понять по ним, что у твоего аккумулятора напряжение 3.9В можно за секунд 10, но только при условии, что вы не собьётесь со счёта.
— четыре быстрых нажатия на кнопку блокируют фонарь. Такой же манипуляцией происходит разблокировка. Удобная функция, которая расположена не так и далеко от основного функционала.
— пять быстрых нажатий переводят фонарь в режим «Momentary». Что это значит? В общем-то, ничего сложного. В этом режиме фонарь будет работать только тогда, когда вы зажимаете кнопку. Как говорит инструкция, это удобно, чтобы использовать Морзянку. Нельзя не согласиться. А вот чтобы выйти из этого режима, нужно открутить хвост, так как пятью нажатиями чисто физически нельзя выйти из режима — ведь он мигает каждый раз, когда вы нажимаете на кнопку. Важно знать, что яркость в этом режиме фиксируется. Хотите максимальную — включайте уже на максимальном.Теперь, что касается мигалок. Они тут есть, конечно. И их тут так же много, и расписывать каждый я не буду. Лишь напишу, что для того, чтобы зайти в режим мигалок, нужно из выключенного состояния фонаря два раза нажать на кнопку, а на третий держать палец.
Из режима с проверкой напряжения, можно пройти в другие мигания, в режим Beacon (маяк), а так же настроить его мануально, с помощью четырёх нажатий и дальнейших манипуляций; отсюда же можно пройти и в другие несколько режимов, которые описаны тут: комментарий от ув. validall
Вот как-то так, слов вышло много, но если прочитать и вдуматься — хватит одного раза.
***
— Нагрев.
В этом фонаре это отдельная и правда интересная тема для обсуждения.
Фонарь греется, и греется он сильно. Как только вы повысите яркость до максимальной, уже можно будет начать чувствовать плавное увеличение температуры корпуса, а если включите турбо — это будет происходить в считанные секунды. Уже через минуту корпус станет невозможно держать, яркость упадет и корпус начнет приходить в норму.
Что можно сказать? Это вполне ожидаемо. Фонарь маленький, светодиода три и очень даже хорошие. Логично, что на максимальной мощности этого компактного зверя можно будет обжечь себе пальцы. А поблагодарить стоит за степдаун, который значительно продлит жизнь вашего фонаря, если вы будете мучить его длительными сессиями на турбо. На максимальном режиме, особенно на улице, фонарь будет «lite» грелкой для рук, не более.
***
— Примеры фото внутри/снаружи.
Итак, в нашем распоряжении три SST20, цветовая температура которых 4000k (в этом фонаре, причем выбора в случае EDC18 больше нет). Официальный даташит прилагаю. Насколько я могу судить, это мода уходящего года — в разделе новинок у магазинов много таких фонарей, у которых один или несколько SST20 фирмы Luminous. Лично я их выделить не могу, потому что это мой первый фонарь на этой основе, но пока что мне нравится.
Lumintop EDC18 из-за строения головы имеет три оригинальных рефлектора, вкупе которые дают следующую форму луча:
Четкого хотспота тут нет, фонарь явно не для дали и ничуть не дальнобой. Оно и логично, фонарь карманного ношения логически должен быть для «подсветить под ноги», хотя нынешние фонари уже давным-давно отошли от этого и умеют куда-куда больше.
Бимшоты получаются очень плавными. И цвет у светодиодов приятный. 4000k хорошая середина, хоть и это и субъективный параметр. Ниже гифка составленная на кадрах с минимального (к слову, это натуральный мунлайт, 1лм) по турбо режим:
***
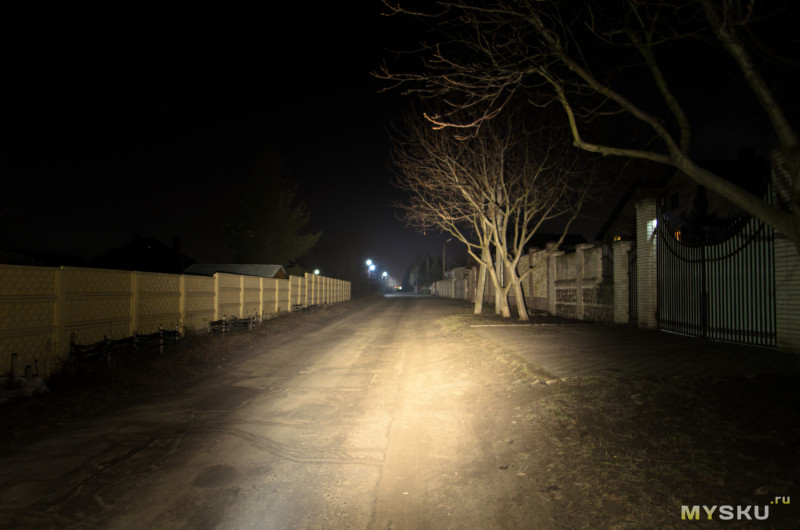
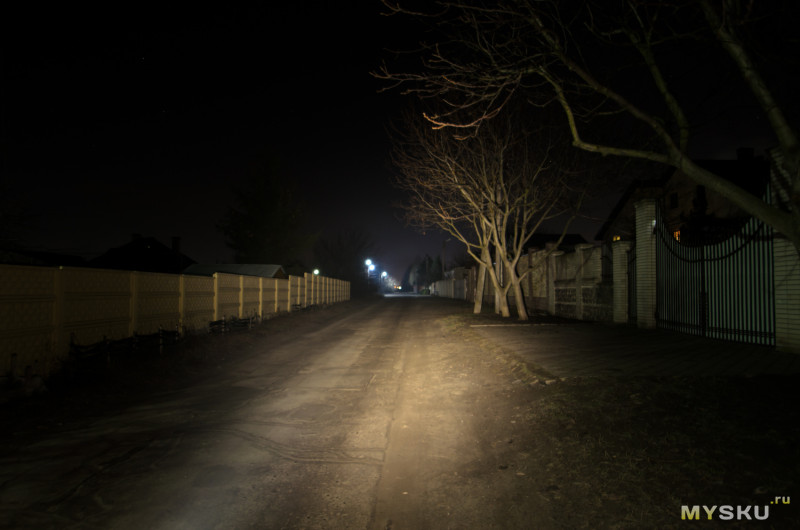
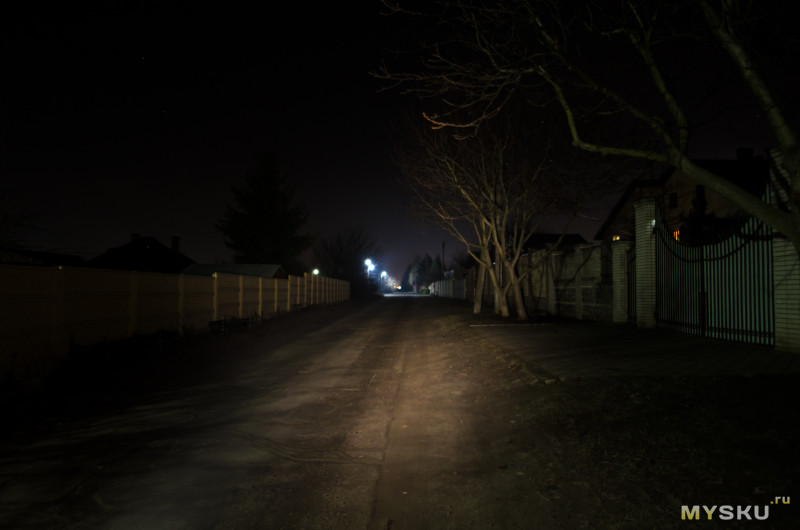
И теперь пройдём (буквально) к примерам фото на улице. В качестве основной проверочной области стал переулок с минимальным количеством освещения в ночное время суток. На этот раз продемонстрирую турбо (первый кадр), максимальный, средний и около-минимальный (но не мунлайт, так как его на улице уже не видно).
Плавная регулировка вместе с турбо продемонстрирована на гифке ниже:
Бонус с сюрпризом:
С фонарем в зимнее время года можно делать что-то типа такого прямо на ровном месте:
В домашних условиях
Что насчет диффузора, спросите вы. Спросите? Ну, наверное
Выглядит он странновато, чисто из-за того, что на голову фонаря он становится как не родной.
Но держится крепко, другого и не нужно.
Если внутрь, на стекло, положить силиконовую розоватую насадку (которая хорошо держится на стекле), то можно получить более мягкий и приятный розоватый свет:
Диффузор есть диффузор, штука хороша для кемпинга или для тех мест жительства, где могут выключать электричество (думаю, многие в этой категории). Комнату освещает замечательно уже со средней яркости. Без проблем можно читать книги и прочее. На улице это дело выглядит в кое-каких условиях даже эпично:
Фото:
В общем, диффузор хорошее дополнение к фонарю за предлагаемую стоимость. Хоть и сама стоимость его составляет в районе всего 1-3 долларов.
***
— Выводы.
Так как текста вышло немало, обзор получился объёмным, давайте тезисно о плюсах и минусах.
Плюсы:
— комплект поставки (диффузор, как минимум, и прочая мелочевка, причем редкая)
— качество сборки, которая привычно всем Lumintop’ам
— множество режимов и плавная регулировка яркости благодаря Anduril UI.
— мощный свет, как для компактного EDC фонаря на 1х18650.
Минусы:
— большой нагрев на турбо.
— все же неприглядная упаковка при цене в $40+.
Итак, Lumintop EDC18 — вполне себе удался. Я бы его оценил в 18 из 20, а то причем тут цифра 18 (если только не к диаметру используемых аккумуляторов). Лично мне тут не хватает встроенного разъёма для зарядки, тем более фонарь мощный и заряжать аккум. 18650 придется как минимум пару раз в месяц-два, при среднем уровне использования, хотя и вещь сугубо индивидуальная — фонарем на постоянной основе пользуется далеко не каждый второй владелец фонаря в своем шкафу/кладовке.
Модель привычно качественная и приятная, и имеет кучу потенциала благодаря хорошему интерфейсу. В довесок к этому в комплект докинули «ништяков» — чего еще нужно?
При цене в 40-45 долларов EDC18 стоит рядом с другими моделями от таких же именитых брендов. Кто-то в чем-то лучше, кто-то в чем-то хуже. Дело обычное.
Если вам подошел этот фонарь — значит подошел. Звучит логично
На сим всё, спасибо за внимание и не забывайте новогоднее настроение!
In July 2020, ToyKeeper, posted on BudgetLightForum about
work on Anduril 2: a major rewrite of
the Anduril 1 firmware.
Based on the
original text manual found in the source code, this is a formatted version of that manual for easy readability
on mobile devices and to make linking to specific sections possible.
A big thanks again to ToyKeeper for continued
innovation and updates on the great Anduril UI firmware.
Table of Contents
Anduril 2 User Manual
Anduril is an open-source firmware for flashlights, distributed under
the terms of the GPL v3. The sources can be obtained here:
- Link 1
- Link 2
Quick Start
After putting a battery in the light and tightening the parts together,
the light should quickly blink once to confirm it has power and is now
operational. After that, basic usage is simple:
- Click to turn the light on or off.
- Hold the button to change brightness.
- Release and hold again to change brightness the other way.
That is all the user needs to know for basic use, but there are many
more modes and features available for people who want more.
Before reading the rest of this manual, it is recommended that users
look at the Anduril UI diagram(s), which should be provided along with the
flashlight.
With great power comes great complexity 😵.
Button presses
Button presses are abbreviated using a simple notation:
| Button | Meaning | |
|---|---|---|
1C |
One click | Press and then quickly release the button |
1H |
Hold | Press the button, but keep holding it |
2C |
Two clicks | Press and release quickly, twice |
2H |
Click, hold | Click two times, but hold the second press |
3C |
Three clicks | Press and release quickly, three times |
3H |
Click, click, hold | Click three times, but hold the final press |
The same pattern is used with higher numbers too. For example, 10C
means ten clicks… and 10H means ten clicks but hold the final press.
Simple UI
By default, the light uses a simple UI. This is useful if you lend the
light to someone else, or if you just don’t want to bother with any
crazy disco modes.
Simple UI has all the basic functions needed to work as a flashlight,
but the minimum and maximum brightness are limited by default to make it
safer, and any complex or advanced functions are blocked.
Simple UI diagram/flowchart.
Functions available in Simple UI include:
| Button | Action |
|---|---|
1C |
On / off |
1H |
Ramp up (or down, if button was released less than a second ago) |
2H |
If light is on : ramp down / If light is Off: momentary high mode |
2C |
Double click to go to / from highest safe level |
3H |
Tint ramping (on lights that have it) |
4C |
Lockout mode |
Some other modes and functions are available too. When the light is
Off, these are the options:
| Button | Action |
|---|---|
3C |
Battery check mode (displays voltage once, then turns off) |
4C |
Lockout mode |
10H |
Switch to Advanced UI |
15C or more |
Version check |
In Lockout mode with Simple UI, there are a few functions:
| Button | Action |
|---|---|
1H |
Momentary moon |
2H |
Momentary low |
3C |
Unlock and turn off |
4C |
Unlock and turn on |
4H |
Unlock and turn on at low level |
5C |
Unlock and turn on at high level |
To change between Simple UI and Advanced UI, turn the light Off and then
do one of these:
| UI | Button | Action |
|---|---|---|
| Simple UI | 10H |
Go to Advanced UI |
| Advanced UI | 10C |
Go to Simple UI |
| Advanced UI | 10H |
Configure Simple UI |
If you get lost, or if you want to auto-calibrate the temperature sensor, do a factory reset.
The process for this is:
- Loosen tailcap
- Hold button
- Tighten tailcap
- Keep holding button for about 4s
The light should flicker while getting brighter, then briefly burst to
full power. Hold until it reaches full power to do a reset, or let go
of the button early to abort.
On some lights, like products where the tailcap method is impossible,
use 13H from Off to do a factory reset. If this is difficult, try
counting it like music to make it easier:
1 2 3 4
1 2 3 4
1 2 3 4
HOLD
Simple UI is enabled after each factory reset.
Simple UI can be configured in several ways, but not while Simple UI is
active. So go to the Advanced UI, configure things, then go back to
Simple UI.
Configurable options include:
- floor level
- ceiling level
- number of steps (in stepped ramp)
- turbo style
Other options are inherited from Advanced UI:
- ramp style (smooth / stepped)
- smooth ramp speed
- ramp-after-moon style
- memory settings
- auto-lock settings
- aux LED settings
- voltage calibration
- thermal regulation settings
- hardware-specific “misc menu” settings
Advanced UI
Most of the information below this is for the Advanced UI. Anything not
already noted above is blocked in the Simple UI.
Ramping / Stepped Ramping Modes
Anduril’s ramping mode uses a smooth ramp or a stepped ramp, depending
on which style the user prefers.
Each ramp has its own settings:
- floor (lowest level)
- ceiling (highest level)
- and the stepped ramp can also have a configurable number of
steps
Additionally, Simple UI has its own ramp settings for floor, ceiling,
and number of steps. The smooth/stepped style is inherited from the
Advanced UI’s ramp.
There are four ways to access Ramping mode when the light is Off:
| Button | Action |
|---|---|
1C |
Turn on at the memorized brightness. (see below for details about what “memorized” means) |
1H |
Turn on at the floor level. Let go after the light turns on to stay at the floor level, or keep holding to ramp up. |
2C |
Turn on at the ceiling level. |
2H |
Turn on at full power, turn off when released. (momentary turbo) (in Simple UI, this uses the ceiling level instead of turbo) |
While the light is on, a few actions are available:
| Button | Action |
|---|---|
1C |
Turn Off. |
2C |
Go to or from the turbo level. (or if it has regulated down, “bump” back up to turbo) (turbo level / behavior is configurable) |
1H |
Change brightness (up). If the button was released less than a second ago, or if it’s already at the ceiling, it goes down instead. |
2H |
Change brightness (down) |
3C |
Switch to the other ramp style. (smooth / stepped) |
3H |
Tint ramping (on lights which have it). |
3H |
Momentary turbo (on lights with no tint ramping). |
4C |
Go to Lockout mode. |
5C |
Go to Momentary mode. |
5H |
Start a Sunset Timer. |
7H |
Ramp config menu.
|
10C |
Activate Manual memory and save the current brightness. |
10H |
Ramp extras config menu.
|
Memory determines which brightness level the light goes to with 1C
from Off. There are three types of brightness memory to choose from:
| Memory Style | Brightness |
|---|---|
| Automatic | Always uses the last-ramped brightness. (does not memorize levels accessed by a shortcut, like turbo, 2C for ceiling, or 1H-from-off for floor) |
| Manual | Always uses the user’s saved brightness. |
| Hybrid | Uses the Automatic memory brightness if the light was only off for a short time, or resets to the Manual memory level if it was off for a longer time. The timer for this is configurable from 0 to ~140 minutes. |
Another way to think of it is: There are three styles of memory for the
last-ramped brightness level…
- Always remember (Automatic)
- Remember for N minutes (Hybrid)
- Never remember (Manual)
To choose a memory style, set the configuration accordingly:
| Mem Style | Manual mem | Manual mem timer |
|---|---|---|
| Automatic | off | any |
| Manual | on | zero |
| Hybrid | on | non-zero |
Sunset Timer
In the Ramp mode or Candle mode, it’s possible to make the light turn
itself off after a while.
To activate the timer, go to the brightness you want and then use a 5H. Keep holding the button, and the light should blink once per
second. Each blink adds 5 minutes to the timer.
In Ramp mode, it slowly dims until it’s at the lowest level, then shuts
off. In Candle mode, it stays at the same brightness until the final
minute, at which point it dims and dies out.
The user can change the brightness while the timer is active. If this
happens during the final few minutes, it also “bumps” the timer up to a
minimum of 3 minutes. So if it’s getting really dim and you need a
little more time, you could do a 5H to add 5 minutes, or simply ramp up
to the desired brightness.
Other Modes
Anduril has several other modes too. To access these, press the button
more than 2 times when the light is off:
| Button | Action |
|---|---|
3C |
Blinky / utility modes, starting with battery check |
3H |
Strobe modes, starting with the most recently used strobe |
4C |
Lockout mode |
5C |
Momentary mode |
7C / 7H |
Aux LED configuration |
9H |
Misc configuration menu (only on some lights) |
10H |
Simple UI configuration menu |
13H |
Factory reset (on some lights) |
15C or more |
Version check |
Lockout Mode
4C from Off to enter Lockout mode. Or 4C from Ramp mode.
This makes the light safe to carry in a pocket or a bag or anywhere else
the button might be pressed by accident.
To exit Lockout mode, 4C. The light should blink briefly and
then turn on at the memorized level. Or 4H to turn on
at the floor level instead:
| Button | Action |
|---|---|
4C |
Go to Ramp mode (memorized level). (uses manual mem level if there is one) |
3C |
Unlock and go to Off mode |
4H |
Go to Ramp mode (floor level). |
5C |
Go to Ramp mode (ceiling level). |
Lockout mode also doubles as a momentary moon mode, so the user can do
quick tasks without having to unlock the light. The brightness in
Lockout mode has two levels:
| Button | Action |
|---|---|
1H |
Light up at the lowest floor level. |
2H |
Light up at the highest floor level. (or the manual mem level, if there is one) |
It is also possible to make the light lock itself automatically after
being turned off. To enable this, go to Lockout mode and use 10H
to activate the auto-lock config menu. Release the button after
the first blink. Then at the prompt, click N times to set the auto-lock
timeout to N minutes.
10H: Auto-lock config menu. Click N times to set timeout to N minutes.
A value of zero disables the auto-lock feature.
So, to turn off auto-lock, don’t click at all.
And on lights which have aux LEDs, there may be additional functions:
7C/7H: Change Lockout Mode’s aux LED pattern. More details on
this below, in a separate section.
Blinky / Utility Modes
3C from Off to access Anduril’s blinky / utility modes. This
always starts at Battery check and the user can proceed to other blinky
modes if Advanced UI is enabled. The sequence is:
- Battery check
- Temperature check (if light has a temperature sensor)
- Beacon mode
- SOS mode (if enabled)
In all of these modes, some basic actions are available:
1C: Turn off.2C: Next blinky mode.
Additionally, in Battery check and Temperature check modes:
7H: Go to the voltage config menu or thermal config menu.
In more detail, this is what each blinky / utility mode does:
Battery check
Blinks out the battery voltage per cell. Full is 4.2V, empty is
about 3.0V. The light blinks the whole-number digit first, pauses,
then blinks out the “tenths” digit. Then a longer pause, and it
repeats.
So for 4.2V, it would be “blink-blink-blink-blink .. blink-blink”.
A “zero” digit is represented by a very quick blink.
The voltage config menu has one setting:
- Voltage correction factor. This adjusts the battery
measurement sensor, allowing the user to add or subtract up to
0.30V in 0.05V steps. Click N times to enter a value:Clicks Value 1C-0.30V 2C-0.25V 3C-0.20V 4C-0.15V 5C-0.10V 6C-0.05V 7Cdefault, 0V 8C+0.05V 9C+0.10V 10C+0.15V 11C+0.20V 12C+0.25V 13C+0.30V
Temperature check
Blinks out the current temperature in degrees C. This number
should be pretty close to what a real thermometer says. If not, it
would be a good idea to enter the thermal config menu and calibrate
the sensor. Or let the light settle to room temperature, then use
factory reset to auto-calibrate the sensor.
The thermal config menu has two settings:
-
Current temperature.
Clickonce per degree C to calibrate the
sensor. For example, if the ambient temperature is 21 C, then
click 21 times. -
Temperature limit. This sets the maximum temperature the light
can reach before it will start doing thermal regulation to keep
itself from overheating.Clickonce per degree C above 30. For
example, to set the limit to 50 C,click 20 times. The default
is 45 C, and the highest value it will allow is 70 C.
Beacon mode
Blinks at a slow speed. The light stays on for 100ms, and then
stays off until the next blink. The brightness and the number of
seconds between pulses are configurable:
-
Brightness is the user’s memorized ramp level, so set this in
ramping mode before activating beacon mode. Follows the same
memory rules as ramping – automatic, manual, or hybrid. -
Speed is configured by holding the button. The light should
blink once per second while holding the button. Release it
after the desired amount of time has passed, to set a new
beacon speed.
For example, to do a 10-second alpine beacon, hold the button
for 10 seconds.
SOS mode
Blinks out a distress signal.
Three short, three long, three short.
Repeats until light is turned off or until battery is low.
The memorized ramp level determines the brightness of SOS Mode.
Strobe / Mood Modes
Anduril includes a few extra modes for a variety of purposes:
- Candle mode
- Bike flasher
- Party strobe
- Tactical strobe
- Lightning storm mode
Beware: fast blinking lights ahead
3H from Off to access these. The last-used strobe mode is remembered,
so it will return to whichever one you used last.
In all of these modes, a few actions are available:
| Button | Action |
|---|---|
1C |
Turn off |
2C |
Next strobe / mood mode |
1H |
Increase brightness, or strobe faster (except lightning) |
2H |
Decrease brightness, or strobe slower (except lightning) |
5C |
Go to momentary mode, for a momentary strobe (this is useful for light painting) |
Additionally, Candle mode has one more action:
| Button | Action |
|---|---|
5H |
Activate Sunset Timer, and/or add 5 minutes to the timer |
In more detail, here is what each mode does:
-
Candle mode
Brightness changes randomly in a pattern resembling a candle flame.
If a timer is set, it will run until the timer expires, then get
dimmer for one minute, then sputter and turn itself off. Without a
timer, candle mode runs until the user turns it off. Brightness is
configurable. -
Bike flasher
Runs at a medium level, but stutters to a brighter level once per
second. Designed to be more visible than a normal ramping mode, but
otherwise works mostly the same. Brightness is configurable. -
Party strobe
Motion-freezing strobe light. Can be used to freeze spinning fans
and falling water. Speed is configurable. -
Tactical strobe
Disorienting strobe light. Can be used to irritate people. Speed
is configurable, and the duty cycle is always 33%.Be careful about heat in this mode, if using it for a long time.
-
Lightning storm mode
Flashes at random brightness and random speed to simulate lightning
strikes during a busy lightning storm. Do not look directly at the
flashlight when this mode is running, because it may suddenly go to
full power without warning.
Momentary Mode
5C from Off to enter Momentary mode. Or 5C from Ramp mode,
or 5C from a strobe mode.
This locks the flashlight into a single-mode interface where the LEDs
are only on when the button is held down. It is intended for Morse
code, light painting, and other tasks where the light should be on only
for a short time and probably in a pattern.
Momentary mode does either a steady brightness level or a strobe,
depending on which was active before going to Momentary mode. To select
which one, go to the mode you want to use, adjust the brightness and
speed and other settings, then 5C to enter Momentary mode.
In steady mode, brightness is the memorized ramp level, so adjust that
in Ramp Mode before entering Momentary mode.
In momentary strobe mode, the settings are copied from the last-used
strobe mode, such as party strobe, tactical strobe, or lightning.
To exit this mode, physically disconnect power by unscrewing the tailcap
or battery tube.
Every config menu has the same interface. It has one or more options
the user can configure, and it will go through them in order. For each
menu item, the light follows the same pattern:
-
Blink once, then go to a lower brightness. The user can keep
holding the button to skip this menu item, or release the button to
dive in and enter a new value. -
If the user released the button:
-
Stutter or “buzz” quickly between two brightness levels for a few
seconds. This indicates that the user can click one or more times
to enter a number. It will keep buzzing until the user stops
clicking, so there is no need to hurry.The actions here are:
- click: add 1
- hold: add 10 (only in versions 2021-09 or later)
- wait: exit
-
After entering a number, or after skipping every menu item, it waits
until the button is released then exits the menu. It should return to
whatever mode the light was in before entering the config menu.
While the light is on in a Ramping mode, 7H to access the config menu for the current ramp.
Or, to access the ramp config for Simple UI, make sure the Simple UI is
not active, then do a 10H from Off.
For smooth ramping mode, there are three menu options:
- Floor. (default = 1/150)
- Ceiling. (default = 120/150)
- Ramp speed. (default = 1, fastest speed)
For the stepped ramping mode, there are three menu options:
- Floor. (default = 20/150)
- Ceiling. (default = 120/150)
- Number of steps. (default = 7)
For the Simple UI mode, there are four menu options. The first three
are the same as stepped ramping mode.
- Floor. (default = 20/150)
- Ceiling. (default = 120/150)
- Number of steps. (default = 5)
- Turbo style. (default = 0, no turbo)
Default values are different for each model of flashlight. The numbers
above are only examples.
To configure the floor level, click the button equal to the number of
ramp levels (out of 150) at which the floor should be. To set the
lowest possible level, click once.
To configure the ceiling level, each click goes one level lower. So
1 click sets the highest possible level, 2 clicks is the 2nd-highest,
3 clicks is the 3rd-highest level, etc. To set the default of 120/150,
click 31 times.
When configuring the number of steps, the value can be anything from 1
to 150. A value of 1 is a special case. It places the step halfway
between the floor and ceiling levels.
Version Check Mode
This allows people to see which version of the firmware is installed on
their light. The format for this is (usually) 12 digits – a date
followed by a model number.
YYYYMMDDBBPP
- YYYY: Year
- MM: Month
- DD: Day
- BB: Brand ID
- PP: Product ID
The date is when the firmware was compiled. If the vendor did not set
this value, it defaults to 1969-07-20, the date of first human contact
with the moon. However, it might not be a date at all; some vendors may
specify a completely different type of value here.
The brand/product values are also known as the model number. These are
hard-coded in the source code for each light’s build target, and can be
looked up in the “MODELS” file or by using the “make models” command.
Protection Features
Anduril includes low voltage protection (LVP) and thermal regulation.
LVP makes the light step down to a lower level when the battery is low,
and if the light is already at the lowest level, it shuts itself off.
This activates at 2.8V. LVP adjustments happen suddenly, in large
steps.
Thermal regulation attempts to keep the light from overheating, and
otherwise adjusts output to stay as close as possible to the
user-configured temperature limit. Thermal adjustments happen
gradually, in steps so small they are difficult for humans to perceive.
WARNING: thermal regulation only works in Ramping Mode (both Stepped/Smooth and Turbo, but not Momentary Turbo).
Aux LEDs / Button LEDs
Some lights have aux LEDs or button LEDs. These can be configured to do
different things while the main emitters are off. There is one aux LED
mode for the regular Off mode, and another aux LED mode for Lockout
mode. This allows the user to see at a glance whether the light is
locked.
Aux LED modes typically include:
- Off
- Low
- High
- Blinking
To configure the aux LEDs, go to the mode you want to configure and then
7C. This should change the aux LEDs to the next
mode supported on this light.
7C: Next aux LED mode.
If the aux LEDs can change color, there are additional actions to change
the color. It is the same as above, but hold the button on the last
click and then let go when the desired color is reached.
7H: Next aux LED color.
On most lights, the colors follow this sequence:
- Red
- Yellow (Red+Green)
- Green
- Cyan (Green+Blue)
- Blue
- Purple (Blue+Red)
- White (Red+Green+Blue)
- Disco (fast random colors)
- Rainbow (cycles through all colors in order)
- Voltage (uses color to display battery charge)
In voltage mode,
the colors follow the same sequence, in the same order
as a rainbow…
with red indicating a low battery and purple indicating
a full battery.
For lights with a button LED, the button LED typically stays on while
the main emitters are on. Its brightness level is set in a way which
mirrors the main LED – off, low, or high.
For lights with a RGB button LED, the button LED indicates battery
charge during use in the same manner as the aux LED voltage mode.
For lights with front-facing aux LEDs, the aux LEDs typically stay off
when the main emitters are on, and when the light is otherwise awake.
The aux LEDs on most lights only turn on when the light is asleep.
Some models may have an extra config menu for settings which don’t fit
anywhere else. These settings are, in order:
-
Tint ramp style:
0 = smooth (blend channels in any proportion)
1 = toggle (only one channel active at a time) -
Jump Start level:
Some lights are prone to starting up slowly at low levels, so they
have an option to “jump start” the engine by pulsing a higher power
level for a few milliseconds when changing from off to a low level.
This setting specifies how bright that pulse should be.The value can be from 1 to 150, but is usually between 20 and 50.
These settings are hardware-specific and may not be present on all
lights. The number of settings in the global menu depends on the
hardware model and the firmware version.
Tint Ramping
Some lights have more than one set of LEDs which can be adjusted to
change the color temperature of the light. On these models, there is a
global button mapping which works at all times unless it’s overridden by
the mode the light is in:
3H: Tint ramping
So, at almost any time, 3H, and it
can change the color of the light. This is best done with the light at
a moderately high level, because it makes the changes smooth. Low
levels have more coarse resolution and will typically change in very
visible steps.
At both ends of the tint ramp, there is an “auto tint” mode. This
automatically chooses a tint based on the brightness level… so it can
be warm white while dim, or cool white while bright. Or vice-versa. To
access this, ramp to the end of the tint range, then keep holding until
the light blinks a second time.
The misc config menu also has a setting to choose a tint ramp style.
This can be smooth, allowing the user to smoothly blend both channels in
whatever ratio they desire… or it can be “tint toggle” style, where
only one channel is active at a time.
UI Reference Table
This is a table of all button mappings in Anduril, in one place:
| Mode | UI | Button | Action |
|---|---|---|---|
| Off | Any | 1C |
On (ramp mode, memorized level) |
| Off | Any | 1H |
On (ramp mode, floor level) |
| Off | Any | 2C |
On (ramp mode, ceiling level) |
| Off | Simple | 2H |
On (momentary ceiling level) |
| Off | Full | 2H |
On (momentary turbo) |
| Off | Any | 3C |
Battcheck mode |
| Off | Full | 3H |
Strobe mode (whichever was used last) |
| Off | Any | 4C |
Lockout mode |
| Off | Full | 5C |
Momentary mode |
| Off | Full | 7C |
Aux LEDs: Next pattern |
| Off | Full | 7H |
Aux LEDs: Next color |
| Off | Full | 9H |
Misc config menu (varies per light) |
| Off | Full | 10C |
Enable Simple UI |
| Off | Simple | 10H |
Disable Simple UI |
| Off | Full | 10H |
Simple UI ramp config menu: 1: floor, 2: ceiling, 3: steps, 4: turbo style |
| Off | Any | 13H |
Factory reset (on some lights) |
| Off | Any | 15+C |
Version check |
| Ramp | Any | 1C |
Off |
| Ramp | Any | 1H |
Ramp (up, with reversing) |
| Ramp | Any | 2H |
Ramp (down) |
| Ramp | Any | 2C |
Go to/from ceiling or turbo (configurable) |
| Ramp | Full | 3C |
Change ramp style (smooth / stepped) |
| Ramp | Any | 3H |
Tint ramping (on some lights) |
| Ramp | Full | 3H |
Momentary turbo (on lights without tint ramping) |
| Ramp | Any | 4C |
Lockout mode |
| Ramp | Full | 5C |
Momentary mode |
| Ramp | Full | 5H |
Sunset timer on, and add 5 minutes |
| Ramp | Full | 7H |
Ramp config menu (1: floor, 2: ceiling, 3: speed/steps) |
| Ramp | Full | 10C |
Turn on Manual memory and save current brightness |
| Ramp | Full | 10H |
Ramp Extras config menu: 1: enable automatic mem, 2: set manual mem timeout, 3: ramp after moon or not, 4: advanced UI turbo style |
| Lockout | Any | 1C/1H |
Momentary moon (lowest floor) |
| Lockout | Any | 2C/2H |
Momentary moon (highest floor, or manual mem level) |
| Lockout | Any | 3C |
Unlock (go to Off mode) |
| Lockout | Any | 4C |
On (ramp mode, memorized level) |
| Lockout | Any | 4H |
On (ramp mode, floor level) |
| Lockout | Any | 5C |
On (ramp mode, ceiling level) |
| Lockout | Full | 7C |
Aux LEDs: Next pattern |
| Lockout | Full | 7H |
Aux LEDs: Next color |
| Lockout | Full | 10H |
Auto-lock config menu (1: set timeout) |
| Strobe (any) | Full | 1C |
Off |
| Strobe (any) | Full | 2C |
Next strobe mode |
| Strobe (any) | Full | 3H |
Tint ramping (on some lights) |
| Strobe (any) | Full | 5C |
Momentary mode (using current strobe) |
| Candle | Full | 1H/2H |
Brighter / dimmer |
| Candle | Full | 5H |
Sunset timer on, add 5 minutes |
| Party strobe | Full | 1H/2H |
Faster / slower |
| Tactical strobe | Full | 1H/2H |
Faster / slower |
| Biking | Full | 1H/2H |
Brighter / dimmer |
| Lightning | Full | 1H |
Interrupt current flash or start new one |
| Batt check | Any | 1C |
Off |
| Batt check | Full | 2C |
Next blinky mode (Temp check, Beacon, SOS) |
| Batt check | Full | 7H |
Voltage config menu |
| Temp check | Full | 1C |
Off |
| Temp check | Full | 2C |
Next blinky mode (Beacon, SOS, Batt check) |
| Temp check | Full | 7H |
Thermal config menu |
| Beacon | Full | 1C |
Off |
| Beacon | Full | 1H |
Configure beacon timing |
| Beacon | Full | 2C |
Next blinky mode (SOS, Batt check, Temp check) |
| SOS | Full | 1C |
Off |
| SOS | Full | 2C |
Next blinky mode (Batt check, Temp check, Beacon) |
| Momentary | Full | Any | On (until button is released) |
| Momentary | Full | Disconnect power | Exit Momentary mode |
| Config menus | Full | Hold | Skip current item with no changes |
| Config menus | Full | Release | Configure current item |
| Number entry | Full | Click | Add 1 to value for current item |
| Number entry | Full | Hold | Add 10 to value for current item |
Additional Resources
- BudgetLightForum: Anduril … 2?
- BudgetLightForum: Anduril 2 UI diagrams
- /r/flashlight: Anduril 2 explained
- Patreon: ToyKeeper
Краткая инструкция управления режимами и настройкой в фонарике Sofirn sc31 pro с прошивкой АндурилПодробнее

Фонарик Wurkkos TS21 с USB C и Андурил 2. Самое сложное управление режимами в мире.Подробнее
Sofirn BLF LT1 V2.0 (A5) Anduril 2 — управление, настройкаПодробнее

SOFIRN SC31 PRO | МОЩНЫЙ ФОНАРЬ с ИНТЕРФЕЙСОМ ANDURIL | ЧУТЬ НЕ ОСЛЕП !Подробнее
АНДУРИЛ 2 /как настроить ПОДСВЕТКУ кнопки/как настроить ТЕРМОКОНТРОЛЬПодробнее
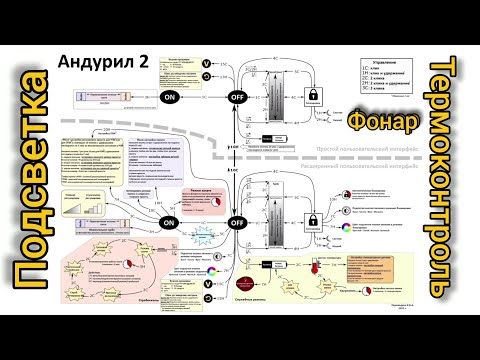
САМЫЙ ЯРКИЙ ФОНАРЬ ЗА 5 000Р !!! поднимаем потолок 70° anduril 2 и смотрим кто лучше!!!Подробнее

Обзор фонаря Wurkkos TS21 — 3x SST20 с 4000к/type-C/21 700 и много крутых фишек (Anduril 2?)Подробнее
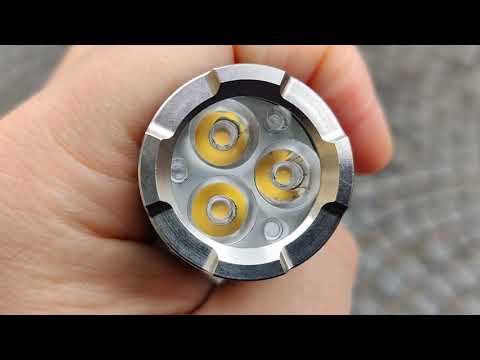
Andúril 2 Покрокова інструкція налаштувань Wurkkos TS25, TS21, TS10, Sofirn, AstroluxПодробнее

Anduril 2 налаштування ліхтарика Українською,Wurkkos FC13 ,Sofirn,Lumintom.Подробнее
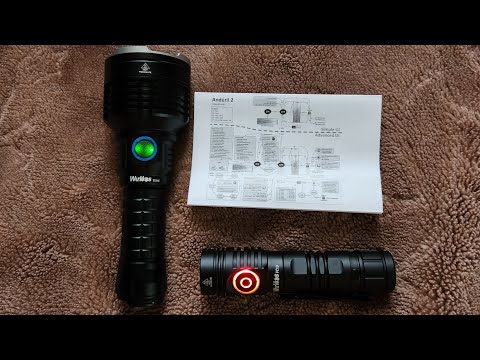
Обзор бюджетного фонаря Wurkkos FC13 — 3400 лм от SFN43, Anduril 2.0 и функционал Power BankПодробнее
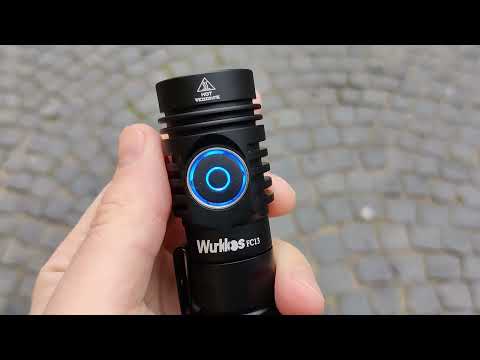
ПЕРВЫЙ ФОНАРЬ С НОВЫМ СВЕТОДИОДОМ UHi 40 — Nitecore MH12 PRO — ОБЗОРПодробнее

Доступный горячий фонарик 16 000-24 000 люмен /sofirn Q8plus /sofirn ec06Подробнее

Обзор фонаря Sofirn IF25A BLF Anduril — хороший, но таких многоПодробнее
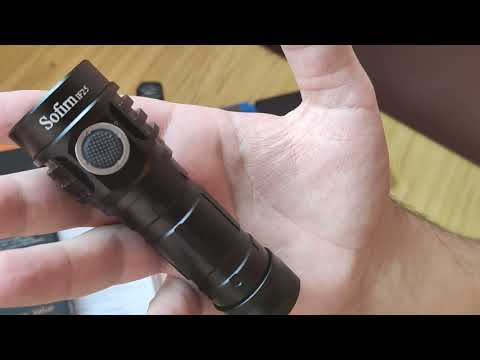
Обзор брендовых фонарей Sofirn и WvurkosПодробнее
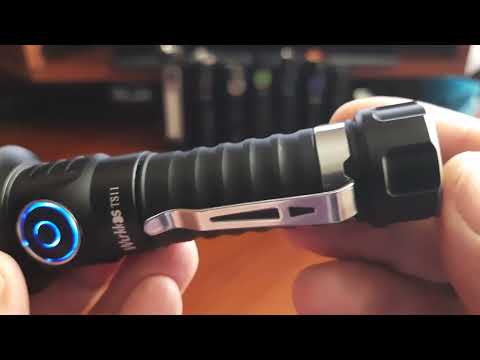
ТАКОЙ ФОНАРИК НЕ ЖАЛКО И ПОТЕРЯТЬ! Пользуюсь несколько лет.Подробнее

Обзор фонаря Sofirn SC21 (1000lm) #sofirn #фонарьПодробнее
ФОНАРЬ С RGB подсветкой /WURKKOS TS25Подробнее
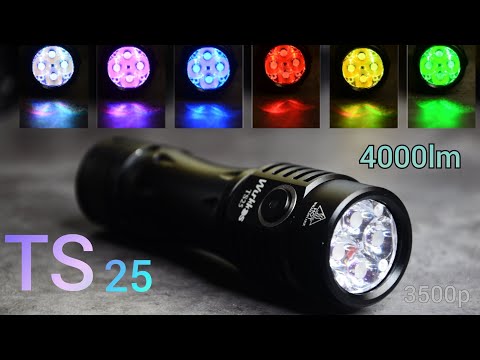
Многофункциональный налобный фонарь COB+LED XPE с функцией включения взмахом рукиПодробнее

Новости
Anduril User Manual
Anduril is an open-source firmware for flashlights, distributed under
the terms of the GPL v3. The sources can be obtained here:
http://tiny.cc/TKAnduril
https://bazaar.launchpad.net/~toykeeper/flashlight-firmware/trunk/files/head:/ToyKeeper/spaghetti-monster/anduril/
Quick Start
After putting a battery in the light and tightening the parts together,
the light should quickly blink once to confirm it has power and is now
operational. After that, basic usage is simple:
- Click to turn the light on or off.
- Hold the button to change brightness.
- Release and hold again to change brightness the other way.
That is all the user needs to know for basic use, but there are many
more modes and features available for people who want more.
Before reading the rest of this manual, it is recommended that users
look at the Anduril UI diagram, which should be provided along with the
flashlight.
Ramping / Stepped Ramping Modes
Anduril’s normal operation mode uses a smooth ramp or a stepped ramp,
depending on which style the user prefers.
Each ramp has its own settings — floor (lowest level), ceiling (highest
level), and the stepped ramp can also have a configurable number of
steps.
There are four ways to access this mode when the light is off:
- Click: Turn on at the memorized brightness.
- Hold: Turn on at the floor level. The light should give a very
subtle dark blink when the user can let go of the button to stay at
the floor, or keep holding the button to ramp up. - 2 clicks: Turn on at the ceiling level.
- Click, hold: Turn on at the ceiling level, then ramp down.
While the light is on, a few basic actions are available:
- Click: Turn off.
- 2 clicks: Go to or from turbo (full power).
- Hold: Change brightness (up). If the button was released less than
a second ago, or if it’s already at the ceiling, it goes down
instead. - Click, hold: Change brightness (down).
- 3 clicks: Switch to the other ramp.
- 4 clicks: Go to ramp config mode.
- 5 clicks: Activate manual memory and save the current brightness.
- 5 clicks, but hold the last click: Go back to automatic memory.
The «automatic» vs «manual» memory modes change the level the light goes
to with 1 click from off. In automatic mode, it uses the last
brightness the user ramped to. In manual mode, it uses the brightness
the user explicitly saved with 5 clicks.
Other Modes
Anduril has several other modes too. To access these, press the button
more than 2 times when the light is off:
- 3 clicks: Access the blinky / utility modes.
- Click, click, hold: Access the strobe modes.
- 4 clicks: Lockout mode.
- 5 clicks: Momentary mode.
- 6 clicks: Muggle mode.
Blinky / Utility Modes
Click 3 times from Off to access Anduril’s blinky / utility modes. This
always starts at battery check and the user can proceed to other blinky
modes from there. The sequence is:
- Battery check.
- Sunset mode.
- Beacon mode.
- Temperature check.
In all of these modes, some basic actions are available:
- Click: Turn off.
- 2 clicks: Next blinky mode.
Additionally, in beacon and temperature check modes:
- 4 clicks: Go to the beacon config mode or thermal config mode.
In more detail, this is what each blinky / utility mode does:
-
Battery check.
Blinks out the battery voltage per cell. Full is 4.2V, empty is
about 3.0V. The light blinks the whole-number digit first, pauses,
then blinks out the «tenths» digit. Then a longer pause, and it
repeats.
So for 4.2V, it would be «blink-blink-blink-blink .. blink-blink».A «zero» digit is represented by a very quick blink.
-
Sunset mode.
This starts at a low level, then dims gradually for an hour, and
then shuts off. It is intended for use when going to bed. -
Beacon mode.
Blinks at a slow speed. The light stays on for half a second, and
then stays off until the next blink. The brightness and the number
of seconds between pulses are configurable:-
Brightness is the user’s last-ramped level, so set this in
ramping mode before starting beacon mode. -
Speed is configured in beacon config mode. Click 4 times to
enter beacon config mode, wait for the light to stutter, then
click to enter the number of seconds per blink. For example,
to do a 10-second alpine beacon, click 10 times.
-
-
Temperature check.
Blinks out the current temperature in degrees C. This number
should be pretty close to what a real thermometer says. If not, it
would be a good idea to click 4 times to enter thermal config mode,
and calibrate the sensor.Thermal config mode has two settings:
-
Current temperature. Click once per degree C to calibrate the
sensor. For example, if the ambient temperature is 21 C, then
click 21 times. -
Temperature limit. This sets the maximum temperature the light
can reach before it will start doing thermal regulation to keep
itself from overheating. Click once per degree C above 30. For
example, to set the limit to 50 C, click 20 times. The default
is 45 C.
-
Strobe / Mood Modes
Anduril includes a few extra modes for a variety of purposes:
- Candle mode
- Bike flasher
- Party strobe
- Tactical strobe
- Lightning storm mode
Click 3 times from Off to access these, but hold the third click for a
moment. Click, click, hold. The last-used strobe mode is remembered,
so it will return to whichever one you used last.
In all of these modes, a few actions are available:
- Click: Turn off.
- 2 Clicks: Next strobe / mood mode.
- Hold: Increase brightness, or strobe faster. (except lightning)
- Click, hold: Decrease brightness, or strobe slower. (except lightning)
Additionally, candle mode has one more action:
- 3 clicks: Add 30 minutes to the timer.
In more detail, here is what each mode does:
-
Candle mode
Brightness changes randomly in a pattern resembling a candle flame.
If a timer is set, it will run until the timer expires, then get
dimmer for one minute, then sputter and turn itself off. Without a
timer, candle mode runs until the user turns it off. Brightness is
configurable. -
Bike flasher
Runs at a medium level, but stutters to a brighter level once per
second. Designed to be more visible than a normal ramping mode, but
otherwise works mostly the same. Brightness is configurable. -
Party strobe
Motion-freezing strobe light. Can be used to freeze spinning fans
and falling water. Speed is configurable. -
Tactical strobe
Disorienting strobe light. Can be used to irritate people. Speed
is configurable, and the duty cycle is always 33%. -
Lightning storm mode
Flashes at random brightness and random speed to simulate lightning
strikes during a busy lightning storm. Do not look directly at the
flashlight when this mode is running, because it may suddenly go to
full power without warning.
Lockout Mode
Click 4 times from Off to enter Lockout mode. This makes the light safe
to carry in a pocket or a bag or anywhere else the button might be
pressed by accident.
To exit lockout mode, click 4 times. The light should blink briefly and
then return to the regular «off» mode.
Lockout mode also doubles as a momentary moon mode, so the user can do
quick tasks without having to unlock the light. The brightness in
lockout mode has two levels:
- Hold: light up at the floor level of the current ramp.
- Click, Hold: light up at the floor level of the other ramp.
Momentary Mode
Click 5 times from Off to enter Momentary mode. This locks the
flashlight into a single-mode interface where the LEDs are only on when
the button is held down. It is intended for Morse code, light painting,
and other tasks where the light should be on only for a short time and
probably in a pattern.
Momentary mode does either a steady brightness level or a strobe. To
select which one, go to the mode you want to use, adjust the brightness
and speed and other settings, then turn the light off. Then click 5
times to enter momentary mode.
Supported momentary modes are steady (normal ramping mode) and strobes
(everything in the «strobe» mode group).
In steady mode, brightness is the last-ramped level, so adjust that
before entering momentary mode.
In momentary strobe mode, the settings are copied from the last-used
strobe mode, such as party strobe, tactical strobe, or lightning.
To exit this mode, physically disconnect power by unscrewing the tailcap
or battery tube.
Muggle Mode
Click 6 times from Off to enter Muggle mode. This is a simpler and
less-bright interface which makes the light relatively safe to lend to
children or other people who could use the light unsafely.
In Muggle mode, there are only a few available actions:
- Click: Turn the light on or off.
- Hold: Change brightness.
- 6 clicks: Exit Muggle mode.
The brightness in this mode usually goes from about 10 lm to 300 lm.
Muggle mode is remembered even after changing the battery. This helps
prevent children from exiting the mode by unscrewing the tailcap.
However, be sure to supervise children whenever they are using any
powerful tools, including a bright flashlight.
Note: If the light steps down in muggle mode, it probably needs to have
the temperature sensor calibrated. Use thermal config mode to do this.
Configuration Modes
Every config mode has the same interface. The menu has one or more
options the user can configure, and it will go through them in order.
For each menu item, the light will follow the same pattern:
-
Blink one or more times, corresponding to the item number.
-
Stutter or «buzz» quickly between two brightness levels for a few
seconds. This indicates that the user can click one or more times
to enter a number. It will keep buzzing until the user stops
clicking, so there is no need to hurry. -
Pause, and then go to the next option.
After the light has gone through all of the menu options, it should
return to whatever mode the light was in before entering the config
mode.
If the user doesn’t press a button during a menu item’s «buzz» phase,
that item remains unchanged from its previous value.
Ramp Config Mode
While the light is on in a ramping mode, click 4 times to enter the
config mode for the current ramp.
For smooth ramping mode, there are two menu options:
- Floor. (default = 1/150)
- Ceiling. (default = 120/150)
For the stepped ramping mode, there are three menu options:
- Floor. (default = 20/150)
- Ceiling. (default = 120/150)
- Number of steps. (default = 7)
To configure the floor level, click the button equal to the number of
ramp levels (out of 150) at which the floor should be. To set the
lowest possible level, click once.
To configure the ceiling level, each click goes one level lower. So 1
click sets the highest possible level, 2 clicks is the 2nd-highest, 3
clicks is the 3rd-highest level, etc. To set the default of 120/150,
click 31 times.
When configuring the number of steps, the value can be anything from 2
to 150.
Protection Features
Anduril includes low voltage protection (LVP) and thermal regulation.
LVP makes the light step down to a lower level when the battery is low,
and if the light is already at the lowest level, it shuts itself off.
This activates at 2.8V. LVP adjustments happen suddenly, in large
steps.
Thermal regulation attempts to keep the light from overheating, and
otherwise adjusts output to stay as close as possible to the
user-configured temperature limit. Thermal adjustments happen
gradually, in steps so small they are difficult for humans to perceive.
Aux LEDs / Button LEDs
Some lights have aux LEDs or button LEDs. These can be configured to do
different things while the main emitters are off. There is one aux LED
mode for the regular «off» mode, and another aux LED mode for «lockout»
mode. This allows the user to see at a glance whether the light is
locked.
Aux LED modes typically include:
- Off
- Low
- High
- Blinking
To configure the aux LEDs, go to the mode you want to configure and then
click the button a few times:
- Off mode: 7 clicks.
- Lockout mode: 3 clicks.
This should change the aux LEDs to the next mode supported on this
light.
If the aux LEDs can change color, there are additional actions to change
the color. It is the same as above, but hold the button on the last
click and then let go when the desired color is reached.
- Off mode: 7 clicks, but hold the last click.
- Lockout mode: 3 clicks, but hold the last click.
For lights with a button LED, the button LED typically stays on while
the main emitters are on. Its brightness level is set in a way which
mirrors the main LED — off, low, or high.
For lights with front-facing aux LEDs, the aux LEDs typically stay off
when the main emitters are on, and when the light is otherwise awake.
The aux LEDs on most lights only turn on when the light is asleep.