
MicroVerb 4.  ?oeiaianoai iieuciaaoaey
I?ia?aiie?oaiue 18-aeoiue neaiaeuiue i?ioanni?
Общие правила пользования прибором
AIEIAIEA! I?e yenieoaoaoee i?eai?a iaiaoiaeii no?iai i?eaa??eaaouny neaao?ueo i?aaee:
1)  I?a?aa ?ai i?enooieou e ?aaioa, iciaeiiuoanu ni anaie eino?oeoeyie, i?eeaaaaiuie e i?eai?o.
2)  Ia ?aniieaaaeoa i?eai? a ianoao, a eioi?uo ia iaai ii?ao iiianou aiaa, iai?eia?, ?yaii n aaiiie, ?aeiaeiie, ia iie?ii
iieo, aaeece aannaeia e o.a.
3)  Ecaaaaeoa i?iaie?eoaeuiie ?aaiou i?eai?a ia iiauoaiiuo o?iaiyo auoiaiiai neaiaea. Yoi ii?ao i?eaanoe e a?aiaiiie
iioa?a neooa.
4)  Ia onoaiaaeeaaeoa i?eai? aaeece enoi?ieeia oaiea, oaeeo eae iaa?aaaoaee, aaoa?ae e o.a.
5)  Anee au ia iieucoaoanu i?eai?ii a oa?aiea aeeoaeuiiai a?aiaie, auieiaeoa naoaaie oio? ieoaiey ec ?icaoee.
6)  Iiiaaaiea ?a?ac ioaa?noey ei?iona aioo?u i?eai?a eii?iaiuo oae eee ?eaeinoe ii?ao i?eaanoe e auoiao aai ec no?iy.
7)  A ia?a?eneaiiuo ie?a neo?ayo ?aiiio i?eai?a aie?ai i?iecaiaeouny eaaeeoeoe?iaaiiui ianoa?ii:
a) iia?a?aai naoaaie eaaaeu;
a) aioo?u i?eai?a iiiaee eii?iaiua oaea eee ?eaeinou;
a) i?eai? iiiae iia ai?au;
a) iaia?o?aiu iaeni?aaiinoe a ?aaioa i?eai?a;
a) i?eai? oiae eee iia?a?aai aai ei?ion.
8)  Ia iuoaeoanu naiinoiyoaeuii ono?aieou iaiieaaee a ?aaioa i?eai?a. ?aiiio aie?ai i?iecaiaeouny eaaeeoeoe?iaaiiui
ianoa?ii.
Заземление
I?eai? aie?ai auou cacaieai. A neo?aa ?acee?iiai ?iaa iaiieaaie cacaieaiea nie?aao aa?iyoiinou ii?a?aiey yeaeo?e?aneei
oieii. I?eai? iai?oaiaai eaaaeai n cacaiey?uei i?iaiaii e ?acuaiii. Naoaaie ?acuai ii?ii niaaeiyou oieuei n  oi?ioi
cae?aieaiiie e cacaieaiiie ?icaoeie.
AIEIAIEA!  Iai?aaeeuiay eiiiooaoey cacaiey?uaai i?iaiaa oaaee?eaaao aa?iyoiinou ii?a?aiey yeaeo?e?aneei oieii. Anee o
aan aicieeee niiiaiey ii iiaiao i?aaeeuiinoe cacaieaiey i?eai?a, i?ieiinoeuoe?oeoanu n eaaeeoeoe?iaaiiui yeaeo?eeii.
Ia iuoaeoanu iiaeoeoe?iaaou cacaiey?uee ?acuai i?eai?a a neo?aa, anee ii ia iiaoiaeo e ?icaoea. A yoii neo?aa iaiaoiaeii
onoaiiaeou a?oao? ?icaoeo n iiiiuu? eaaeeoeoe?iaaiiiai yeaeo?eea.
Введение
Nianeai ca oi, ?oi au i?eia?aee ioeuoeyooaeoi?iue i?ioanni? MicroVerb 4 oe?iu Alesis. Aey oiai, ?oiau eniieuciaaou an?
ooieoeiiaeuio? iiuiinou MicroVerb 4 e i?iaeeou n?ie neo?au i?eai?a, aieiaoaeuii eco?eoa yoi ?oeiaianoai.
Правила пользования руководством
?oeiaianoai ninoieo ec ianeieueeo aeaa, iienuaa?ueo ?acee?iua ?a?eiu ?aaiou MicroVerb 4. Iu ?aeiiaiaoai ia?eiaou
eco?aiea ?oeiaianoaa n naiiai ia?aea, iaiaei iiuoiua iieuciaaoaee iiaoo ainiieuciaaouny niaa??aieai aey iciaeiieaiey n
i?aaeeaie oi?aaeaiey oai eee eiui ?a?eiii.
Aeaaa 1: Ia?aei ?aaiou n MicroVerb 4. Aa?ony iniiaiua ?aeiiaiaaoee ii ?aniaeiaea e caioneo i?eai?a, i?ineooeaaie?
caaianeeo i?ia?aii, ?aaoee?iaea o?iaiae, n?aaiaie? e caiiieiaie? io?aaaeoe?iaaiiuo i?ia?aii.
Aeaaa 2: Eiiiooaoey. I?eaiayony naaaaiey, iaiaoiaeiua aey eiiiooaoee i?eai?a n a?oaeie eiiiiiaioaie aoaei-nenoai
(eino?oiaiou, ieeoa?iua ioeuou, eiiiooaoi?u (patchbay) e iiiaiai?i?a?iua iaaieoioiiu).
Aeaaa 3: Yooaeou. Aaoaeuii ?anniao?eaa?ony ooieoee neaiaeuiie ia?aaioee i?ioanni?a MicroVerb 4 e eiioaioey
ioeuoeyooaeoi?iiai i?ia?aiie?iaaiey.
Aeaaa 4: Oi?aaeaiea i?eai?ii. Iienuaa?ony ana i?aaiu oi?aaeaiey i?eai?ii (eiiiee, ?acuaiu e ia?aiao?u).
Aeaaa 5: ?aaioa n MIDI. I?eaiayony iniiaiua i?aaeea ?aaiou n MIDI-ooieoeyie, oaeeie eae aucia i?ia?aii, iiaoeyoey
ia?aiao?ia a ?a?eia ?aaeuiiai a?aiaie, ia?aaa?a aaiiuo SysEx.
Aeaaa 6: Ono?aiaiea iaiieaaie. Iienuaa?ony iaiieaaee, aicii?iua i?e?eiu e niiniau eo ono?aiaiey, i?aaeea ooiaa ca
i?eai?ii, ea?oa MIDI-ooieoee (MIDI Implementation Chart).
Используемые обозначения
Iacaaiey eiiiie, ?o?ae e ?acuaiia caaiae iaiaee caee??a?ony a eaaa?aoiua neiaee e caienuaa?ony caaeaaiuie aoeaaie.
Iai?eia?, eiiiea [STORE], eieani [VALUE]. Auaa??ee n ye?aia aenieay caee??aaony a oeao?iua neiaee, iai?eia?, io {00}
ai {127}.
Iniai aa?iay eioi?iaoey auaaeaia iia?a?eiooui eo?neaii.
MicroVerb 4. ?oeiaianoai iieuciaaoaey                                                                  1
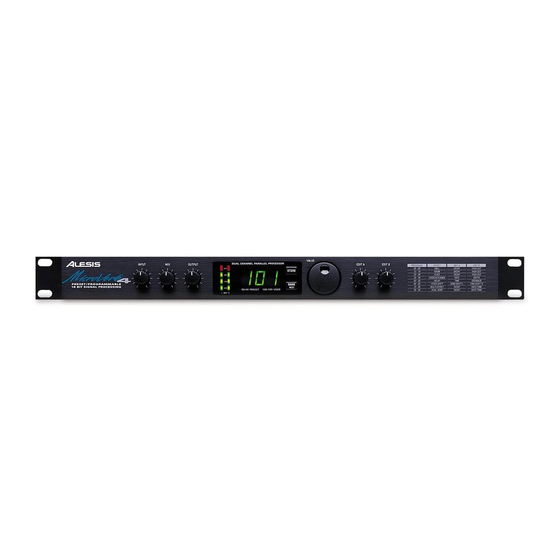
Глава 1
Начало работы с MicroVerb 4
Распаковка и проверка
Oaa?e?iay oiaeiaea MicroVerb 4 i?aaio?aiyao i?eai? io iia?a?aaiey ai a?aiy o?ainii?oe?iaee. Ii?aeoenoa nio?aiyeoa
oiaeiai?iua ei?iaee ia neo?ae, anee o aan aicieeiao iaiaoiaeiinou auneaou i?eai? ia na?aeniia ianeo?eaaiea.
Oiaeiai?iay ei?iaea niaa??eo:
•   ?oeiaianoai iieuciaaoaey
•   I?eai? Alesis MicroVerb 4 n oai ?a iiia?ii, ?oi e ia oiaeiai?iie ei?iaea
•   Aeie ieoaiey
•   Aa?aioeeiue oaeii oe?iu Alesis
Iaiaoiaeii ca?aaeno?e?iaaou aaoo iieoieo. Caiieieoa aa?aioeeiue oaeii e ioioeeoa aai ia oe?io Alesis,
Основные соединения
MicroVerb 4 ii?ii eniieuciaaou a naiuo ?acee?iuo aoaei-nenoaiao. Aai ii?ii eiiiooe?iaaou eae iaiin?aanoaaiii n
eino?oiaioii, oae e n ieeoa?iie eiinieu?. I?eaaaaiiay ie?a eioi?iaoey iicaieeo aai auno?i neiiiooe?iaaou i?eai? e
i?enooieou e ?aaioa. Aieaa iia?iaiay eioi?iaoey i niiniaao eiiiooaoee i?eai?a i?eaiaeony a aeaaa 2.
Iiiioiie?aneee aoia, iiii eee noa?ai auoia. Niaaeieoa enoi?iee iiii neaiaea iiiioiie?aneei i?iaiaii n aoiaii
[LEFT/MONO INPUT] MicroVerb 4. (Eaaue aoia aoaao oi?aaeyou iaieie aoiaaie). Neiiiooe?oeoa n iiiiuu? iiiioiie?aneiai
i?iaiaa auoia i?eai?a [LEFT OUTPUT] n caoeioneeeaa?uae nenoaiie eee ieeoa?iui ioeuoii. E?iia oiai, au ii?aoa
nieiaou neaiae n i?aaiai auoiaa [RIGHT OUTPUT] e eniieuciaaou aai a noa?aioiie?aneie nenoaia caoeioneeaiey eee
iiaaaaou ia aoi?ie eaiae ieeoa?a.
Noa?ai. Niaaeieoa aaoiy iiiioiie?aneeie i?iaiaaie aoiau [LEFT/MONO INPUT] e [RIGHT INPUT] MicroVerb 4 n enoi?ieeii
noa?ai neaiaea. N iiiiuu? aua aaoo iiiioiie?aneeo i?iaiaia niaaeieoa auoiau i?eai?a [LEFT OUTPUT] e [RIGHT OUTPUT]
n nenoaiie noa?aioiie?aneiai oneeaiey eee aaoiy eaiaeaie ieeoa?iie eiiniee.
?aaoeyoi? [MIX]  iicaieyao iai?aaeyou ia auoiau MicroVerb 4 oieuei ia?aaioaiiue yooaeoii neaiae (a yooaeoi?iii ieena iao
i?yiiai neaiaea). Yoi ii?ao iio?aaiaaouny aey noai eiiiooaoee i?eai?a n aiiieieoaeuiuie iinueaie/aica?aoaie ieeoa?iie
eiiniee.
Включение питания
Ieoaiea i?eai?a aee??aeoa iinea oiai, eae caaa?oai i?ioanna eiiiooaoee. I?e yoii iaiaoiaeii i?eaa??eaaouny neaao?uae
iineaaiaaoaeuiinoe:
1)  Ia?aa aee??aieai ieoaiey MicroVerb 4 i?iaa?uoa:
•   I?aaeeuiinou eiiiooaoee
•   Auaaaaiu ee ia ieieioi ?o?ee oi?aaeaiey o?iaiai neaiaea ia oneeeoaea eee ieeoa?a.
2)  Iiaee??eoa aaaioa? e naoe e niaaeieoa aai ni aoiaii [POWER], ?aniiei?aiiui ia caaiae iaiaee MicroVerb 4.
I?e aee??aiee ieoaiey caai?a?ony ana eiaeeaoi?u eeoaaie iaiaee, aunaa?eaaaony aa?ney i?ia?aiiiiai iaania?aiey e iiia?
iineaaiae aua?aiiie i?ia?aiiu (00 — 199).
3)  Aee??eoa ieoaiea oneeeoaey/ieeoa?a e io?aaoee?oeoa o?iaaiu.
Регулировка уровня
I?aaeeuiay onoaiiaea aoiaiiai e auoiaiiai o?iaiae niinianoaoao oaaee?aie? niioiioaiey neaiae/ooi. Eo?oa onoaiaaeeaaou
?aaoeyoi?u ia 3/4 (75 % io iaeneiaeuiiai o?iaiy). Anee oneeeoaeu eee ieeoa? ia?aa?o?aaony aneaanoaea aunieiai o?iaiy
neaiaea MicroVerb 4, i?eaa?eoa iaiiiai auoiaiie o?iaaiu.
Краткое описание лицевой панели
I?aaiu oi?aaeaiey MicroVerb 4:
1) Aoia. ?aaoeyoi? aoiaiiai o?iaiy onoaiaaeeaaao o?iaaiu neaiaea, iinooia?uaai ia aioo?aiiea eiioo?u i?eai?a. Ii aie?ai
auou io?aaoee?iaai oaeei ia?acii, ?oiau eiaeeaoi? aoiaa (4) iieacuaae i?eia?ii -6 dBu (aie?ii ai?aou 3 ec 4 naaoiaeiaia).
MicroVerb 4. ?oeiaianoai iieuciaaoaey                                                                  3
Регулятор устанавливает уровни левого и правого каналов одновременно.
2)Ìèêñ. Определяет баланс прямого (необработанного) и обработанного сигналов.
3)Выход. Определяет уровень сигнала, подаваемого с MicroVerb 4 на микшер или усилитель.
4)Индикаторы уровня. Отображают уровень сигнала, поступающего на внутренние контуры прибора. Каждый из каналов (левый и правый) имеет свой индикатор уровня, однако в монофоническом режиме горят оба индикатора.
5)Светодиодный дисплей. Дисплей отображает выбранную программу. При нажатой Кнопке [BANK/MIDI], на дисплей выводится номер канала MIDI. Если производятся манипуляции ручками [EDIT A] или [EDIT B], то дисплей отображает величину редактируемого параметра. Номер выбранной программы отображается с чуть большей яркостью по сравнению с остальными параметрами. При нажатии на кнопку [STORE], на дисплее будет мигать номер программы-приемника.
6)Кнопка [STORE]. При нажатии на кнопку [STORE], на дисплее будет мигать номер программы, под которым будет сохранена текущая. Если еще раз нажать на эту кнопку, то дисплей быстро замигает и текущая программа сохранится. Программы запоминаются только в пользовательский банк (номера 100 — 199).
7)Кнопка [BANK/MIDI]. Каждое нажатие на кнопку приводит к выбору программы из противоположного банка. Например, если была выбрана пресетная программа {34}, то при нажатии на эту кнопку, MicroVerb 4 переключится на пользовательскую программу с номером {134}.
При удерживании этой кнопки более одной секунды на дисплей выводится номер MIDI-канала. Для изменения номера канала необходимо вращать колесо [VALUE], удерживая нажатой кнопку [BANK/MIDI].
 Колесо [VALUE]. Колесо используется для выбора программ и изменения канала MIDI (см. выше).
9)Регуляторы [EDIT A]/[EDIT B]. Все программы MicroVerb 4 имеют по два регулируемых параметра. В зависимости от программы это может быть длина хвоста, глубина хоруса и т.д. При повороте одного из этих регуляторов, дисплей на короткое время отобразит новое значение редактируемого параметра.
10)Список параметров. Список отображает различные группы программ, связанные с ними эффекты, а также определяет функции регуляторов [EDIT A] и [EDIT B].
Программы
MicroVerb 4 имеет 100 пресетных программ, расположенных в банке пресетов и 100 пользовательских, хранящихся в пользовательском банке. Эти программы позволяют использовать MicroVerb 4 в самых разнообразных областях. Различие между пользовательскими и пресетными программами заключается в том, что пользовательские программы можно перезаписывать, в то время как пресетные зашиты в постоянной памяти.
Для смены программ используйте колесо [VALUE].
Переключение между пресетным и пользовательским банками
Для мгновенного переключения между банком пресетов и банком пользовательских программ используется кнопка [BANK]. Каждое нажатие на эту кнопку приводит к переключению с одного банка на другой. Банку пресетов соответствуют программы с номерами 00 — 99, а пользовательскому — от 100 до 199.
Перейти из одного банка в другой можно также с помощью колеса [VALUE]. При вращении [VALUE] по часовой стрелке после пресетной программ с номером {99}, произойдет переключение на пользовательский банк, и на дисплее высветится номер первой программы из этого банка — {100}. И наоборот, при вращении колеса [VALUE] против часовой стрелки после программы с номером {100} (первой из банка пользовательских программ), произойдет переход к пресетному банку, и на дисплее появится номер пресетной программы {99}. Однако, если вы будете вращать колесо [VALUE] дальше и достигнете программы с номером {00}, то переключение на пользовательскую программу с номером {199} не произойдет. Дисплей будет отображать номер первой программы из банка пресетов — {00}.
Управление миксом прямого и обработанного сигналов
Независимо от количества эффектов, входящих в конкретную программу MicroVerb 4, вам необходимо установить требуемый баланс между прямым (необработанным) и обработанным сигналами. Баланс между уровнем прямого сигнала и эффекта, генерируемого MicroVerb 4, устанавливается с помощью регулятора [MIX] .
При коммутации с такими приборами как гитарный усилитель и т.п., [MIX] устанавливается примерно посередине, определяя одинаковый уровень чистого и обработанного сигналов. Если же MicroVerb 4 подключается к дополнительному посылу микшерной консоли, то имеет смысл вывернуть [MIX] до упора вправо (в этом случае на выходе присутствует только обработанный сигнал), а регулировку баланса прямого и обработанного сигналов проводить непосредственно на консоли.
Запоминание отредактированных программ
После того, как вы отредактировали программу, ее необходимо записать в память прибора. MicroVerb 4 запоминает текущую программу в долговременную память. Если вы не запомнили отредактированную программу, то при отключении питания или при выборе новой программы все изменения теряются.
Несмотря на то, что MicroVerb 4 имеет два банка (пресетный и пользовательский), программы запоминаются только в пользовательском банке.
Для записи отредактированной программы:
1) Нажмите кнопку [STORE].
На дисплее будет мигать номер программы-приемника, в которую будет сохранена текущая программа. Если редактируемая программа относится к банку пресетов (программы с номерами от 0 до 99), то MicroVerb 4 сохранит ее в соответствующую программу из пользовательского банка (увеличивая номер программы на 100). Вы не можете изменять номер программыприемника, т.е. не существует способа сохранить какую-либо версию программы 112 в программу с номером 113.
2) Нажмите кнопку [STORE] еще раз.
Мерцание дисплея в течение непродолжительного времени сигнализирует о том, что программа сохранилась.
Все изменения, внесенные в программу, остаются временными до того момента, пока вы не записали их в память. Если редактируемая программа выбрана из пресетного банка, то вы должны сохранить ее в соответствующую область пользовательского. Вызов другой программы перед сохранением редактируемой приводит к потере внесенных в нее изменений.
Перед вами файл pdf, где представлена инструкция (руководство) на русском для ALESIS MICROVERB 4. Вы можете скачать ее либо изучить в онлайн режиме.
Подробные сведения об инструкции:
Устройство из раздела: процессор
Бренд-производитель: ALESIS
Наименование модели: ALESIS MICROVERB 4
Язык: Руководство на русском языке
Файл: pdf
Размер файла: 235,89 kB
Скачать инструкцию к HARPER HDT2-1110
ЗАГРУЗИТЬ
Просмотр инструкции онлайн
-
Страница 1
A L ES I S MicroVerb 4 Reference M a nu a l[…]
-
Страница 2
MicroVerb 4 Reference Manual 1 Introduction Thank you for purchasing the Alesis MicroVerb 4 Multieffects Processor. To take full advantage of the MicroVerb 4’s functions, and to enjoy long and trouble-free use, please read this user’s manual carefully. How To Use This Manual This manual is divided into the following sections describing the vari[…]
-
Страница 3
2 MicroVerb 4 Reference Manual[…]
-
Страница 4
Contents MicroVerb 4 Reference Manual 3 C ONTENTS Your First Session with the MicroVerb 4 ………………………….. ……………………… 7 Unpacking and Inspection ………………………….. ………………………….. ………………………….. …. 7 Basic Connections ………………………….. ……………[…]
-
Страница 5
Contents 4 MicroVerb 4 Reference Manual Pitch Shifter Effects ………………………….. ………………………….. ………………………….. ………….. 27 Stereo Pitch Shifter ………………………….. ………………………….. ………………………….. . . 27 Stereo Pitch Detuner …………………..[…]
-
Страница 6
Contents MicroVerb 4 Reference Manual 5[…]
-
Страница 7
6 MicroVerb 4 Reference Manual[…]
-
Страница 8
Your First Session with the MicroVerb 4 – Chapter 1 MicroVerb 4 Reference Manual 7 C HAPTER 1 Y OUR F IRST S ESSION WITH THE M ICRO V ERB 4 Unpacking and Inspection Your MicroVerb 4 was packed carefully at the factory, and the shipping carton was designed to protect the unit during shipping. Please retain this container in the highly unlikely eve[…]
-
Страница 9
Chapter 1 – Your First Session with the MicroVerb 4 8 MicroVerb 4 Reference Manual ¿ Before turning on the MicroVerb 4’s power, check the following items: • Have all connections been made correctly? • Are the volume controls of the amplifier or mixer turned down? ¡ Plug in the power adapter and insert the Power jack into the [POWER] input[…]
-
Страница 10
Your First Session with the MicroVerb 4 – Chapter 1 MicroVerb 4 Reference Manual 9 The display will dim slightly when it is not displaying the current Program. When the Store button is pressed, the Display will flash the destination Program number. ± STORE Button. When the [STORE] button is pressed, the LED Display will flash the number of the P[…]
-
Страница 11
Chapter 1 – Your First Session with the MicroVerb 4 10 MicroVerb 4 Reference Manual Auditioning Internal Programs The MicroVerb 4 comes with 100 Programs in a Preset bank, plus another 100 Programs in the User bank. These Programs represent the wide range of applications for which the MicroVerb 4 is suited. The difference between Preset and User […]
-
Страница 12
Your First Session with the MicroVerb 4 – Chapter 1 MicroVerb 4 Reference Manual 11 Storing Edited Programs Once you are satisfied with the changes you have made to an edited Program, or are creating a new Program from scratch, you will need to store your edited Program back into memory. The MicroVerb 4 will temporarily store the currently select[…]
-
Страница 13
Chapter 1 – Your First Session with the MicroVerb 4 12 MicroVerb 4 Reference Manual[…]
-
Страница 14
Connections – Chapter 2 MicroVerb 4 Reference Manual 13 C HAPTER 2 C ONNECTIONS AC Power Hookup The MicroVerb 4 comes with a power adapter suitable for the voltage of the country it is shipped to (either 110 or 220V, 50 or 60 Hz). With the MicroVerb 4 off, plug the small end of the power adapter cord into MicroVerb 4’s [POWER] socket and the ma[…]
-
Страница 15
Chapter 2 – Connections 14 MicroVerb 4 Reference Manual • Although Alesis does not endorse any specific product, chemicals such as Tweek and Cramolin, when applied to electrical connectors, are claimed to improve the electrical contact between connectors. Typical Applications The analog audio inputs and outputs are typically used in one of thre[…]
-
Страница 16
Connections – Chapter 2 MicroVerb 4 Reference Manual 15 • Mono. Connect a mono cord to the [LEFT] INPUT o f the MicroVerb 4 from a mono source, and another mono cord from the [LEFT] output of the MicroVerb 4 to an amplification system or mixer input. MIX INPUT OUTPUT DUAL CHANNEL PARRELL PROCESSOR 00-99 PRESET 100-199 USER CLIP -6dB -12dB -32dB[…]
-
Страница 17
Chapter 2 – Connections 16 MicroVerb 4 Reference Manual Interfacing to a Mixing Console The MicroVerb 4 handles mono or stereo sends at all system levels. The input circuitry of the MicroVerb 4 can easily handle +4 dBu levels (+20 dBu peaks), while having enough input and output gain to interface with the low -10 dBV signal levels of budget recor[…]
-
Страница 18
Connections – Chapter 2 MicroVerb 4 Reference Manual 17 Mono In — Stereo Out. If you only want to feed the MicroVerb 4 a mono input, but wish to connect both of its outputs back to the mixer, you will need three 1/4″ audio cables. Connect a mono cord from an effect send to the [LEFT] input of the MicroVerb 4, another mono cord from the [LEFT[…]
-
Страница 19
Chapter 2 – Connections 18 MicroVerb 4 Reference Manual By using individual channel inserts, you can dedicate the MicroVerb 4 to a specific channel (or pair of channels) on the mixer. The Insert connections on the back of the mixer provide a way of “inserting” external processing equipment into the signal path. The insert occurs after the inp[…]
-
Страница 20
Connections – Chapter 2 MicroVerb 4 Reference Manual 19 inputs. This is done by using two 1/4″ mono cables to connect the Left and Right Main Outputs of the mixing console to the [LEFT/MONO] and [RIGHT] inputs of the MicroVerb 4. The [LEFT] and [RIGHT] outputs of the MicroVerb 4 are then connected to a stereo amplifier, or two input channels[…]
-
Страница 21
Chapter 2 – Connections 20 MicroVerb 4 Reference Manual Avoiding Ground Loops In today’s studio, where it seems every piece of equipment has complex routing and computer logic, there are many opportunities for ground loop problems to occur. These show up as hums, buzzes or sometimes radio reception and can occur if a piece of equipment “sees?[…]
-
Страница 22
Connections – Chapter 2 MicroVerb 4 Reference Manual 21 MIDI MIDI (Musical Instrument Digital Interface) is an internationally-accepted protocol that allows musical-related data to be conveyed from one device to another. The MIDI connections on the MicroVerb 4 provide four different functions: • To recall Programs using MIDI program change mess[…]
-
Страница 23
Chapter 2 – Connections 22 MicroVerb 4 Reference Manual assembly with a stereo cord already attached. The pedals are often packaged with digital pianos. You should not use the dual footswitch from a guitar amplifier, as these are typically latching type footswitches. You can tell a latching footswitch from an unlatched type when it takes two pres[…]
-
Страница 24
Overview of Effects – Chapter 3 MicroVerb 4 Reference Manual 23 C HAPTER 3 O VERVIEW OF E FFECTS Reverb Effects Reverb is made up of a large number of distinct echoes, called reflections. In a natural acoustic space, each reflection’s amplitude and brightness decays over time. This decaying action is influenced by the room size, the location of[…]
-
Страница 25
Chapter 3 – Overview of Effects 24 MicroVerb 4 Reference Manual some of these effects can sound similar to one another depending on the parameter settings, each is achieved differently and can be quite dramatic under the right circumstances. Pitch effects are achieved by splitting the signal into at least two parts, effecting the pitch of one of […]
-
Страница 26
Overview of Effects – Chapter 3 MicroVerb 4 Reference Manual 25 This is a less processor intensive version of the Stereo Chorus, used in Multi Effect configurations. The effect of Chorusing is achieved by splitting and slightly delaying one part of the signal, then varying the time delay with an LFO. The delayed signal is then mixed back with the[…]
-
Страница 27
Chapter 3 – Overview of Effects 26 MicroVerb 4 Reference Manual Rate (Edit A) The Rate control sets the speed of the Chorus or Flanging sweep. When the Edit A knob is turned, the LCD display will show the edited sweep frequency in Hertz. Depth (Edit B) The Depth control sets the intensity of the Chorus or Flanger sweep. The LCD display will show […]
-
Страница 28
Overview of Effects – Chapter 3 MicroVerb 4 Reference Manual 27 tap will be heard. At a setting of 10%, only a little signal will be fed back through the delay, so the signal will repeat back a few times before fading into silence. At a Feedback setting of 100%, the signal will continue repeating for a few minutes before decaying into silence. Se[…]
-
Страница 29
Chapter 3 – Overview of Effects 28 MicroVerb 4 Reference Manual effect will ramp rather than change abruptly, just as a true Lezlie speaker system would do. Multi Effects Parameters: Decay (Edit A) The Decay parameter controls the length of the Reverb. When adjusted, the LCD display will show the decay time in Seconds and Milliseconds. Rate/Time […]
-
Страница 30
Overview of Effects – Chapter 3 MicroVerb 4 Reference Manual 29[…]
-
Страница 31
Chapter 1 – Your First Session with the MicroVerb 4 30 MicroVerb 4 Reference Manual[…]
-
Страница 32
Description of Controls – Chapter 4 MicroVerb 4 Reference Manual 31 C HAPTER 4 D ESCRIPTION OF C ONTROLS Front Panel Input Level The Input Level controls the level of the signal being fed into the MicroVerb 4. The MicroVerb 4 can operate with signal levels anywhere from +4dBv Pro Audio gear to guitar level signals. To set the input level, watch t[…]
-
Страница 33
Chapter 4 – Description of Controls 32 MicroVerb 4 Reference Manual which was last selected. (Note: When the MicroVerb 4’s power is disconnected, any edits to the currently selected Program will be lost.) The MicroVerb 4’s display is used to indicate the following: ¿ Program Number . MicroVerb 4 Programs are numbered from 00 to 199. Programs[…]
-
Страница 34
Description of Controls – Chapter 4 MicroVerb 4 Reference Manual 33 Edit A/ Edit B Knobs The Edit A and Edit B knobs are used to adjust aspects of the currently selected Program. For example, on a Concert Hall program, the Edit A knob adjusts Reverb Decay Time and the Edit B knob adjusts Reverb Input Hi Cut. When the Edit A or Edit B knobs are ad[…]
-
Страница 35
Chapter 4 – Description of Controls 34 MicroVerb 4 Reference Manual Rear Panel Power This is a plug for connecting the Alesis Model P3 +9VAC power supply (supplied). The power supply is then connected to an AC outlet delivering a nominal 120VAC. The correct power supply must be used AT ALL TIMES. Any other power supply might create a fire risk an[…]
-
Страница 36
Description of Controls – Chapter 4 MicroVerb 4 Reference Manual 35 These are 1/4″ phone jacks which connect to sources such as the effects sends of mixing consoles. They may be used with nominal input levels from -10dBV (guitar level) to +4dBu. For mono applications, use the [LEFT/MONO] input. The [LEFT/MONO] input jack is normalled to the […]
-
Страница 37
Chapter 1 – Your First Session with the MicroVerb 4 36 MicroVerb 4 Reference Manual[…]
-
Страница 38
Advanced Applications – Chapter 5 MicroVerb 4 Reference Manual 37 C HAPTER 5 MIDI A PPLICATIONS MIDI Functions The MicroVerb 4 provides many MIDI functions, including being able to respond to program changes, sending and receiving Program information via SysEx (System Exclusive) dumps, and realtime control over effect parameters via MIDI controll[…]
-
Страница 39
Chapter 5 – Advanced Applications 38 MicroVerb 4 Reference Manual MicroVerb 4: ¿ Connect the MicroVerb 4’s [MIDI OUT] to the receiving device’s MIDI IN. ¡ Press and hold [BANK/MIDI] and press the [STORE] button. The display will read Snd as the User Programs are sent. ¬ When you send a Sysex dump back to the MicroVerb 4, it will automatica[…]
-
Страница 40
Troubleshooting – Chapter 6 MicroVerb 4 Reference Manual 39 C HAPTER 6 T ROUBLESHOOTING Troubleshooting Index If you are experience problems while operating the MicroVerb 4, please use the following table to locate possible causes and solutions before contacting Alesis customer service for assistance. Symptom Cause Solution The display does not l[…]
-
Страница 41
Chapter 6 – Troubleshooting 40 MicroVerb 4 Reference Manual Disconnect the AC cord, then use a damp cloth to clean the MicroVerb 4’s metal and plastic surfaces. For heavy dirt, use a non-abrasive household cleaner such as Formula 409 or Fantastik. DO NOT SPRAY THE CLEANER DIRECTLY ONTO THE FRONT OF THE UNIT AS IT MAY DESTROY THE LUBRICANTS USED[…]
-
Страница 42
MIDI Implementation Chart MidiVerb 4 Reference Manual 41 MIDI I MPLEMENTATION C HART Function Transmitted Recognized Remarks Basic Channel Default Changed X * * * * * * * * 1 — 16 Mode Default Messages Altered X X * * * * * * * * Mode 3 X Note Number True Voice X * * * * * * * * X X Velocity Note On Note Off X X X X After Touch Key’s Ch’s X X[…]
-
Страница 43
Specifications 42 MicroVerb 4 Reference Manual S PECIFICATIONS Electrical Frequency Response: ± 1dB from 20Hz to 20 kHz Dynamic Range: >90dB «A» wtg., 20 Hz-22kHz Distortion: <0.009% @ 1kHz, nominal level (-12 dBfs) <0.005% @ peak level Crosstalk: <90dB below full scale Input Number of Channels: 2 Format: 1/4″ unbalanced[…]
-
Страница 44
Specifications MicroVerb 4 Reference Manual 43 Factory Preset Programs (ROM): 1 0 0 Internal processing resolution: 24 bit accumulator Delay memory: 1270 milliseconds Reverb effects: Concert Hall, Real Room, Ambience, Plate Reverb, Nonlinear Delay effects: Mono Delay, Stereo Delay, Ping Pong Delay, Multi Tap Delay Pitch effects: Stereo Chorus, Quad[…]
-
Page 1: Alesis MICROVERB 4
A L ES I S MicroVerb 4 Reference M a nu a l[…]
-
Page 2: Alesis MICROVERB 4
MicroVerb 4 Reference Manual 1 Introduction Thank you for purchasing the Alesis MicroVerb 4 Multieffects Processor. To take full advantage of the MicroVerb 4’s functions, and to enjoy long and trouble-free use, please read this user’s manual carefully. How To Use This Manual This manual is divided into the following sections describing the vari[…]
-
Page 3: Alesis MICROVERB 4
2 MicroVerb 4 Reference Manual[…]
-
Page 4: Alesis MICROVERB 4
Contents MicroVerb 4 Reference Manual 3 C ONTENTS Your First Session with the MicroVerb 4 ………………………….. ……………………… 7 Unpacking and Inspection ………………………….. ………………………….. ………………………….. …. 7 Basic Connections ………………………….. ……………[…]
-
Page 5: Alesis MICROVERB 4
Contents 4 MicroVerb 4 Reference Manual Pitch Shifter Effects ………………………….. ………………………….. ………………………….. ………….. 27 Stereo Pitch Shifter ………………………….. ………………………….. ………………………….. . . 27 Stereo Pitch Detuner …………………..[…]
-
Page 6: Alesis MICROVERB 4
Contents MicroVerb 4 Reference Manual 5[…]
-
Page 7: Alesis MICROVERB 4
6 MicroVerb 4 Reference Manual[…]
-
Page 8: Alesis MICROVERB 4
Your First Session with the MicroVerb 4 – Chapter 1 MicroVerb 4 Reference Manual 7 C HAPTER 1 Y OUR F IRST S ESSION WITH THE M ICRO V ERB 4 Unpacking and Inspection Your MicroVerb 4 was packed carefully at the factory, and the shipping carton was designed to protect the unit during shipping. Please retain this container in the highly unlikely eve[…]
-
Page 9: Alesis MICROVERB 4
Chapter 1 – Your First Session with the MicroVerb 4 8 MicroVerb 4 Reference Manual ¿ Before turning on the MicroVerb 4’s power, check the following items: • Have all connections been made correctly? • Are the volume controls of the amplifier or mixer turned down? ¡ Plug in the power adapter and insert the Power jack into the [POWER] input[…]
-
Page 10: Alesis MICROVERB 4
Your First Session with the MicroVerb 4 – Chapter 1 MicroVerb 4 Reference Manual 9 The display will dim slightly when it is not displaying the current Program. When the Store button is pressed, the Display will flash the destination Program number. ± STORE Button. When the [STORE] button is pressed, the LED Display will flash the number of the P[…]
-
Page 11: Alesis MICROVERB 4
Chapter 1 – Your First Session with the MicroVerb 4 10 MicroVerb 4 Reference Manual Auditioning Internal Programs The MicroVerb 4 comes with 100 Programs in a Preset bank, plus another 100 Programs in the User bank. These Programs represent the wide range of applications for which the MicroVerb 4 is suited. The difference between Preset and User […]
-
Page 12: Alesis MICROVERB 4
Your First Session with the MicroVerb 4 – Chapter 1 MicroVerb 4 Reference Manual 11 Storing Edited Programs Once you are satisfied with the changes you have made to an edited Program, or are creating a new Program from scratch, you will need to store your edited Program back into memory. The MicroVerb 4 will temporarily store the currently select[…]
-
Page 13: Alesis MICROVERB 4
Chapter 1 – Your First Session with the MicroVerb 4 12 MicroVerb 4 Reference Manual[…]
-
Page 14: Alesis MICROVERB 4
Connections – Chapter 2 MicroVerb 4 Reference Manual 13 C HAPTER 2 C ONNECTIONS AC Power Hookup The MicroVerb 4 comes with a power adapter suitable for the voltage of the country it is shipped to (either 110 or 220V, 50 or 60 Hz). With the MicroVerb 4 off, plug the small end of the power adapter cord into MicroVerb 4’s [POWER] socket and the ma[…]
-
Page 15: Alesis MICROVERB 4
Chapter 2 – Connections 14 MicroVerb 4 Reference Manual • Although Alesis does not endorse any specific product, chemicals such as Tweek and Cramolin, when applied to electrical connectors, are claimed to improve the electrical contact between connectors. Typical Applications The analog audio inputs and outputs are typically used in one of thre[…]
-
Page 16: Alesis MICROVERB 4
Connections – Chapter 2 MicroVerb 4 Reference Manual 15 • Mono. Connect a mono cord to the [LEFT] INPUT o f the MicroVerb 4 from a mono source, and another mono cord from the [LEFT] output of the MicroVerb 4 to an amplification system or mixer input. MIX INPUT OUTPUT DUAL CHANNEL PARRELL PROCESSOR 00-99 PRESET 100-199 USER CLIP -6dB -12dB -32dB[…]
-
Page 17: Alesis MICROVERB 4
Chapter 2 – Connections 16 MicroVerb 4 Reference Manual Interfacing to a Mixing Console The MicroVerb 4 handles mono or stereo sends at all system levels. The input circuitry of the MicroVerb 4 can easily handle +4 dBu levels (+20 dBu peaks), while having enough input and output gain to interface with the low -10 dBV signal levels of budget recor[…]
-
Page 18: Alesis MICROVERB 4
Connections – Chapter 2 MicroVerb 4 Reference Manual 17 Mono In — Stereo Out. If you only want to feed the MicroVerb 4 a mono input, but wish to connect both of its outputs back to the mixer, you will need three 1/4″ audio cables. Connect a mono cord from an effect send to the [LEFT] input of the MicroVerb 4, another mono cord from the [LEFT[…]
-
Page 19: Alesis MICROVERB 4
Chapter 2 – Connections 18 MicroVerb 4 Reference Manual By using individual channel inserts, you can dedicate the MicroVerb 4 to a specific channel (or pair of channels) on the mixer. The Insert connections on the back of the mixer provide a way of “inserting” external processing equipment into the signal path. The insert occurs after the inp[…]
-
Page 20: Alesis MICROVERB 4
Connections – Chapter 2 MicroVerb 4 Reference Manual 19 inputs. This is done by using two 1/4″ mono cables to connect the Left and Right Main Outputs of the mixing console to the [LEFT/MONO] and [RIGHT] inputs of the MicroVerb 4. The [LEFT] and [RIGHT] outputs of the MicroVerb 4 are then connected to a stereo amplifier, or two input channels[…]
-
Page 21: Alesis MICROVERB 4
Chapter 2 – Connections 20 MicroVerb 4 Reference Manual Avoiding Ground Loops In today’s studio, where it seems every piece of equipment has complex routing and computer logic, there are many opportunities for ground loop problems to occur. These show up as hums, buzzes or sometimes radio reception and can occur if a piece of equipment “sees?[…]
-
Page 22: Alesis MICROVERB 4
Connections – Chapter 2 MicroVerb 4 Reference Manual 21 MIDI MIDI (Musical Instrument Digital Interface) is an internationally-accepted protocol that allows musical-related data to be conveyed from one device to another. The MIDI connections on the MicroVerb 4 provide four different functions: • To recall Programs using MIDI program change mess[…]
-
Page 23: Alesis MICROVERB 4
Chapter 2 – Connections 22 MicroVerb 4 Reference Manual assembly with a stereo cord already attached. The pedals are often packaged with digital pianos. You should not use the dual footswitch from a guitar amplifier, as these are typically latching type footswitches. You can tell a latching footswitch from an unlatched type when it takes two pres[…]
-
Page 24: Alesis MICROVERB 4
Overview of Effects – Chapter 3 MicroVerb 4 Reference Manual 23 C HAPTER 3 O VERVIEW OF E FFECTS Reverb Effects Reverb is made up of a large number of distinct echoes, called reflections. In a natural acoustic space, each reflection’s amplitude and brightness decays over time. This decaying action is influenced by the room size, the location of[…]
-
Page 25: Alesis MICROVERB 4
Chapter 3 – Overview of Effects 24 MicroVerb 4 Reference Manual some of these effects can sound similar to one another depending on the parameter settings, each is achieved differently and can be quite dramatic under the right circumstances. Pitch effects are achieved by splitting the signal into at least two parts, effecting the pitch of one of […]
-
Page 26: Alesis MICROVERB 4
Overview of Effects – Chapter 3 MicroVerb 4 Reference Manual 25 This is a less processor intensive version of the Stereo Chorus, used in Multi Effect configurations. The effect of Chorusing is achieved by splitting and slightly delaying one part of the signal, then varying the time delay with an LFO. The delayed signal is then mixed back with the[…]
-
Page 27: Alesis MICROVERB 4
Chapter 3 – Overview of Effects 26 MicroVerb 4 Reference Manual Rate (Edit A) The Rate control sets the speed of the Chorus or Flanging sweep. When the Edit A knob is turned, the LCD display will show the edited sweep frequency in Hertz. Depth (Edit B) The Depth control sets the intensity of the Chorus or Flanger sweep. The LCD display will show […]
-
Page 28: Alesis MICROVERB 4
Overview of Effects – Chapter 3 MicroVerb 4 Reference Manual 27 tap will be heard. At a setting of 10%, only a little signal will be fed back through the delay, so the signal will repeat back a few times before fading into silence. At a Feedback setting of 100%, the signal will continue repeating for a few minutes before decaying into silence. Se[…]
-
Page 29: Alesis MICROVERB 4
Chapter 3 – Overview of Effects 28 MicroVerb 4 Reference Manual effect will ramp rather than change abruptly, just as a true Lezlie speaker system would do. Multi Effects Parameters: Decay (Edit A) The Decay parameter controls the length of the Reverb. When adjusted, the LCD display will show the decay time in Seconds and Milliseconds. Rate/Time […]
-
Page 30: Alesis MICROVERB 4
Overview of Effects – Chapter 3 MicroVerb 4 Reference Manual 29[…]
-
Page 31: Alesis MICROVERB 4
Chapter 1 – Your First Session with the MicroVerb 4 30 MicroVerb 4 Reference Manual[…]
-
Page 32: Alesis MICROVERB 4
Description of Controls – Chapter 4 MicroVerb 4 Reference Manual 31 C HAPTER 4 D ESCRIPTION OF C ONTROLS Front Panel Input Level The Input Level controls the level of the signal being fed into the MicroVerb 4. The MicroVerb 4 can operate with signal levels anywhere from +4dBv Pro Audio gear to guitar level signals. To set the input level, watch t[…]
-
Page 33: Alesis MICROVERB 4
Chapter 4 – Description of Controls 32 MicroVerb 4 Reference Manual which was last selected. (Note: When the MicroVerb 4’s power is disconnected, any edits to the currently selected Program will be lost.) The MicroVerb 4’s display is used to indicate the following: ¿ Program Number . MicroVerb 4 Programs are numbered from 00 to 199. Programs[…]
-
Page 34: Alesis MICROVERB 4
Description of Controls – Chapter 4 MicroVerb 4 Reference Manual 33 Edit A/ Edit B Knobs The Edit A and Edit B knobs are used to adjust aspects of the currently selected Program. For example, on a Concert Hall program, the Edit A knob adjusts Reverb Decay Time and the Edit B knob adjusts Reverb Input Hi Cut. When the Edit A or Edit B knobs are ad[…]
-
Page 35: Alesis MICROVERB 4
Chapter 4 – Description of Controls 34 MicroVerb 4 Reference Manual Rear Panel Power This is a plug for connecting the Alesis Model P3 +9VAC power supply (supplied). The power supply is then connected to an AC outlet delivering a nominal 120VAC. The correct power supply must be used AT ALL TIMES. Any other power supply might create a fire risk an[…]
-
Page 36: Alesis MICROVERB 4
Description of Controls – Chapter 4 MicroVerb 4 Reference Manual 35 These are 1/4″ phone jacks which connect to sources such as the effects sends of mixing consoles. They may be used with nominal input levels from -10dBV (guitar level) to +4dBu. For mono applications, use the [LEFT/MONO] input. The [LEFT/MONO] input jack is normalled to the […]
-
Page 37: Alesis MICROVERB 4
Chapter 1 – Your First Session with the MicroVerb 4 36 MicroVerb 4 Reference Manual[…]
-
Page 38: Alesis MICROVERB 4
Advanced Applications – Chapter 5 MicroVerb 4 Reference Manual 37 C HAPTER 5 MIDI A PPLICATIONS MIDI Functions The MicroVerb 4 provides many MIDI functions, including being able to respond to program changes, sending and receiving Program information via SysEx (System Exclusive) dumps, and realtime control over effect parameters via MIDI controll[…]
-
Page 39: Alesis MICROVERB 4
Chapter 5 – Advanced Applications 38 MicroVerb 4 Reference Manual MicroVerb 4: ¿ Connect the MicroVerb 4’s [MIDI OUT] to the receiving device’s MIDI IN. ¡ Press and hold [BANK/MIDI] and press the [STORE] button. The display will read Snd as the User Programs are sent. ¬ When you send a Sysex dump back to the MicroVerb 4, it will automatica[…]
-
Page 40: Alesis MICROVERB 4
Troubleshooting – Chapter 6 MicroVerb 4 Reference Manual 39 C HAPTER 6 T ROUBLESHOOTING Troubleshooting Index If you are experience problems while operating the MicroVerb 4, please use the following table to locate possible causes and solutions before contacting Alesis customer service for assistance. Symptom Cause Solution The display does not l[…]
-
Page 41: Alesis MICROVERB 4
Chapter 6 – Troubleshooting 40 MicroVerb 4 Reference Manual Disconnect the AC cord, then use a damp cloth to clean the MicroVerb 4’s metal and plastic surfaces. For heavy dirt, use a non-abrasive household cleaner such as Formula 409 or Fantastik. DO NOT SPRAY THE CLEANER DIRECTLY ONTO THE FRONT OF THE UNIT AS IT MAY DESTROY THE LUBRICANTS USED[…]
-
Page 42: Alesis MICROVERB 4
MIDI Implementation Chart MidiVerb 4 Reference Manual 41 MIDI I MPLEMENTATION C HART Function Transmitted Recognized Remarks Basic Channel Default Changed X * * * * * * * * 1 — 16 Mode Default Messages Altered X X * * * * * * * * Mode 3 X Note Number True Voice X * * * * * * * * X X Velocity Note On Note Off X X X X After Touch Key’s Ch’s X X[…]
-
Page 43: Alesis MICROVERB 4
Specifications 42 MicroVerb 4 Reference Manual S PECIFICATIONS Electrical Frequency Response: ± 1dB from 20Hz to 20 kHz Dynamic Range: >90dB «A» wtg., 20 Hz-22kHz Distortion: <0.009% @ 1kHz, nominal level (-12 dBfs) <0.005% @ peak level Crosstalk: <90dB below full scale Input Number of Channels: 2 Format: 1/4″ unbalanced[…]
-
Page 44: Alesis MICROVERB 4
Specifications MicroVerb 4 Reference Manual 43 Factory Preset Programs (ROM): 1 0 0 Internal processing resolution: 24 bit accumulator Delay memory: 1270 milliseconds Reverb effects: Concert Hall, Real Room, Ambience, Plate Reverb, Nonlinear Delay effects: Mono Delay, Stereo Delay, Ping Pong Delay, Multi Tap Delay Pitch effects: Stereo Chorus, Quad[…]
-
Contents
-
Table of Contents
-
Troubleshooting
-
Bookmarks
Quick Links
ALESIS
MicroVerb 4
Reference Manual
Related Manuals for Alesis MICROVERB 4
Summary of Contents for Alesis MICROVERB 4
-
Page 1
ALESIS MicroVerb 4 Reference Manual… -
Page 2: How To Use This Manual
This manual is divided into the following sections describing the various modes of the MicroVerb 4. Though we recommend you take time to read through the entire manual once carefully, those having general knowledge about effects devices should use the table of contents to reference specific functions.
-
Page 3
MicroVerb 4 Reference Manual… -
Page 4: Table Of Contents
Your First Session with the MicroVerb 4 … 7 Unpacking and Inspection … 7 Basic Connections … 7 Powering Up … 8 Setting Levels … 8 What’s on the Front Panel? … 8 Auditioning Internal Programs … 10 Switching Between Preset and User Banks … 10 Adjusting Effects Mix Levels …
-
Page 5
Realtime Modulation Functions … 38 Troubleshooting… 39 Trouble-Shooting Index … 39 Re-initializing … 39 Checking the Software Version … 39 Maintenance/Service … 40 Cleaning… 40 Obtaining Repair Service… 40 MIDI Implementation Chart… 42 Specifications … 43 MicroVerb 4 Reference Manual… -
Page 6
Contents MicroVerb 4 Reference Manual… -
Page 7
MicroVerb 4 Reference Manual… -
Page 8: Your First Session With The Microverb 4
Mono In, Mono or Stereo Out. Connect a mono cord to the [LEFT/MONO] INPUT of the MicroVerb 4 from a mono source. (The Left input will then feed both inputs.) Connect another mono cord from the [LEFT] OUTPUT of the MicroVerb 4 to an amplification system or mixer input.
-
Page 9: Setting Levels
If the Input Meters on the MicroVerb 4 begin to clip (go into the red), turn down the Input level or decrease the volume of the source (instrument, mixer send, etc.). If the MicroVerb 4’s level is causing the mixer or amp to distort, turn the Output Level…
-
Page 10
MIDI channel (see above). ¥ Edit A/ Edit B Controls. Each Program on the MicroVerb 4 has two parameters which can be adjusted. Depending on the type of Program selected, these might alter Reverb Decay, Chorus Depth, etc. When an Edit knob is adjusted, the new value is briefly shown on the LED Display. -
Page 11: Auditioning Internal Programs
To instantly switch between the Preset and User banks, press the [BANK] button. Each time you press the [BANK] button, the MicroVerb 4 will toggle back and forth between the Preset and User banks. The display will indicate this by showing a program in the 00-99 (Preset) range or the 100-199 (User) range.
-
Page 12: Storing Edited Programs
If you select another Program from memory before storing the edited Program, your changes will also be lost. Although the MicroVerb 4 has two banks (Preset and User), you can only store Programs in the User bank. To store an edited Program: ¿…
-
Page 13
Chapter 1 – Your First Session with the MicroVerb 4 MicroVerb 4 Reference Manual… -
Page 14: Connections
AC Power Hookup The MicroVerb 4 comes with a power adapter suitable for the voltage of the country it is shipped to (either 110 or 220V, 50 or 60 Hz). With the MicroVerb 4 off, plug the small end of the power adapter cord into MicroVerb 4’s [POWER] socket and the male (plug) end into a source of AC power.
-
Page 15: Typical Applications
When used with a mono source, the MicroVerb 4 is placed between the source and the mixer/amplifier. Although the source may be mono, both the [LEFT/MONO] and [RIGHT] outputs can be connected to the inputs of a mixer/amplifier if stereo processing effects are desired.
-
Page 16
Dual Mono. Connect two mono cords to the [LEFT] and [RIGHT] inputs of the MicroVerb 4 from two mono sources , and two other mono cords from the [LEFT ] and [ RIGHT] outputs of the MicroVerb 4 to a stereo amplification system or two mixer inputs. -
Page 17: Interfacing To A Mixing Console
(4, 6 or 8, perhaps), the first two sends are reserved for the cue sends, while the remaining sends are used to feed effects, such as the MicroVerb 4. If you are using a mixer with more than two sends, connect the MicroVerb 4 using post-fader sends.
-
Page 18: Using Inserts
Mono In — Stereo Out. If you only want to feed the MicroVerb 4 a mono input, but wish to connect both of its outputs back to the mixer, you will need three 1/4″ audio cables. Connect a mono cord from an effect send to the [LEFT] input of the…
-
Page 19: Using Main Outputs
If you do not hear any audio after making these connections, swap the input and output cables at the MicroVerb 4, as these may be wired backwards. If the cable is color-coded, usually the red jack represents the send (which connects to the MicroVerb 4’s input) and black is the return (which connects to the output).
-
Page 20
Main Outputs of the mixing console to the [LEFT/MONO] and [RIGHT] inputs of the MicroVerb 4. The [LEFT] and [RIGHT] outputs of the MicroVerb 4 are then connected to a stereo amplifier, or two input channels of another mixing console (for sub-mixing applications). -
Page 21: Avoiding Ground Loops
In some cases, a “star grounding” scheme must be used, with the mixer at the center of the star providing the shield ground on telescoping shields, which do NOT connect to the chassis ground of other equipment in the system. MicroVerb 4 Reference Manual…
-
Page 22: Midi
Note: It is not necessary to follow step 2 if you intend to only send information to the MicroVerb 4, and do not need to receive information back from it. Example: If you only want to be able to recall Programs using MIDI program change messages, there is no need to connect a cable to the MicroVerb 4’s [OUT/THRU] connector.
-
Page 23
Make sure that the level of these impulses are at least -6dB on the front panel meters (the third segment up) so that the MicroVerb 4 has sufficient level to trigger from. Tip: High notes work better than low notes when using this feature. -
Page 24: Overview Of Effects
This decaying action is influenced by the room size, the location of the sound source in the room, the hardness of the walls, and many other factors. The MicroVerb 4 offers the following types of reverberation: Concert Hall (Programs 00-09, 100-109) This is a simulation of a large concert hall.
-
Page 25: Stereo Chorus
Finally, the waveform shape of the LFO can be changed from a smooth sine wave, to a more abrupt squarewave to make the pitch detuning more pronounced. Some of the MicroVerb 4’s Choruses have individual LFOs controlling the Left and Right sides, set at different rates. These effects, called True Stereo Choruses, often have a wider stereo image than regular Stereo Chorus effects.
-
Page 26: Stereo Flange
Edit A controls the speed of the panning effect and Edit B controls the width of the pan. When using the Auto Pan effect, the MicroVerb 4 should have its effects mix 100% wet with no direct signal mixed in to avoid phase problems.
-
Page 27: Rate
After a signal has gone through the delay processing, it is fed back to the delay input. The Feedback control sets what percentage of the signal will go back through the delay. At a setting of 0%, no signal will go back through the delay, so only one delay MicroVerb 4 Reference Manual…
-
Page 28: Setting Delay Time Using Tap Tempo
The MicroVerb 4 can also set its Delay Time by playing audio into the Inputs. To set the delay time using this method, hold down the Control Footswitch and play some quick notes into the MicroVerb 4.
-
Page 29: Multi Effects Parameters
This is an ideal setup for someone using the MicroVerb 4 with a mixer. By hooking two of the Aux Sends into the Left and Right inputs of the MicroVerb 4, you can use it to provide two discrete effects. Some of the multi effects include:…
-
Page 30
Overview of Effects – Chapter 3 MicroVerb 4 Reference Manual… -
Page 31
Chapter 1 – Your First Session with the MicroVerb 4 MicroVerb 4 Reference Manual… -
Page 32: Description Of Controls
Front Panel Input Level The Input Level controls the level of the signal being fed into the MicroVerb 4. The MicroVerb 4 can operate with signal levels anywhere from +4dBv Pro Audio gear to guitar level signals. To set the input level, watch the Input Meters while adjusting the Input level (see below).
-
Page 33: Store Button
VALUE Knob When no other button is being pressed, the Value Knob is used to change Programs. If the Bank/MIDI button is held while the Value Knob is being turned, the MicroVerb 4 will change its MIDI channel. MicroVerb 4 Reference Manual…
-
Page 34: Edit A/Edit B Knobs
Program. For example, on a Concert Hall program, the Edit A knob adjusts Reverb Decay Time and the Edit B knob adjusts Reverb Input Hi Cut. When the Edit A or Edit B knobs are adjusted, the new parameter registers briefly on the display. MicroVerb 4 Reference Manual…
-
Page 35: Rear Panel
When one footswitch is plugged into the Footswitch jack, it will function as a Bypass footswitch. When the Footswitch is pressed, the display will read “bYP”, the display will dim, and the MicroVerb 4 will stop producing effects. If the footswitch is pressed again, effects output will continue.
-
Page 36: Output (Left & Right)
[LEFT/MONO] input is routed to the [RIGHT] as well. Output (Left & Right) These are 1/4″ phone jacks which connect to devices such as the effects returns on a mixing console or Power Amplifier Inputs. For mono applications, use the [LEFT] output. MicroVerb 4 Reference Manual…
-
Page 37
Chapter 1 – Your First Session with the MicroVerb 4 MicroVerb 4 Reference Manual… -
Page 38: Midi Functions
Connect the control device’s MIDI OUT to the MicroVerb 4’s [MIDI IN]. ¡ Make sure that the MicroVerb 4 is set to the same MIDI Channel as the device that you are sending from (see above). Note: It is possible to select either the Preset or User bank via MIDI by sending a Controller 0 message immediately followed by a program change message.
-
Page 39: Realtime Modulation Functions
The display will read Snd as the User Programs are sent. ¬ When you send a Sysex dump back to the MicroVerb 4, it will automatically go into receive mode (you do not have to do anything to the unit). When this occurs, the display will read rEc.
-
Page 40: Troubleshooting
MIDI System Exclusive before performing a re-initialization (see Chapter 6). Checking the Software Version The current software version is displayed when the MicroVerb 4 is powered on. To check the software version, plug in the Microverb 4 and note the number displayed.
-
Page 41: Obtaining Repair Service
Chapter 6 – Troubleshooting Disconnect the AC cord, then use a damp cloth to clean the MicroVerb 4’s metal and plastic surfaces. For heavy dirt, use a non-abrasive household cleaner such as Formula 409 or Fantastik. DO NOT SPRAY THE CLEANER DIRECTLY ONTO THE FRONT OF THE UNIT AS IT MAY DESTROY THE LUBRICANTS USED IN THE SWITCHES AND CONTROLS! Spray onto a cloth, then use cloth to clean the unit.
-
Page 42: Midi Implementation Chart
MIDI I MPLEMENTATION Function Basic Default * * * * * * * * Channel Changed Default Mode Messages * * * * * * * * Altered Note * * * * * * * * Number True Voice Velocity Note On Note Off…
-
Page 43: Specifications
LED Display LED Peak Meters 1/4″ 2-conductor 1/4″ 2-conductor 1/4″ Stereo (accepts normally open or normally closed momentary footswitches, such as the Alesis PD, and Stereo Footswitches) 5 pin DIN 9 Volt Power Transformer (Alesis P3) MicroVerb 4 Reference Manual…
-
Page 44
Delay memory: Reverb effects: Delay effects: Pitch effects: Special effects: Multiple effect configurations: MicroVerb 4 Reference Manual 24 bit accumulator 1270 milliseconds Concert Hall, Real Room, Ambience, Plate Reverb, Nonlinear Mono Delay, Stereo Delay, Ping Pong Delay, Multi Tap Delay…
Содержание
Начало работы с MicroVerb 4 . . . . . . . . . . . . . . . . . . . . . . . . . . . . . . . . . . . . . . . . . . . . . . 3
Ðàñïàêîâêà è ïðîâåðêà. Îñíîâíûå ñîåäèíåíèÿ. Âêëþ÷åíèå ïèòàíèÿ. Ðåãóëèðîâêà óðîâíÿ. Êðàòêîå îïèñàíèå ëèöåâîé
ïàíåëè. Ïðîãðàììû. Ïåðåêëþ÷åíèå ìåæäó ïðåñåòíûì è ïîëüçîâàòåëüñêèì áàíêàìè. Óïðàâëåíèå ìèêñîì ïðÿìîãî è
îáðàáîòàííîãî ñèãíàëîâ. Çàïîìèíàíèå îòðåäàêòèðîâàííûõ ïðîãðàìì. Ðåæèì bypass.
Коммутация . . . . . . . . . . . . . . . . . . . . . . . . . . . . . . . . . . . . . . . . . . . . . . . . . . . . . . . . . . . . 5
Ïîäêëþ÷åíèå ïèòàíèÿ. Óñòðîéñòâà çàùèòû îò ñáîåâ â ñåòè ïèòàíèÿ. Àóäèî-êîììóòàöèÿ. Ñòàíäàðòíîå èñïîëüçîâàíèå
àóäèî-âõîäîâ/âûõîäîâ. Ðàñïàéêà âõîäíîãî ðàçúåìà. Êîììóòàöèÿ ñ èíñòðóìåíòàìè. Êîììóòàöèÿ ñ ïóëüòîì.
Èñïîëüçîâàíèå äîïîëíèòåëüíûõ ïîñûëîâ. Èñïîëüçîâàíèå ðàçðûâîâ. Ïîäêëþ÷åíèå ê îñíîâíîìó âûõîäó. “Çåìëÿíûå”
ïåòëè. MIDI. Íîæíîé ïåðåêëþ÷àòåëü.
Эффекты . . . . . . . . . . . . . . . . . . . . . . . . . . . . . . . . . . . . . . . . . . . . . . . . . . . . . . . . . . . . . . 9
Ýôôåêòû ðåâåðáåðàöèè. Concert Hall. Real Room. Plate Reverb. Ïàðàìåòðû ýôôåêòîâ ðåâåðáåðàöèè. Äëèíà õâîñòà
(Decay). Îáðåçíîé ôèëüòð âûñîêèõ ÷àñòîò. Ýôôåêòû õîðóñ/ôëýíæåð. Ñòåðåî õîðóñ (Stereo Chorus). Êâàäðàòè÷íûé
õîðóñ (Quad Chorus). Õîðóñ (Chorus). Ñòåðåî ôëýíæåð (Stereo Flange). Àâòîìàòè÷åñêîå ïàíîðàìèðîâàíèå (Auto Pan).
Ïàðàìåòðû õîðóñà/ôëýíæåðà. Òåìï (Rate). Ãëóáèíà (Depth). Ýôôåêòû çàäåðæêè. Ìîíîôîíè÷åñêàÿ çàäåðæêà (Mono
Delay). Ñòåðåîôîíè÷åñêàÿ çàäåðæêà (Stereo Delay). Çàäåðæêà òèïà “ïèíã-ïîíã” (Ping Pong). Ìíîãîîòáîðíàÿ çàäåðæêà
(MultiTap Delay). Ïàðàìåòðû çàäåðæêè. Âðåìÿ çàäåðæêè (Time). Îáðàòíàÿ ñâÿçü (Feedback). Óñòàíîâêà âðåìåíè
çàäåðæêè ñ ïîìîùüþ Tap Tempo. Ýôôåêòû ñäâèãà ÷àñòîòû. Ñòåðåîôîíè÷åñêèé ñäâèã ÷àñòîòû (Stereo Pitch Shifter).
Ñòåðåîôîíè÷åñêàÿ ðàññòðîéêà òîíà (Stereo Pitch Detuner). Ìóëüòèýôôåêòû. Ýôôåêò Ëåñëè (Lezlie). Ïàðàìåòðû
ìóëüòèýôôåêòîâ. Äëèíà õâîñòà. ×àñòîòà/Âðåìÿ. Ýôôåêòû ñ äâîéíûì ïîñûëîì. Ðåâåðáåðàòîð/Çàäåðæêà
(Reverb/Delay). Ðåâåðáåðàòîð/Õîðóñ (Reverb/Chorus). Ðåâåðáåðàòîð/Ôëýíæåð (Reverb/Flange).
Управление прибором . . . . . . . . . . . . . . . . . . . . . . . . . . . . . . . . . . . . . . . . . . . . . . . . . . . 12
Ëèöåâàÿ ïàíåëü.Óðîâåíü âõîäíîãî ñèãíàëà. Óðîâåíü ìèêñà. Óðîâåíü âûõîäíîãî ñèãíàëà. Èíäèêàòîðû óðîâíåé.
Ñâåòîäèîäíûé äèñïëåé. Êíîïêà Store. Êíîïêà Bank/MIDI. Êîëåñî Value. Ðåãóëÿòîðû Edit A è Edit B. Çàäíÿÿ ïàíåëü.
Ïèòàíèå. Ãíåçäî ïîäêëþ÷åíèÿ íîæíîãî ïåðåêëþ÷àòåëÿ. Ðàçúåì MIDI IN. Ðàçúåì MIDI OUT/THRU. Âõîäíûå ðàçúåìû
Input (Left/Mono è Right). Âûõîäíûå ðàçúåìû (Left è Right).
Работа с MIDI . . . . . . . . . . . . . . . . . . . . . . . . . . . . . . . . . . . . . . . . . . . . . . . . . . . . . . . . . . 14
MIDI-ôóíêöèè. Êàíàë MIDI. MIDI THRU. Ïðèåì êîìàíä Program Changes. Çàïèñü äàìïà SysEx. Ìîäóëÿöèÿ çíà÷åíèÿ
ïàðàìåòðîâ â ðåàëüíîì âðåìåíè.
Устранение неполадок . . . . . . . . . . . . . . . . . . . . . . . . . . . . . . . . . . . . . . . . . . . . . . . . . . . 15
Ñïèñîê âîçìîæíûõ íåèñïðàâíîñòåé. Ïåðåçàïóñê. Ïðîâåðêà âåðñèè ïðîãðàììíîãî îáåñïå÷åíèÿ. Îáñëóæèâàíèå. Óõîä.
Ðåìîíò.
Карта MIDI7функций . . . . . . . . . . . . . . . . . . . . . . . . . . . . . . . . . . . . . . . . . . . . . . . . . . . . 16
Характеристики . . . . . . . . . . . . . . . . . . . . . . . . . . . . . . . . . . . . . . . . . . . . . . . . . . . . . . . . 16
2
MicroVerb 4. Ðóêîâîäñòâî ïîëüçîâàòåëÿ
Перед вами файл pdf, где представлена инструкция (руководство) на русском для ALESIS MICROVERB 4. Вы можете скачать ее либо изучить в онлайн режиме.
Подробные сведения об инструкции:
Устройство из раздела: процессор
Бренд-производитель: ALESIS
Наименование модели: ALESIS MICROVERB 4
Язык: Руководство на русском языке
Файл: pdf
Размер файла: 235,89 kB
Скачать инструкцию к HARPER HDT2-1110
ЗАГРУЗИТЬ
Просмотр инструкции онлайн
Краткое содержание страницы № 1
ALESIS
MicroVerb 4
Reference Manual
Краткое содержание страницы № 2
Introduction Thank you for purchasing the Alesis MicroVerb 4 Multieffects Processor. To take full advantage of the MicroVerb 4’s functions, and to enjoy long and trouble-free use, please read this user’s manual carefully. How To Use This Manual This manual is divided into the following sections describing the various modes of the MicroVerb 4. Though we recommend you take time to read through the entire manual once carefully, those having general knowledge about effects devices should use the tab
Краткое содержание страницы № 3
2 MicroVerb 4 Reference Manual
Краткое содержание страницы № 4
Contents CONTENTS Your First Session with the MicroVerb 4 7 ………………………………………………….. Unpacking and Inspection 7 ………………………………………………………………………………………. Basic Connections 7 …………………………………………………………………………………………………. Powering Up ……………………………………………………………………………………………..
Краткое содержание страницы № 5
Contents Pitch Shifter Effects 27 ……………………………………………………………………………………………….. Stereo Pitch Shifter 27 …………………………………………………………………………………….. Stereo Pitch Detuner 27 ………………………………………………………………………………….. Multi Effects ……………………………………………………………………………………..
Краткое содержание страницы № 6
Contents MicroVerb 4 Reference Manual 5
Краткое содержание страницы № 7
6 MicroVerb 4 Reference Manual
Краткое содержание страницы № 8
Your First Session with the MicroVerb 4 – Chapter 1 CHAPTER 1 YOUR FIRST SESSION WITH THE MICROVERB 4 Unpacking and Inspection Your MicroVerb 4 was packed carefully at the factory, and the shipping carton was designed to protect the unit during shipping. Please retain this container in the highly unlikely event that you need to return the MicroVerb 4 for servicing. The shipping carton should contain the following items: • This instruction manual • Alesis MicroVerb 4 with the same serial number a
Краткое содержание страницы № 9
Chapter 1 – Your First Session with the MicroVerb 4 ¿ Before turning on the MicroVerb 4’s power, check the following items: • Have all connections been made correctly? • Are the volume controls of the amplifier or mixer turned down? ¡ Plug in the power adapter and insert the Power jack into the [POWER] input on the rear panel of the MicroVerb 4. Upon power-up, the display will briefly illuminate all front panel LEDs, display the Software version, and then display the last selected Program Number
Краткое содержание страницы № 10
Your First Session with the MicroVerb 4 – Chapter 1 The display will dim slightly when it is not displaying the current Program. When the Store button is pressed, the Display will flash the destination Program number. ± STORE Button. When the [STORE] button is pressed, the LED Display will flash the number of the Program that the current program will be stored to. If Store is pressed again, the display will flash rapidly and the current Program will be stored. Programs can only be stored into
Краткое содержание страницы № 11
Chapter 1 – Your First Session with the MicroVerb 4 Auditioning Internal Programs The MicroVerb 4 comes with 100 Programs in a Preset bank, plus another 100 Programs in the User bank. These Programs represent the wide range of applications for which the MicroVerb 4 is suited. The difference between Preset and User Programs is that User Programs can be replaced with your own edits, but Preset Programs are permanently stored into memory. To audition the internal effect Programs, turn the [VALUE] k
Краткое содержание страницы № 12
Your First Session with the MicroVerb 4 – Chapter 1 Storing Edited Programs Once you are satisfied with the changes you have made to an edited Program, or are creating a new Program from scratch, you will need to store your edited Program back into memory. The MicroVerb 4 will temporarily store the currently selected Program in non-volatile memory. If you edit a Program, the changes you made will be lost the next time you power on the unit if you haven’t stored the edited Program into memory. If
Краткое содержание страницы № 13
Chapter 1 – Your First Session with the MicroVerb 4 12 MicroVerb 4 Reference Manual
Краткое содержание страницы № 14
Connections – Chapter 2 CHAPTER 2 CONNECTIONS AC Power Hookup The MicroVerb 4 comes with a power adapter suitable for the voltage of the country it is shipped to (either 110 or 220V, 50 or 60 Hz). With the MicroVerb 4 off, plug the small end of the power adapter cord into MicroVerb 4’s [POWER] socket and the male (plug) end into a source of AC power. It’s good practice to not plug in the MicroVerb 4 until all other cables are hooked up. Alesis cannot be responsible for problems caused by using t
Краткое содержание страницы № 15
Chapter 2 – Connections • Although Alesis does not endorse any specific product, chemicals such as Tweek and Cramolin, when applied to electrical connectors, are claimed to improve the electrical contact between connectors. Typical Applications The analog audio inputs and outputs are typically used in one of three ways: • from one or two effect/aux send outputs of a mixer, and out to the effect return inputs of the mixer; or, • from a line-level instrument (like a guitar or keyboard with either
Краткое содержание страницы № 16
Connections – Chapter 2 • Mono. Connect a mono cord to the [LEFT] INPUT of the MicroVerb 4 from a mono source, and another mono cord from the [LEFT] output of the MicroVerb 4 to an amplification system or mixer input. INSTRUMENT OR EFFECTS SEND TO MIXING CONSOLE OR AMPLIFIER LEFT/MONO INPUT LEFT OUTPUT INPUT MIX OUTPUT DUAL CHANNEL PARRELL PROCESSOR CLIP -6dB STORE -12dB BANK -32dB MIDI 00-99 PRESET 100-199 USER L INPUT R • Mono In, Stereo Out. While still using a mono input, you could conne
Краткое содержание страницы № 17
Chapter 2 – Connections Interfacing to a Mixing Console The MicroVerb 4 handles mono or stereo sends at all system levels. The input circuitry of the MicroVerb 4 can easily handle +4 dBu levels (+20 dBu peaks), while having enough input and output gain to interface with the low -10 dBV signal levels of budget recording systems. The MicroVerb 4 may be connected to a mixing console in several different ways. It can be used to effect several instruments at once by using the auxiliary send and retur
Краткое содержание страницы № 18
Connections – Chapter 2 Mono In — Stereo Out. If you only want to feed the MicroVerb 4 a mono input, but wish to connect both of its outputs back to the mixer, you will need three 1/4″ audio cables. Connect a mono cord from an effect send to the [LEFT] input of the MicroVerb 4, another mono cord from the [LEFT] output of the MicroVerb 4 to an effect return or other mixer input, and another mono cord from the [RIGHT] output of the MicroVerb 4 to an adjacent effect return or mixer input. LEFT/MONO
Краткое содержание страницы № 19
Chapter 2 – Connections By using individual channel inserts, you can dedicate the MicroVerb 4 to a specific channel (or pair of channels) on the mixer. The Insert connections on the back of the mixer provide a way of “inserting” external processing equipment into the signal path. The insert occurs after the input amplifier, and before the main fader; essentially it is the same as connecting the source (instrument or microphone) into the MicroVerb 4 before the mixer’s channel input. However, some
Краткое содержание страницы № 20
Connections – Chapter 2 inputs. This is done by using two 1/4″ mono cables to connect the Left and Right Main Outputs of the mixing console to the [LEFT/MONO] and [RIGHT] inputs of the MicroVerb 4. The [LEFT] and [RIGHT] outputs of the MicroVerb 4 are then connected to a stereo amplifier, or two input channels of another mixing console (for sub-mixing applications). LEFT/MONO INPUT RIGHT INPUT INPUT MIX OUTPUT DUAL CHANNEL PARRELL PROCESSOR CLIP -6dB STORE -12dB BANK -32dB MIDI 00-99 PRESET 10
Процессор ALESIS MICROVERB 4 — это экономичное цифровое устройство дополняет любую студию множеством важных функций динамической обработки аудиосигнала.
2-канальный/стерео режим
MICROVERB 4 оснащен стерео входом и выходом на базе профессиональных акустических разъемов 1/4» TRS (6.2 mm jack). 2 канала обеспечивают независимое наложение эффектов.
Дистанционное управление
Возможно подключение MIDI-устройств к 5-контактному DIN-входу для управления во время LIVE-концертов; сквозной выход обеспечивает ретрансляцию сигналов на другие устройства.
ЦАП-АЦП
Преобразователи Sigma-Delta отличного качества 18 бит с частотой дискретизации 48 кГц.
Производительность и быстродействие
Встроенный DSP разрядностью 24 бит гарантирует богатый функционал и наилучшее качество звука.
Программный WET/DRY
Функция балансировки wet/dry для определения соотношения исходного аудиосигнала с эффектами в миксе.
Bypass
Функция байпассирования (обхода цифрового процессора) доступна при подключении футсвитча к специальному TRS-входу на задней панели; при нажатии на педаль аудиосигнал проходит по тракту без наложения эффектов MICROVERB 4.
Пресеты и программы
MIDIVERB 4 обладает богатейшим набором специальных эффектов, позволяющим создать неповторимый саунд на студии звукозаписи. Возможности ограничиваются только Вашей фантазией. Ресурс процессора включает в себя до 100 заводских пресетов. Дополнительно пользователям доступно формирование и хранение до 100 произвольных пресетов благодаря различным комбинациям. В перечень входят такие популярные эффекты, как pitch-эффект, реверберация, задержка до 1270 мс и др., которые позволяют создать неповторимую акустику, например, для эффекта вокала в ограниченном или широком пространстве или на сцене, популярного эффекта флэнджера, chorus и многое другое. До 3 эффектов одновременно.
Эргономичные переключатели
Выбор программ, переключение пресетов, регулировка уровней входного и выходного сигналов, а также баланса реализуется посредством удобных поворотных ручек на передней панели.
Дисплей
Повышенная информативность благодаря большому ЖК-дисплею, на котором отображается все необходимые текущие сведения о состоянии каналов, уровней, пресетах и пр.
Дизайн
Стандартизированный корпус может устанавливаться в 19»-стойке.
Подробное описание
Схема подключения ALESIS MICROVERB 4
вход моно — выход стерео

Схема подключения ALESIS MICROVERB 4
вход стерео — выход стерео

Схема подключения ALESIS MICROVERB 4
с использованием Insert входа в режиме моно

Схема подключения ALESIS MICROVERB 4
между микшером и усилителем

<< свернуть
| Количество каналов: | 2 |
| Аналоговые аудиовходы: | |
| — разъемы: | 1/4» TRS х 2 |
| — сопротивление: | 500 кОм / канал моно; 1 МОм / канал стерео |
| — максимальный уровень на входе: | +10 дБу |
| Аналоговые аудиовыходы: | |
| — разъемы: | 1/4» TRS х 2 |
| — сопротивление: | 500 Ом |
| — максимальный уровень на выходе: | +17,5 дБу |
| Вход Foot switch / Bypass: | |
| — разъем: | 1/4» TRS |
| Цифровые входы/выходы: | |
| — разъемы: | DIN 5-pin |
| Частотная характеристика: | 20 Гц — 20 кГц; +/- 1 дБ |
| Динамический диапазон: | 90 дБ |
| Коэффициент нелинейных искажений: | <0,009% / 1 кГц |
| DSP: | 24 бит |
| Память процессора: | 64К х 16 бит |
| АЦП: | Sigma-Delta 18 бит; 128-кратная передискретизация |
| ЦАП: | Sigma-Delta 18 бит; 8-кратная передискретизация |
| Частота дискретизации: | 48 кГц |
| Количество пресетов: | 100 заводских + 100 пользовательских |
| Максимальное время задержки: | 1270 мс |
| Функция Bypass: | при подключении педального футсвитча (TRS) |
| Питание: | 220 B AC (сетевой адаптер 9 В АС) |
| Потребляемый ток: | 500 мА |
| Габариты: | 483х44х152 мм (19» 1U) |
| Вес: | 2,3 кг |
Распечатать информацию о товаре
Дополнительно

SPX2000 YAMAHA Процессор эффектов
Процессор мультиэффектов; реверберация REV-X; эхо и задержка; Pitch; модуляция; лупер Freeze; динам. фильтры; Bypass; пресеты; 2 входа XLR/TRS; 2 выхода XLR/TRS; вход/выход AES/EBU; вход/выход MIDI; 1 вход footswitch; 1 вход BNC; USB; LCD-дисплей; 220 В (сетевой адаптер); 480х45х372.5 мм (19» 1U); 4 кг.
MIDIVERB 4 ALESIS Процессор эффектов
2-канальный цифровой процессор эффектов; DSP 24 бит; автокоррекция уровня входного сигнала; реверберация; pitch; flanger; chorus; задержка до 1300 мс; wet/dry баланс; 128 заводских+128 пользовательских пресетов; LCD-дисплей; Bypass через футсвитч (TRS); 2 входа TRS; 2 выхода TRS; вход/выход MIDI; 220 В (сетевой адаптер); 483х44х152 мм (19» 1U); 2.3 кг (СНЯТ С ПРОИЗВОДСТВА).