
Доброго времени суток!
99,9% владельцев Wrangler JK знают о существовании этого надежного и проверенного инструмента чип-тюнга и значительная часть этих владельцев имеют AEV Procal module в пользовании.
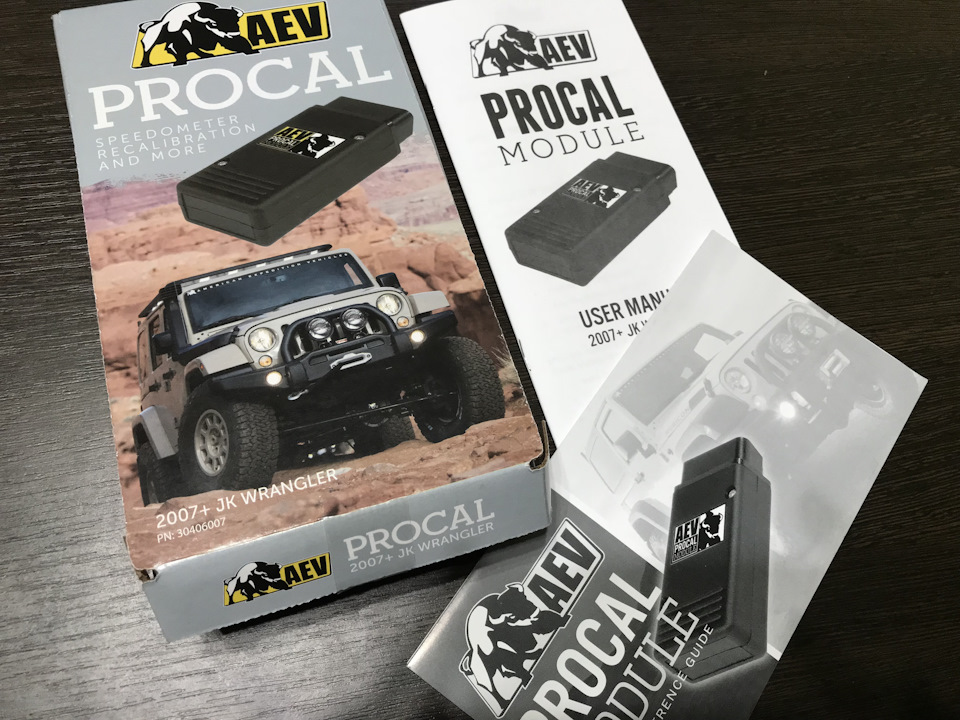
Ничего нового для владельцев JK я тут не напишу, но из уважения к подписчикам обозначу назначение этого модуля…
Функционал следующий:
— корректировка показаний спидометра для колес от 24″ до 53.75″ с шагом в 0.25″;
— корректировка порогового значения (или полное отключение) информирования «низкое давление в шинах»;
— корректировка настроек по коробке передач (если замена коробки на ATLAS, например);
— корректировка настроек по передаточному числу головных пар от 3.07:1 до 5.67:1 (при замене ГП);
— выключение/включение кратковременного моргания сигнала поворота при перестроении;
— опция автоматического включения днем ближних/дальних/туманок в пол-накала и/или габаритов;
— удаление кодов ошибок;
— регулировка отклика от нажатия педали газа;
— разовое повышение оборотов работы двигателя до 2000 на холостом ходу на 10 минут после старта (необходимо при использовании прожорливых потребителей электроэнергии);
— регулировка положения поворота руля относительно поворота колес (при проведении работ по рулевой, «нулевая точка» выставляется по индикаторам поворотников);
— сброс настроек на заводские;
— отключение/включение индикации «sway bar» в разомкнутом (неисправном, отключенном) состоянии, для чего собственно и купил.
Вообще-то хотел другой вариант этого инструмента — Superchips Traildash2, но в машинах от 2015 года (по VIN BlackJack 2015 модельного года) часть функций залочена. Для перепрошивки, необходима отправка ECM. Пока услугам почтовых сервисов я не на столько доверяю да и «простой» автомобиля неопределенное время меня не устраивает. Вопрос не закрыт, бум думать…

изменил пороговое значение индикации TRMS. Качаешь 2.2 bar, на трассе поднимается до 2.6 bar, заезжаешь в «прохладную» климатическую зону — падает до 1.8-1.9 с индикацией на приборке. Потушить индикацию — подкачать до нормы предусмотренной производителем авто. В жарком климате эта «норма» приобретает запредельные значения… Азот в шины на дальние перегоны? Спорно! AEV Procal модуль на перепады давления не повлияет, но индикацию не по делу уберет😉
крутится мысль перепрописать размер колес, посмотреть скорость в сравнении с данными GPS при движении на круизе. Замерил размер передних колёс (как в методике), сравнил с «паспортными» данными — имеется нестыковочка.
Штучка несомненно полезная для JK-вода.
При прошивке модуль «привязывается» к авто, чтоб отвязать и/или продать — настройки авто сбрасываются на «заводские».
На этом всё!
Мирного неба над головой!
Высокооплачиваемой работы!
Теплого майского настроения!
(или «Мир, Труд, Май», другими словами😉)
upd: нулевая точка руля (в инструкциях нет):
1.up 2.up 3.dn 4.dn 5.up 6.dn 7.dn 8.dn 9.dn
при не корректном выходе из режима, сигналы поворотников останутся включенными (см. USER GUIDE)
QUICK REFERENCE GUIDE
USER GUIDE
(Ocr-Read Summary of Contents of some pages of the AEV PROCAL Document (Main Content), UPD: 29 May 2023)
-
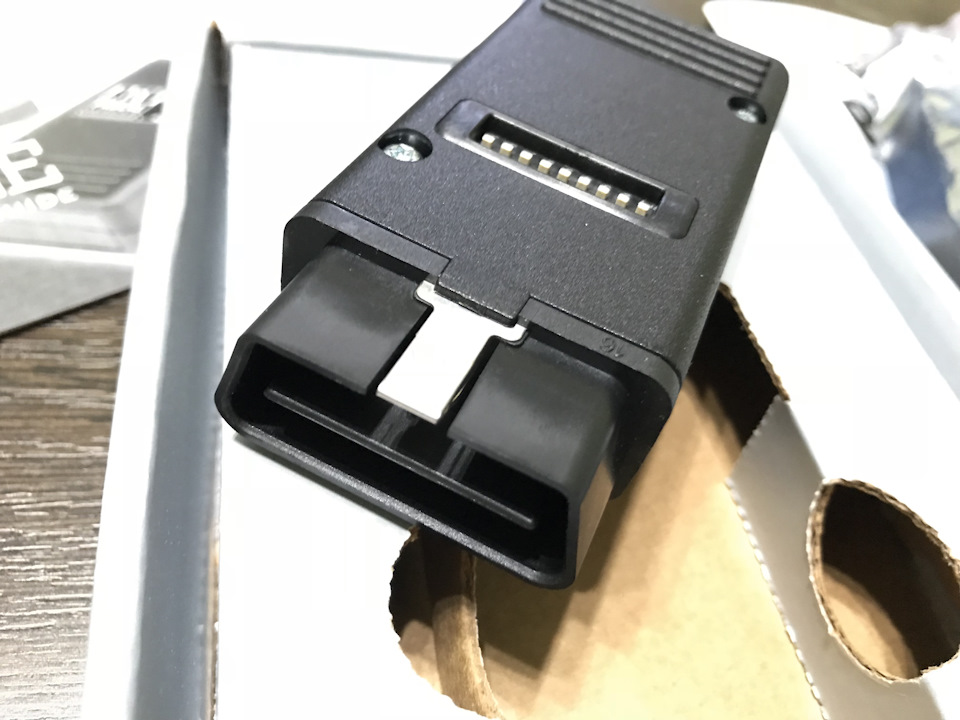
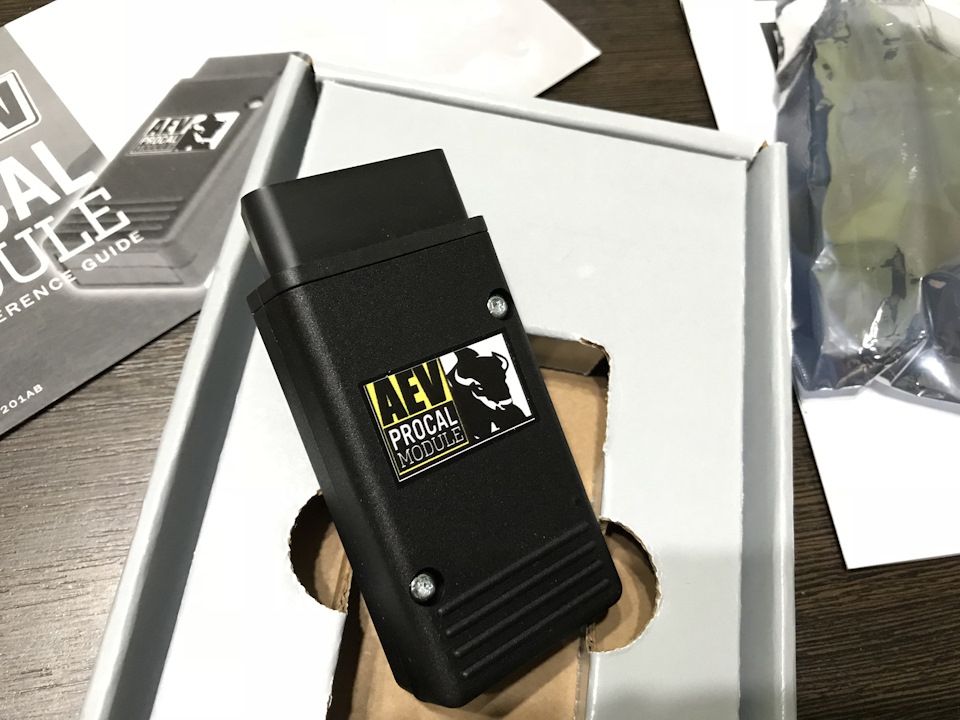
2, AEV ProCal Module User MANUAL Please consult the Troubleshooting Guide if you experience any issues. INCLUDED PARTS QTY REQUIRED TOOLS ProCal Module 1 Fine pointed instrument Quick Reference Guide 1 for toggling switches FEATURES OF THE MODULE The ProCal Module allows the user to adjust several factory parameters including: • Tire Size • Gear Ratio • Transfer Case Low Ratio • One Touch Lane Change • Daytime Running Lamps • Low Tire Pressure Indicator • Sm…
-
3, AEV PROCAL AEV ProCal Module User MANUAL Please consult the Troubleshooting Guide if you experience any issues. INCLUDED PARTS QTY REQUIRED TOOLS ProCal Module 1 Fine pointed instrument Quick Reference Guide 1 for toggling switches FEATURES OF THE MODULE The ProCal Module allows the user to adjust several factory parameters including: • Tire Size • Gear Ratio • Transfer Case Low Ratio • One Touch Lane Change • Daytime Running Lamps • Low Tire Pressure Indicator • Smart Bar Indicator …
-
4, AEV PROCAL For AEV HEMI Builders Kits, the ProCal Module will: • Program the Vehicle’s VIN into the new PCM controller (only required for older kits) • Program the Pedal Calibration and Tolerance • Adjust transmission settings for your 5.7L or 6.4L engine on 2012 or newer vehicles The ProCal Module is only designed to be plugged into the vehicle during programming or activation of runtime features. Between uses AEV recommends storing the unit in the g…
-
5, TIRE SIZE MODE Description: This mode allows the user to adjust the tire size setting on the vehicle. This will ensure proper speedometer reading, odometer function, and automatic transmission shift points. Note: • In order to program the proper tire size, a measurement of the front tire will need to be taken on the vehicle under normal load and air pressure rounded down to the nearest quarter inch (1/4”). DO NOT use the manufacturers listed tire size. • Because a correct speedometer is important…
-
6, 4567 4567 4567 4567 4567 4567 4567 4567 4567 4567 4567 4567 4567 4567 4567 AXLE RATIO MODE Description: This mode allows the user to modify the gear ratio setting in the vehicle’s computer. This will ensure proper automatic transmission shift points. On vehicles with A580 transmissions — it is imperative to correct function that the vehicle’s computers match the actual ratio in the differentials. Notes: • There is a common decimal discrepancy in certain ratios, ignore minor con�…
-
7, • You must be VERY CAREFUL of the physical ratio before programming. Many people are told they have one ratio, or forget what ratio they have, or are told in is some ratio, when these people program that incorrect ratio – some vehicles (with A580 transmissions) will not shift at all. They will start and remain in second gear, this is called “Limp In” mode. • “Limp In” can be diagnosed by trying to use the “au…
-
8, AEV PROCAL • If using an Advanced Adapter’s product with an 2012+ Automatic (A580 transmission) using their accessory module that sends the correct 4WD Status single is required. If you shift into 4WD Low with this setup, and do not see “ESP OFF” on the dashboard, the system does not know it’s in 4WD LOW and the transmission will not shift correctly even after the ProCal is used to program the proper value. Contact Advanced Adapters in this event. ONE TOUCH LANE CHANGE (OTLC) MODE Description…
-
9, • The TPMS sensors use timed and pressure-loss triggers to update the vehicle of tire pressures. This may require driving the vehicle around before the new setting “takes” or the indicator light turns off. DAYTIME RUNNING LAMPS (DRL) MODE Description: This mode allows the user to activate, deactivate, or change the vehicle’s Daytime Running Lamp (DRL) mode. If you live in a DRL regulated area (Canada and some parts of Europe), please check with your local laws prior to making any DRL changes. • When…
-
10, AEV PROCAL built with this feature (all Rubicons), removal of the module will constantly illuminate the “Sway Bar” lamp on the dash. For vehicles that were built without this feature, addition of the module will not by itself enable the system. For either circumstance, the AEV ProCal can activate or deactivate the ASBS. Note: Installing or removing the module must be done prior to using the ProCal Module. THROTTLE TOLERANCE PROGRAMMING MOD…
-
11, 3. Insert the ProCal. 4. When the module is ready to start, the Electronic Throttle (ETC) Indicator (a lightning bolt surrounded by two vertical lines) will ash on the dash. 5. To start the pedal routine, pull the headlight stalk back into the “Highbeam Flash” position, then release the headlight stalk allowing it to fall back into the “Highbeam Off” position. Just as if you were ashing another v…
-
12, AEV PROCAL • If you have a running/functioning vehicle, this setting will do nothing. Only vehicles with brand new PCM parts will work with this routine. Without initializing a new PCM, the vehicle’s theft system will prevent the vehicle from running and possibly prevent the engine from cranking. This only applies to certain 2007-2011 AEV Hemi Builder Kits. CLEAR DIAGNOSTIC TROUBLE CODES MODE Description: This mode allows the user to turn off the Check Engine Light on the vehicle’s dash. • This func…
-
13, • To prevent he vehicle from going into a lower power mode or presenting the user with a low power error lamp, the AEV ProCal should only be used while winching, using an on-board welder, or for other power intensive tools. • This feature has a 10 minute timeout. The engine can safely be turned off at any time. • The E-brake must be set while the function is active. • This feature may or may not work on 2.8L Diesel manuals of certain years. Instructions: To start the procedure, locate the dimme…
-
14, light. If the wheel is too far to the left, the left indicator will light. If the steering wheel is stopped exactly dead center, the highbeam indicator and both turn signal lamps will light. • The ProCal module will allow the user to perform a proper alignment without having to use the dealer diagnostic tool. • This feature is typically only used on an alignment rack. The only way to exactly correlate the…
-
15, RESTORE MODE Description: This module can be “restored” to work on new vehicles, but will set the paired vehicle back to the original settings rst. Only one vehicle can be modied at a time. • Do not use restore before going to the dealer. The ProCal is “Dealer Safe” and no issue will come from using the factory tools “on top of” the ProCal. That said, using the factory tools could over- write the settings. In this case…
-
16, Instructions: Same as any other programming mode. Turn the vehicle’s ignition to RUN, set the switching according to the value above, and insert the module. Restore may take a few seconds longer than other programming modes. The horn will honk three times on successful completion. TROUBLESHOOTING On occasion, the ProCal module may be unable to complete a desired request for a variety of reasons, including network errors, an invalid DIP switch setting, or a prohi…
-
17, CODE Description Solution 1-x, 2-x, 3-x Internal Error Contact AEV 4-2 Wrong VIN This module is locked to another vehicle’s VIN. Use the module in the vehicle it is locked to. 4-3 Wrong Vehicle Type Jeep Wrangler is the only currently supported vehicle. 4-5 Feature Not Supported Feature is unavailable for your vehicle type, conguration or year. 4-6 Key In Wrong Position Please make sure you have turned the key “two clicks” to ignition-RUN mode before inserting the ProCal. All of the lights will be on in the cluster and t…
-
18, Common Issues • Set the switches. Turn the vehicle on. Then insert the ProCal. Always. • It does not matter if you remove the ProCal then turn the vehicle off, or turn the vehicle off then remove the ProCal. • To determine Up or Down, hold the module in your hand looking at the switches, with the connector by your thumb, this is “UP”. • If you feel the ProCal “isn’t doing anything”, please rst read this: ○ If the ProCal honks the horn twice on a programming event, it IS wor…
-
19, • Be EXTREMELY cautious of purchasing from places like Craigslist or Ebay or Forums. Very many times, a user will sell a module that is locked to their or some other VIN. There is no way to know if a module was actually released from its original vehicle before trying in your own. AEV never recommends buying a used module at all, it’s very often a hassle for both private parties. comments or questions? American Expedition Vehicles www.aev…
Table of Contents: AEV ProCal SNAP Control Unit Owner’s Manual
-
AEV ProCal SNAP + – + – + – + + Tre b — Mid — Bass — Tre b + Mid + Bass + +3 +4 +2 + – + – + – + + Tre b — Mid — Bass — Tre b + Mid + Bass + +3 +4 +2 Adjust the stereo’s EQUALIZER SETTINGS to the values you wish to set (be sure the stereo source is set to AM). Always enter the values in order: Bass, Mid, Treb. • Example
-
AEV-CONVERSIONS.COM ©2020 American Expedition Vehicles
-
SET + SET — RES CANC RES + SET – CANCEL + BRAKE PEDAL RES + EXAMPLE: TIRE SIZE To recalibrate Tire Size: Begin by physically measuring your tire diameter IN INCHES from the ground to the top of front tire with the vehicle level and on the ground. Press 2 times to put into the “RUN” position. Insert ProCal SNAP into the OBDII port. Wait for a solid GREEN light on the SNAP. 2 1 3 ACTUAL MEASURMENT TO THE NEAREST 10th IN. Set the EQ values for the tire size (Example: 34.2” Tires, Bass = 3, Mid = 4, Treb = 2.). Press the combination below. PRESS and
-
AEV ProCal SNAP ADDITIONAL FUNCTIONS To use ProCal SNAP to clear DTC codes or restore your vehicle’s factory settings, follow programming steps 1 and 2 then PRESS/PULL and the combinations below and HOLD for 3 SECONDS. CLEAR DTC CODES RESTORE FACTORY SETTINGS + + BRAKE PEDAL RES PULL HIGH BEAM + + BRAKE PEDAL CRUISE ON/OFFPULL HIGH BEAM VIEW SETTINGS To view the current settings in your vehicle on the Instrument Cluster Display: • Insert the ProCal SNAP into the OBDII port • Use the Cluster Display Control Buttons (arrow buttons) to navigate to the AUDIO set
-
1 2 3 4 5 6 1. INSTRUMENT CLUSTER DISPLAY CONTROL BUTTONS 2. INSTRUMENT CLUSTER DISPLAY 3. CRUISE CONTROL BUTTONS 4. STEREO DISPLAY 5. OBDII PORT 6. ENGINE START/STOP BUTTON OVERVIEW The AEV ProCal SNAP is a simple, easy to use electronic recalibration module for Ram Truck. ProCal SNAP has the ability to recalibrate your vehicle’s speedometer to compensate for non-factory tire sizes, replacement axle gear ratios and aftermarket or dierent transfer case gear ratios by simply plu
-
AEV ProCal SNAP SET + SET — RES CANC RES + SET – CANCEL Wait for a blinking GREEN light on the SNAP and a blinking BRAKE light on the speedometer. With your foot on the brake, PRESS and HOLD the CRUISE ON/OFF button for 3 SECONDS. HONK! HONK! HONK! When the pairing process is complete, the horn will sound quickly 3 times. Your ProCal SNAP is now paired and ready to recalibrate your vehicle. + 3 4 5 PAIR PROCAL SNAP TO VEHICLE Insert ProCal SNAP into the OBDII port. 1 2 Press 2 times to put into the “RUN” position. NOTE: The ProCal SNAP must be paired to a vehicle before it will recal
-
AEV ProCal SNAP Q: No light on the ProCal SNAP. A: Contact Support. Q: The light was solid green, I attempted to program something, there was no honk and now the ProCal SNAP has a fast pulsing blue light. A: Turn the radio o. Use the Instrument Cluster Display Control Buttons to navigate to AUDIO. Record the error message and contact AEV support with the information shown. Q: What if I don’t have a factory stereo? A: Contact AEV support, some aftermarket radios could still function properly. We’ll be able to advise you before trying. AE
-
AEV ProCal SNAP USER GUIDE | RAM TRUCK AEV30410AA
Questions, Opinions and Exploitation Impressions:
You can ask a question, express your opinion or share our experience of AEV ProCal SNAP device using right now.
Aev procal module, User guide
- Text mode
- Original mode
Advertising

2/5/2009
Page 1 of 10
AEV30200AA
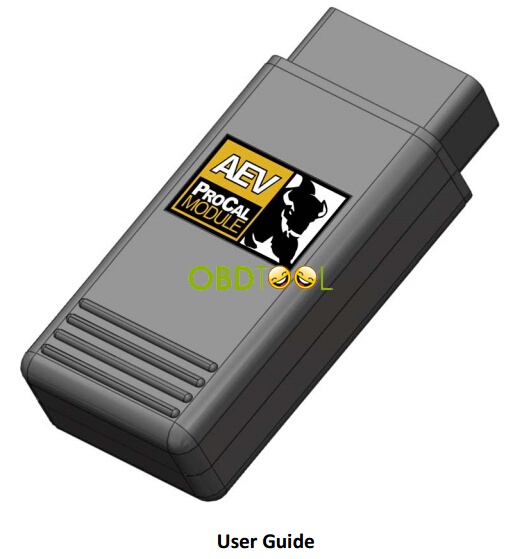
AEV ProCal MODULE
User Guide
Digital version of this document is available online at:
http://www.aev-conversions.com/products/docs
Advertising
Table of contents
Document Outline
- AEV ProCal MODULE
- User GuideDigital version of this document is available online at: http://www.aev-conversions.com/products/docs
- Required Tools
- FEATURES OF THE MODULE
- COMMENTS OR QUESTIONS?
IN ORDER TO ENSURE PROPER FUNCTION, WE RECOMMEND READING THESE INSTRUCTIONS THOROUGHLY BEFORE BEGINNING ANY WORK.

FEATURES OF AEV ProCal Module
The ProCal Module allows the user to reprogram several factory parameters including:
• Tire size
• Gear Ratio • One Touch Lane Change
• Daytime Running Lamps
• Low Tire Pressure Indicator
• Smart Bar Indicator Disable (after Smart Bar removal)
• Clear Diagnostic Trouble Codes While the module is plugged into the OBD port, the ProCal Module can also:
• Set a Temporary Extended Idle
• Provide a Dead Center Steering Wheel Indication
• Clear Diagnostic Trouble Codes (DTCs) / Turn of the Check Engine Lamp For AEV HEMI Builders Kit customers, The ProCal Module will:
• Program the Vehicle’s VIN into the new PCM Controller
• Program the Pedal Calibration and Tolerance The ProCal Module is only designed to be plugged into the vehicle during programming or activation of runtime features. Between uses AEV recommends storing the unit in the glove box or console. The included Quick Reference Guide is intended to fit in your Owners Manual folder. It is important to cycle the key OFF after any successful programming before starting/running the vehicle. The module will lock to a vehicle’s VIN number and may not be used on another vehicle until the “RESTORE” function is used on the original vehicle. The “RESTORE” function will reset a vehicle’s default settings to stock and unlock the module for use in another vehicle.
Tire Size Mode
Description: This mode allows the user to adjust the tire size setting on the vehicle. This will ensure
proper speedometer reading, odometer function, and automatic transmission shift points. In order to
program the proper tire size, a measurement of the front tire will need to be taken on the vehicle under
normal load and air pressure rounded to the nearest quarter inch (1/4”). Do not use the manufacturers
listed tire size.
Notes: There are two tire size modes, the first mode is for tires that are 24.00 inches to 38.75 inches in
diameter and the second is for tires that are 39.00 inches to 53.75 inches in diameter. Begin by setting
the first three switches to select the proper mode.
Procedure: Consult the Quick Reference Guide and set the DIP switches accordingly. With the engine off
and ignition on, plug the module into the OBD port and wait for the horn to sound. If the horn does not
sound, consult the troubleshooting section of these instructions. Do not attempt to program tire size
while the engine is running. It is important to cycle the key OFF after any successful programming
before starting/running the vehicle.
If the vehicle’s speedometer does not seem to function after a successful programming an error has
occurred in the vehicle network. If at any time the vehicle modules do not agree on a tire size coefficient
the speedometer will cease to operate, the Sway Bar light may come on, and the DTC U1412
(Implausible Vehicle Speed Signal Received) will be set along with the Check Engine Lamp / MIL. If this
occurs there are some easy solutions (choose any one of these):
1. Cycle the key off then on to ignition, then Clear DTC codes using the AEV ProCal
2. Program a new tire size (at least .25” different then last programmed) then cycle the key off
3. Use the Restore feature, then reprogram desired settings (cycle the key between each feature)
4. Pull the Positive (+) battery terminal away from the battery for a few minutes to reset the vehicle
5. The problem will eventually resolve itself, but use this as a last resort.
Axle Ratio Mode
Description: This mode allows the user to modify the gear ratio setting in the vehicle’s computer. This
will ensure proper automatic transmission shift points.
Notes: There is a common decimal discrepancy in certain ratios, ignore minor conflicts in ratio value and
select the closest ratio possible.
Procedure: Consult the Quick Reference Guide and set the DIP switches accordingly. With the engine off
and ignition on, plug the module into the OBD port and wait for the horn to sound. If the horn does not
sound, consult the troubleshooting section of these instructions.
One Touch Lane Change (OTLC) Mode
Description: This mode is used to enable and disable the One Touch Lane Change feature. OTLC allows
the driver to signal a lane change by moving the turn signal lever partially up or down without moving
beyond the detent. The signal will light up three times for each activation.
Procedure: Consult the Quick Reference Guide and set the DIP switches accordingly. With the engine off
and ignition on, plug the module into the OBD port and wait for the horn to sound. If the horn does not
sound, consult the troubleshooting section of these instructions.
Tire Pressure Monitoring System (TPMS) Mode
Description: This mode allows the user to modify the factory Tire Pressure Monitoring System (TPMS)
low tire pressure threshold values. In stock configuration, when tire pressure drops below the factory
threshold value, the TPMS warns the driver by illuminating a dash warning lamp. The ProCal Module can
establish alternate threshold values so that low tire pressures can be utilized without triggering a
warning. Generally, the warning threshold is set 4psi less than the desired tire pressure (ie. set the
threshold at 24 psi for tires running at 28psi). For a detailed description of TPMS functions please
consult your vehicle’s Owners Manual.
Notes: Disabling the factory TPMS should be used for off road use only and may not be legal to
change is certain countries, please check local regulations. For on road use, please consult your tire
manufacturer to determine an appropriate value for your vehicle’s tires and gross vehicle weight
(GVW).
Some users have reported the TPMS indicator lamp staying on after setting the Low Pressure Threshold
to a new value. The TPMS sensors use timed and pressure-loss triggers to update the vehicle of tire
pressures. In the event that the Low Pressure Threshold has changed to a value equal to or higher than
actual tire pressure, the tires must be inflated to at least 5 psi over the new low value. The vehicle must
then be driven up to 10 minutes above 15mph before the TPMS sensors update the vehicle of the new
tire pressure. Once the reported tire pressure is 5psi above the Low Pressure Threshold the TPMS
indicator lamp will turn off.
Procedure: Consult the Quick Reference Guide and set the DIP switches accordingly. With the engine off
and ignition on, plug the module into the OBD port and wait for the horn to sound. If the horn does not
sound, consult the troubleshooting section of these instructions.
Daytime Running Lamps (DRL) Mode
Description: This mode allows the user to activate, deactivate or change the vehicle’s Daytime Running
Lamp (DRL) mode. If you live in a DRL Regulated areas (Canada, some parts of Europe), please check with
your local laws prior to making any DRL changes.
Notes: When DRL is enabled, the specified location’s lamps will light when the vehicle is in gear. The
lamp location options are Low Beams, Fog Lights and Turn Signals. The lamps are fed half the normal
voltage (roughly 6V) and will not affect normal operation of the vehicle’s lights. The DRL function is not a
replacement for nighttime vehicle lighting.
Procedure: Consult the Quick Reference Guide and set the DIP switches accordingly. With the engine off
and ignition on, plug the module into the OBD port and wait for the horn to sound. If the horn does not
sound, consult the troubleshooting section of these instructions.
Automatic SmartBar System (ASBS) Mode
Description: This mode allows the user to activate or deactivate the vehicle’s Automatic Smartbar
System (ASBS). The ASBS is an electronic module that disconnects the front sway bar. For vehicles that
were built with this feature, removal of the module will constantly illuminate the “Sway Bar” lamp on
the dash. For vehicles that were built without this feature, addition of the module will not by itself
enable the system. For either circumstance, the AEV ProCal can activate or deactivate the ASBS.
Notes: Installing or removing the module must be done prior to using the ProCal Module.
Procedure: Consult the Quick Reference Guide and set the DIP switches accordingly. With the engine off
and ignition on, plug the module into the OBD port and wait for the horn to sound. If the horn does not
sound, consult the troubleshooting section of these instructions.
Post Views:
753
AEV ProCal Module
Throttle Tolerance Programming Mode
Description: This mode allows the user to program throttle tolerance and effectively pair a PCM and pedal. When a new PCM or pedal has been installed, the previous values stored in the PCM may not match the specific tolerance of the pedal and need to be reprogrammed.
Notes: This mode requires simultaneous inputs from a user on the throttle pedal as well as the multifunction light stalk. When programming, follow the steps in a deliberate, but not rushed, manner.
The entire process should take approximately 3-4 seconds. If the process is completed either too fast or too slow, the pairing will fail.
Procedure: Consult the Quick Reference Guide and set the DIP switches accordingly. With the engine off and ignition on, plug the module into the OBD port and follow the steps below:
1. When the module is ready, the Professional Diagnostic Tools Electronic Throttle (ETC) Indicator (a lightning bolt surrounded by two vertical lines) will flash on the dash.
2. To start the pedal routine, pull the headlight stalk back into the “Highbeam Flash” position, then release the headlight stalk allowing it to fall back into the “Highbeam Off” position. The routine has now started.
3. Press and hold the pedal all the way to the floor.
4. Move the headlight stalk forward to the “Highbeam On” position.
5. Release the pedal completely.
6. Move the headlight stalk back to the ”Highbeam Off” position.
7. The routine is now completed.
8. Turn the ignition Off, wait, then start the engine. Test the pedal and verify that it is functioning properly. If not, repeat steps 2-8.
New Powertrain Control Module (PCM) Setup Mode Description: This mode allows the user to program the vehicle’s VIN number into a new Powertrain Control Module (PCM). When installing an AEV HEMI BuildersKit with a new PCM, the new module will need to be initialized and paired with the vehicle’s VIN in order for it to properly function.
Notes: After setting the ProCal module’s DIP switches to this mode, no further input is required from the user. The module will determine the vehicle’s VIN and initialize the new PCM accordingly. After programming, the vehicle will need to be key cycled Off, then On.
Without initializing a new PCM, the vehicle’s theft system will prevent the vehicle from running and possibly prevent the engine from cranking.
This mode is only for new PCMs, such as those included in AEV HEMI Builders Kit. If the process is run again the AEV ProCal will report a successful programming (two honks), this is to confirm a proper initialization.
Procedure: Consult the Quick Reference Guide and set the DIP switches accordingly. With the engine off and ignition on, plug the module into the OBD port and wait for the horn to sound. If the horn does not sound, consult the troubleshooting section of these instructions.
Clear Diagnostic Trouble Codes Mode
Description: This mode allows the user to turn off the Check Engine Light on the vehicle’s dash. Notes: This function will clear any codes stored in the PCM and TIPM modules. In most cases this will turn off the MIL (Malfunction Indicator Lamp) / Check Engine Light on the dash, provided there are no active problems in any of the engine systems. Depending on Active and Stored DTC codes that exist in certain vehicle modules, the AEV ProCal may not honk the horn after successful clearing of DTC codes, this is normal.
Procedure: Consult the Quick Reference Guide and set the DIP switches accordingly. With the engine off and ignition on, plug the module into the OBD port and wait for the horn to sound. If the horn does not sound, consult the troubleshooting section of these instructions.
Extended Idle Mode
Feature Description: This mode allows the user to set the vehicle’s idle speed at a higher level than the stock level (up to 2000 rpm). The newer engine systems found in the latest Chrysler cars idle at a lower speed then previous generation vehicles. These lower idle speeds combined with an electronically sensitive vehicle network can create issues for power intensive tools such as winches and on-board welders.
Notes: To prevent the vehicle from going into a lower power mode or presenting the user with a low power error lamp, the AEV ProCal should only be used while winching, using an on-board welder, or for other power intensive tools.
This feature has a 10 minute timeout. The engine can safely be turned off at any time.
Procedure: Consult the Quick Reference Guide and set the DIP switches accordingly. With the engine on and running, plug the module into the OBD port and engage the e-brake. Use the overhead light dimmer on the multifunction stalk to set the vehicle’s idle speed. To turn the feature off, check to ensure that the vehicle is in park or neutral, press the brakes firmly, and then release the e-brake. The idle should slowly return to its stock level.
Steering Wheel Centering Mode
Description: The ESP system present on all newer Chrysler vehicles utilizes a digital sensor pack in the steering wheel to determine exactly where the user wants the vehicle to go. Disconnecting the steering, or replacing any of the related components (tie rod, front axle etc) can cause this module to become out of correlation with the wheels. To center the wheels with the steering system, the AEV ProCal can indicate to the user exactly where zero is on the internal sensor.
By enabling the Steering Center mode, the ProCal module determines where the steering wheel is and lights up a corresponding turn signal lamp and turn signal indicator. If the wheel is too far to the right, the right indicator will light. If the wheel is too far to the left, the left indicator will light. If the steering wheel is stopped exactly dead center, the highbeam indicator and both turn signal lamps will light.
Notes: This is a feature normally found in the dealer diagnostic tool. The ProCal module will allow the user to perform a proper alignment without having to use the dealer diagnostic tool.
The only way to exactly correlate the wheels with the steering wheel is to complete the process on an alignment rack.
If the function is not terminated properly the lights/indicators may remain stuck on or off. Be sure to exit the mode properly by enabling either turn signal before removing the module. If a clean exit does not occur, plug the module back in, enable the turn signals, and then remove the module. This can also be reset by removing and reconnecting the Positive (+) battery terminal.
Procedure: Consult the Quick Reference Guide and set the DIP switches accordingly. With the ignition on and engine off, plug the module into the OBD port. Use the indications to center the wheel. To exit the mode, activate either the right or left turn signal, and then remove the module.
Troubleshooting
On occasion, the ProCal module may be unable to complete a desired request for a variety of reasons,including network errors, an invalid DIP switch setting, or a prohibited request. For example, if a user tries to set a TPMS low pressure threshold on a 2007 JK Wrangler, the module will abort and present an error code because the 2007 JK Wrangler does not have TPMS.
When in an error state, the ProCal module will flash a sequence on the dashboard of the vehicle, usually on the vehicle’s theft system indicator (this is most commonly a red LED in the cluster). This is a two stage display, where a sequence is flashed once, followed by a short pause, then another sequence, and finally a longer pause and the code will repeat. Simply count the two sequences and refer to the list below. For example, if using an improper DIP switch combination the user may see 6 flashes followed by a short pause, and then 4 more flashes.